-lw-scaled.png.png)
19 Travel Accessories That'll Help You Save A Ton Of Money On The Road
"Beware of little expenses; a small leak will sink a great ship." - Benjamin Franklin
The subject of how to save money while travelling is a huge one, but perhaps the most important and fundamental step you can take towards saving money on the road is to pack the right gear.
You need to carry those travel accessories that are not only useful and serve an important function, but that can also reduce your expenses while travelling.
Some of those accessories can often be bought on the road but others can be very difficult to find once travelling and should be packed prior to embarking upon your journey.
When it boils down to it, there are really two main ways that the right travel accessories reduce your travel expenses; by reducing or eliminating your dependency on the products and services of others and by helping you to avoid making costly travel mistakes.
While there are many travel accessories that undoubtedly and undeniably save you money, some items can be a bit more ambiguous in that they can save you money in one way, but can also cost you money in an entirely different way. Some of these items still save you money overall, some don’t.
You also have figure out if a travel accessory is useful enough or saves you enough money for you to justify carrying it. After all, you probably won’t want to carry an item that’s a major physical burden unless it really saves you a ton of money.
Sounds complicated? It is a little but we’ve figured out which travel accessories are useful enough and can save you enough money to be worth carrying.
In fact, most of the items on our list are so useful, light and portable that we’d carry them for their usefulness alone, even if they didn’t save us any money!
Without further ado, here are 19 travel accessories that’ll save you a ton of money on the road:
#1 - A cordless beard trimmer
.jpg)
Every male traveller that’s not cultivating a beard needs to carry one of these when on the road. Period.
Travelling with a rechargeable cordless beard trimmer means that you don’t ever need to visit the costly barbershop when you need a shave.
Trimmers also work out cheaper in the long run than disposable razors or refillable razors and they're less likely to cut your face too. Unlike with razor blades, which tend to dull very quickly, the cutting head on a trimmer will stay sharp for months or even years before it has to be replaced.
Moreover, a cordless trimmer is still a lightweight and compact travel accessory, so it won’t take up much space in your backpack or weigh you down when you're on the move.
The fact that these trimmers are cordless and run on a rechargeable battery also means that if you go camping or off-grid for a few days, you can charge it up fully beforehand and then enjoy the privilege of being able to keep yourself well groomed while living rough.
In fact, the battery in the recommended model we’ve linked to will provide a full 60 minutes of cordless use on a single charge. This could easily afford you ten shaves while you’re out in the bush!
Perhaps the best thing about this nifty accessory though is the money-saving benefit – an excellent trimmer can be picked up for less than $20, an investment that you’ll easily recoup after just a few shaves. No more costly visits to the barber or having to replace dulled razor blades.
Rechargeable trimmers normally come in a box with a variety of different attachments for shaving at different depths (some units include nose trimmers, ear trimmers, precision trimmers etc.), a charging cable with adapter and a small maintenance kit.
The maintenance kit will usually consists of a miniature brush (for removing hair clogged in the teeth after use), a small squirt-bottle of oil (keeps the teeth well-lubricated) and sometimes an Allen key that allows you to detach the cutting head and clean out any hair that may be trapped inside.
It’s worth mentioning that while these trimmers will give you a pretty close shave, you won’t get that perfectly smooth baby-face look, even if you use the naked blade without any attachments. Rather, you’ll be left post-shave with a rough stubble that feels a lot like sandpaper to the touch.
Ending up with stubble shouldn’t be an issue for most guys though, as a recent study that polled more than 8,500 women, showed that men were rated at their most attractive and most desirable for short-term relationships when sporting stubble.
When the same men had beards or were clean-shaven, they were rated as less attractive, although bearded men were seen as the best candidates for long-term relationships.
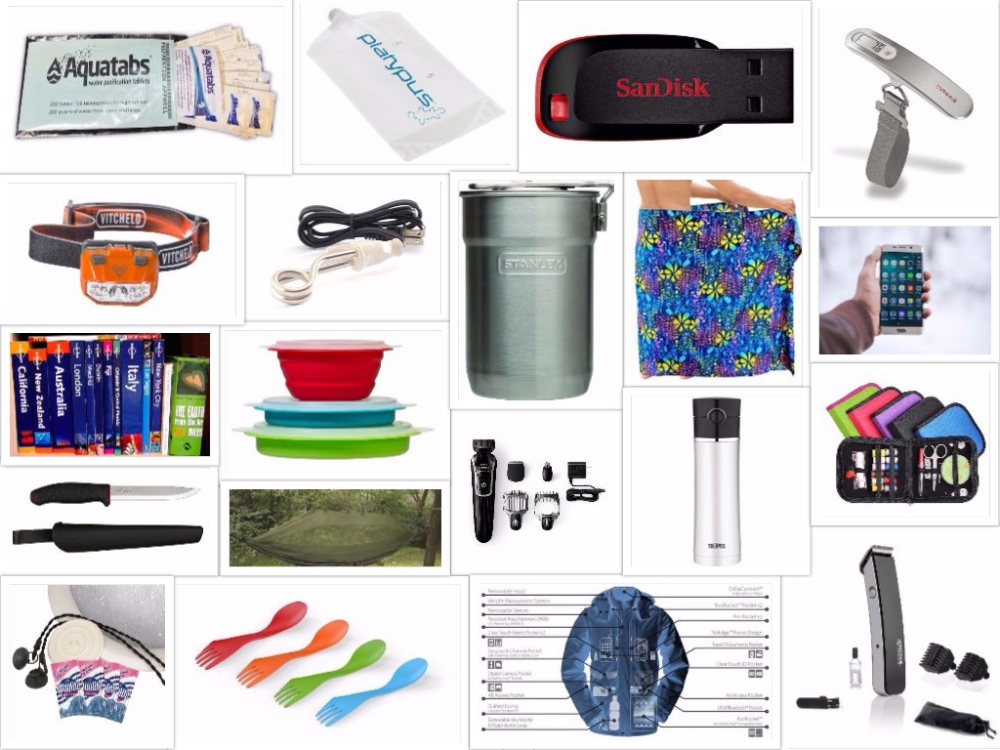
#2 - A sarong
A sarong is one of the most useful and versatile items that a traveller can carry. But did you know that aside from being incredibly pragmatic, this accessory can also save you money on the road?
Indeed, a common travel scenario where possessing your own sarong can save you some dough is when visiting sacred temples or other sites of great religious significance. To understand how it can save you money, let’s look at the situation in most Asian countries.
When foreigners visit certain Theravada Buddhist temples, shrines and stupas or Hindu temples in Asia, it will often be required that their knees, shoulders and even their entire legs are covered up before they can enter the sacred temple interior.
We’ve personally been forced to wrap our bare legs in a sarong at countless such temples in India, Sri Lanka, Thailand, Cambodia, Laos, Myanmar and Indonesia.

While this dress code is often more strictly enforced for women, you should make no mistake about it; if you’re a man travelling in this part of the world there will be instances where you will be denied entry if you arrive at a temple in a pair of shorts.
Because of many travellers aren't aware of the strict dress codes that certain temples have or don't possess a sarong, a business opportunity is created. Enterprising locals often erect stalls near the entrances to these sacred temples and shrines to rent out sarongs to tourists who are in need.
We advise you not to be one of those under-equipped tourists that constantly pays money to hire out a sarong at every important religious site. If you’re going to be travelling in Asia or anywhere for that matter, make sure you pick one up ahead of time and carry it with you on the road.
Also, if you’re man, please don’t be embarrassed about wearing a sarong.
Sarongs are actually a unisex clothing item like pants; you just have to pick up a men's sarong. In Asia at least, nobody will bat an eyelid if they see a man wearing a sarong.
With the amount of practical uses that sarongs have and their ability to save you money on the road, sarongs are absolutely worth the minimal weight and space they occupy in your backpack.
#3 - Water purification tablets

Most travellers know that it’s not worth the risk of drinking the tap water in certain developing countries, so they solve the problem by purchasing gallons and gallons of bottled water.
However, this is a costly and environmentally unsound solution to the problem. By some estimates, bottled water is 2,900 times more expensive than tap water!
Moreover, bottled water is not even guaranteed to be free of contaminants and can frequently contain more harmful contaminants than tap water. Luckily, there is a cheaper and better workaround.
The cheaper solution is to carry a packet of water purification tablets in your backpack and use the method of chemical purification to render tap water, spring water and other suspect water potable.
Water purification tablets are not only useful for hikers, campers and wilderness trekkers who have to drink water from lakes and streams. They can also help ordinary travellers to save money. How much money can they save you?
For the cheaper brands, you'll typically pay about 10-12 cents per tablet and one tablet will usually purify 1 litre of water, so that works out at 10-12 cents for a litre of water. That's way cheaper than bottled water in most parts of the world.
There are typically three active constituents found in water purification tablets; iodine, chlorine and chlorine-dioxide. Most tablets are based on just one of these.
All three chemicals ultimately accomplish the same thing; rendering a sample of water safe to drink by exterminating all of the harmful viruses, bacteria and protozoan parasites that are present in the water.
Let’s now compare the three most common types of tablets.
Iodine-based tablets usually take between 30-60 minutes to purify a water sample, depending on the water’s temperature. For cold water, it might take closer to 60 minutes.
One drawback with iodine tablets is that they can cause allergic reactions in certain people and they may also be unsuitable for pregnant women or those with thyroid problems. Even if your thyroid is functioning normally, you should not take iodine tablets for longer than 6 weeks, as they could cause health complications.
Iodine also cannot exterminate the hardy cryptosporidium parasite, although it does a good job at deactivating the giardia lamblia parasite. Both of these parasites can cause severe diarrhea.
Iodine tablets also have a reputation for the unpleasant aftertaste that they leave in the mouth, although this can be counteracted with Iodine neutralizer tablets.
Chlorine-based tablets are the most commonly found in the marketplace and account for many of the most popular brands. They are the fastest acting and can purify a water sample in a matter of minutes.
The effervescent tablets normally work by releasing chlorine gas when they make contact with the water.
However, much like the Iodine-based tablets, chlorine won’t inactivate the cryptosporidium parasite and the purifying effect is only temporary; water samples treated with chlorine can become contaminated again if left alone for a period of time. The tablets also impart that “swimming pool” taste to the water that some may find unpleasant.
Chlorine dioxide tablets are generally believed to be the most effective of all three, as they exterminate the greatest number of harmful microorganisms, including cryptosporidium. Chlorine-dioxide is also the chemical that is used for disinfecting many municipal water supplies.
The tablets work by releasing chlorine-dioxide, a yellowish-green gas and powerful oxidizing agent, when they make contact with the water. The gas then dissolves in the water and wreaks havoc with the cell walls of the microorganisms that are present.
Although these are the most effective tablets against water-borne pathogens, their major downside is that they can take a full 4 hours to purify a water sample, if you want to make sure there’s no cryptosporidium still alive in there.
Chlorine dioxide tablets can also have an aftertaste, although most manufacturers claim that the aftertaste of their tablets is minimal and not unpleasant.
So which tablets are best suited to the general traveller? If you have the time to wait around for your water to purify, go for chlorine-dioxide tablets, as these are the most effective at removing the hardy protozoan parasites like cryptosporidium and rarely come with a bad aftertaste.
However, if you can’t stand afford to wait around for hours, chlorine-based tablets like Aquatabs and Oasis are your best bet. These are also the most popular tablets.
We wouldn’t really recommend any iodine-based tablets as we’ve never used them personally and they have too many limitations and potential side-effects in our opinion.
Some general tips for using water purification tablets:
- Make sure the water is clear before dropping in the tablet as suspended particles in cloudy or murky water can shield the microorganisms from the attacking chemicals, thus reducing the efficacy of the tablets
- Check the expiry dates on tablets that you buy. Many tablets have a shelf life of 5 years or more but you never know how long the tablets have been sitting on the shelf before you buy them.
- When in doubt about how to use the tablets, carefully follow the instructions (if any) provided with the packet. Factors like waiting times, tablet to water ratio etc. vary from brand to brand.
#4 - A refillable water bottle

Water purification tablets are great, but you also need some way to store and transport water when you’re travelling.
A refillable water bottle is the perfect solution here and what’s more, this item can also save you a ton of money by enabling you to fill up on free or almost free water whenever the opportunity arises. You will be less of a slave to the bottled water monopoly.
For example, when you pass through airport security, you can refill your water bottle from one of the water fountains that are often present on the other side near the boarding gates. In this instance, it saves you having to buy the super costly airport bottled water.
You can also use the bottle to get a free or almost free refill from:
- Your hotel water cooler (free)
- Reverse osmosis machines (these vending machines are often found on the streets in many countries like Thailand, Malaysia etc. and 1.5 litres costs just a few cents)
- Public drinking fountains (free and found in parks, schools, stadiums, railway stations, bus stations, malls and other public places)
- Restaurant water jugs (often complimentary with your meal)
- Natural springs (as long as they’re trusted)
- Tap water (in countries or cities where it can be trusted)
- Water refill stations or any other places that present a free or almost-free alternative to bottled water.
Now you could just pick up an ordinary disposable plastic water bottle when you’re on the road and keep refilling that but there are a few problems with that approach:
- Disposable plastic bottles aren’t durable. They easily get crushed, dented and deformed, losing much of their original capacity.
- They aren’t designed for long-term use. The ridges and tiny cracks that they develop with repeated use are both breeding grounds for bacteria and dangerous germs like the notavirus.
- The narrow bottle opening means that they’re not very easy to wash and give a good scrub down when you want to clean them. A rinse with soapy water won’t be as effective at neutralizing germs as a proper cleaning job.
- The process of washing disposable water bottles causes degradation and thinning of the plastic over time, especially if excessively hot water is used.
For those reasons, you’re much better off buying a proper reusable water bottle that’s designed for long-term use.
Some travellers like to carry a hydration bladder like a Platypus Platy Bottle or similar because they weigh virtually nothing and when not in use, they pack completely flat or can be rolled up into an extremely compact unit.
However, we own one of these and after using it for a while it started to leak, so we have lost faith in it. Hydration bladders can also be a little tricky to clean because of the small screw-cap opening.
For these reasons, we recommend a more traditional non-collapsible water bottle, but one with a special twist. We have a particular one in mind that comes with an integrated water purification system.
Having a water purification system built into the bottle means that you can save even more money, because you can then drink from just about any water source (within reason) and can virtually always avoid having to buy bottled water, even if you can’t find any other free or cheap water sources like drinking fountains, reverse osmosis machines, water refill stations and so on.
The reusable water-purifying bottle that we personally use and recommend is the Aqua Pure Traveller.
Weighing in at just 120 g, the weight of the empty bottle has never been a concern and we’ve been using it for three years in developing countries for purifying water from taps, rivers, streams, lakes, puddles and from other untrusted sources. We have never gotten sick from using it.
The Aqua Pure Traveller has a capacity of 750 ml and comes with an integrated water purification unit, which is built into the underside of the bottle’s screw cap. The filter can purify up to 350 L of contaminated water (466 refills) before it will have to be replaced.
This will easily last you for 6 months if dealing with contaminated water the entire time. In practice, the filter will usually last travellers a lot longer than that, as they’ll also be refilling the bottle with water that’s already potable. With water that’s already safe to drink, you can just drink it straight up without passing it through the filter.
At a price of around $50 on Amazon for the water bottle unit and bearing in mind that this money buys you 350 L of potable drinking water, the cost per litre works out at just 14 cents, making it very cost-effective and certainly cheaper than bottled water.
In case you’re curious, the technology used is M.A.D (mechanically advanced disinfection), which uses a process based on electrohesion. The company claims that the filter will not only remove all harmful germs (viruses, bacteria, protozoan parasites) but also all undesirable chemicals, heavy metals, dirt, odors and other contaminants.
The Aqua Pure Traveller is actually the only such product on the market that will remove virtually every undesirable substance from a water sample. It’s really a standalone option for purifying water, even if you’re not carrying water purification tablets.
Using the water bottle couldn’t be simpler. All you have to do is fill the bottle up with the dubious water, screw on the filter cap, invert it and start squeezing the sides of the bottle.
Purified, potable water will immediately be forced through the integrated filter before flowing out through the cap nozzle and pouring into your mouth. It’s almost like magic.
Yes, these types of water bottles do take up more space than a water bladder when not in use, but that need not be an issue, as you can carry them outside your backpack in the external side mesh pockets. This way, the more precious space inside is still preserved.
#5 - A mini-immersion heater

Think about how much money some travellers spend on tea and coffee while they’re on the road. When you buy these popular beverages at say, a café or restaurant, the price is pretty heavily marked up.
Even if you avoid expensive coffee chains like Starbucks or Costa Coffee and buy from the cheapest possible street vendor, you’re still paying quite a lot per cup.
It’s obviously more cost effective then to buy your own tea bags, instant coffee, milk and sugar from the supermarket and simply prepare your own tea and coffee at your hotel or guesthouse. But what if you’re staying at a place where you have no access to boiling water?
The fact of the matter is that budget rooms are rarely equipped with kettles and not all lodgings provide a self-catering kitchen or a hot-water dispensing machine. So how can you guarantee access to boiling water, regardless of where you’re staying?
By carrying a mini-immersion heater.
Mini-immersion heaters consume minimal space and weight in your backpack, yet provide you with the means to boil water whenever you have access to a power outlet.
Travelling with one of these means that you can easily make your own hot drinks at your guesthouse and get your caffeine fix each morning before you hit the streets, allowing you to avoid buying expensive cups of tea and coffee when you’re on the move.
Immersion heaters boil water by passing an electric current through a metal coil, which heats the coil and transfers heat to the water. To use one, you just immerse the metallic part in some water, plug the device into a power outlet and it will immediately start heating the water. It usually takes 2-5 minutes to boil a cup of water, with the time depending on the wattage of the heater and the amount of water being heated.
As regards what to boil the water in, we have found that an ordinary drinking glass works perfectly and never cracks. Some rooms supply glasses or you might be able to borrow one from somewhere.
Porcelain mugs also work great. A plastic cup will work too but you’d definitely want to make sure the plastic is BPA-free. Bisphenol-A is a toxic chemical (an endocrine disruptor) that leaches into boiling water 55 times faster than it leaches into room-temperature water.
By the way, a travel immersion heater is one item where it'll pay off to spend a bit more and invest in a high quality product. There are so many cheap products that rust quickly, stop working after a while or that can even be downright dangerous to use. We've had two terrifying fireworks displays to date when plugging in the device.
But coffee and tea are not the only things that a mini-immersion heater can save you money on.
Because this device grants you the ability to boil water at your lodging, it means that you no longer have to spend money on bottled water during your stay, even if your hotel doesn’t provide drinking water.
You can now just boil the hotel’s tap water and drink that, provided that it’s free of contaminants like chemicals and heavy metals that aren’t removed by boiling.
Indeed, if the only concern with the hotel water supply is harmful germs, boiling is one of the most effective means of exterminating them. Generally it’s enough to just bring the water to a rolling boil and then let it cool down naturally.
However, if you’re in the mountains at a higher altitude, many people advise to continue the rolling boil for a few minutes before pulling out the plug. If you follow this advice correctly, it’s virtually guaranteed that you won’t get sick from any water-borne pathogens.
If you want to boil a large quantity of tap water each morning to last you most of the day, you’ll want to also carry some kind of vessel to boil it in, since a mug or drinking glass won’t hold much. This brings us onto our next travel accessory that can help you save you money on the road…
#6 - A metal cooking pot

Now some travellers might object to carrying a metal cooking pot, considering it to be too bulky or heavy an item to justify carrying.
But if you think about it, a metal cooking pot hardly takes up any space at all, if you fill the empty space inside it with useful items. You can pack the pot with small accessories or even try stuff some clothing items in there. You might even consider clipping it to the outside of your backpack on a carabiner to conserve the space inside.
As for the weight issue, you can resolve that by opting for a titanium cooking pot. Titanium is 45% lighter than steel and stronger too. Moreover, it’s a completely food safe metal, so you don’t have to worry about ingesting toxins from the cookware itself.
We recommend you buy a pot with a capacity of approximately 1 litre, which will allow you to boil a reasonable quantity of water, but won’t be too cumbersome or heavy to carry.
Not only will the metal pot allow you to purify tap water whenever you have access to a power outlet, but it will also allow you to prepare your own meals in your room, whenever you want. It no longer matters whether your guesthouse or hostel provides a self-catering kitchen. This opens up a whole new world of possibilities.
It’s actually surprising how many different meals you can prepare with just a small metal pot, a mini-immersion heater and some water. You obviously can’t fry anything, but you can prepare foods like poached eggs, boiled eggs, sweet potatoes, regular potatoes, pasta, noodles, rice, soup and various vegetables.
You can even make delicious stews with stock cubes, vegetables and meat or use the boiled water to prepare oat porridge each morning. If you’re creative or are an experienced cook, you can probably do a lot more than this.
Many of these room-cooked meals prepared with the immersion heater will cost you only 50 cents or less. That is very inexpensive indeed. Even if you’re travelling in countries where street food is incredibly cheap, you’ll be hard-pressed to find a filling meal for less than $1.
So a mini-immersion heater can even save you money on breakfast, lunch and dinner in the world’s cheapest countries.
But after you prepare one of these room-cooked meals, you’re still going to need something to eat it with. That leads us nicely onto our next money-saving travel accessory….
#7 - A portable eating utensil (or set of utensils)

The most versatile and minimalistic eating utensil for travellers is definitely a spork. These ingenious tools are said to bring a bit of civilization to the wild and bit of the wild to civilization. They have a spoon at one end and a fork at the other, giving you the best of both worlds.
The most popular sporks are the original Light My Fire ones made from Tritan, which is a BPA-free plastic. These come in a few different sizes and colours and there’s even a “lefty” spork that you can buy if you’re left-handed. One of the fork tines has a slightly serrated edge, so you can also you a spork to cut your meat and vegetables without cutting your mouth.
The same company, Light My Fire, also makes titanium sporks, which are the best ones to buy, as they’re the most durable and still very lightweight. The only drawback is that they’re a little pricier.
If a spork just won’t cut it for you (pardon the pun) and you’ll also be needing a knife to spread butter or jam on your bread, a better option is to buy a portable cutlery set.
With one of these you’ll also be able to eat with more than one utensil at a time, something you obviously can’t do with a spork. Some cutlery sets even provide chopsticks if you want to go all Asian.
#8 - Collapsible Tupperware

During those times when you’re on the go as a traveller, everything always seems to be more costly. This isn’t just your imagination. Prices for ordinary commodities like snacks and bottled water usually are noticeably higher at bus stations, train stations and especially at airports.
The reasons for the hiked up prices in these transport hubs vary; fewer competitors, high rental costs and also the fact that travellers are usually strapped for time at transport hubs and rarely have much time to shop around for a better deal.
Also, travellers are usually going to be anxious to eat a meal or stock up on food and water supplies when they have a long journey ahead of them, so they’ll pay more than they normally would.
But if you could somehow avoid having to buy poor-value snack foods while you’re on the move as a traveller, you could save a lot of money. It turns out a set of collapsible Tupperware can help you in that endeavor.
This is basically a set of lightweight, collapsible storage bowls (they collapse down to one-third their original height) so that they take up less space when not in use. The bowls also have snap-on lids to help keep the contents from spilling out.
The beauty of collapsible Tupperware is that you can pack all kinds of pre-prepared foods or snacks into these bowls and avoid having to buy costly impulse snacks on the go. The possibilities for what to pack here are endless.
You can pack the bowls with fruit, porridge, sandwiches, mashed potato, hard- boiled eggs, noodles, pasta, rice, salads, peanuts, potato chips, yoghurt and countless other things that you have prepared (in the room with your mini-immersion heater and cooking pot ;) or bought from a cheap grocery store beforehand.
Your spork or mini-cutlery set will also come in really handy here too when it’s time to whip out that Tupperware and start eating your pre-packed breakfast, lunch or dinner.
#9 - A Thermos bottle
.jpg)
We wouldn’t personally save any money by carrying a Thermos and hence we don’t carry one, but that’s because we’re not particularly prone to buying hot drinks when we’re on the go.
But if you’re the type of person that can’t resist the urge to buy overpriced hot drinks like tea, coffee, hot chocolate, soup etc. whenever you’re on the move, a Thermos might be the solution.
Just before you leave your guesthouse, you can use your mini-immersion heater to boil up some water directly inside the thermos and then brew your favourite hot drink, whether that’s tea, coffee, hot chocolate, soup, Ovaltine or what have you. And with the vacuum insulation technology that the Thermos bottle uses, your drink will stay hot for up to 12 hours, so you’ll have the whole day before it cools down.
We recommend a 16-ounce Thermos bottle (473 ml), as this should provide you with enough liquid for a quick caffeine fix, without being too cumbersome or heavy to carry on the road. The larger 28-ounce ones we feel are too big to be backpacking with.
Thermos bottles are also very useful to outdoor enthusiasts, who might be very glad of a hot drink when hiking in bad weather or in bitterly cold environments.
A Thermos can also be a lifesaver to those involved in watersports like kayaking, surfing, sailing and diving, especially in colder countries.
In such endeavours, athletes that spend too long immersed in the cold water may emerge in a hypothermic state and a Thermos filled with hot liquid can help to restore the athlete's body temperature to normal levels.
#10 - A USB flash drive
.jpg)
When you’re on the road and you’ve booked a flight to your next destination, some airlines, such as Air Asia, will e-mail you telling you that need to provide a printout of your boarding pass when you arrive at the airport check-in desk.
If you don’t provide the requested printout the airline may charge you a reprint or counter check-in fee at the airport on the day of departure.
To print your boarding pass, you’ll usually have to find an Internet café that also offers a printing service. Sometimes you can get it done in computer retail shops, bus stations and other random places but most of the time, you’ll end up at a cybercafé when you need a printout.
However, if you turn up at an Internet café without a USB flash drive, you’ll have to start an Internet session, log into your e-mail account (and God only knows how long that could take with the snail-like Internet speeds in many countries) and print off the ticket from the original e-mail that the airline sent you.
But that’s going to cost you money. Even if you’re really quick and done in a flash, many cybercafés have a minimum rate, so that you could get charged the same fee for a 1-minute Internet session as for a 30-minute session.
But if you carry a USB flash-drive you will usually be able to just walk into the cybercafé, hand somebody the drive and just pay for the printouts, without having to pay any Internet access fee. This will save you a few bob here and there.
However, we did unfortunately encounter a few cybercafés in Bangkok where the computers were all rigged and would not even boot up Windows until you inserted a minimum amount (5 baht in this case) of money into a coin slot. So we weren’t able to just plug in our flash drive and print off our boarding passes without paying to use the Internet as well. Downright thievery.
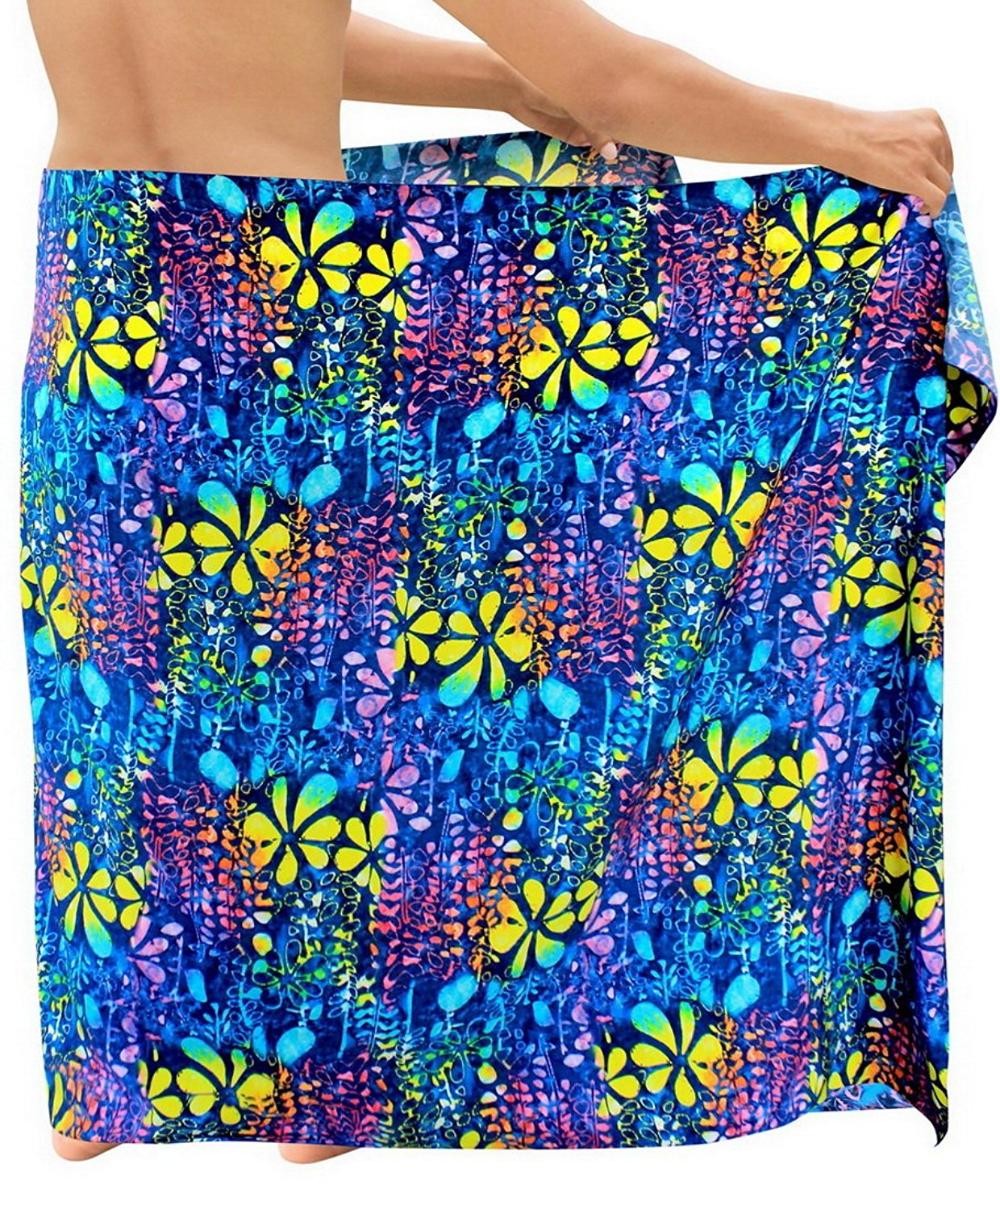
#11 - An unlocked smartphone
Many travellers have returned home from a short trip abroad to find themselves billed with massive roaming charges for calls, texts and data, which often total hundreds or even thousands of dollars. This need not happen to you though.
One of the best ways to avoid roaming charges when you’re travelling and still be able to enjoy all the benefits a smartphone, is to buy a local SIM card in the country you’re visiting.
But unfortunately, a foreign SIM card won’t work with every single mobile phone. It’ll only work if your phone is unlocked.
The opposite of an unlocked phone is one that’s network locked, which means that it’s tied to the original phone company’s network and can’t be used on any other network.
Now, if you’re from Europe or Asia and you paid full price for the phone, there’s a good chance that your phone will already be unlocked.
Locked phones are more common in the U.S.A, Australia and New Zealand, especially if the phone came free or was bought at a discount price. If you insert a SIM card from another network into a locked phone, it won’t work.
The best way to determine if your phone is locked or unlocked before you hit the road is to try inserting a SIM card from a friend or family member that’s on a different network to you. Restart the phone after doing this. If after restarting there’s a signal and you can make calls, then the phone is unlocked. If not, then it’s probably locked.
But if your phone is locked and you have an upcoming trip overseas, it doesn’t necessarily mean that you have to go out and buy a new unlocked smartphone.
It may be possible to get your existing phone unlocked, although, depending on your specific situation, you won’t always be able to get it done for free.
The first thing to try is to contact your provider and request that they unlock the phone. Some phone companies offer a free unlocking service. Others may charge a fee, depending on the circumstances.
For the latter case, if the phone is bill paid, you may have to first pay off any unpaid bills and the remainder of the contract. If it’s a prepaid phone, you may have to top-up by a certain minimum amount before the company will unlock it for you.
However, if you’re out of contract or if you’ve had the phone for a certain minimum length of time, the company often won’t be legally entitled to deny you. See this page for more details on the legal policies for different countries.
If you can’t get your cell company to unlock the phone, your next best option is to pay somebody to unlock the phone for you in any independent tech shop or specialized unlocking store. Places like this are found all throughout the world, but are especially common in Southeast Asia.
Another way to do it is to buy the unlocking code from online companies like Unlock Base. This method is the most prone to scams and fraud so tread especially carefully here. The code also may not work but most companies promise a refund if it doesn’t. Any companies offering free unlocking codes are best avoided, as these codes usually don’t work and can cause irreparable damage to your phone.
The cost to get your phone unlocked using either of these two methods can vary wildly depending on where you get it unlocked, what type of phone you have, what network it’s locked to and how quickly you need it unlocked. It typically ranges from $10 to $100.
#12 - A hammock
.jpg)
Where a hammock can save travellers money, is on accommodation. Sleeping in a hammock is one of the many ways that travellers can sleep completely for free while they’re on the road.
You can rig one up between two goalposts on a playing field, inside any jungle, forest or wooded area, within unoccupied or under-construction buildings, in people’s back gardens (ensure first there’s no dog on the property), at designated campsites, at laid-back eco-resort guesthouses, and in many other scenarios.
The only downside with using a hammock to save money, is that it means you have to also carry additional auxiliary gear, which inevitably starts to add a lot of extra weight and take up a lot of extra space inside your backpack.
Indeed, if you want to sleep in a hammock, you’ll also need to carry additional gear like a sleeping bag to stay warm at night, a rain fly to protect you from the elements and afford you some privacy (although these are often integrated with the hammock) and a foam sleeping pad to line the hammock with.
Moreover, with all this additional gear, you’ll be hard-pressed to fit everything into a carry-on compliant backpack, which means that you’ll likely need to keep checking your baggage whenever you fly. The savings gained by sleeping for free will therefore be somewhat offset by the checked baggage fees.
However, if you’re frequently using the hammock or if you’re travelling in countries like Japan or Switzerland, where accommodation is very costly, then you will undoubtedly save a ton of money by carrying a hammock, even if you do have to pay checked luggage fees every time you fly.
The hammock that we recommend for travellers is the Snugpack Jungle Hammock. This is the one we personally use and it has lasted us for ages. Only now after 5 years of use have the zippers started to show some signs of rusting.
The Snugpack Jungle Hammock is a super lightweight (only 0.8 kg) hammock that comes in a little stuff sack and has an integrated mosquito net, which has always done a fantastic job at keeping the mosquitoes and other biting insects at bay whenever we’ve slept in the jungle.
The fabric's subdued olive green colour means that you can stay fairly well camouflaged in a wooded area and won’t draw too much attention. It's designed as a one-man hammock, but couples will be able to sleep in it together (it’s very roomy), so long as their combined weight doesn’t exceed 400 lbs.
The suspension system (two lengths of paracord knotted at regular intervals and two steel carabiners) and four 10-foot long guy ropes are included with the hammock. You’re also provided with two elastic cords to suspend the mosquito net.
The only downside with this hammock is that it doesn’t have an integrated rain fly but we use a square 3m x 3m tarpaulin instead and that works just fine.
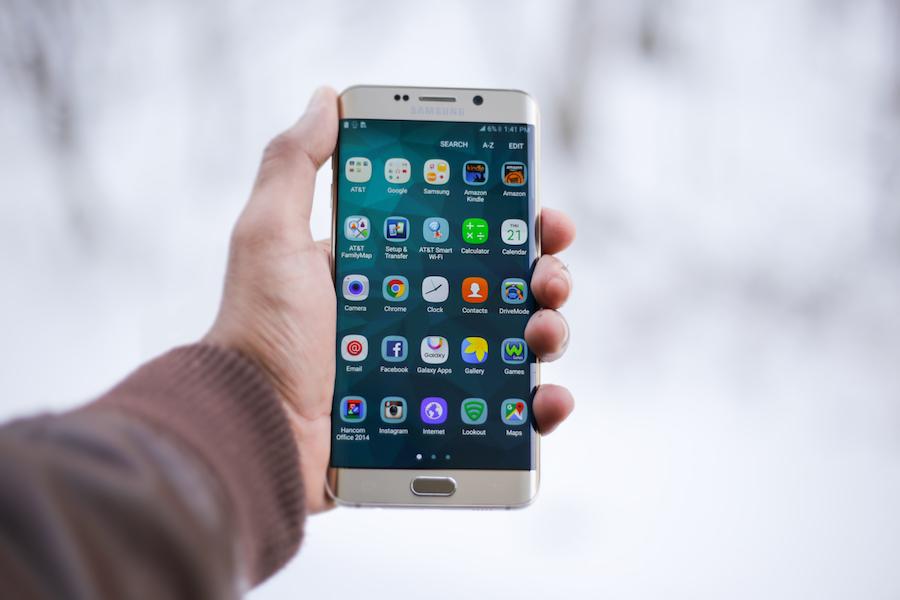
#13 - A headlamp
Headlamps are a great travel accessory for all those poorly lit situations you find yourself in while travelling – cycling back to your guesthouse on a dark potholed road with no street lights, riding a motorcycle with faulty headlights at night, navigating your way through unlit cave passageways, descending a mountain in the dark and so on.
They also come in really handy during those all-too-frequent power outages in many developing countries and can even be a lifesaver when you’re stumbling down a dark corridor of your guesthouse during the night in an attempt to find the bathroom.
The advantage that a headlamp has over a handheld flashlight is that it's handsfree. This proves to be very advantageous in many outdoor pursuits, such as trying to pitch a tent in the dark or in many of the scenarios we already mentioned above.
But a headlamp is not only an incredibly useful travel accessory - it can also save you money if you’re an adventurous traveller and you like to go spelunking or exploring caves when you’re on the road.
Having your own headlamp means you’re not at the mercy of all those enterprising locals who wait by the entrances to popular caves and rent out headlamps to tourists who somehow never anticipated that they would need some kind of light source to you know, explore the depths of a pitch dark cave.
This happens a lot in Southeast Asia, a part of the world where there are some truly marvellous caves, just begging to be explored. In fact, the Son Doong cave, which is now believed to be the world’s largest cave, is found in the Phong Nha-Ke Bang National Park in Vietnam.
But it was in Vang Vieng, Laos where we first noticed that many enterprising locals were capitalizing on this opportunity.
Vang Vieng is famous, among other things, for its intricate caves, which are a result of the Karst topography. The landscape here is quite surreal, with jagged limestone pinnacles that seem to rise out of a sea of emerald green paddy fields.
Right by the entrances to the most popular caves in the area, local entrepreneurs would often set up a stall renting out headlamps and would then simply wait for visitors to come.
The travellers that wanted to explore beyond the well-lit cave entrance and weren’t carrying their own headlamps were obliged to hire one, making a tidy profit for the stallholder.
So if you think you’ll be doing some cave exploring on your trip, make sure you pack a headlamp so you don’t get caught out like this.
Pro headlamp tip: Before you pack a headlamp in your backpack, invert one of the batteries (turn it the wrong way around) so that the light won't get turned on by accident when you hit bumps in the road. If this happens you'll run down the battery.
#14 - A portable luggage scales

When adding checked luggage to a flight booking, there are usually certain weight categories to choose from like: up to 20 kg, up to 25 kg, up to 30 kg and so on.
But if you don’t know the exact weight of your luggage, how will you know which category is the most appropriate to select?
Of course, some travellers will weigh their checked baggage pre-trip and take a note of the weight, but what if the weight of your backpack changes significantly while you’re on the road?
This could easily happen if you were to accrue new clothes, souvenirs or other items. It could also happen if you were to jettison a few obsolete items from your backpack.
Imagine the scenario where your backpack was to put on weight during the course of your travels but you didn’t really notice the increase or you weren’t sure exactly how much heavier it had become.
If the bag’s weight came to exceed the maximum allowance for the baggage category that you normally select, you could then end up unknowingly selecting the wrong baggage category when booking a flight!
You’d then be in for an unpleasant surprise and have to pay excess luggage fees at the airport check-in desk when the clerk discovers your mistake. Excess luggage fees paid at the airport can actually be colossal and can easily exceed $1,000 in some cases.
The excess luggage fee could potentially be avoided in this scenario by transferring weight from your checked luggage to your person or to your carry-on bag, but if you were way over the limit, you’d probably have to throw some of your luggage into the trash in order to avoid the fee.
Let’s also examine the opposite situation. If your baggage weight was to decrease during the course your travels, you might then be eligible to step down to a cheaper baggage category.
But if you didn’t have a means to determine how heavy your bag was, you’d probably never know this and you’d likely continue to unknowingly select the higher (and more costly) baggage category every time you booked a flight. Again, not so ideal.
Those who only travel with carry-on luggage should also be careful not to get caught out with fees for going over cabin baggage weight allowances. Sometimes airlines will ask you to weigh your carry-on bag at the check-in desk.
If you happen to have added a number of new items to the bag over the course of your travels, its weight or even its size may come to exceed the maximum carry-on allowance for certain airlines. Ryanair are perhaps the strictest airline in this regard.
So the key to avoid being landed with all these luggage surcharges is to have a means to keep track of your baggage weight while you’re on the road. The best accessory for this is a portable luggage scales. These are a compact, lightweight and essential accessory for any thrifty traveller.
Having one in your kit means that you can get an accurate weight reading of your bag anywhere, anytime, avoid any financial disasters at the airport and always select the most appropriate checked baggage category when you’re booking a flight.
#15 - Multi-pocket clothing
Budget airlines and low-cost carriers often compensate for their low airfares with inflated checked baggage fees and by making it difficult to avoid checking a bag with their restrictive carry-on size and weight limits.
As a result of the strict requirements, many globetrotters really struggle to downsize their gear list to the point where they can fit everything into a carry-on compliant backpack.
In spite of the difficulties that many people face, we still feel that baggage fees are an unnecessary expense for the general traveller. Aside from applying our 6 ultralight packing principles, there are also certain accessories that can help you to avoid the vexing expense of checked luggage.
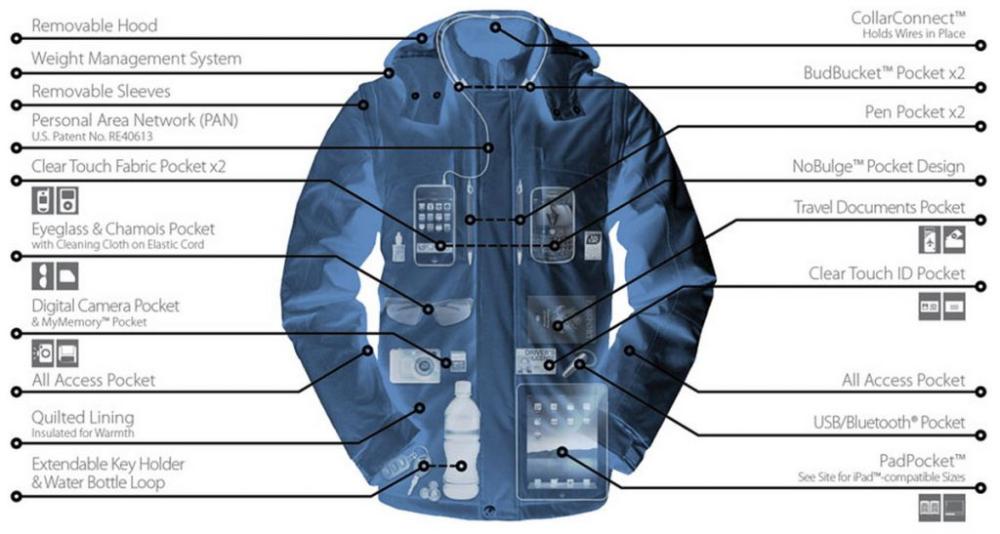
We’re talking specifically about the line of intelligent clothing made by ScotteVest. This is a company that makes multi-pocket vests, pants, hoodies, jackets and even boxer shorts, for both men and women. They call what they do “pocket science.”
Their clothing is specially designed to hold all the portable electronic devices and gadgets that travellers tend to carry with them on the road.
The cleverly designed pockets will hold laptops, cameras, tablets, e-readers, water bottles, paperback books and other heavy or cumbersome items that you’d normally keep in your backpack.
Many of their jackets also feature a conduit system with special wire pathways. Using these, it's possible to charge a device in one pocket from an external battery in another, or run headphone wires through the pockets and up to the collar.
Rather impressively, The ScotteVest OTG (off the grid) jacket, with a total of 29 different pockets, has two padded pockets in the front, which can each hold up to a 15 inch laptop. Admittedly, this only applies to the largest sized men's jackets but that’s still quite an achievement.
What ScotteVest means for travellers, is that they will now find it much easier to travel with a carry-on backpack. If your bag is permissible dimension-wise but it exceeds the cabin baggage weight allowances of some of the stricter airlines like Ryanair or Air Asia, you can offload some of the heavier items into your Scottevest jacket.
After doing so, your backpack will then hopefully be within the airline luggage limit and you won't have to pay for costly checked baggage. Hell, some of you won't need a carry-on backpack at all if you travel with one of these jackets.
Luckily, the airlines haven’t cottoned on to this ploy yet and hopefully they never will.
#16 - A DIY laundry kit
.jpg)
If you want to save money on laundry, you’ll have to eschew Laundromats, launderettes, laundry ladies, dhobis and all other laundry services. The tried and tested way to save money on laundry when you’re travelling is to do it yourself by hand.
By hand-washing your clothes in a sink, bathtub, bucket, basin, plastic bag, river or lake, you can save a ton of money on laundry. All you need to accomplish this is a small DIY laundry kit that you will carry with you while on the road.
You can buy pre-assembled kits or you can assemble your own kit from scratch (our preference).
If assembling your own, a typical DIY hand-washing laundry kit would include a portable sink stopper (to plug the sink or bathtub), an ALOKSAK bag (a backup in case there’s no sink, bathtub, bucket etc.), a portable elastic washing line (to hang your washed clothes out to dry) and a detergent like Dr. Bronner’s Magic Soap.
To learn more about how to wash your clothes by hand while you’re travelling, check out our detailed article here.
#17 - A travel sewing kit
.jpg)
If you spend enough time on the road, the fabric-based items that you’re carrying and wearing will eventually begin to fall apart from wear and tear. This applies to backpacks and virtually all clothes items. Threads unravel or pop, bag straps break, fabrics thin from wear, holes and tears begin to appear.
The problem is that most of those items can be very expensive to replace outright – especially backpacks and large clothing items like jackets. A new backpack of decent quality, for example, can cost $100 or more.
Of course there do exist charity shops or thrift stores in some countries, where you can often pick up donated second-hand clothes and backpacks for a few dollars. Unfortunately however, you won’t always be near one of these shops when you’re travelling.
Finding somebody to mend your tattered clothes or backpack is another option but that’s still going to cost you money and the shop could easily rip you off too.
So when your backpack strap pops or your pants burst at the seams, how do you solve the problem without spending a fortune on a replacement or paying somebody to repair it for you?
You carry a travel sewing kit and learn how to mend holes, tears and damaged stitching.
We can testify that sewing is an incredibly useful skill to have when on the road. Many of the previous backpacks that we owned started to fall apart during our travels and we were able extend their lifespan by months by repairing them with a needle and thread. We’ve also repaired holes in pants, shirts and other fabrics.
Invest in a good sewing kit before you hit the road and learn how to carry out basic repairs with it. It’ll save you a ton of money.
#18 - A knife

How a knife would help you to save money on the road may not be patently obvious at first, but just think for a moment about how you would approach buying fruit if you weren’t carrying a knife.
Since fruit sellers are not always willing to dice up large, thick-skinned fruits into manageable pieces for their customers, you would probably avoid buying certain fruits like pineapples, papayas, jackfruits, watermelons and so on, preferring instead to buy more manageable fruits like bananas and oranges that you can easily open by hand.
But let's say you really wanted to eat the bigger thick-skinned fruits or they were all that was available, what would you do? You'd probably try to find somebody selling pre-cut segments and diced pieces of those fruits.
Sure enough, this is exactly the behaviour we see from most tourists in Thailand, especially in the Khao San Road area. There they walk the streets, often buying fruit from all the street vendors selling small polythene bags filled with diced pieces of pineapple, mango, watermelon, jackfruit, dragon fruit (pitaya), zalacca, rambutan and other fruits that are troublesome to manage with the bare hands.
But they pay quite the price for that convenience.
The extra preparation work that has gone into making the final product and the fact that you’re not buying in bulk (not buying the entire fruit) together mean that you will get poor value for money by buying a small bag of fruit that has been diced up and prepared by the vendor.
So if you want to save money when buying these kinds of fruits, the solution is to carry a knife and learn how to use it to open and cut up those large, intimidating, thick-skinned fruits that you encounter on your travels. If you get comfortable doing this, you can save money like a boss.
Having a knife will also allow you to buy meat and fish in bulk, which is normally much cheaper than buying those smaller cuts that are pre-packaged at the supermarket. You can buy a whole leg of ham or a large fish and butcher it yourself.
If you can’t consume large quantities in one sitting, you can always refrigerate the leftovers, provided that you’re staying in a hostel or hotel room that provides a fridge.
Travellers that are staying somewhere for a few weeks or months (maybe those that are housesitting) and are lucky enough to have access to a freezer, could take this to the next level and buy an entire pig or a few whole chickens, saving themselves a ton of money on meat.
As for what knife to buy, for a functional outdoor knife that'll take quite a beating and costs less than $20, you can't beat a Mora. These have a Scandinavian grind (flat bevel) and they're an incredibly popular knife among outdoors folk. We travelled with one for about a year until it got stolen in India.
For something more a bit beefier and more high-end, we would have to recommend the Fallkniven F1. This has been the official survival knife of Swedish Air Force pilots since 1995 and we can tell you that this knife will last you years, if not decades. The thing is virtually indestructible with its thick, convex, stainless steel, full tang blade.
Now if you’re planning to travel with just a carry-on backpack, you won’t be able to take a knife with you on the plane, but you can always try to pick up a cheap one for a few bucks from a street vendor or market stallholder when you reach your destination.
For around $5, we managed to pick up a nice Columbia folding knife in Southeast Asia, which has proved itself to be sturdy enough to butcher meat and to crack open tougher woody fruits like coconuts.
Our knife is an exception to the rule though. Most of the knives we've seen on the streets or in marketplaces were complete junk. While travelling Asia over the past few years, only once did we find a shop selling high quality knives.
But if you're travelling carry-on only, you don't necessarily have to settle for buying an inferior knife once you reach your destination.
You can still have the instrument of your choosing if you mail your knife ahead of time to a reputable hotel or to a trusted friend or relative in the country you’ll be visiting. You can try to time your arrival to coincide with the arrival of the package so that you won't have to wait around too long.
A courier service like DHL or FedEx will be the fastest option, but also the most expensive. If you’re using the cheaper snail mail (regular mail), you may have to send the package weeks in advance, depending on the destination you're flying out to.
If you’re travelling with checked baggage, then you can easily pack a knife in there. Here you again have the option of buying a quality knife like the Fallkniven F1 before you embark upon your journey.
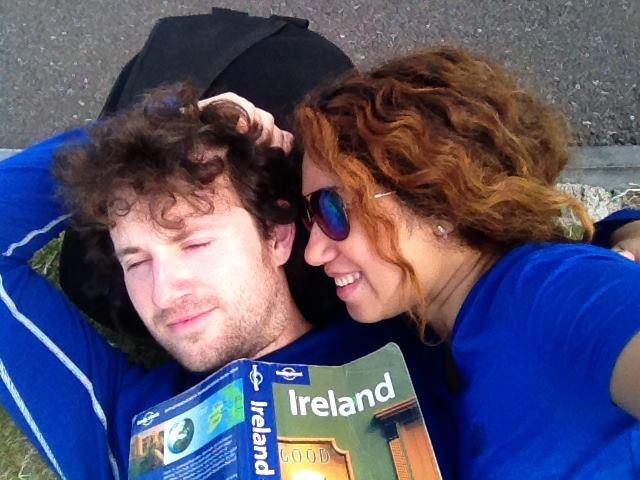
#19 - A guidebook

When you’re travelling in a new and unfamiliar country, there are few things more useful than a well-researched, well-written and up-to-date guidebook. This is especially true if you’re going to be “offline” and won’t have access to the web for information while travelling.
But a guidebook is not only useful. Travelling with one and actually absorbing the information within can also save you a ton of money. Why?
Because the less you know about a country, the more prone you’ll be to making costly financial mistakes. A guidebook substitutes for a real mentor who has made all those expensive errors and figured out the most economic way to travel the country.
So what expensive mistakes might a guidebook save you from making? Loads. Here are just a few:
- Taking a bus or taxi to the wrong airport or the wrong terminal on the day of your departure because you didn’t have a guidebook to inform you that the city has multiple airports
- Paying more than is necessary to reach your next destination by bus or train, because you didn’t have a guidebook to research all the different operators, prices and possibilities for getting there
- Spending money on local transport to get to a museum, temple or other attraction, only to discover that it’s closed because you had no way of finding out the opening hours beforehand
- Without a guidebook, you’ll have no information about how much accommodation, food, transport, groceries and other things should typically cost. Then when a vendor overcharges you, you may not even realize
- A guidebook will inform you about which dates represent peak times, religious holidays, national holidays and other more costly times to visit a destination, when accommodation prices skyrocket
- A guidebook can warn you and inform you about costly scams or fraudulent practices that might operate in the destination you’re visiting.
- A guidebook can point out the locations of budget lodging options, budget restaurants and cheap local markets in a town or city - options that you might otherwise be unaware of, causing you to spend more
Of course we’re not saying that you have to have a guidebook to get all this information. You can also get it from the web, from other travellers, from your guesthouse, from tour operators, from locals and so on.
But it is really convenient to have all the information you need to travel a country, written in your native language, within a single book or “one-stop shop”. And these days, guidebooks don't even necessarily have to be a heavy physical book.
You can now download guidebooks onto your devices in epub, pdf, mobi and other file formats. E-readers like the Amazon Kindle Paperwhite are particularly suited to storing and reading lengthy digital guidebooks.
Our recommended guidebooks are still the Lonely Planet series because they cover almost every country in the world (195 countries), although many people feel that the quality and depth of the content has been deteriorating over the past few years.
Lonely Planet guidebooks can be quite costly when you buy the most up-to-date, paperback editions brand-new, but you can get away with buying older guidebooks from second-hand bookstores or guesthouses, as long as they’re not too old.
When you enter a new country and don’t have a guidebook for it yet, you can also try swapping your now useless guidebook from the previous country for a more relevant one for the current country.
Sometimes you’ll have to trade 2 of your books for 1 of theirs or pay a bit of extra money if you want to do a 1-to-1 book exchange. Nevertheless, it’s still way cheaper to do things this way than it is to buy brand new guidebooks.
Conclusion
We've given you a long list of travel accessories that can help you save money on the road and explained in detail how each one can reduce your expenses. Depending on your specific trip or situation, maybe only a handful of these items will actually help you to save money.
But if you're serious about saving money on the road, you'll want to make it a priority to pack those particular items before you embark upon your trip. That way you'll be able to hit the ground running and won't have to waste time shopping around for gadgets and gizmos that are difficult or impossible to find.
Even carrying just one or two well-chosen accessories from this list could make a huge difference to your budget on the road.
If you liked this article or found it useful, please share it with other travellers. Do you know of any other items that can help travellers save money on the road? Please let us know in the comment section below.
JOIN OUR LIST
SUPPORT US
FOLLOW US
ABOUT US
Our names are Eoghan and Jili and we hail from Ireland and India respectively.
We are two ardent shoestring budget adventure travellers and have been travelling throughout Asia continuously for the past few years.
Having accrued such a wealth of stories and knowledge from our extraordinary and transformative journey, our mission is now to share everything we've experienced and all of the lessons we've learned with our readers.
Do make sure to subscribe above in order to receive our free e-mail updates and exclusive travel tips & hints. If you would like to learn more about our story, philosophy and mission, please visit our about page.
Never stop travelling!
FOLLOW US ON FACEBOOK
FOLLOW US ON PINTEREST
