-lw-scaled.png.png)
50 Powerful Travel Photography Tips To Dramatically Improve Your Images (+ free downloadable PDF)

Travel and photography always seem to go hand in hand.
When we’re exploring a new part of the world, an exotic environment that stimulates and invigorates our senses, many of us feel compelled to capture the highlights, the special moments, the visual spectacles that we witness during the journey.
After all, many of us spend the greater part of our lives sitting behind a desk in a sterile office looking at the screen of a computer.
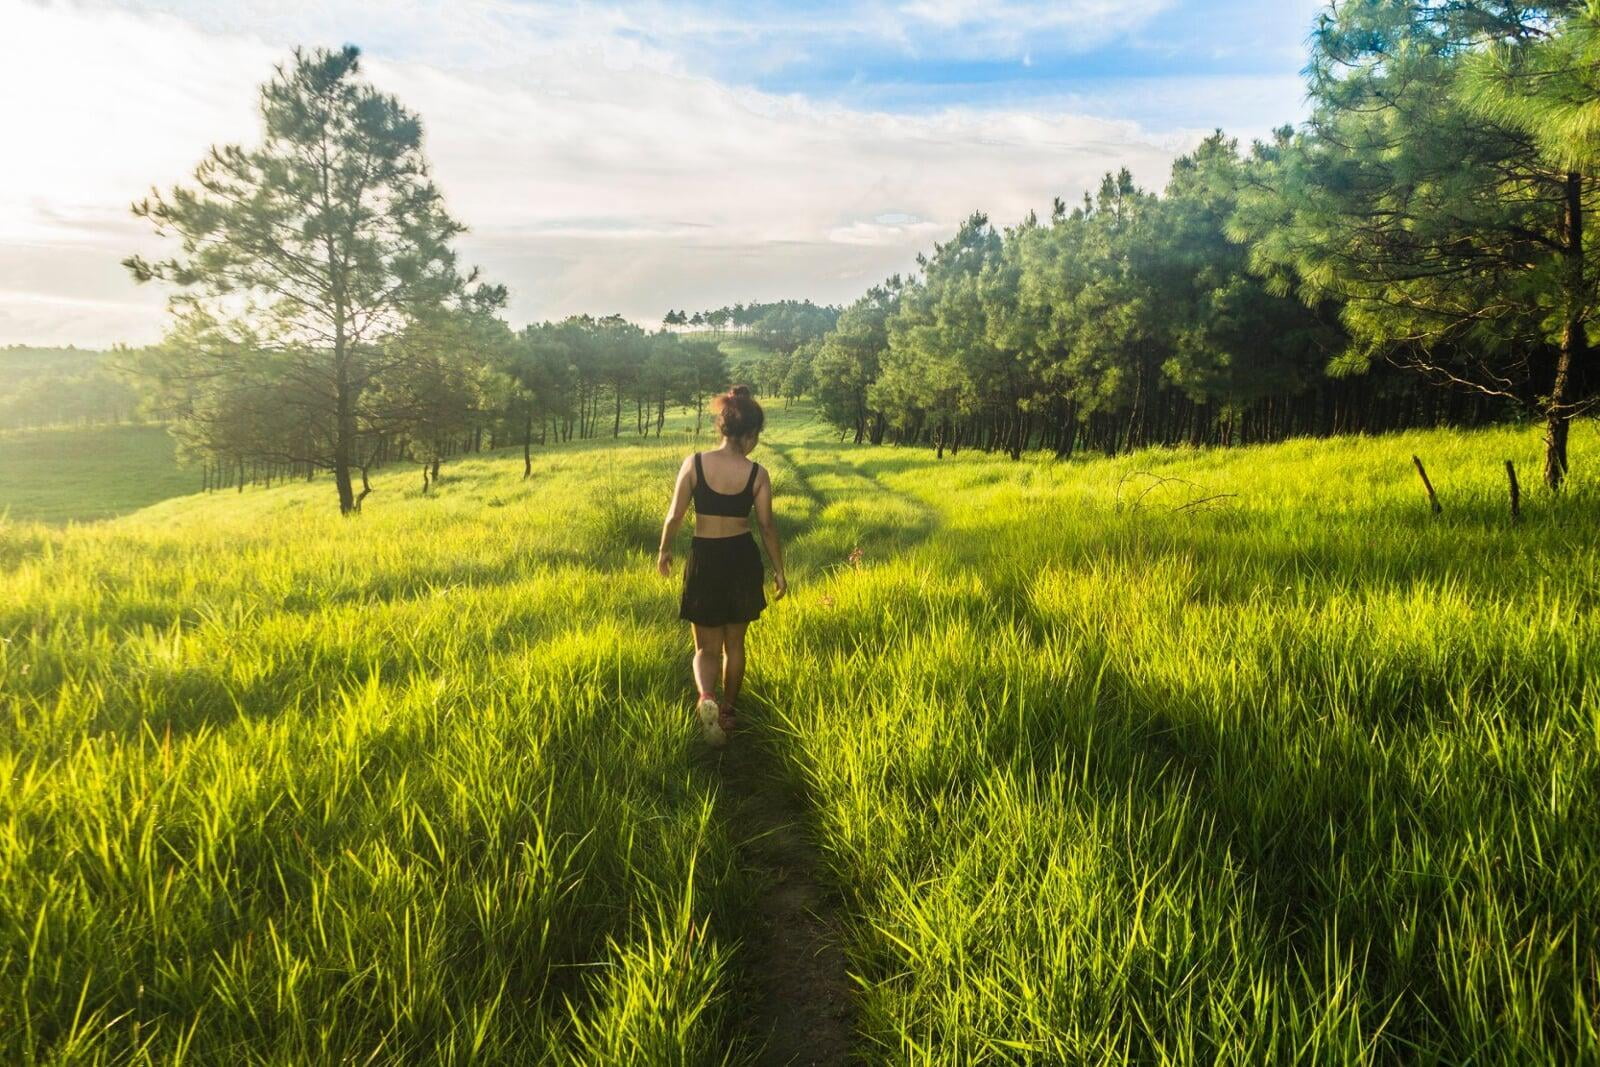
We get to dedicate a much smaller proportion of our lives to exhilarating pursuits like sailing the high seas or skipping through Edenic valleys filled with wildflowers in far-flung lands.
The photographs we take during our travels help us to preserve those rare good times; they help jog our memory when we revisit them in the future, allowing us to almost relive the experience again, long after the memories of the trip have become a blur.
“Once you have traveled, the voyage never ends, but is played out over and over again in the quietest chambers. The mind can never break off from the journey.”
– Pat Conroy
No matter how tedious or monotonous daily life becomes, our travel photos can always, in an instant, mentally transport us back to that enchanting land of vibrant colours, sunny weather and happy people that we once experienced, even if only as a fleeting holiday.
Our travel photos also serve to assist those friends and family members who were not fortunate enough to accompany us on our trip, to understand the import and the sublimity of what we have experienced during our time away.
Our verbal accounts can only communicate so much, but when images accompany the narrative, the story is more complete and our listeners can better relate and truly understand what we have been through.
Perhaps we also wish to take travel photos because of their commercial value; we might like to sell prints, exhibit our portfolio in a photo gallery when we get home, use our images to create a website or a popular social media page, or sell our work on stock photography websites.
Regardless of the underlying motivation for taking photographs during our travels, the better and more compelling our images are, the better they will serve our purposes.
We’ve all experienced that sense of disappointment and regret in the past when the photographs we’ve taken in a bid to capture a key moment during a trip have completely failed to do justice to how the scene looked, how it felt, how we felt.
People want to improve their travel photos for a wide variety of reasons but the tips and advice for improving them are the same for everyone.
I’ve put together here the most comprehensive list of travel photography tips on the web; 40,000+ words of no-nonsense, no-fluff advice gleaned from my own experience of travelling around the world for over 5 years while photographing everything of interest that I've encountered along the way.
This guide is divided up into three sections.
Section 1 covers general photography tips that don’t deal with any specific gear or techniques.
Section 2 focuses on gear and accessories that you’d be wise to invest in if you’re looking to improve your travel photography.
In Section 3, I delve into a number of intermediate to advanced techniques that can be used to create compelling and emotive effects in your images.
Most of the information you need to execute these techniques is in the guide but wherever there is a more involved editing process required for the technique I have linked out to one or two tutorials dealing with that subject.
Without further ado then, let’s dive right into my best photography tips that are going to help you to start creating images that have the power to truly captivate and inspire people.
Section 1: General travel photography tips
#1 - Track down great shooting locations
Just as in real estate, the mantra for travel photography is also location, location, location.
No matter how good a photographer you are, it’s exceedingly difficult, if not completely impossible to create stunning images from drab subjects or humdrum scenes.
Sure, great photo-ops can sometimes unexpectedly materialize in mundane settings, but success is most reliably achieved by tracking down great photography spots.
Compelling travel photos capture subjects, landscapes and environments that are unique, exotic or out of the ordinary, and these are not found everywhere.
You have to think a bit like a predator, like an animal in pursuit of its elusive prey; those who seek out secluded jungle waterfalls, death-defying sea cliffs, ice-capped peaks and other elusive locations will be rewarded with the most sublime images.
Yes, taking truly great travel photos does require you to be something of a pioneer, an explorer, a swashbuckler imbued with the spirit of adventure.
But how can you find these great photography locations?
Here are a few pointers.
Explore beyond the madding crowds
Most tourists just follow the herd and that’s why a lot of their photos from a certain landmark, attraction or national park can look samey.
Even if you only ever visit the popular attractions that everyone else flocks to, you can find unique photo opportunities just by venturing a little further afield than the crowds.
If the majority of tourists tend to snap photos of the front face of the building, why not investigate to see if any interesting shots are to be found around the backside?
If the unenterprising masses normally only climb the mountain as high as the first viewpoint, why not continue on to see if there are even better viewpoints higher up? Why not go all the way up to the summit if you have the energy?
As the well-known saying goes, “the best view comes after the hardest climb.”
One thing I’ve learned in all my years of travel is that being willing to go the extra mile and push myself that little bit further has often rewarded me with spectacular photo opportunities that I would never otherwise have gotten.
Of course, sometimes all that extra exertion can be for nothing too, like when you finally reach the peak after a tough uphill slog only to find that thick trees are obstructing would otherwise have been a sublime view.
But usually, as if by dint of cosmic justice, there will be a treat in store for you to recompense you for your travails.
Follow your curiosity
This tip relates to the last one, but it also applies more generally, even when there are no crowds of tourists around or when you’re not actively shooting.
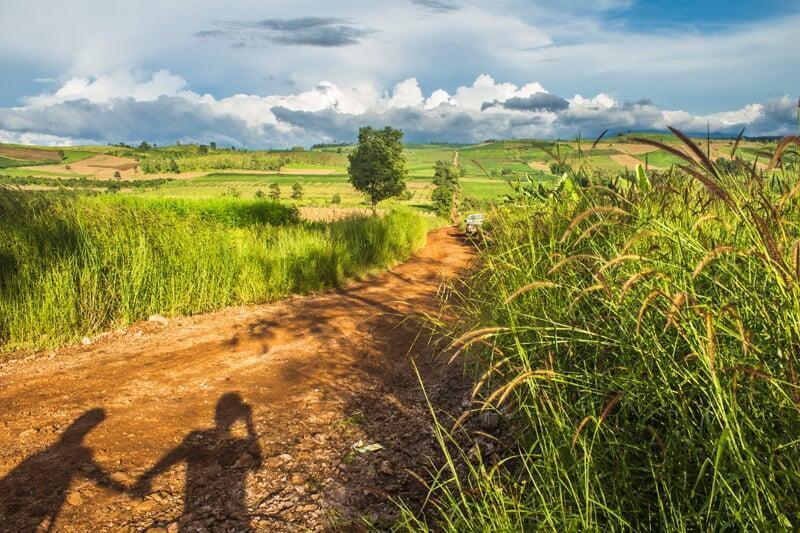
Often, it will be your innate curiosity that will lead you to discover a new photo-worthy location; maybe you’re curious to know where that dirt road near your guest house leads to, or what that strange-looking cluster of boulders in the middle of that distant green field is all about. Maybe it’s a little-known cousin of Stonehenge?
It doesn’t matter if the location you're drawn to isn’t in a guidebook and in fact it’s all the better if it isn’t because it means that you might become one of the first people to photograph it.
So don’t be afraid to investigate some of those relatively unexplored nooks and crannies and diversions that might lure you away from your original plan or program. Follow your instinct and great photo opportunties will reveal themselves. The journey matters more than the destination.
Of course, curiosity will probably lead you to a dead end in more instances than not, but that’s the price you have to pay to find worthwhile new photo spots It’s a process of trial and error..... and mostly error.
Use Google to scout for locations with potential
Into landscape or architectural photography?
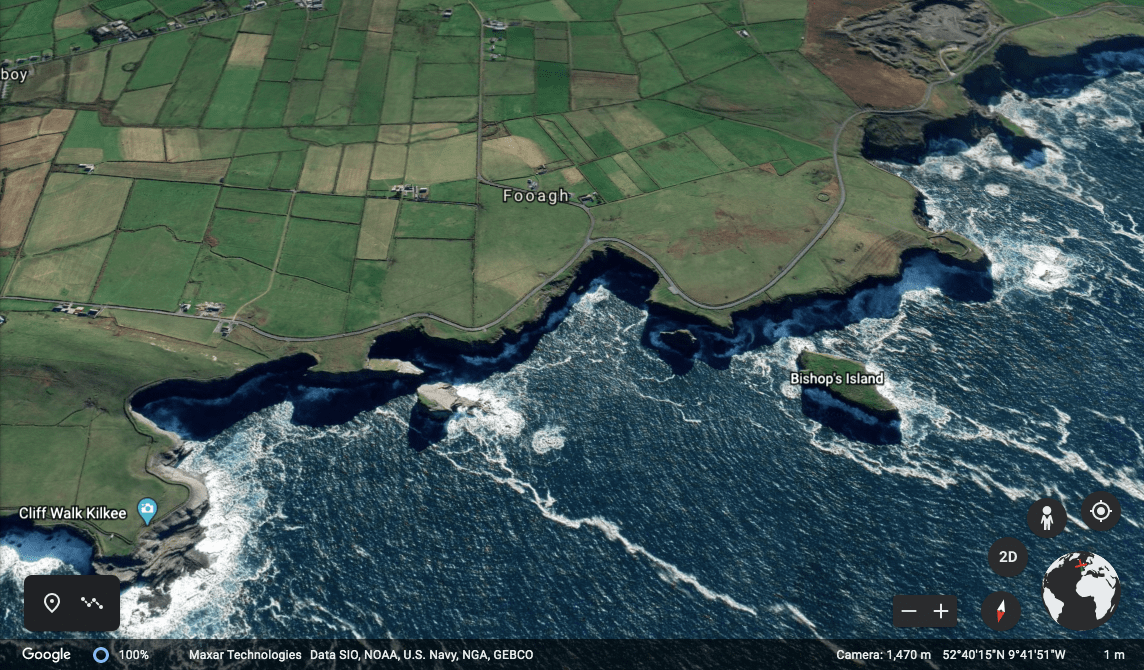
You can use Google Maps and Google Earth to scout out potentially interesting landmarks, buildings and geographical features in your destination.
Potentially interesting locations in and around your destination, like the confluences of rivers, horseshoe bends, lakes, dams, sea cliffs, sea stacks, sandy beaches, lagoons, historical buildings, bridges, and so on can all be easily identified just by looking at a map.
Once you’ve discovered a potential candidate, you can get a fair idea about whether the location has photographic promise by entering the name of the place into Google images and then browsing through some of the photos that were taken at that location by other people.
Ask locals for suggestions
If you’re going to find a secret or unique spot that hasn’t been photographed much by outsiders, it’s probably going to be a local that tells you about the place, since the locals know the hidden gems of their area better than any outsider who writes a guidebook.
Even local people who are not into photography will probably be able to suggest a few scenic locations that you might otherwise have never known about, but it’s even better if you can meet a local photographer and persuade him to let you in on all his favourite spots.
A great way to connect with locals is through Couchsurfing, BeWelcome, Warm Showers, Servas, GlobalFreeloaders and other hospitality exchange websites. See our article on how to sleep for free while travelling for more information about these platforms.
Another way to meet locals is through work exchange or volunteering platforms like HelpX, Workaway, Worldpackers and WWOOF.
Other platforms and apps geared towards tourists having experiences with locals are Withlocals (find local hosts that offer private, personalized tours) and Eatwith or VizEat (enjoy authentic local culinary experiences with local hosts).
Airbnb can also be a way to connect with locals, although some of the hosts are absentee landlords that you probably won’t be able meet during your stay.
You can also just connect with locals in the old-fashioned way – you know, by initiating conversation with people that you encounter in the physical world? Does anyone ever do that anymore?
Hire a local guide
An experienced local guide may be able to take you to some secret or offbeat locations that aren't covered in any travel guidebooks or websites. Some of these little-known places will surely have photographic promise. If the guide is a photographer or knows a thing or two about photography, even better.
In many cases, local guides will approach you soon after you arrive at a destination, long before you even go looking for them.
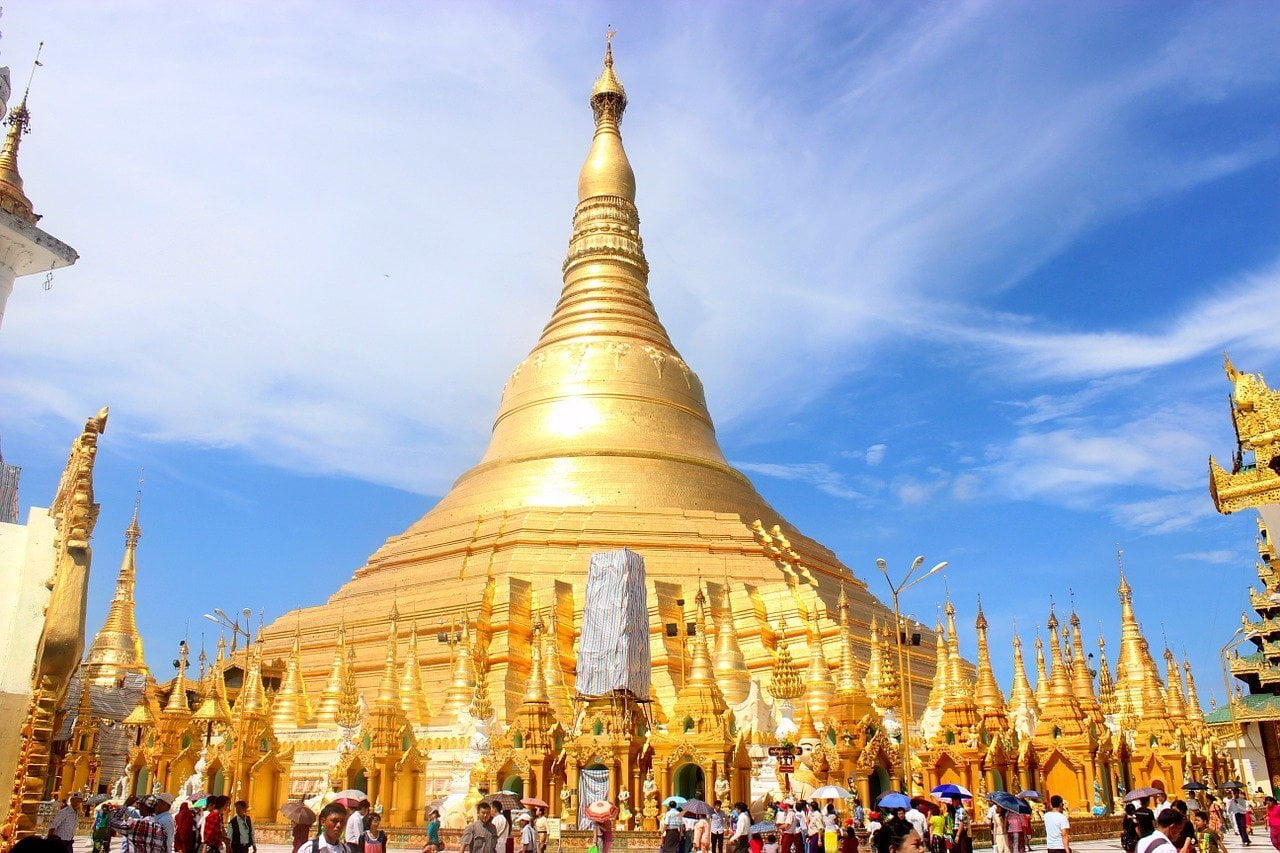
When we visited Yangon's Shwedagon Paya, the most sacred Buddhist pagoda in Myanmar, a local guide approached us while I was taking photos of the monument.
He wanted to show me a few of the pagoda's secrets so that I would be able to photograph them, although I declined his offer, as I wasn't sure how much he was going to try to charge me after revealing the secrets.
One way to get a free local guide is if you use Couchsurfing to sleep in locals' homes and have them show your around their local area. Although some Couchsurfing hosts will be too busy with work and other commitments to give you a tour, other hosts will dedicate their time to you and will be able to show you some really cool places.
Look for local photography spots in postcards, art galleries, museums, guest houses etc.
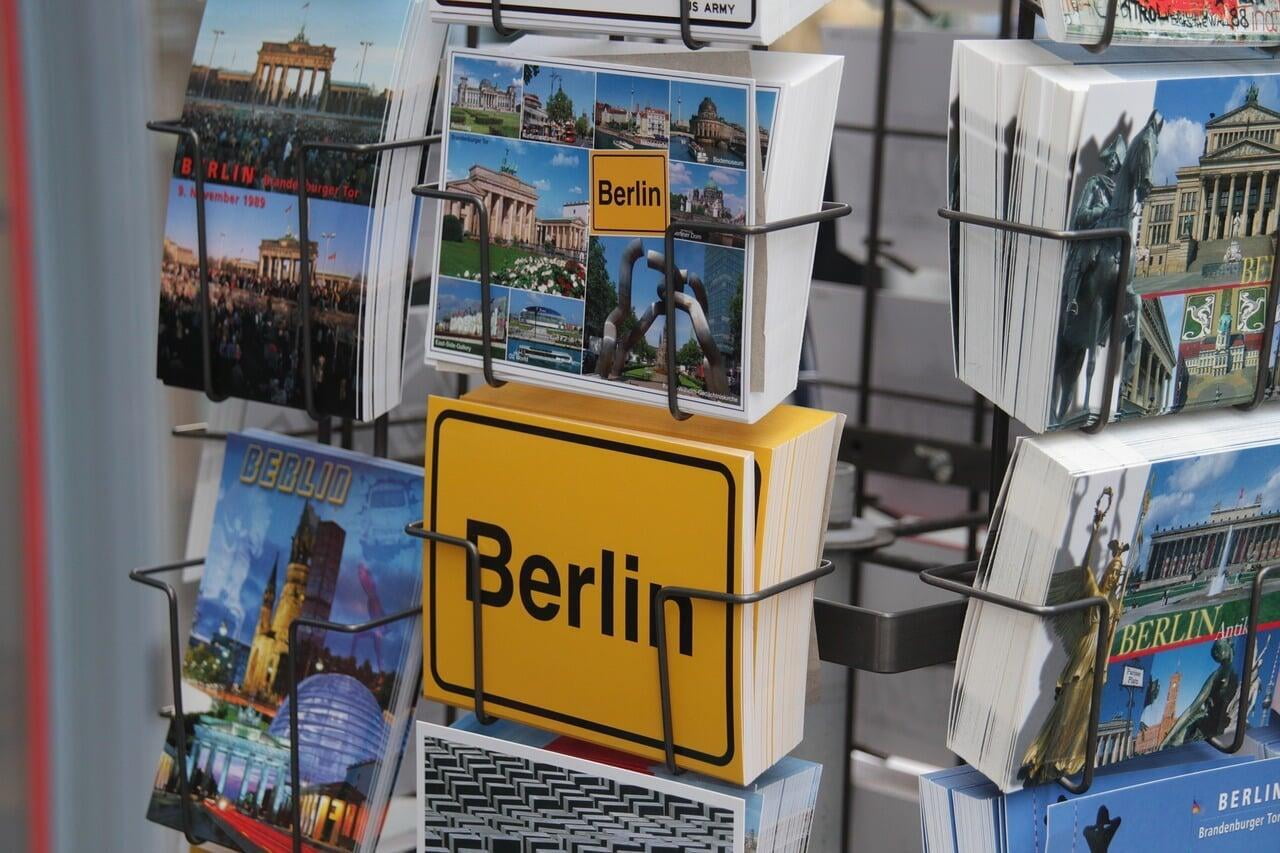
Whenever I visit a new destination, I always pay close attention to the postcards that the shops are selling (if any), as some of these images will usually have been taken at prime photography locations in the locality.
In some towns you’ll find art galleries, commercial photo galleries and even paintings being sold on the streets by local artists; these will often depict picturesque scenes in the vicinity, although you might have to ask someone to tell you the exact locations.
Your guesthouse might also have framed photographs or paintings mounted on the walls depicting interesting scenes from the local area or from the country in general.
You are more likely to find these prideful exhibitions of art and local culture in characterful, family-run accommodation, and far less likely to find it in cookie-cutter hotels that usually just mount some kind of generic painting (like a sailing boat) on the wall above the bed.
Local museums often have interesting photo galleries and exhibitions too, although the photos in museums often only depict scenes from times gone by, and may not reflect the present reality.
Tourist information offices are another good place to look for leads, and if you don’t find too many framed pictures on the walls inside the building, you’ll surely find them in the promotional brochures and flyers that they hand out for free to any tourist that drops in.
Join photography communities and follow creators you like for inspiration and recommendations
While it’s important to always be on the lookout for novel or underexploited photography locations, there's also nothing wrong with visiting well-established locations recommended to you by fellow photographers and travellers.
Following other people's suggestions can often be very rewarding, although it shouldn’t be your only strategy for finding new photo opportunities, lest you become a copycat and end up with a portfolio that's predominantly filled with unoriginal material.
You can see what other photographers are up to by following them on image-sharing platforms and communities like Instagram, 500px, Flickr and Imgur. See this list for more photo-sharing websites.
There used to be a great image-sharing platform called Trover that was dedicated exclusively to travel photography, but sadly it had to close down in August 2020 after being in operation for 9 years.
Travel slow and explore your destination thoroughly
The best travel photo opportunities in any destination often only reveal themselves after some digging and after spending a lot of dirt-time in the field, exploring an area thoroughly.
If you spend longer than most people spend exploring a destination – say a few weeks instead of just a few days - you’ll have extra time to discover photo opportunities that the average visitor who only sticks around for a short time will probably miss.
The fewer stones you leave unturned, the higher the likelihood that you’ll eventually stumble across the hidden gems and leave with the best possible images of your destination.
Be willing to invest money to access prime locations and better photo opportunities
While there are gazillions of spectacular photos to be had for free in this world, many do unfortunately lie behind a paywall.
As you already surely know, popular tourist attractions and national parks with aesthetically pleasing sights often charge visitors a fee for entry, which puts photographers who aren’t able or aren’t willing to pay at a disadvantage.
While you can often still capture a few decent photos from the periphery without entering the actual site, you are inevitably going to have to forego the photo opportunities that are exclusively available to those who ponied up the entry fee.
We have written an article describing how entrance fees at tourist sites can be circumvented in many instances, but much of the time it’s simply not possible to do so due to ticket checks and close monitoring of access points.
Being willing to spend money during a trip can unlock new photo opportunities in other ways too.
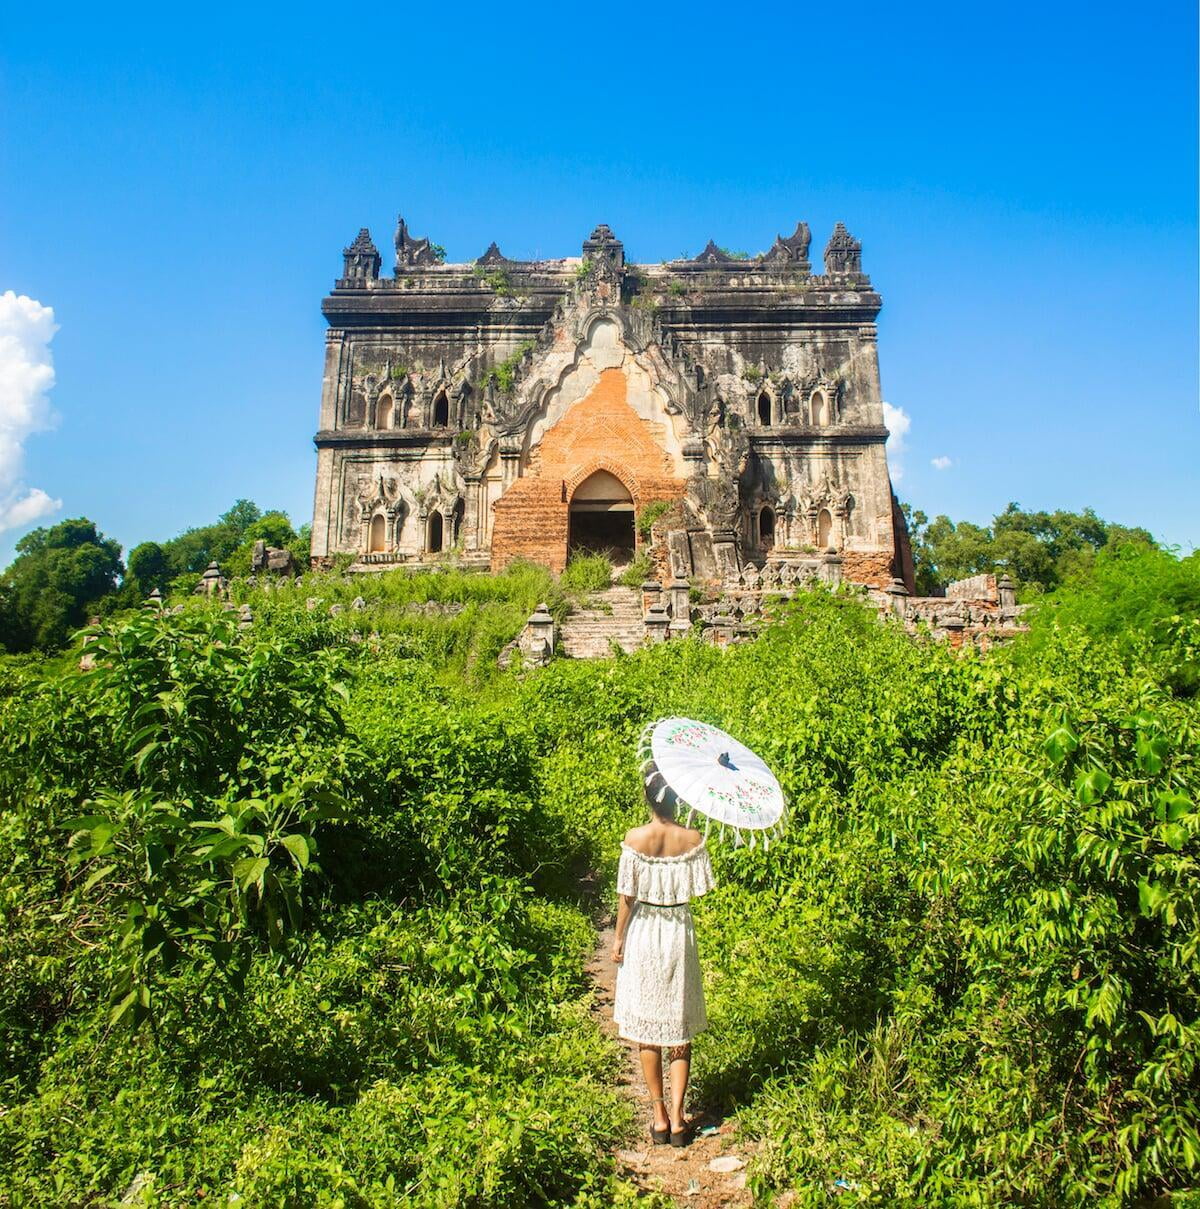
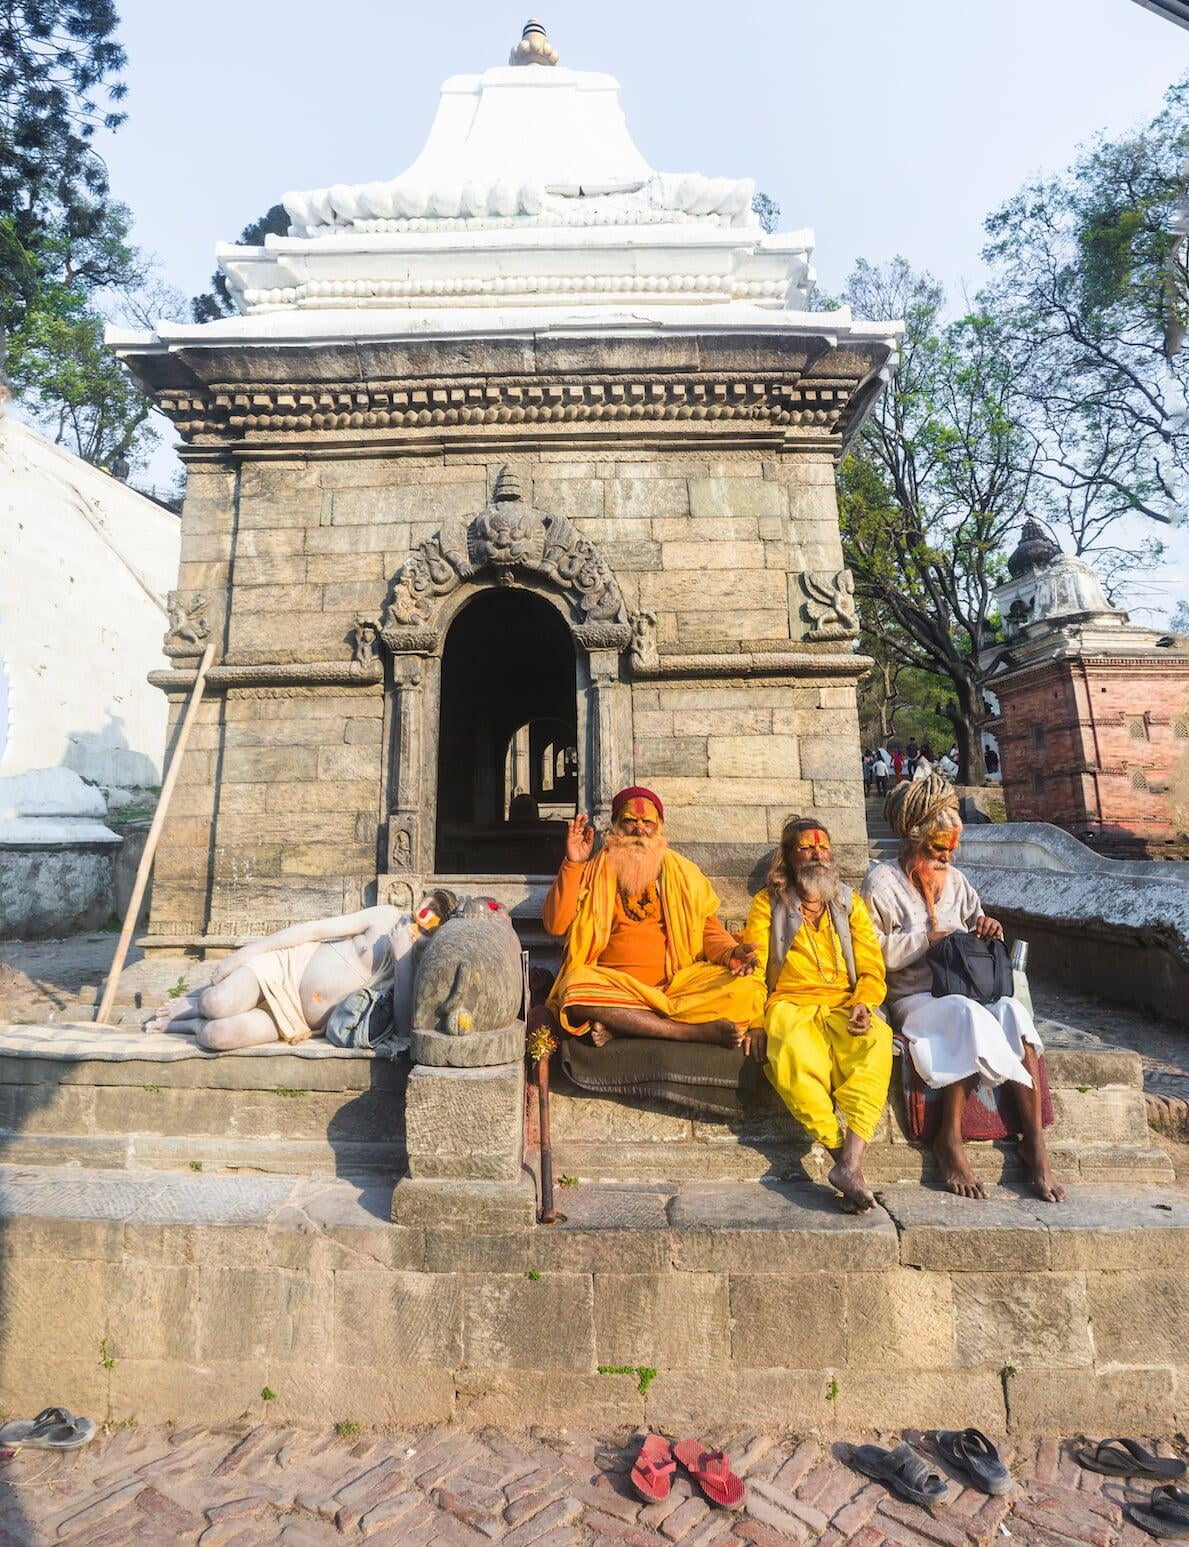
For example, if you are willing to pay to rent a traditional costume, a colourful umbrella or some other interesting prop from a local opportunist at a tourist spot, it will help to embellish your photographs.
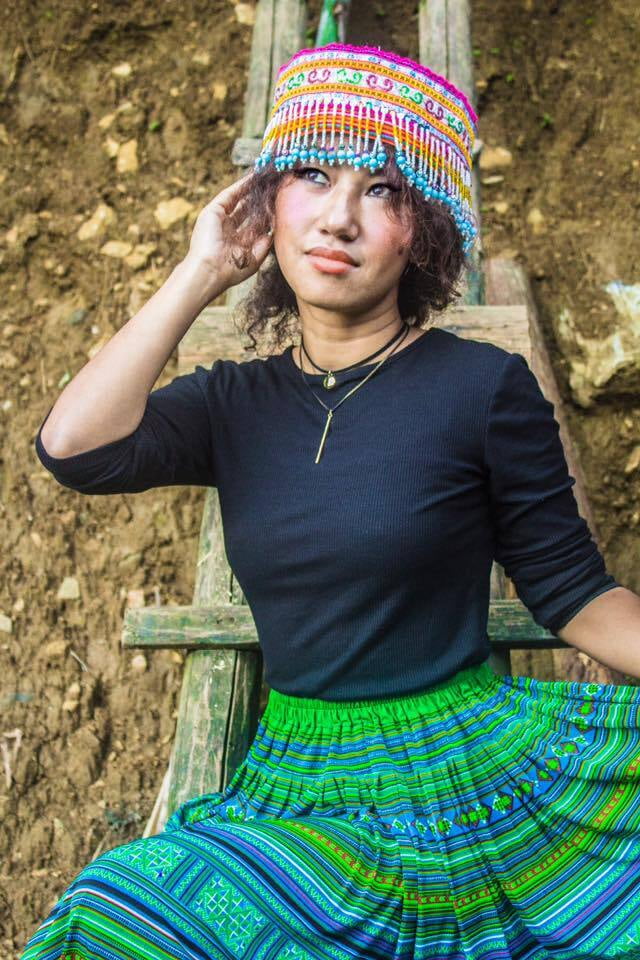
If you're into photographing people, some locals may demand a tip or bribe (known as baksheesh in India) in exchange for their portraits, although this mostly only happens in touristy destinations where certain local personalities with exceptional aesthetic value have gotten used to being barraged with requests for photographs and have started trying to capitalize on the demand.
Usually you can avoid paying this tax, as it's typically a case of "photograph me first, pay the tip before you leave" and often the subject will not mention money at all until after the photo has been taken.
Once you've taken the desired picture (s), can always shake your head and deny payment if you feel a person or group of people is being greedy or is trying to take advantage of the situation.
But if you meet a person who is demanding payment in advance or who tries to get you to agree to a price for a portrait photo beforehand, you will have no choice but to pay.
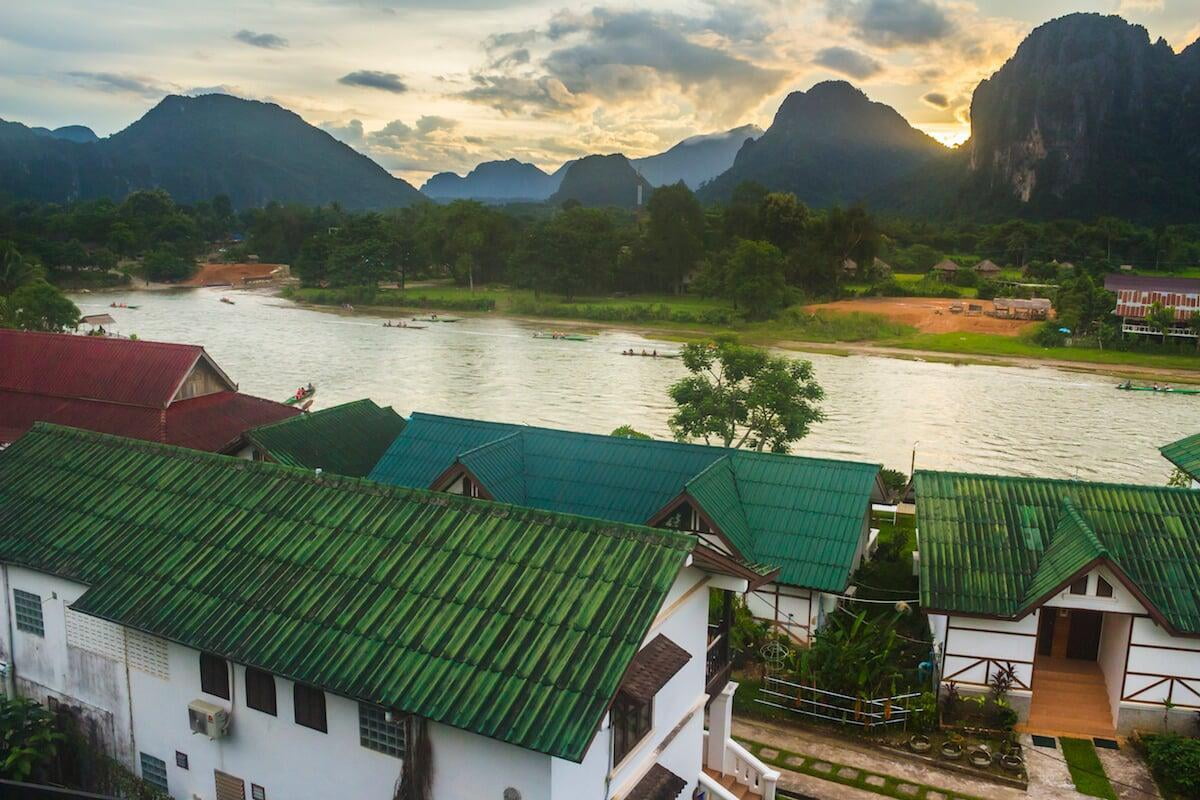
Those who are willing to fork out for expensive accommodation will often land rooms with sweeping balcony vistas or might find themselves staying in heritage hotels (converted from erstwhile palaces, forts, castles, mansions etc.), which boast enthralling traditional architecture and elaborate interior décor that set an appealing backdrop for photos.
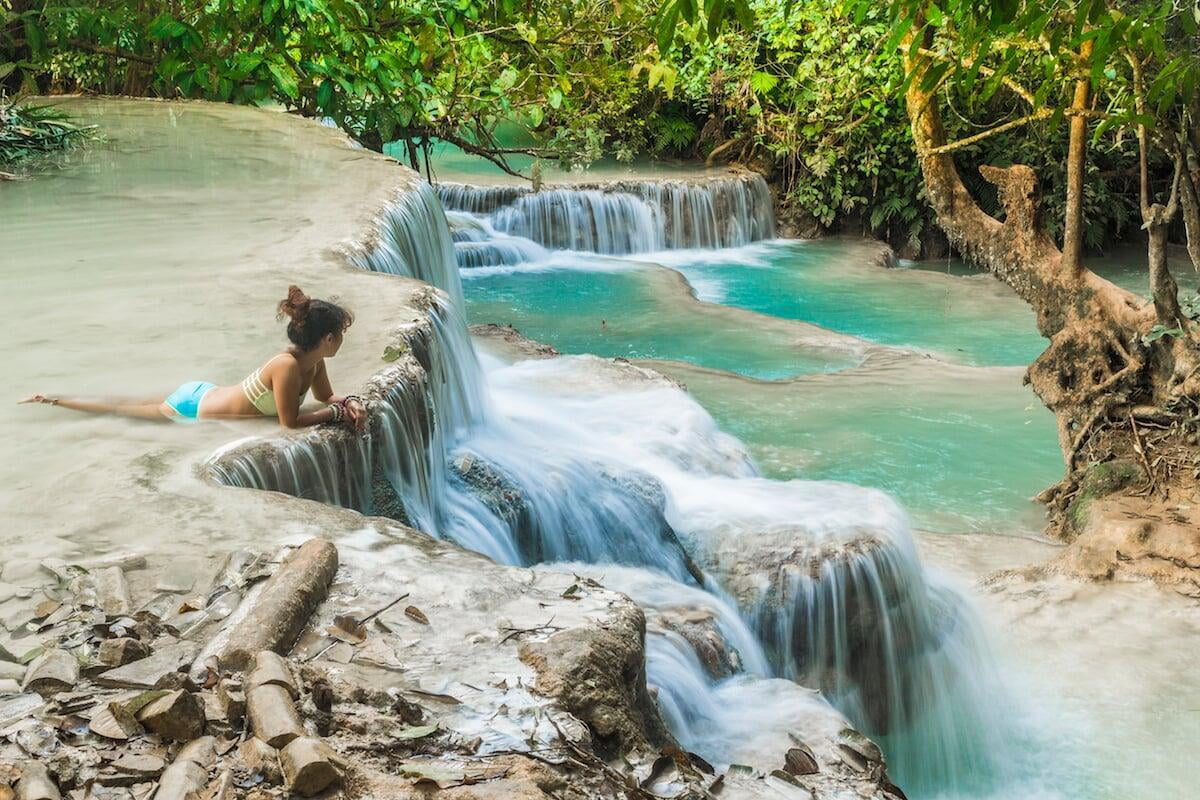
With that being said, many budget accommodation options can also offer guests superb views from the rooms, especially if it’s a naturally stunning location where you’re staying, like Vang Vieng in Laos.
#2 - Take a photography tour or workshop
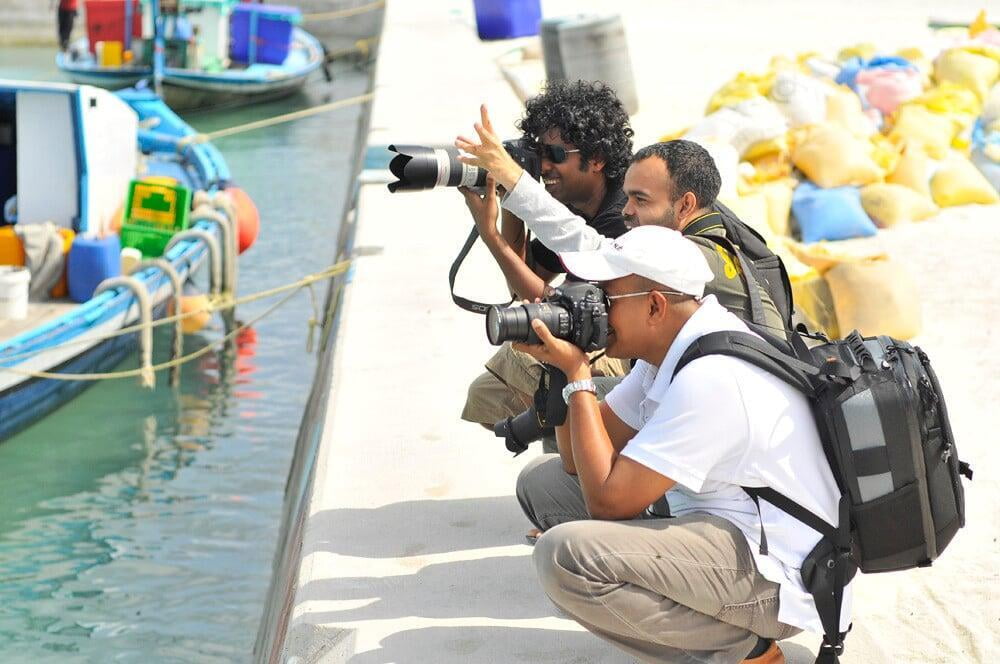
Photography tours and workshops are one way to ensure that you get a chance to photograph many of the most photogenic locations that your destination has to offer.
In the case of the photography tours, they’re usually just a glorified whistle-stop sightseeing tour in a bus.
You can expect the tour guide to take you to various locations with photographic potential, but you won’t get too much hands-on instruction on how to take the actual photographs once you’re there.
Photography workshops, on the other hand, involve much more intensive in-field instruction, critiquing/reviewing of photos and post-processing instruction every day from dawn to dusk. You’ll probably be travelling around in car or a 4 x 4, and will make unplanned stops if something interested is observed on the way to a location.
If you’re already highly accomplished in photography and just want to be shown the best spots, then a photography tour might suit you best, whereas if you feel your skills are lacking and you want to really improve them, a workshop would be the more appropriate choice.
To find photography tours and workshops for your destination, you could do a Google search and you could also check tour-booking websites/apps like Viator and Klook.
You can also look for tours and workshops offered by locals on apps and websites like WithLocals, TourGuide, ShowAround and AirBnB Experiences.
#3 - Chase beautiful light
Every good photographer knows that the type of available lighting in a scene can often either make or break the photograph.
There is no specific type of lighting that is always desirable or always undesirable, although certain types of lighting are rarely of interest to photographers.
When the light is on a photographer’s side, even a normally uninspiring scene can be rendered photo-worthy, while a scene that should be very evocative can lose much of its appeal when the lighting Gods are frowning upon the photographer.
While there is no specific type of lighting that is always desirable (good) or always undesirable (bad), we can speak of certain types as being generally advantageous and other types as being generally disadvantageous.
Let’s first talk about when you are very likely to get favourable lighting conditions.
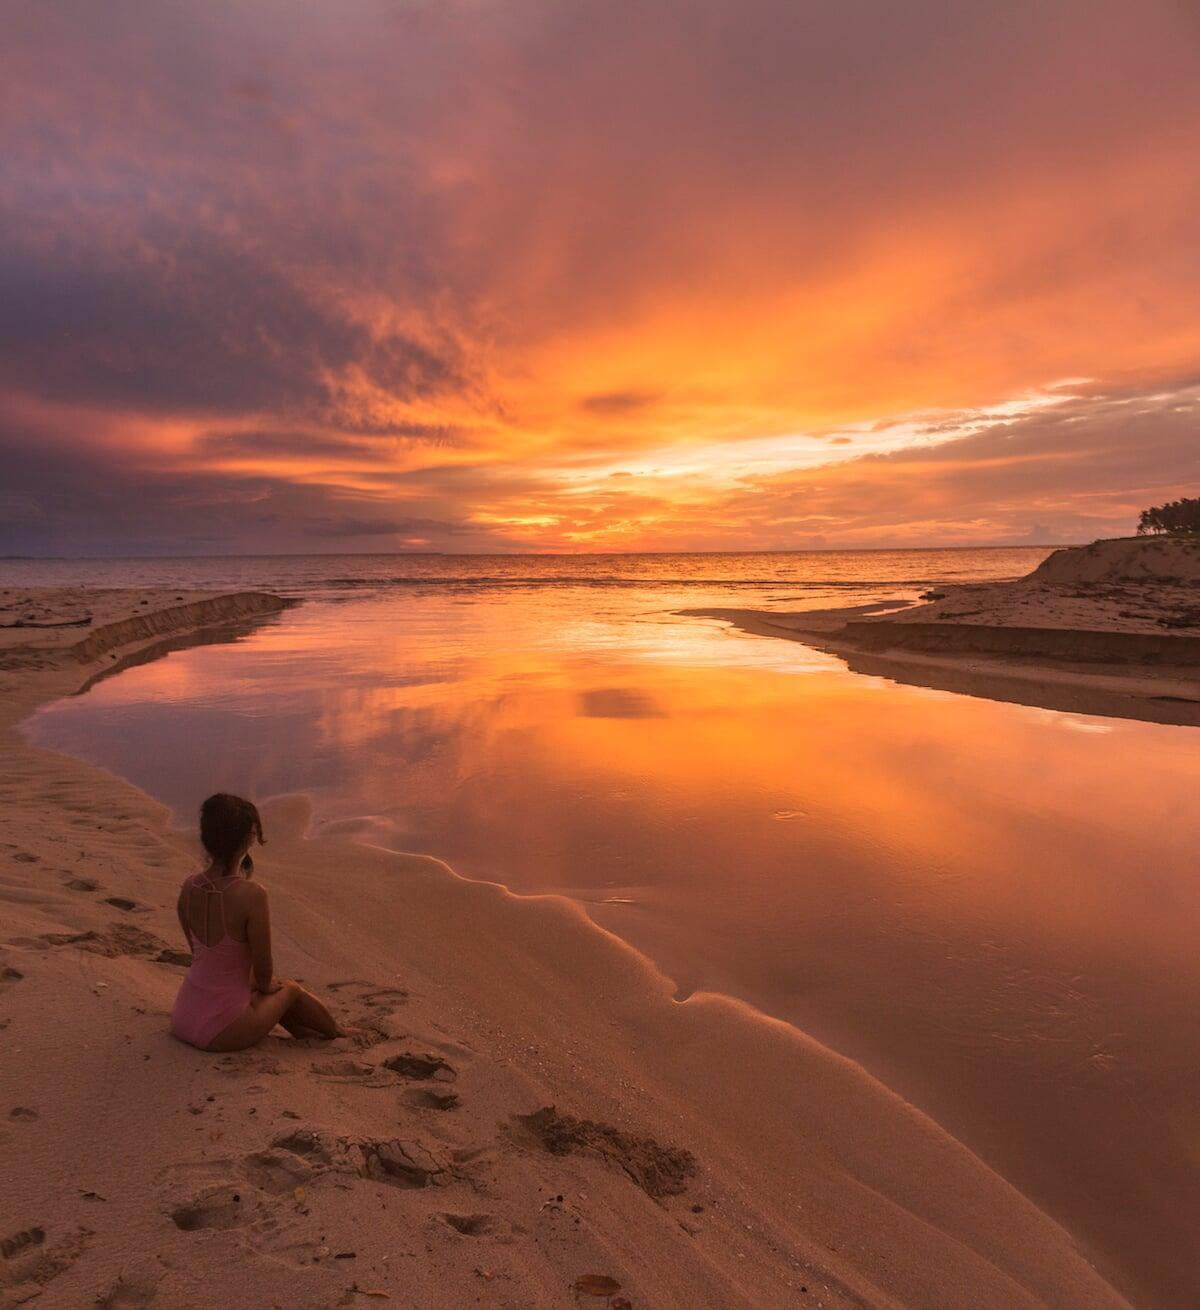
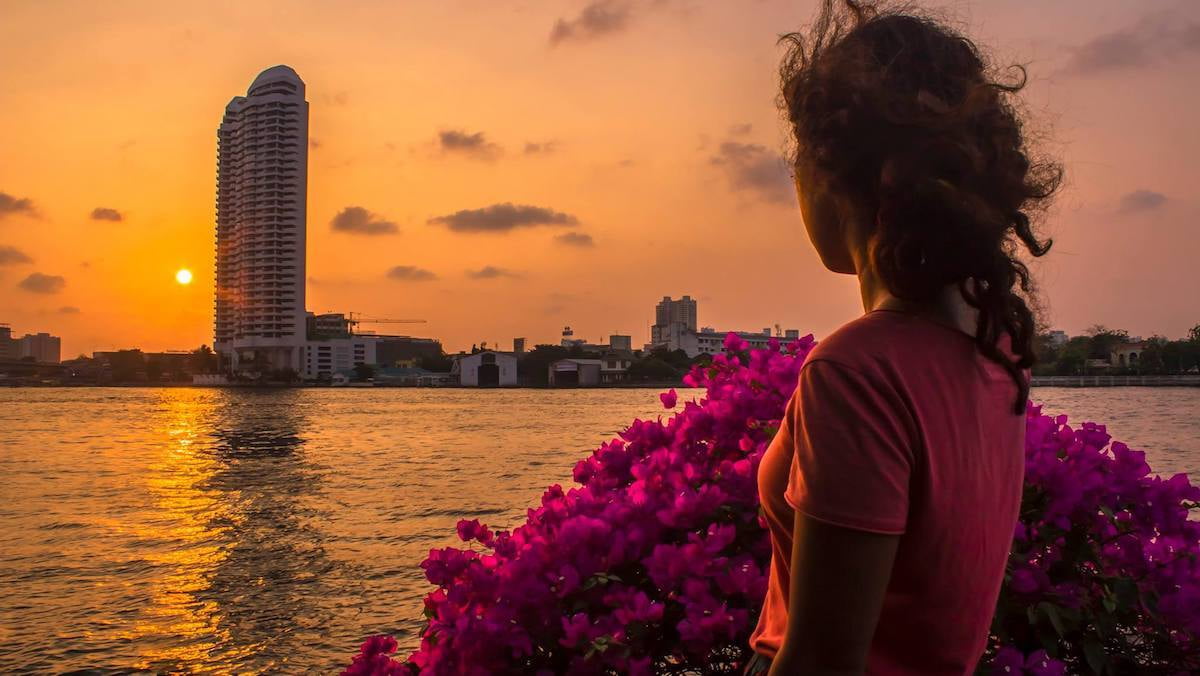
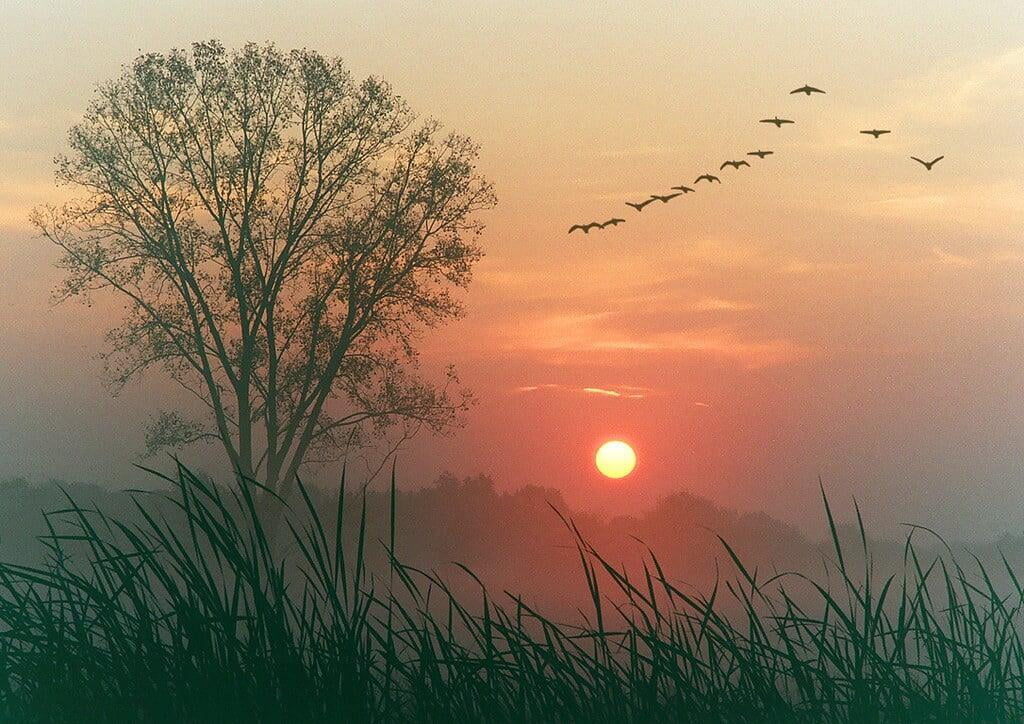
Favourable lighting for general travel photography is very likely to occur in the early morning after sunrise and in the late afternoon before sunset.
The hour following sunrise and the hour preceding sunset are known as the “golden hour” or “magic hour”, due to the ethereal, golden-coloured sunlight that's produced at these times, weather-permitting of course.
When landscapes and subjects are bathed in this warm, golden-coloured sunlight, their aesthetic value is greatly enhanced in the eye of the beholder.
If you are not sure about the golden hour timings for a particular location, you can use this golden hour calculator. This website defines the golden hour as the period when the sun lies between the horizon and 6° above. They also have The Golden Hour App (only available for iOS).
The website displays a map of the world that you can click on to find out the exact times the sunrise and sunset golden hours begin and end for the place on the map that you clicked on.
To view the golden hour timings for sunrise and sunset you need to scroll down to the panel below the map and hover your mouse pointer over the vertical yellow bands. You can also click on different dates in the calendar here to see how the timings vary with the time of year.
So that's a handy tool for finding out the golden hour timings for your location, but how do you know if the sunset or sunrise is likely to be any good and that it won't be completely clouded over?
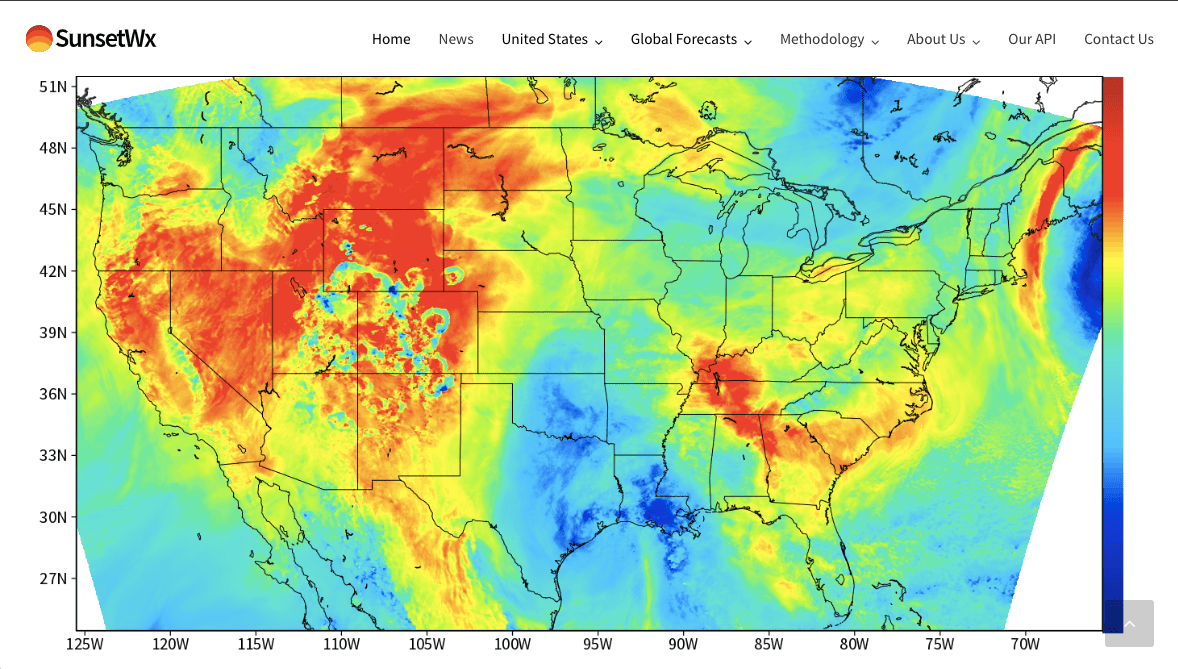
Well, I have often relied on local knowledge and weather forecasts for this, but there is also a website called SunsetWx that can forecast the quality of sunsets and sunrises.
The site is currently only forecasting across North America, but maybe they'll expand to other countries eventually. The forecasts are displayed as a heat map of the continent, where the closer the colour on the map is to red, the higher the probability of a jaw-dropping sunset in that area.
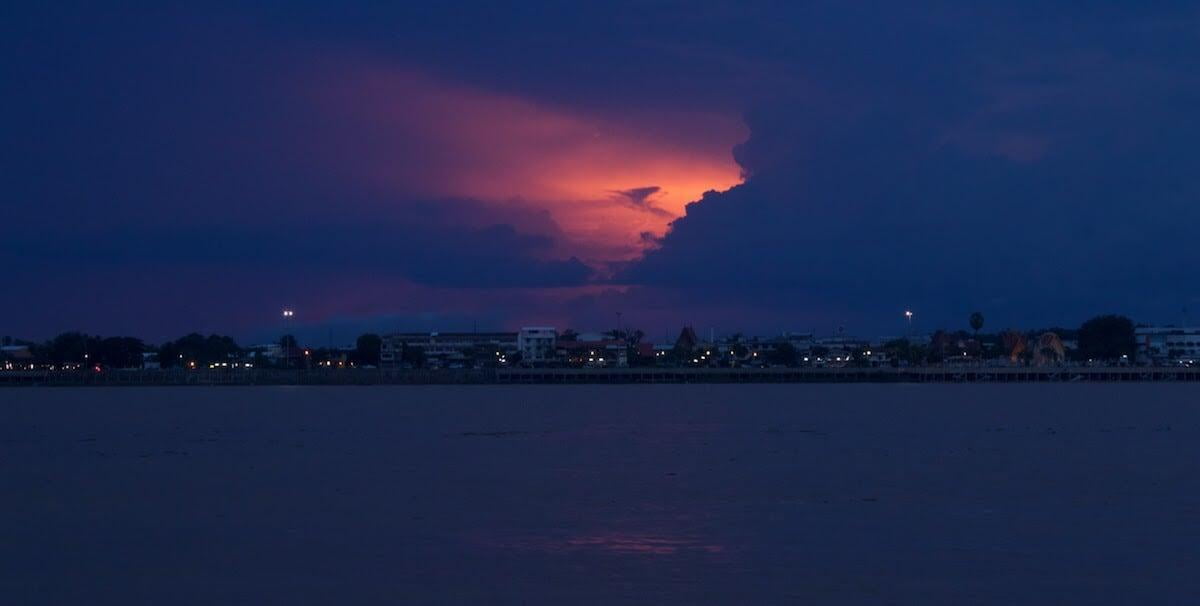
When the magic hour ends and the sun disappears below the horizon many photographers will pack up their tripods and put away their cameras, but this so-called "blue hour" or twilight period when day transitions to night can often be the time when the most incredible light patterns can form in the sky.
It's often well worth waiting for 20-30 minutes after the sun has gone down to see if any interesting colours or light patterns develop in the sky. Sometimes you'll see a brief burst of red or purple in the sky if you're willing to hang around, but you'll need to be quick to capture it, as I've found these extraordinary bursts of light to be very short-lived.

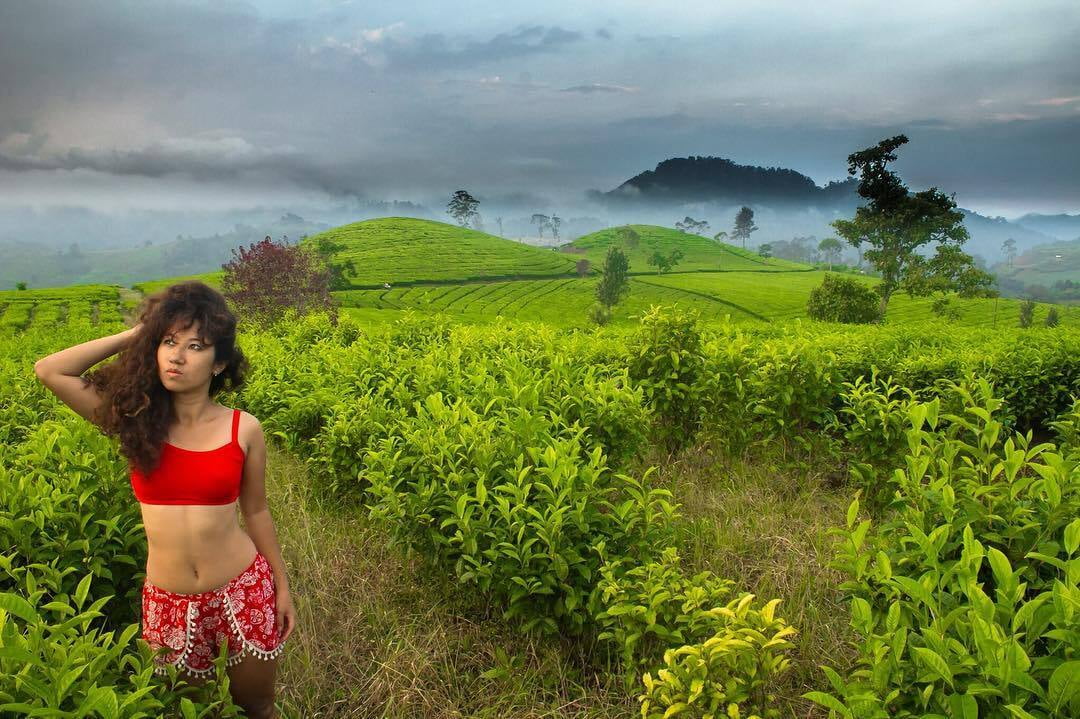
While every photographer loves shooting during the magic hour, many forget that cloudy, moody or overcast weather can also provide very favourable lighting conditions for photography, especially when photographing people or wildlife.
When the skies are clouded over, the light from the sun is diffused through them and becomes what's known as “soft light”.
Soft light or diffuse light is more even and does not create the harsh shadows that are produced by the direct, hard light that comes from the sun when it's high in the sky on a cloudless day.
If you are photographing people you will usually get much better results with the soft lighting that's present on overcast days, as there won’t be any harsh shadows eclipsing areas of your subject’s face (i.e. raccoon eyes) or glaringly bright spots where the sunlight is falling.
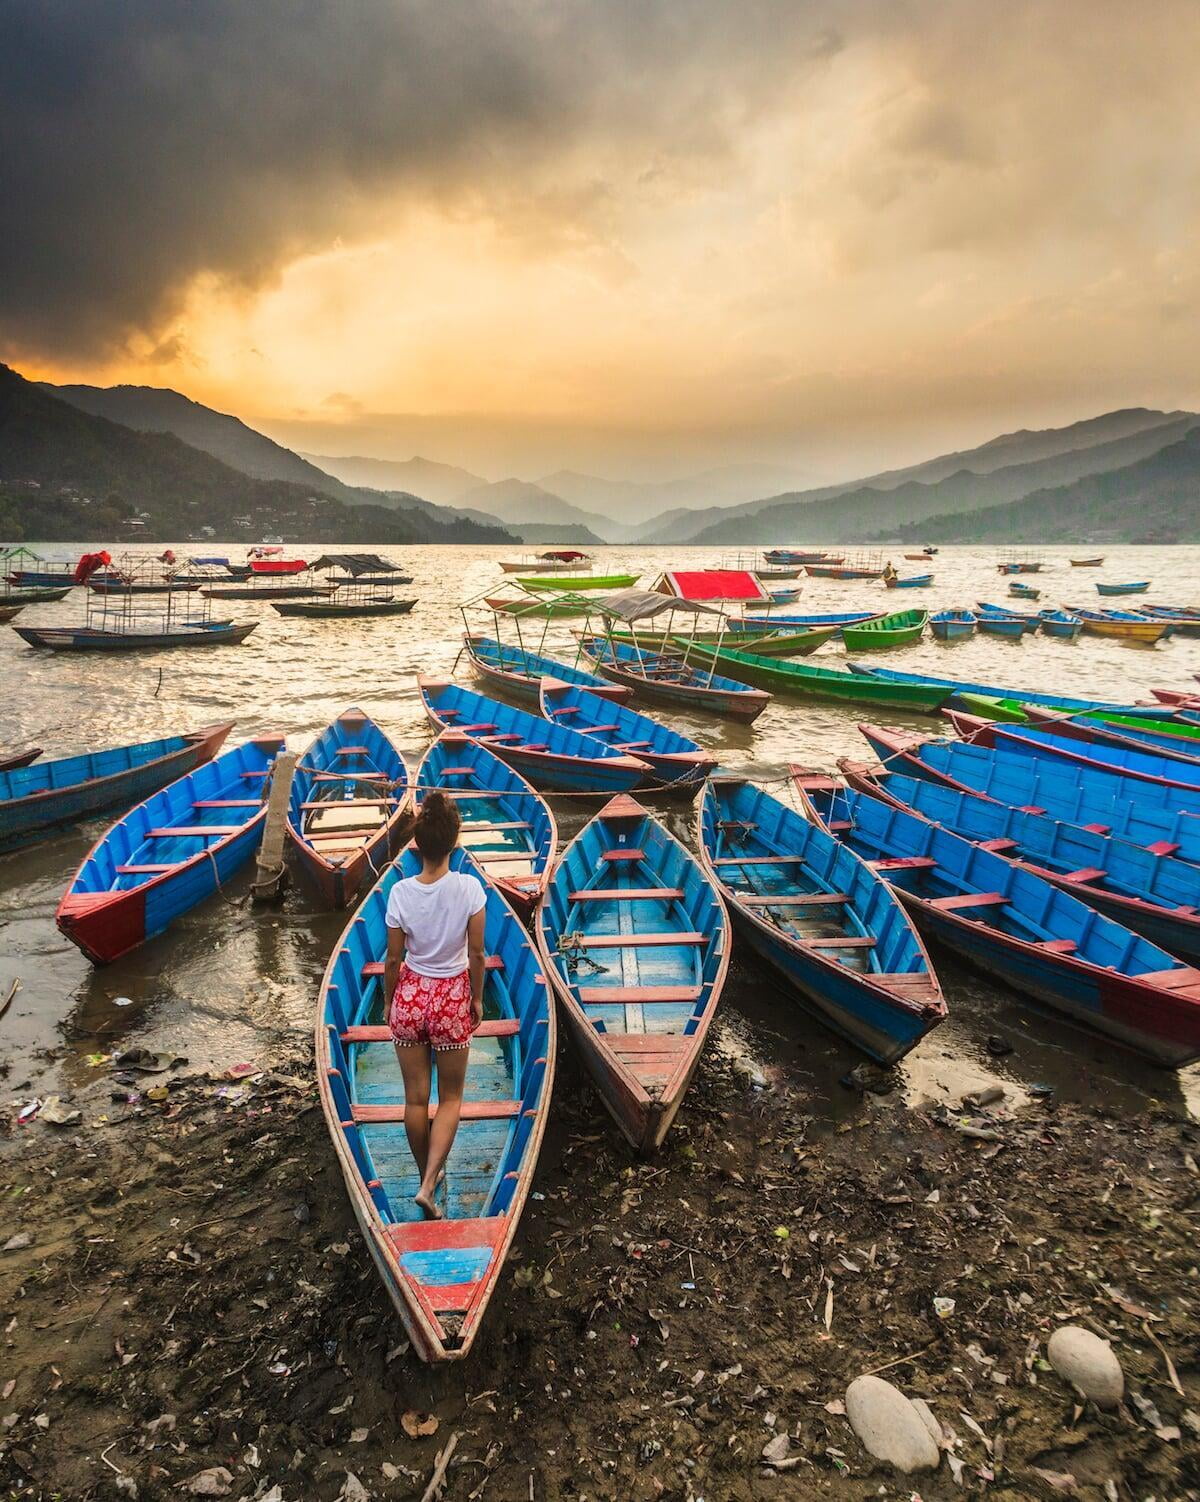
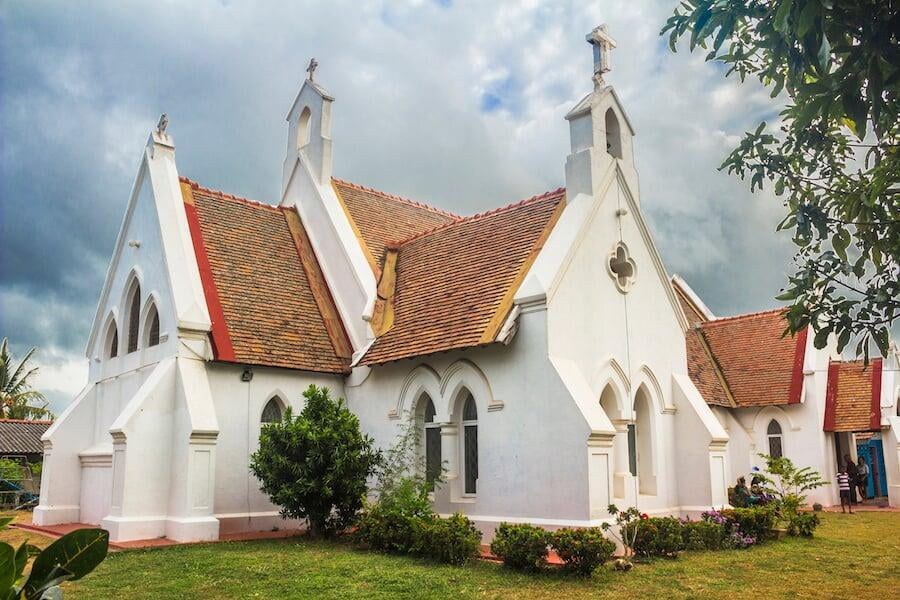
Dark grey skies bearing foreboding cumulonimbus storm clouds or other interesting cloud formations can also make for great “moody” landscape images.
In fact, images with clouds are almost always more interesting than those with featureless blue skies, because clouds impart drama to a photo.
I’ve taken several good pictures with skies bearing ominous rainclouds while travelling in various Asian countries during the monsoon season, a time of year when these countries see far fewer visitors as a result of the frequent afternoon thunderstorms accompanied by heavy downpours.
The only issue with shooting on cloudy days is that the light levels can be significantly lower than on sunny days, which means that, if shooting handheld, you will usually have to increase your camera's ISO setting to 200, 400 or even higher in some cases, thereby introducing more noise into your images.
However, if for those photos that will allow you to use a slower shutter speed, you can use a tripod and set the ISO setting much lower to avoid producing additional noise.
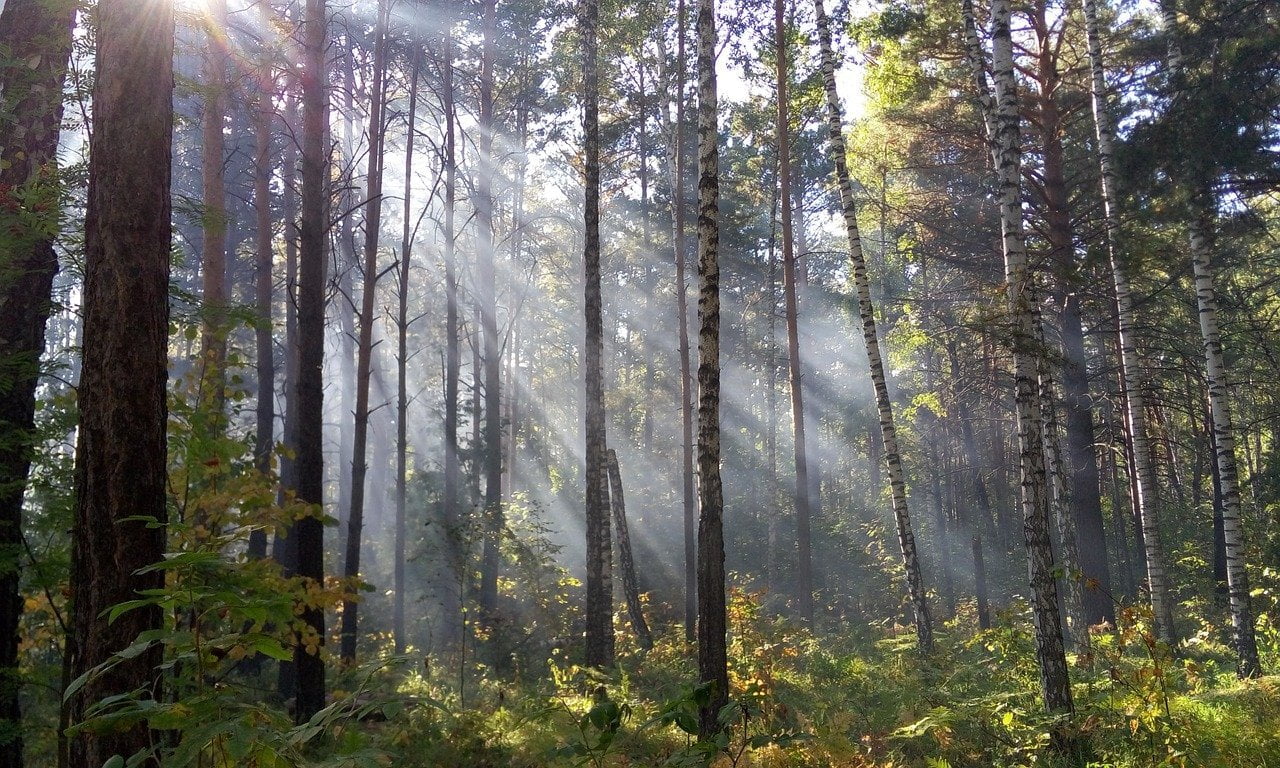
Another occasion when you might be granted very favourable lighting conditions is when the clouds break after a rainstorm.
As the clouds disperse, you'll often witness these amazing "god rays" of light bursting through the openings like spotlights beaming down on the landscape from heaven.
If the storm breaks in the late afternoon or early morning, the effect can be stunning as the light rays breaking through the clouds bathe everything in golden magnificence.
Rainbows are another wonderful natural light phenomenon that can add a touch of magic to any photograph. Rainbows result from an interaction between the white light from the sun and water droplets that are suspended in the atmosphere.
They form when the sun's light gets dispersed (refracted) upon entering, and then again upon exiting a water droplet. The dispersed light exits from the same side of the droplet that it enters, having been reflected off the inside of the droplet.
You can often witness rainbows when it's raining and sunny at the same time, or when the sun is interacting with the fine mist created by waterfalls, water fountains, water jets and so on. Your chances of spotting one are greater in the early or later parts of the day when the sun is lower in the sky.

When trying to locate a rainbow, you should stand with your back to the sun and look towards the rain, waterfall, fountain or other feature that's producing water droplets.
If you are very lucky you might even witness a double, triple (tertiary) or even a quadruple (quaternary) rainbow, although the last two are exceedingly rare.
Double, triple and quadruple rainbows form when light reflects two, three and four times inside a water droplet respectively, as opposed to reflecting just once, as it does for a regular single rainbow.
Also, triple and quadruple rainbows can only be seen by looking towards the sun, unlike single and double rainbows, which are observed with the sun to one's back. Triple and quadruple rainbows actually form around the sun, being centred on it, which can make them difficult to spot.
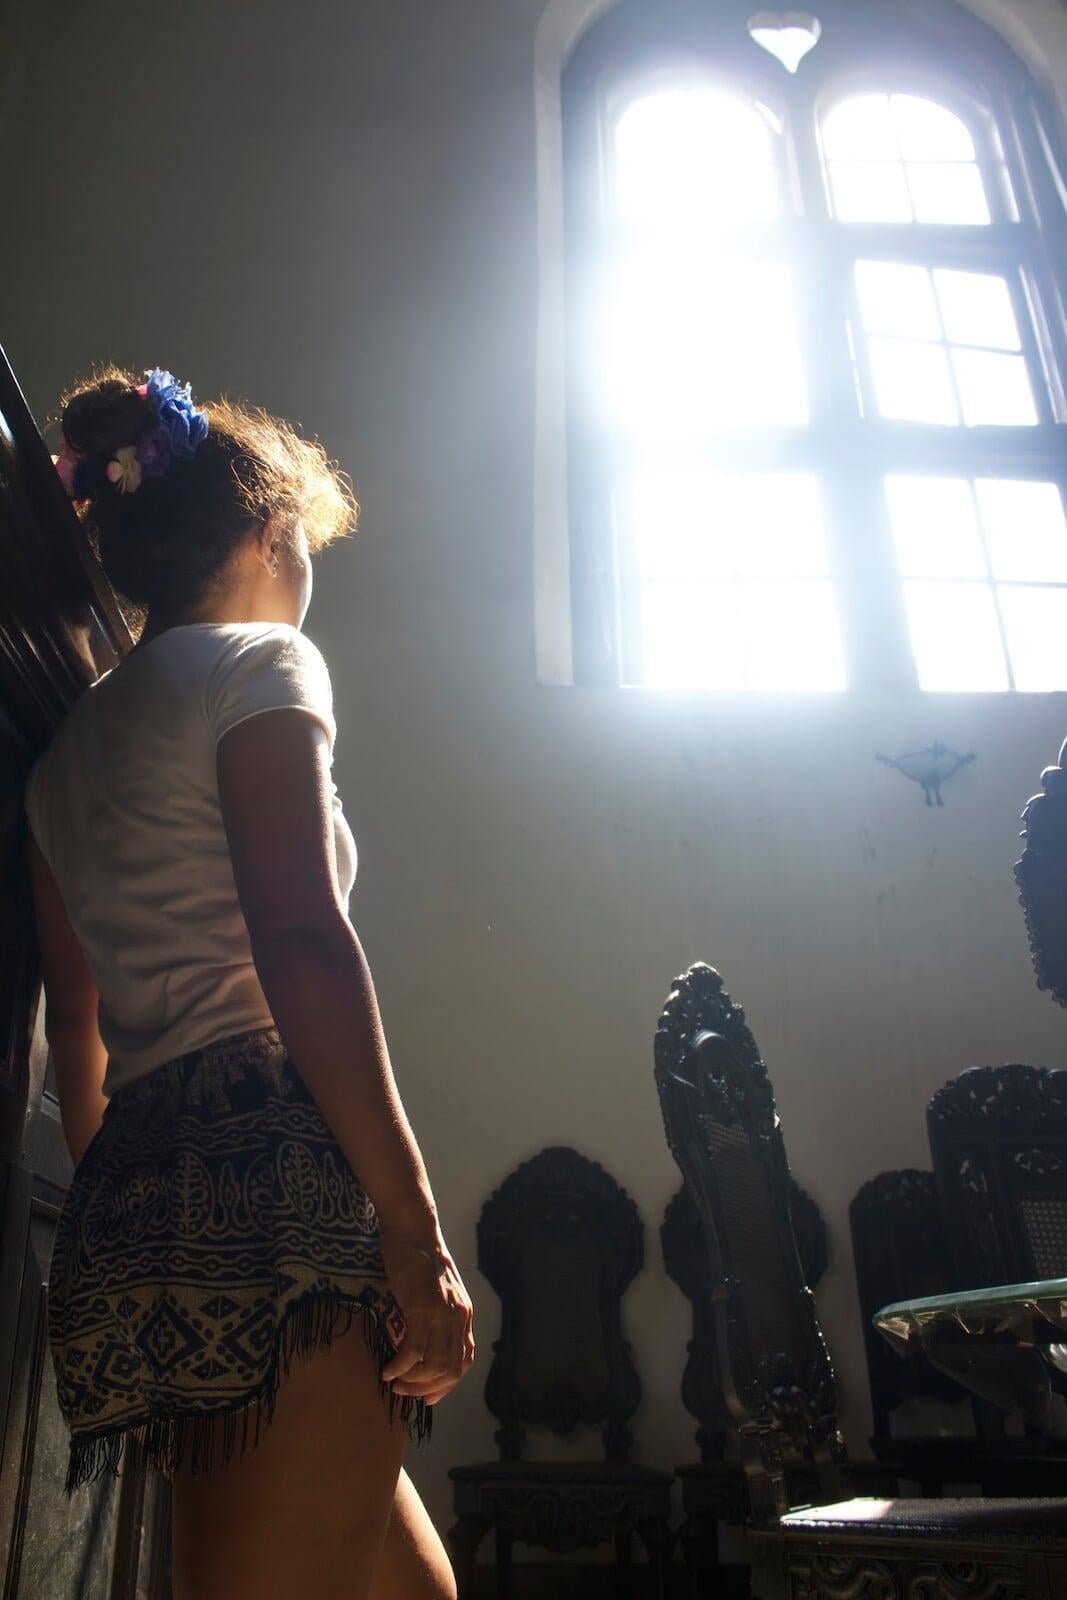
If you’re shooting indoors, you will usually get the most agreeable light near a window or beneath a skylight where natural light is streaming in from outside.
Artificial lighting in a building is often dimmer and doesn’t have the same appealing quality as the natural daylight that pours in through a window.
Of course, window light is only really useful if you’re shooting a person in an indoor environment, and it won’t be available unless there’s a window or skylight (or several) in the room or building.
So, those are some examples of favourable lighting. But what about unfavourable lighting? Are there times when you shouldn't bother shooting?
Many photographers will tell you that on sunny, cloudless days, the worst time for shooting most types of outdoor scenes is around midday.
This is because the sun is highest in the sky at midday and the light is very hard and direct (it's softer when the sun is lower in the sky in the early morning and evening), casting harsh, undesirable, hard-edged shadows across landscapes, buildings and people's faces.
However, while the intense midday sun may not always afford you the most advantageous lighting, it doesn't mean that you can never take great photos under these circumstances.
There are actually certain types of photos that work very well under strong lighting conditions (i.e. backlit trees, rolling landscapes, macro-scale scenes, black and white photos etc.) and sometimes you might want the high-contrast lighting to convey a certain message or mood to the viewer.
You can also always try to find some shade if you find that the harsh midday lighting just isn't working for you.
In other words, there's no hard and fast rule here, and there are many circumstances where it is possible to take great photos in outdoor scenes during the middle of a cloudless, sunny day.
I would advise that you don't restrict yourself to shooting at any particular time of day and that you learn how to make the most of all the different types of outdoor and indoor lighting conditions.
Many photographers will restrict themselves to shooting during the magic hour only to be disappointed when they arrive at the scene to discover that the lighting wasn't what they expected it would be.
You can never be 100% certain that there's going to be a spectacular sunrise or sunset lying in store for you, as nature is unpredictable and ultimately has the final say here.
And if you do get lucky enough to witness a magnificent sunset you should never wait until the sun gets too close to the horizon before taking your photos.
I've made this mistake before myself and watched in horror as, just when I was getting ready to take photos, the sinking sun suddenly disappeared behind an opaque wall of haze that was hanging above the horizon.
I went home that day without anything to show for that beautiful sunset because I didn't take any photos when I had the opportunity, when the sun was not yet obstructed by the atmospheric haze but was still a bit higher in the sky than I wanted it to be.
When you're travelling I recommend going out and shooting at any chance you get, as you can't capture everything during the magic hour; it would take too many days to photograph all the interesting locations at your destination if you were only out shooting for 1-2 hours each day at sunrise and sunset.
Lots of photos of a trip are better than very few, even if many of those photos were taken under suboptimal lighting conditions.
I recommend reserving the locations that you know will make for exceptionally beautiful or romantic photos for the magic hour slot of the day, and then shooting the more prosaic spots at other times of the day.
#4 - Rise early to beat the madding crowd
“Dawn is the time when nothing breathes, the hour of silence. Everything is transfixed, only the light moves.”
- Leonara Carrington
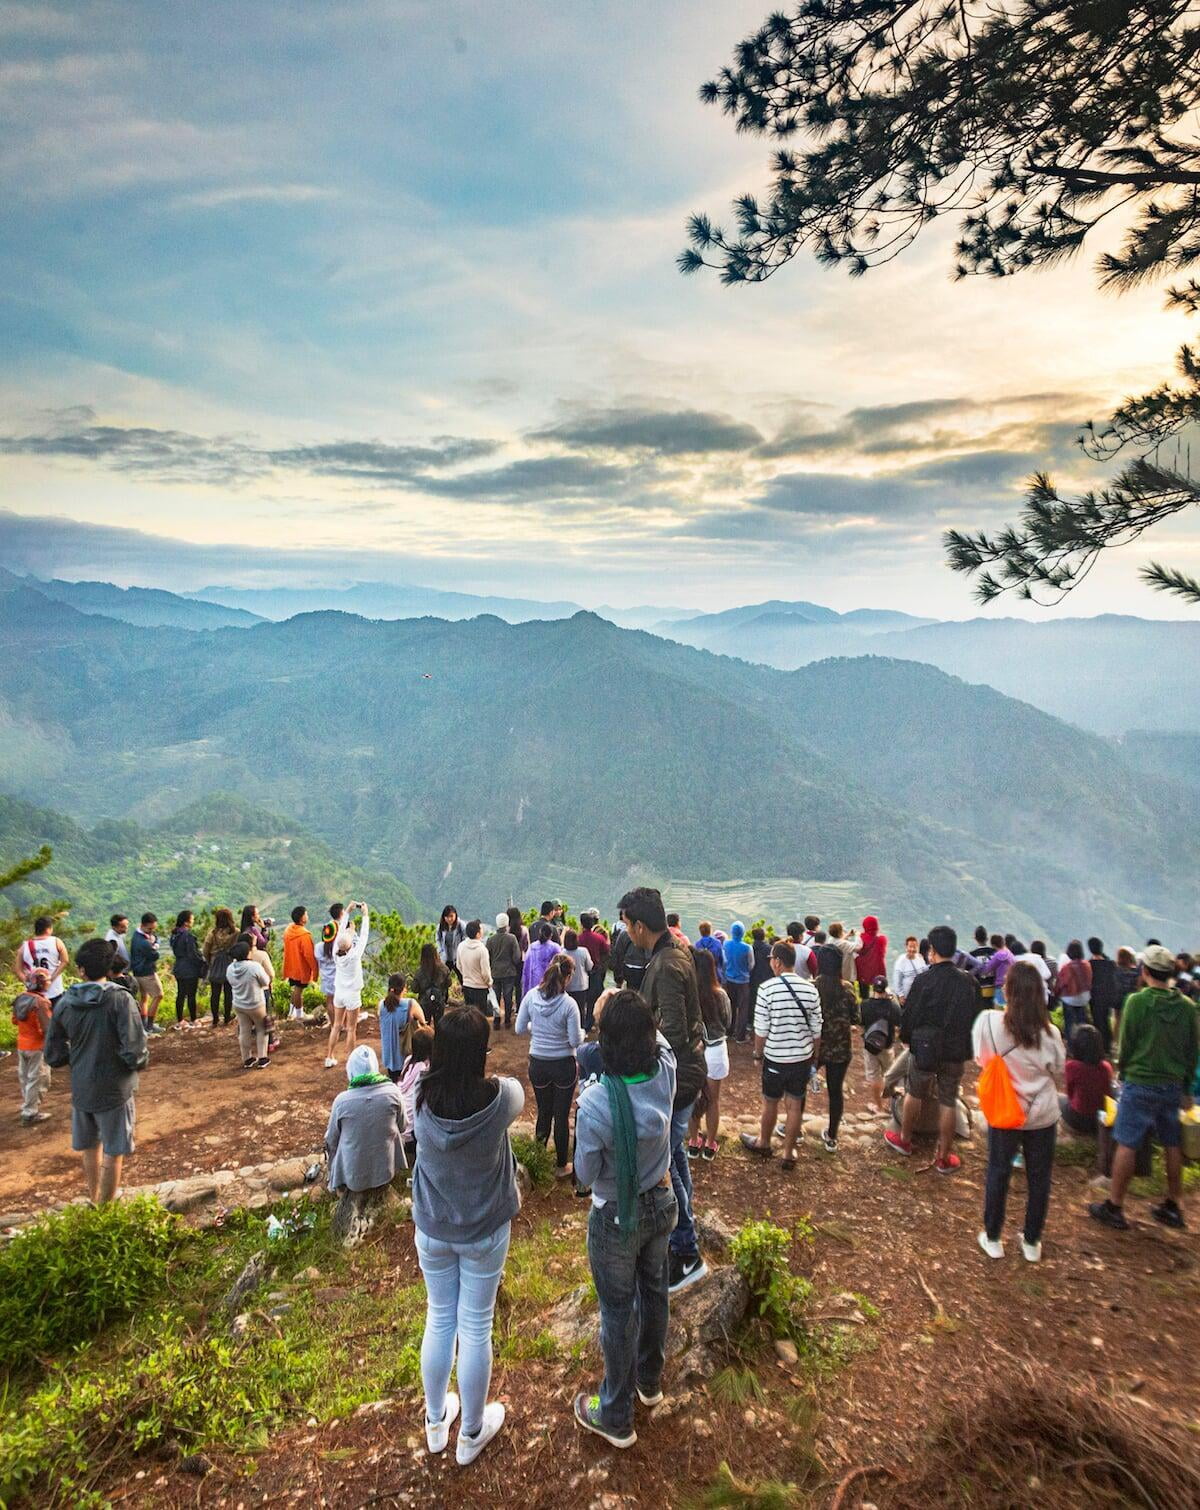
While the golden hours at sunrise and sunset can both present very favourable lighting conditions for photography, the morning window presents an additional advantage over the evening one; fewer people tend to be around.
While I’ve often witnessed large crowds of tourists gathering at popular sunset spots, the crowds that gather at sunrise spots will typically be smaller, since a lot of people just can’t be bothered or don’t have the willpower to get out of bed that early in the morning.
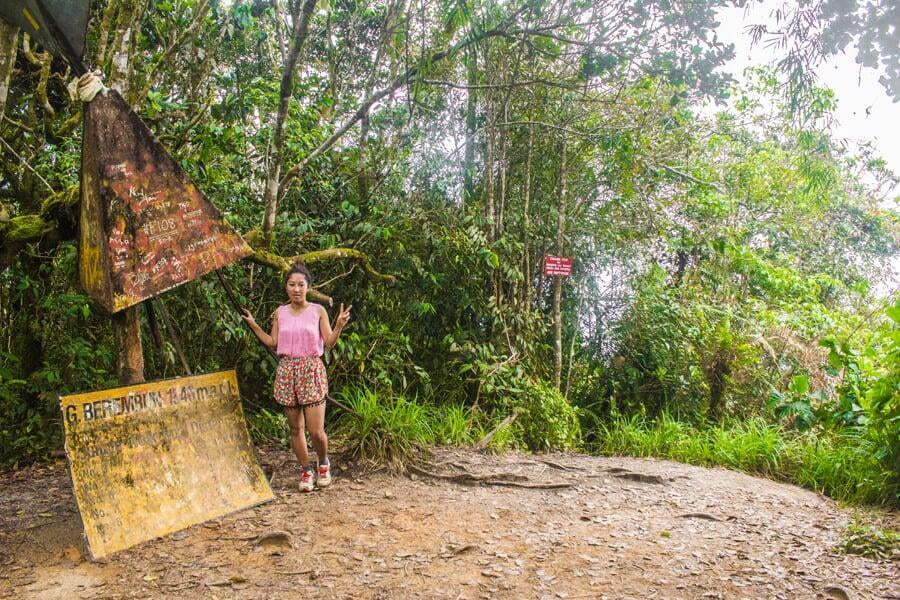
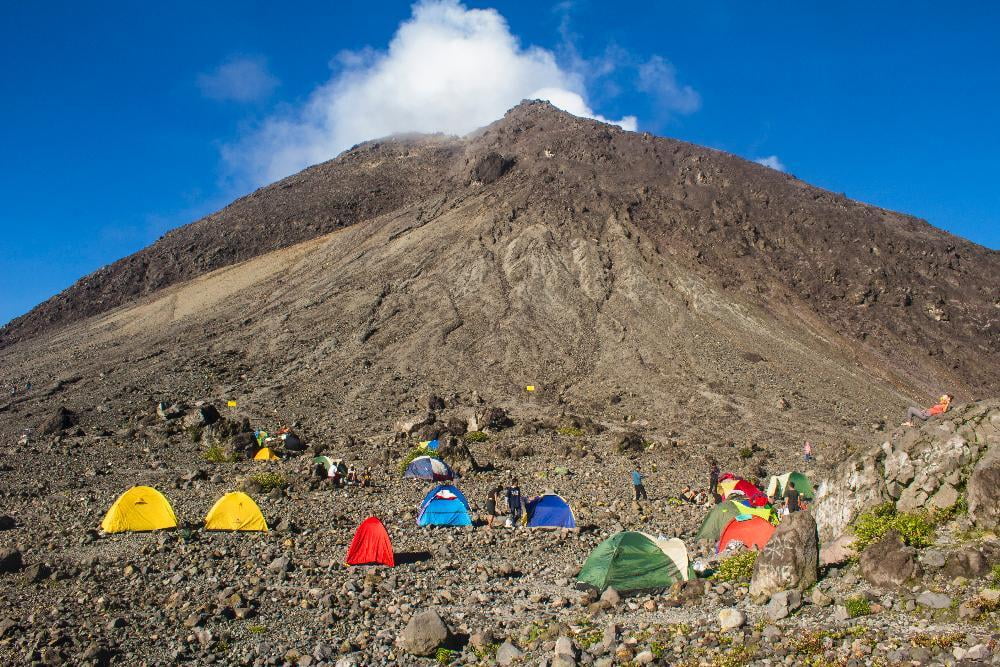
To reach some vantage points in time to witness the sunrise, tourists might have to set out from their hotel at 2 a.m. or earlier and hike for hours in the pitch dark, like that time we climbed Gunung Merapi (a highly active volcano) in central Java, Indonesia.
We had barely arrived at the crater summit of Mt. Merapi when the first welcome rays of the morning sun breached the horizon and began to warm our chilled bones.
Climbing 1,300 vertical metres from the village of Selo to reach the peak of Mt. Merapi was quite onerous and is a challenge that I imagine many people wouldn't be willing to undertake.
There’s a much higher likelihood that you’ll be able to obtain those immaculate, tourist-free images if you can arrive at the popular spots at the crack of dawn (or at least before it opens) in order to beat the crowds. Your images will be refreshingly devoid of distracting elements and you won't have to deal with people obstructing your shots.
There’s something almost magical about having a sight that receives thousands of tourists daily entirely at your own disposal, even if it’s only yours for a few minutes before the hordes of selfie-stick wielders storm the gates and overrun the place.
That electric atmosphere, that pin-drop silence, that feeling of exclusivity that you experienced will be almost palpable in your images.
A deserted location also means that you won’t have to spend a lot of extra time in Photoshop afterwards trying to remove tourists who inadvertently or deliberately spoiled your perfect shots from your images.
The well-known proverb “the early bird catches the worm” definitely applies here.
#5 - Get your timing right
Finding great locations is hugely important in photography, but many photos are also time-sensitive and to nail them you must not only be in the right place, but also be there and press the shutter button at just the right time.
After all, many scenes in the real world are not static and they change with the passage of time, both in the short-term (by the second, minute, hour, day) and in the long-term (over the time span of weeks, months and years).
Having some level of understanding of how places change in the long-term and according to the seasons or time of year is vitally important when it comes to planning your trip.
It's not that any particular time of year is "better" for photography than any other, but many places will appear different depending on when you visit.
If you want to capture a lot of beautiful sunrises and sunsets during your trip, then you need to be paying attention to the climate of the destination you're visiting and plan your visit during the drier months.
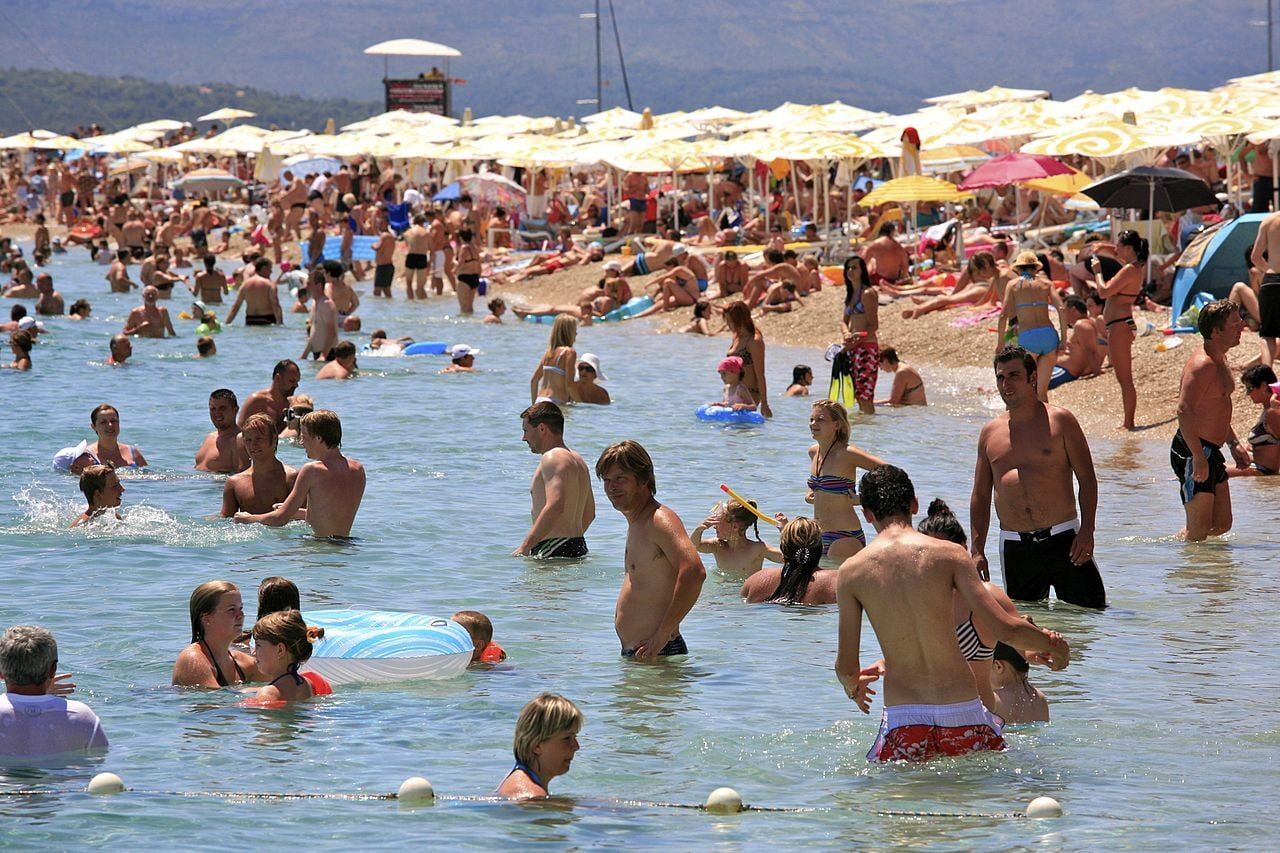
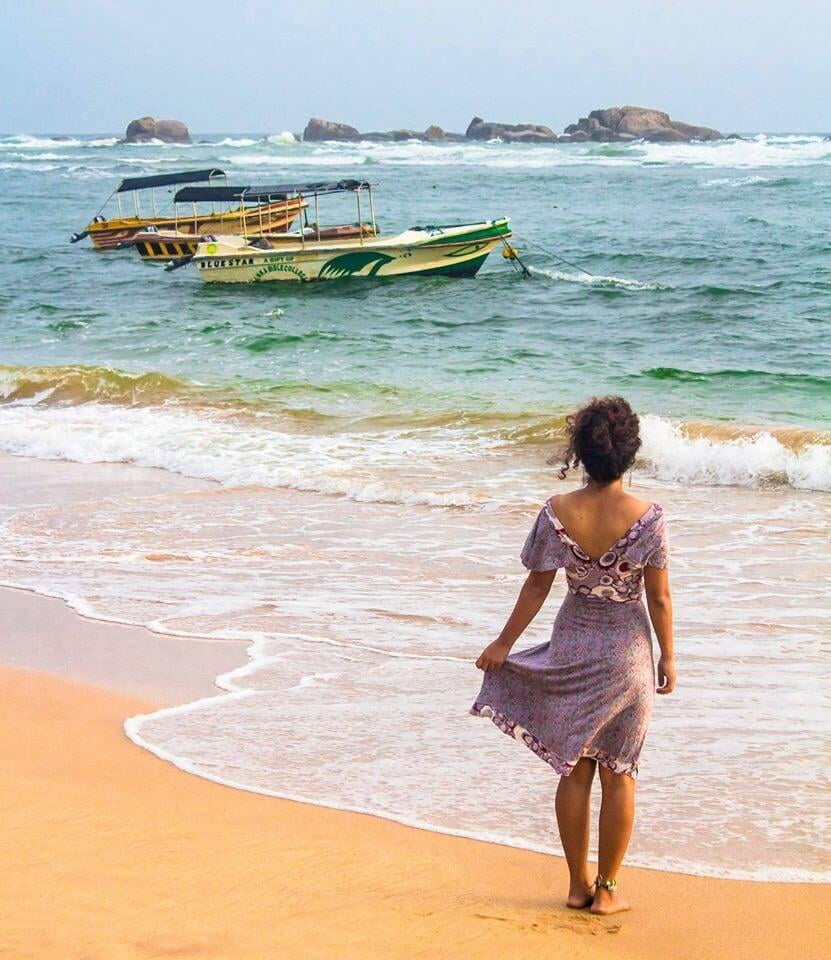
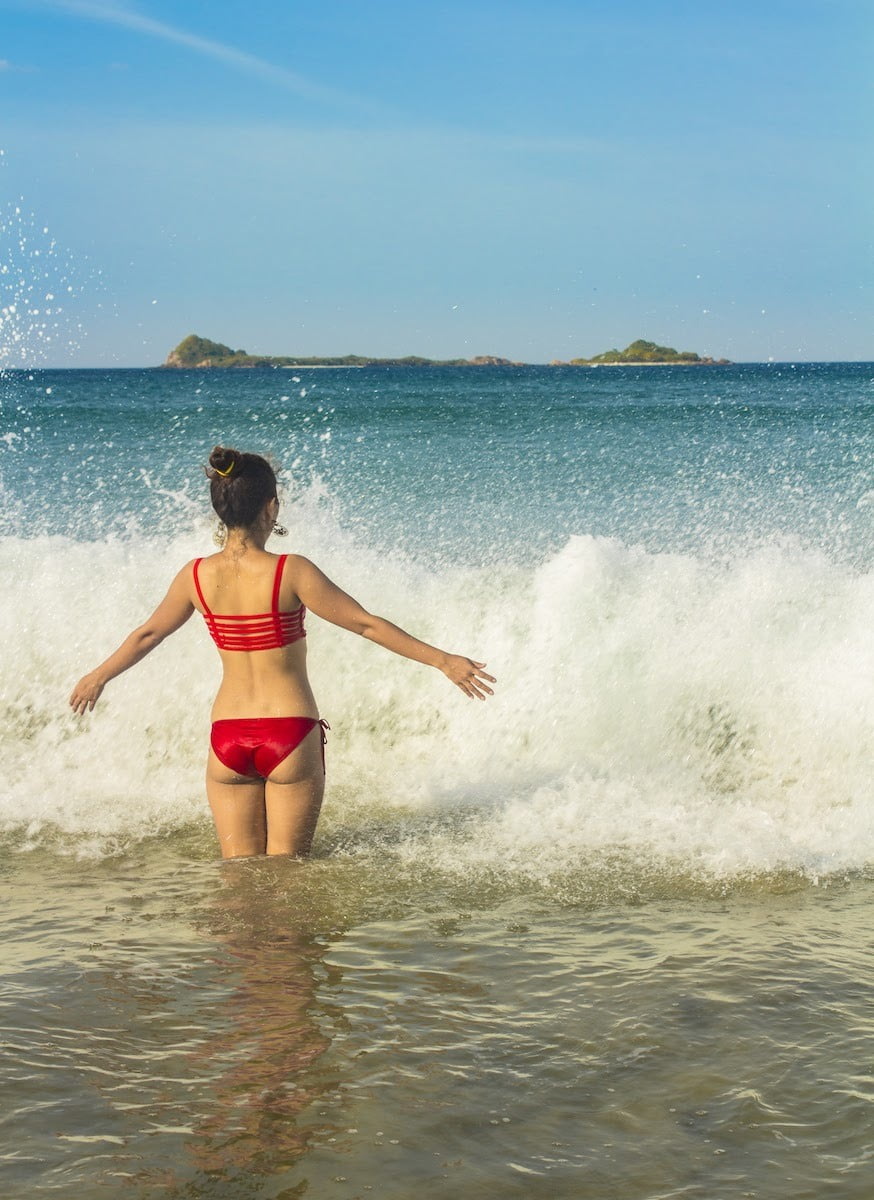
If you're aiming for a postcard look in your photographs, then dry, sunny weather is generally best, especially for photographing beaches and coastal areas.
Sandy beaches will look perfect for sunbathing and the sea will appear calm, blue and inviting (as opposed to grey, turbulent and menacing), making the scene beckon to holidaymakers.
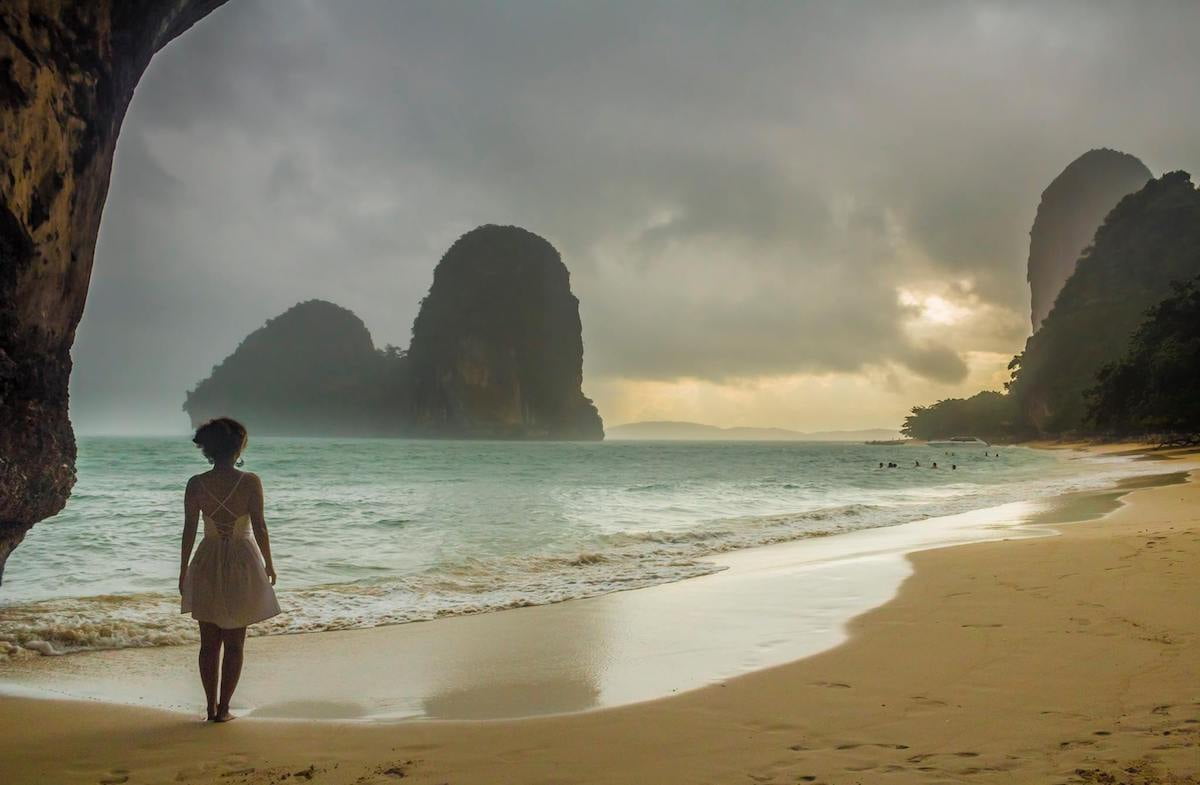
On the other hand, if you want a moody or foreboding look in most of your images, then you should plan to visit during the wetter months when the skies will be grey with threatening storm clouds much of the time.
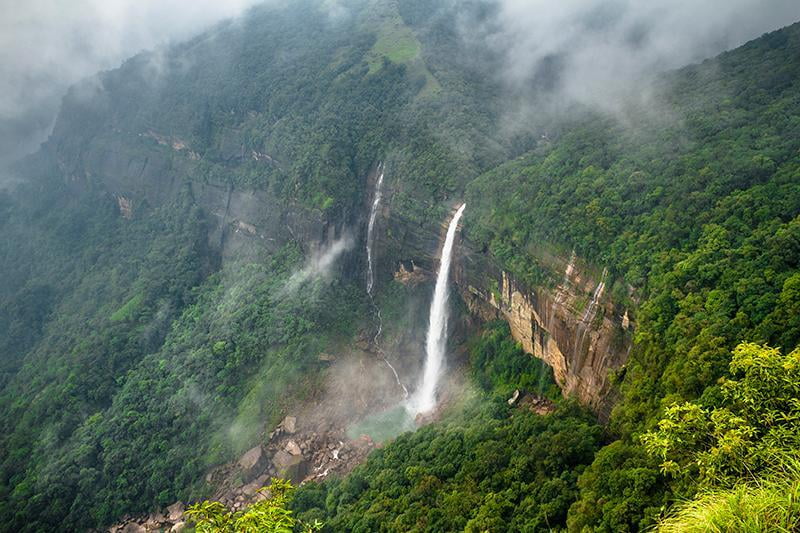
The rainy months are also the best time to photograph waterfalls, as there'll be plenty of water in them whenever there's a downpour. Many waterfalls are dependent on rain and can remain little more than a trickle running down a bare rock face for months until the rains arrive.
Not only that, but the cloudy or overcast weather that you'll get most of the time during the rainy season means that you won't have to deal with high-contrast lighting that will give you blown out highlights where the sun is reflecting off the water, and very dark shadows where it's not.
Additionally, the lower light levels on cloudy days means that you can often take long-exposure shots of waterfalls without having to use an ND (neutral density) filter, which can add an unwanted colour cast or vignetting to your images.
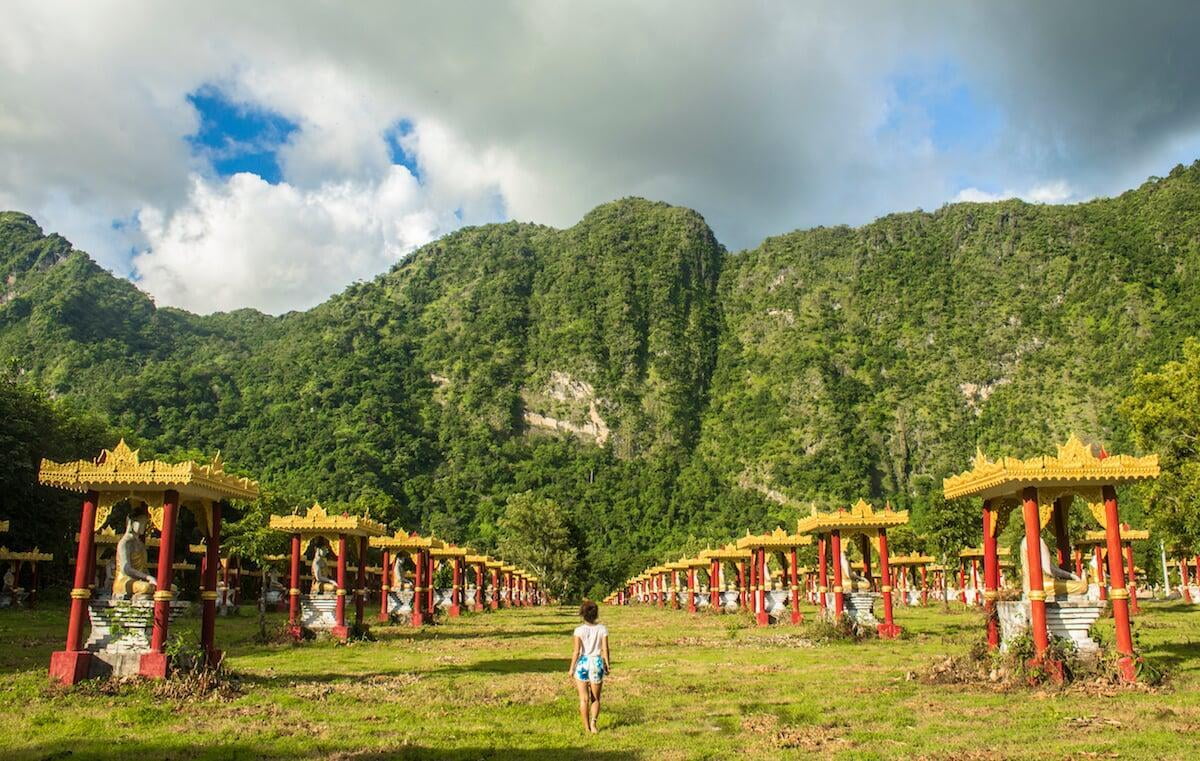
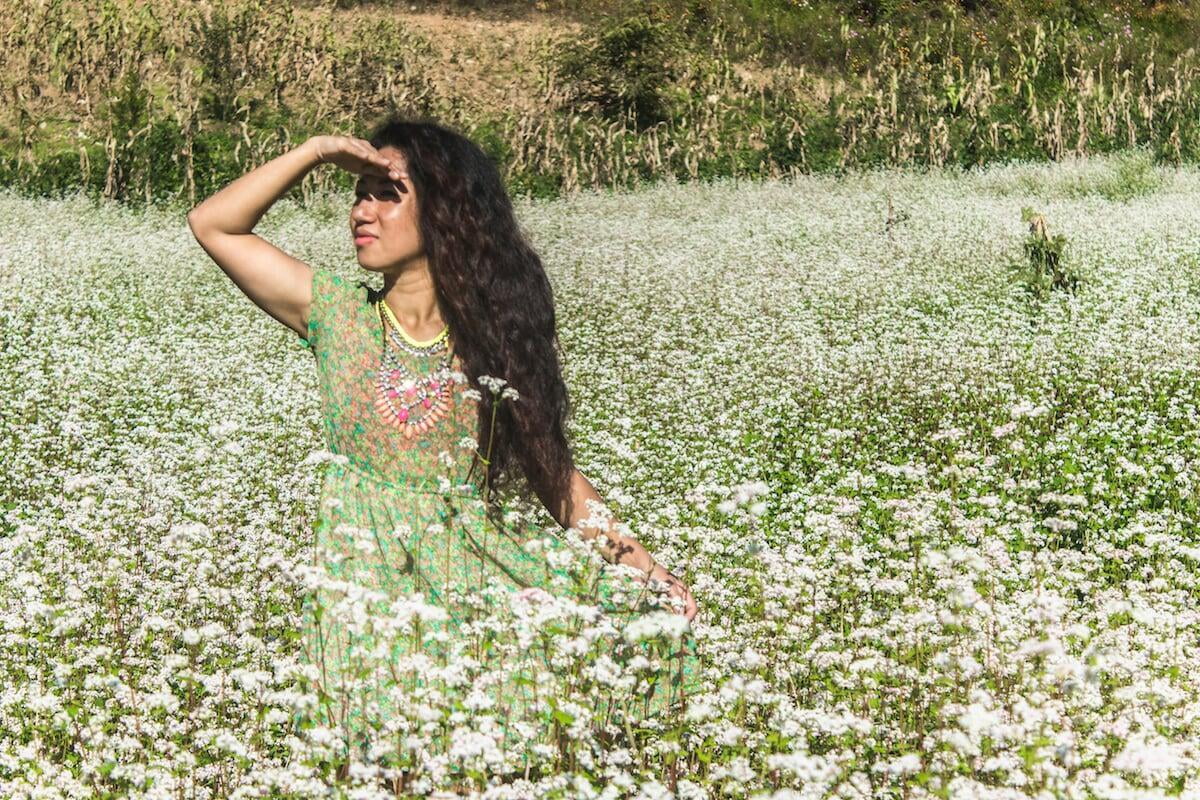
If you're trying to photograph natural flower displays you really need to get your timing right, as many flowers have a narrow peak bloom window lasting just a few days or weeks at best.
Many photographers travel to Japan and South Korea to photograph the magnificent displays of cherry blossoms during the sakura season and the peak bloom window typically only lasts for about 7-10 days from the end of March into the first week of April.
Upland valleys of flowers, such as the enchanting Dzükou Valley of Nagaland and Manipur states in northeast India, also have their peak bloom windows. In the case of the Dzükou Valley, it's the first two weeks of July.
Some flowers can only be photographed once every several years, such as the purplish-blue "Neelakurinji" flower (Strobilanthes kunthianus), which only blooms once every 12 years in Eravikulam National Park, which is located near the hill station of Munnar in the Nilgiri Hills (part of the Western Ghats) of Kerala, India.
The last time Neelakurinji flowered was in 2018 and prior to that was in 2006. It usually blooms for about 3 months, from August until late October.
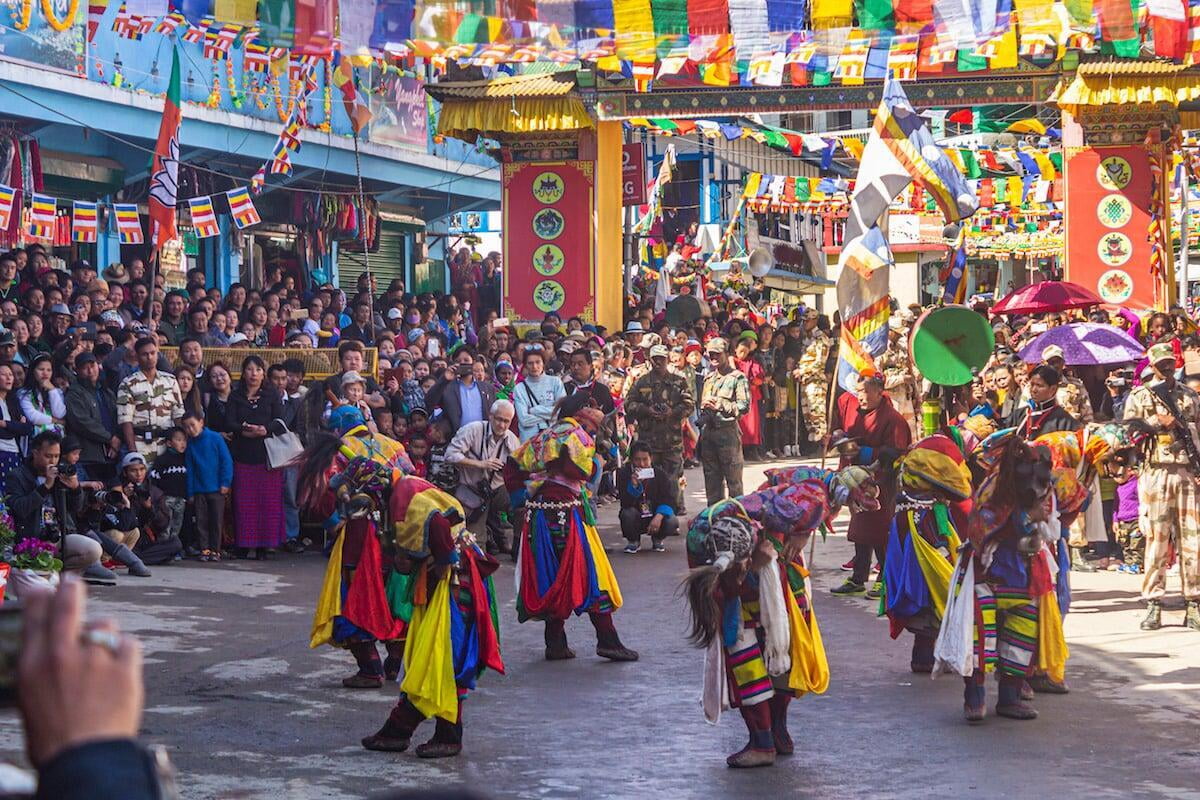
Many travel photographers will also plan their trips to coincide with certain festivals and other special occasions, as great photo opportunities during these types of events can be a million times more forthcoming than at other times of the year.
We never actually planned a trip with a festival in mind (as we hardly ever plan anything), but some of our past trips have coincided with important local festivals by sheer happenstance.
For example, the famous Tawang Festival coincided with our visit to the town of Tawang (2,669 m) in the mountains of Arunachal Pradesh in October 2017.
As well as understanding how long-term and seasonal changes affect the appearance of places, you also have to be highly attuned to the short-term changes that affect a scene as the day progresses and while you're in the process of shooting.
If you want to shoot a waterfall on a sunny day for example, you have to think about what direction the waterfall is facing and time your visit accordingly; if it's facing west then you might want to visit the waterfall in the evening when the sun will be illuminating it. But if you want to shoot the waterfall while it's in shadow, then the morning would be the best time to visit.
When you arrive at the shooting location the changes continue; variations in the light intensity and type (soft light vs hard light) caused moving clouds alternately covering and revealing the sun, elements exiting the scene and new ones entering, elements changing position within the frame, and so on.
There are usually two types of elements in any scene being photographed; static elements that always remain fixed and never move, and dynamic elements that can change position and enter and exit the scene.
Static elements are objects like buildings, trees, rocks, roads, railway tracks, parked vehicles – things that don’t move or don’t move very much.
Dynamic elements are things like the sun, moon, stars, clouds, rivers, waterfalls, waves, people, birds, animals, moving vehicles – things that are moving or are liable to move.
In any given scene, dynamic elements may or may not be present, but whenever they are present, the timing of your photo becomes very important.
In other words, when all the elements in a scene are static, it doesn’t matter when you press the shutter button, but when the scene has moving elements, you will get very different results depending on the exact moment that you pull the trigger.
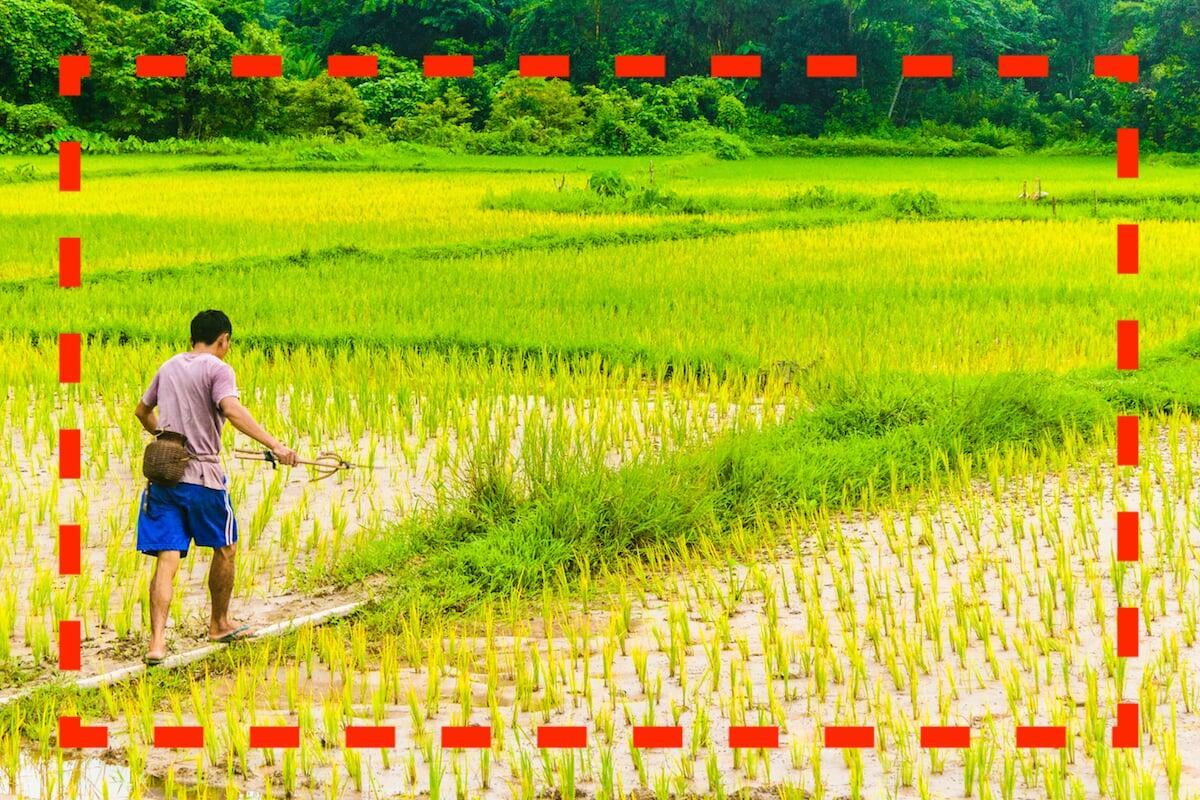
If you're shooting scenes with walking people or moving vehicles in your frame, you'll often want these moving elements to be positioned in a specific area of the frame, and to accomplish that you'll need to wait and then press shutter button at just the right moment.
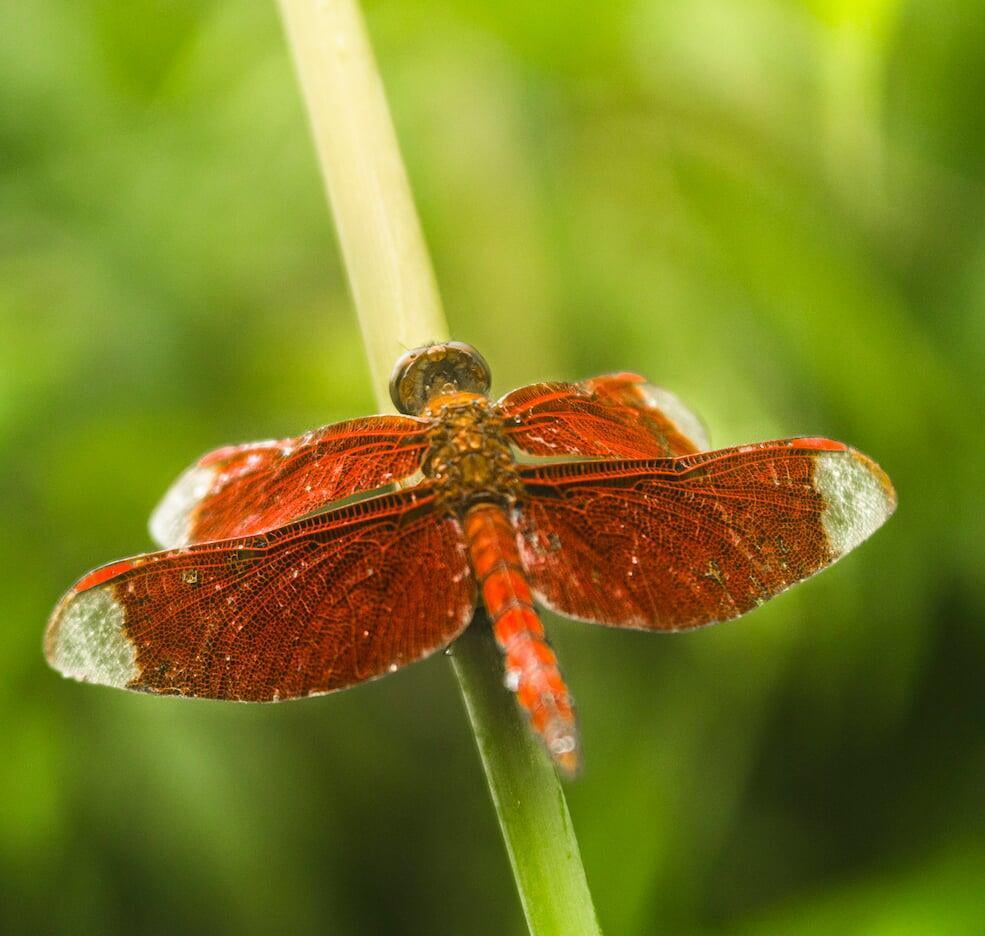
Another example when timing is very important is when you’re trying to photograph a bird in tree, which keeps disappearing behind foliage and then re-appearing again, hopping around on the branches and constantly turning its head this way and that.
You'll ideally want to press the shutter button at just the right moment, like when the bird is side-on and is making eye contact with the camera lens.
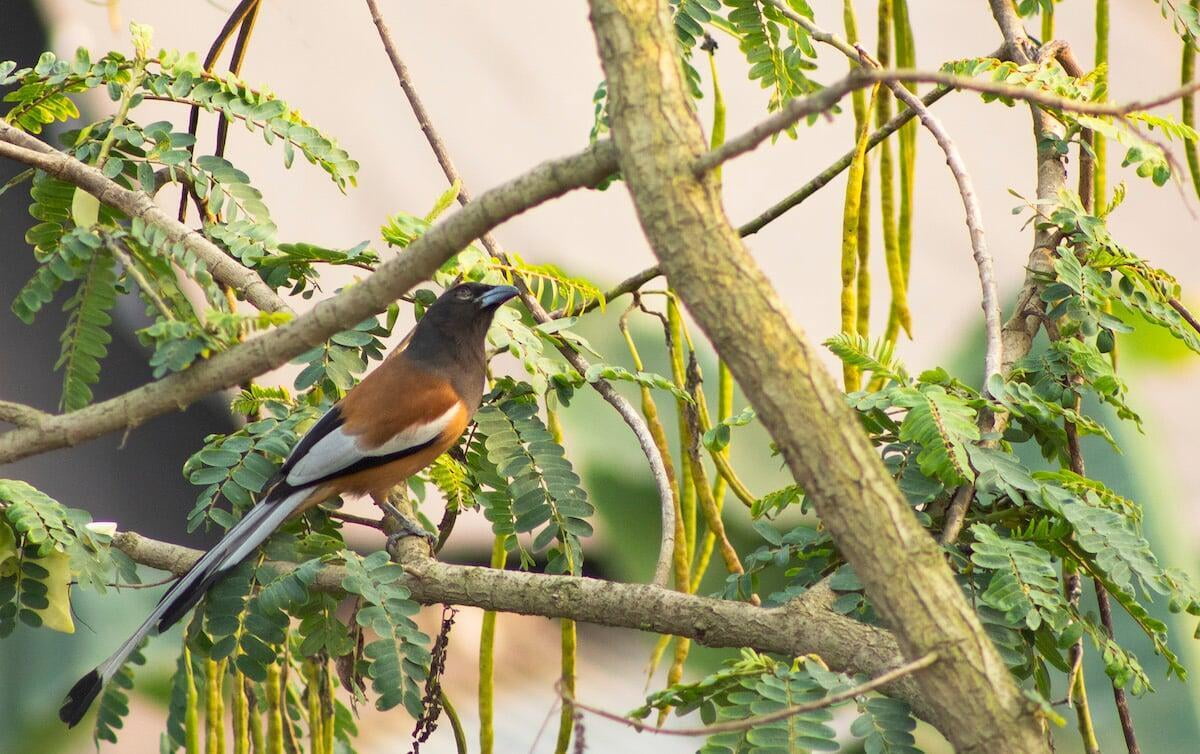
Of course, the desired moment will not always arrive immediately, and when it does it may be very fleeting, so you will probably need to wait very patiently for it while maintaining your concentration on your subject.
This is why patience can be a very important human quality to have in photography.
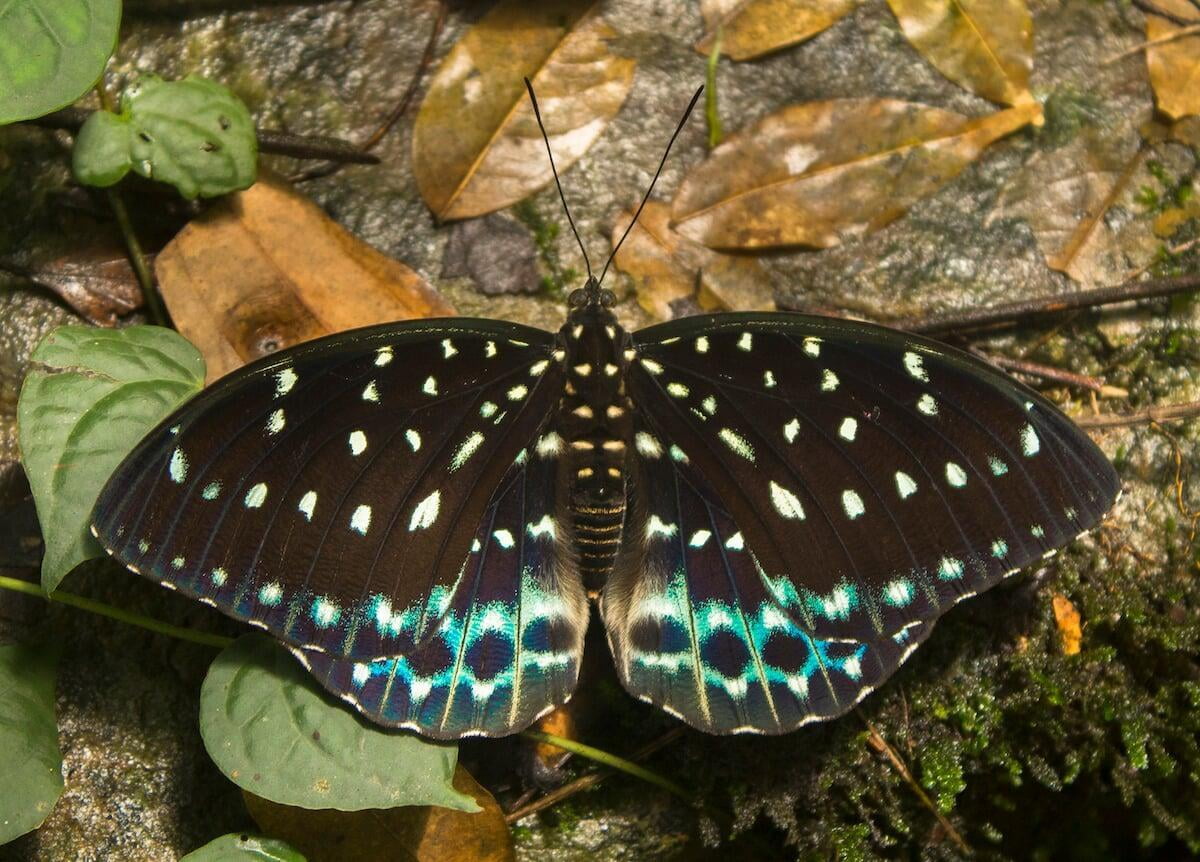
But sometimes patience isn't enough, like when that perfect moment you’re waiting for is too ephemeral for it to be captured deliberately.
For example, a butterfly perching on a flower spreads its wings for a split second, displaying a flash of vibrant colour, but by the time you react to the photo opportunity and press the shutter button the creature’s wings have already closed up again.
One way to get around this problem is to use the continuous shooting feature that most cameras come with nowadays. Also known as burst mode, it’s basically like spraying bullets, where your camera fires off a number of shots in rapid succession.
Afterwards, you sift through all the shots you took in burst mode and pick out the one that was (hopefully) captured at just the right moment.
#6 - Your photos need a compelling subject
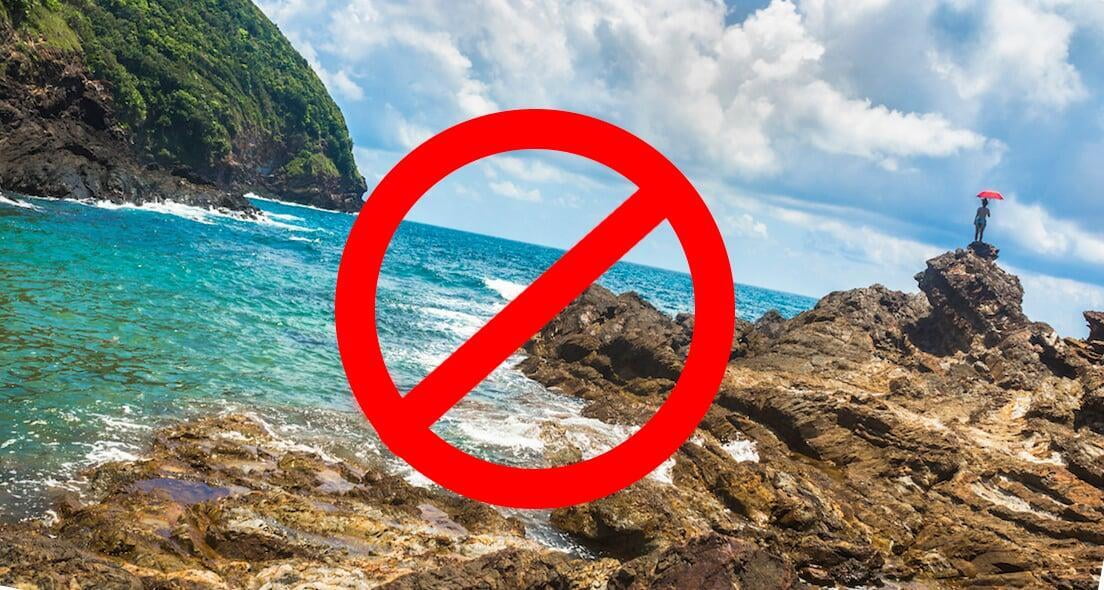
It might seem self-evident that every photo needs to have a compelling subject, but a lot of people apparently forget this basic principle of photography when they capture images like this:
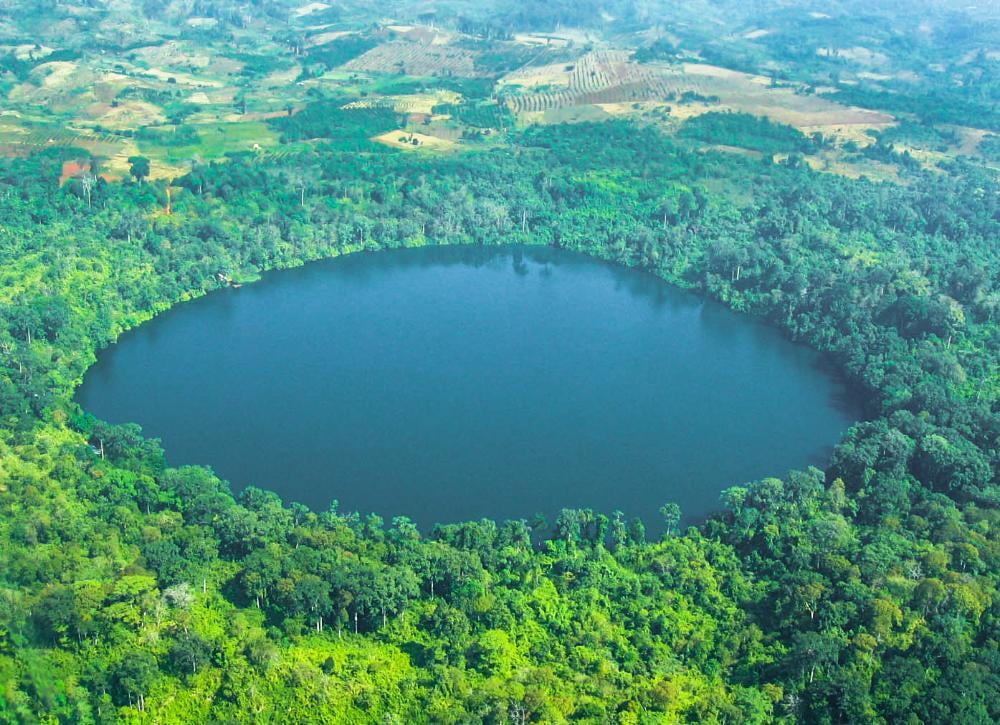
But what is wrong with the above image?
Well, it feels a bit empty doesn't it?
Like it's missing one crucial component?
While the lake has quite an interesting shape, it's still not interesting enough on its own to really capture your attention and draw you into the image.
The photo would be a lot more engaging if there was something out on the lake, like a boat perhaps. The problem is that the image lacks a clear subject.
The subject can be defined as the element or elements in a scene that you want to draw the viewer’s attention to.
It’s the focal point of the image, the thing that the photo is really “about”. It's the specific element in the scene that captured your imagination and made you think “wow, this is really cool”.
When a photo lacks a subject, the viewer is left scratching his head. He or she is unable to figure out what the photo is about, what message the photographer was trying to convey or why the photographer even took the photo in the first place.
A subject-less photo leaves no lasting impression and the viewer will grant it little more than a fleeting glance before turning their attention elsewhere.
Luckily, when you're travelling, there are fascinating things to photograph almost everywhere and anything that captures your attention in real life should be a worthy subject for a photo, as if you found it awesome, other people probably will too.
Your subject could be a unique horseshoe bend in a river, a peculiar-looking cloud in the sky, a wizened old man smoking a pipe, a towering Gothic cathedral, a snow-capped mountain, an exotic looking bird, a giant mushroom, a tribal woman wearing her traditional dress, a tattooed headhunter and countless other things.
Landscape photographs can sometimes challenge photographers with respect to identifying a clear subject, and they'll often forget the importance of having one when capturing a sweeping vista.
But this is always a mistake, as even an epic, wide-angled landscape shot needs a subject for it to be compelling, so you should always try to pinpoint specific features or elements of interest in your environment and position them in your frame.
The subject in the case of a landscape photograph might be a lake, a river confluence, a lone tree, a snow-capped mountain peak in the distance, a cool rock etc, Just remember that for it work as a standalone subject, it needs to be unusual and interesting enough to really pique the viewer's curiosity.
Indeed, a “boring” subject is hardly any better than a photo with no subject at all. The purpose of travel photography is to capture images of interesting, unusual phenomena that people living their humdrum, everyday lives don’t observe very often.
Commonplace things that people see or interact with on a regular basis or subjects that are inherently uninteresting are going to leave the same weak impression on the viewer as a photo with no subject at all.
This is what makes travel photography so exciting, as it spurs us to continually explore new frontiers in the pursuit of extraordinary and compelling new subjects to photograph.
#7 - Learn the fundamental principles of composition (and then break them)
Composition is a complex subject in photography that deserves a dedicated article all to itself, but here we’ll just cover the basic principles of good composition so that you can achieve some immediate improvement in the calibre of your images.
Firstly, what is composition in the context of photography? It’s how a photo is composed or the manner in which the elements in a scene are arranged and positioned in relation to one another and in relation to the frame of the photo.
As a photographer you don’t have complete control over the positioning of all the elements in a scene but you do have some leverage.
By varying your own position, camera angle and focal length, by waiting for dynamic elements to move into the desired position, and by rearranging the elements in a scene whose position you do have control over, you can make a dramatic difference to the compositions of your images.
We discussed the importance of having an interesting subject in your photo in tip #, but the arrangement of that main subject and any secondary elements in your frame is also critical to create a pleasing composition.
An ill-placed subject in a photo will have a jarring effect on the viewer, creating a sense of discordance and disharmony, and spoiling what could have otherwise been a great image.
The five basic principles of composition that we’re going to cover here are fill the frame, the rule of thirds, balance, straight horizons and breathing room.
Fill the frame with what you like
At any given photography location, there can be a hell of a lot going on.
For example, if you’re at the beach, there might be waves, sand dunes, sandcastles, washed-up seashells, driftwood, fishing boats, playing children, sunbathing adults, dogs, beached seals, anglers…. the list goes on.
One of most basic principles of composition can be useful here to help us figure out what we should be photographing. The principle is this: fill the frame with you like.
Decide what exactly it is that you appreciate about the scene (i.e. identify your subject) and completely fill the frame with that, to the exclusion of all the other inconsequential stuff.
Feeling excited about those beached seals? Get as close as you can to the seals without spooking them, use a zoom lens if you have to and try to fill your entire frame with them.
Don’t be the guy that takes the shot from too far away, filling most of his frame with featureless sandy beach and consequently making the seals look merely incidental and not the main subject of the photo.
Like those yellow flowers in that field?
Don’t just photograph them from a distance so that they look small and insignificant in the overall context of the image; zoom in or physically move closer so that the flowers are almost touching your camera lens and fill your entire frame with them. This will create a much more captivating photo.
Instead of doing this.....

Do this.

The rule of thirds
The rule of thirds is a compositional rule of thumb rather than a strict law that must always be followed. Indeed, there are plenty of occasions in photography when it can and should be broken.
Nevertheless, it’s a useful principle to bear in mind when composing your travel photos, as it works remarkably well in a great number of situations.
What is the rule of thirds?
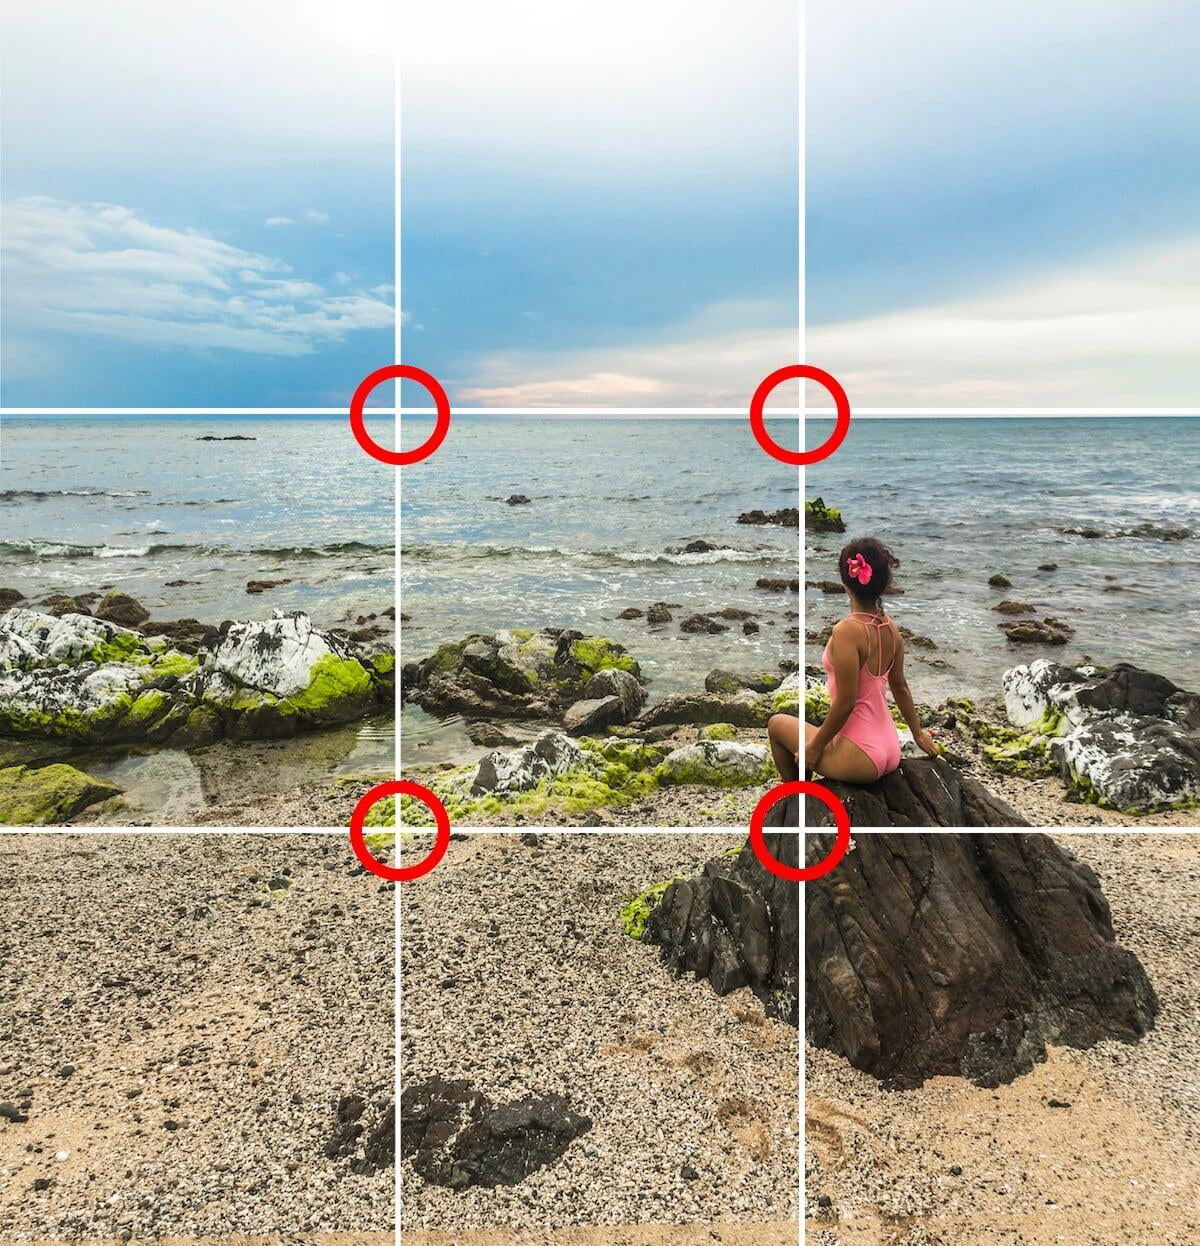
To use the rule of thirds you have to first envision a 3 x 3 grid (like a noughts and crosses or tic-tac-toe grid) overlying the image in your frame.
This grid consists of two horizontal lines intersecting with two vertical lines at four different points, dividing the image up into nine squares of equal size.
In fact, you need not imagine these lines, as your camera probably has a grid overlay option that you can enable.
The rule of thirds uses these horizontal and vertical gridlines as guidelines for where to position your subject(s) and your horizon in the frame.
In landscape or outdoor photography, many novice photographers will instinctively position the horizon line in the middle of the image, dividing it into two equal halves, where 50% of the image is sky and the other 50% is land or water.
Although this type of composition works very well in particular circumstances (i.e. reflections, which we cover in section 3), it is a violation of the rule of thirds and typically won’t result in an appealing composition.
The rule of thirds stipulates that the horizon should be positioned on either of the two horizontal gridlines, thereby dividing the image in a 2:1 ratio of sky to land/water or vice versa.
In other words, a third of the image will consist of land/water and two thirds will consist of sky, or vice versa.
The rule of thirds also tells us exactly where we should position our subject(s) in the frame.
Like with their positioning of the horizon, novice photographers will often have a natural tendency to centre their subject in the frame, as it would seem logical to place the element of greatest importance bang smack in the middle of the frame, right on the bull’s eye.
But photography is an art and does not always follow logic, which is why positioning the subject right in the centre of an image doesn’t usually work.
Again, it’s a rule a thumb, but the rule of thirds dictates that the subject should be positioned at any of the four points in the frame where the horizontal and vertical gridlines intersect, like in the image above.
Once you've gotten comfortable with using the rule of thirds to guide your compositions, it's time to start breaking the rule and trying out different horizon and subject placements.
As you experiment, you will discover that photography is very nuanced and that blanket composition rules like the rule of thirds cannot be successfully applied to every image. The more experience you garner, the better you'll comprehend when the rule should be adhered to and when it should be broken.
Balance
The principle of balance in the context of photographic composition can get quite complicated, but we won’t delve too deeply into the subject here.
The basic idea is that a balanced photo is more appealing than an imbalanced one, as an imbalanced photo creates tension and causes the viewer to experience a desire to restore equilibrium.
When we are talking about balance in a photo, we are talking about visual balance, and we describe the elements of an image as possessing a visual weight.
In a visually balanced image, the viewer’s attention is not overwhelmingly drawn to any particular part of the image, but the entirety of the image competes for his or her attention.
There are many types of balance in a photo, such as:
Symmetrical balance
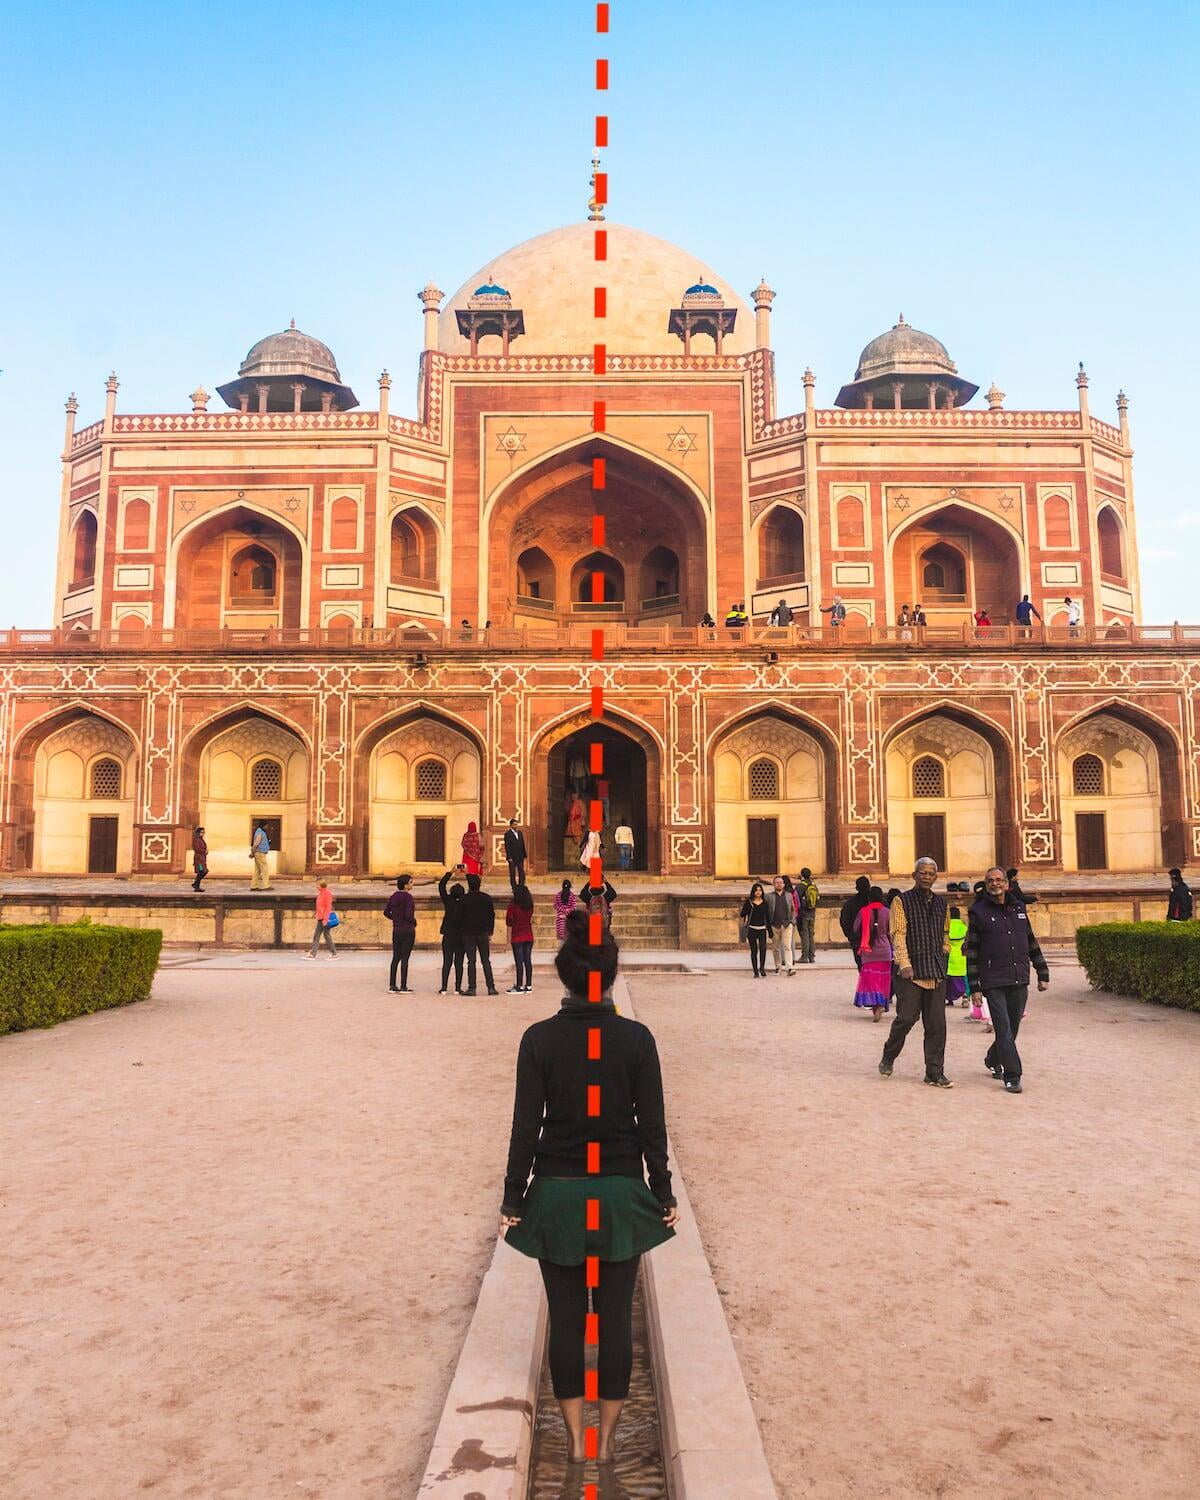
An image that is literally symmetrical (i.e. can be divided into two mirror opposites) or almost symmetrical in photography is considered to be symmetrically balanced.
Reflections can produce symmetrically balanced images, and there are lots of examples in man-made environments and monuments too, since people often endeavour to achieve symmetry in their architectural designs. Aside from reflections, symmetrically balanced images in nature are less common.
The other types of balance in an image are the various types of so-called asymmetrical balance or informal balance. These include the following:
Visual tension
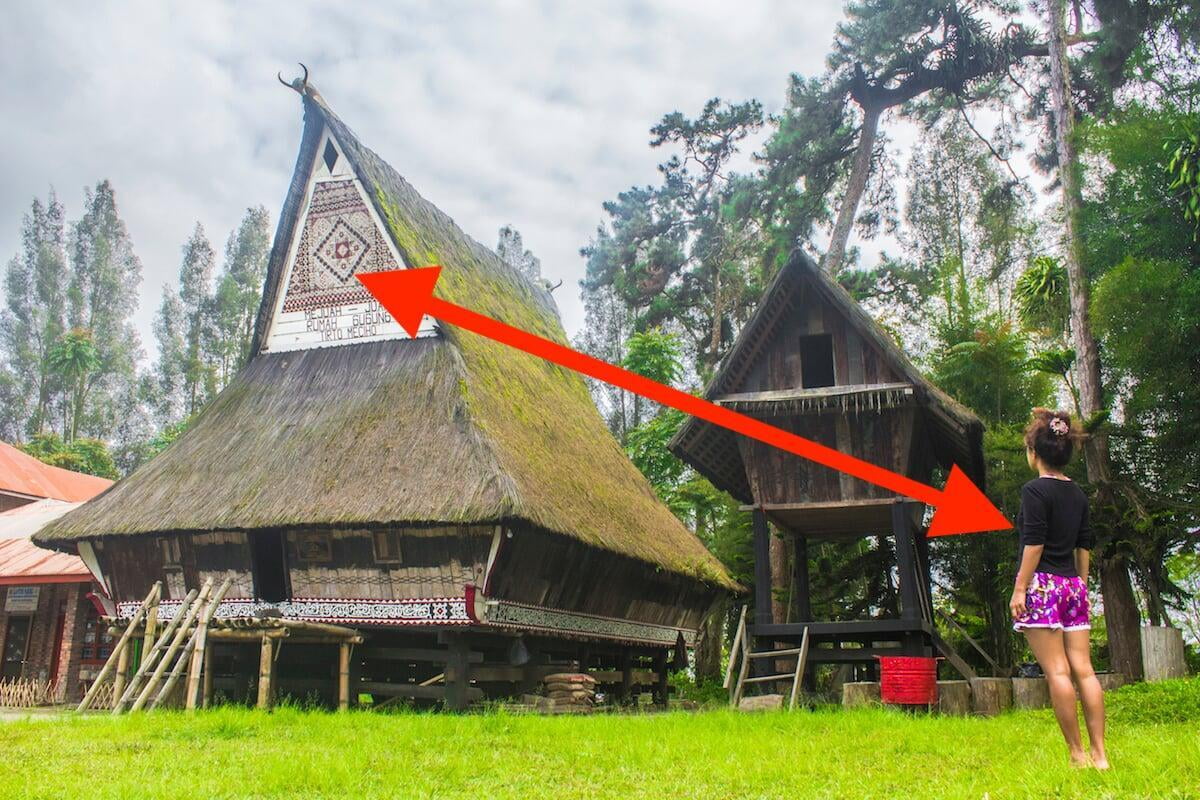
If there is an element bearing considerable visual weight in the top right-hand corner of the frame, an element of similar weight can be positioned in the bottom left-hand corner to balance the image.
The objects shouldn’t be positioned literally in each corner, but roughly in accordance with the rule of thirds where the gridlines intersect.
These opposing elements can be thought of as two competing subjects that create visual tension by pulling the viewer’s eye back and forth (like a ping-pong ball) across the frame.
If an image has an obvious void or an area that looks disconcertingly empty, it is probably symmetrically imbalanced (nature abhors a vacuum), and the imbalance can be remedied by placing something of appropriate visual weight in this void.
Tonal balance
A balance between light and dark tones makes for a great image. This type of balance is particularly easy to observe in black-and-white photos but tonal balance still matters in colour photos too.
Note that dark tones carry more visual weight than light tones, so an image with a 50:50 ratio of dark to light tones is not well balanced. To create a tonally balanced image, you should aim to have more highlights than shadows.
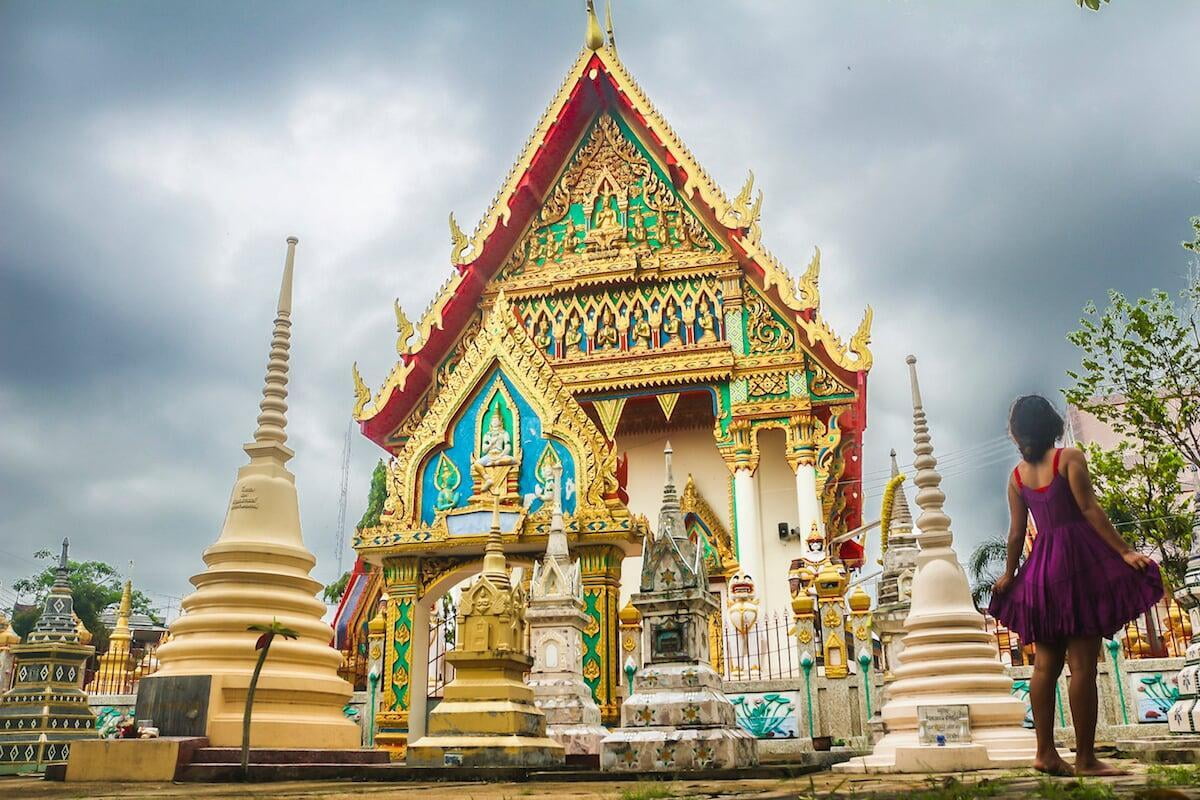
Colour balance
Do you always ensure that the colours in your images are balanced?
If you’re shooting a lavender field for example, your photo might be overpowered by the purple of the flowers. You could try to restore balance to the image by placing a girl in a yellow dress in the scene. This would have to be planned in advance of course.
Although you might think that the purple of the lavender flowers would still dominate the image, yellow is a very bold and bright colour that carries more visual weight than the more subdued purple of the lavender flowers.
As a rule, bright and bold (vibrant) colours carry more visual weight than dull, muted colours.
Size balance

Objects with a lot of visual weight should be made smaller in order to balance them with those of less weight.
For example, the Eiffel tower carries a lot of visual weight, so if you wanted to balance that with something that’s less attention-grabbing in your foreground, you would need to shoot the tower from a distance so that it appears quite small in comparison to your foreground element.
Textural balance
Strongly textured elements carry more visual weight than smooth or textureless elements. A brick wall, for example, has a strong texture and can be used to counterbalance an eye-catching human subject.
Conceptual balance
Also known as abstract balance, conceptual balance involves the juxtaposition of abstract philosophical concepts that seem to oppose one another, like industry and nature, traditional and modern, rich and poor, fear and love, good and evil, powerful and weak, and so on.
Conceptually balanced photos are usually balanced in all the other ways too, with the addition of the underlying and opposing philosophical ideas, which may not be immediately obvious to the viewer.
Straighten that horizon
While there are times when you might want to deliberately and dramatically tilt the horizon to create a feeling of disorientation or uneasiness in the viewer (this is known as a dutch angle, despite the fact that the technique originated in German film in the early 20th century), most photos look best when the horizon is kept perfectly straight.
Crooked or tilted horizons are a very common beginner mistake; fortunately they become less of a problem with practice. However, there's no photographer that can always take pictures with a perfectly straight horizon without some kind of technological aid.
Luckily, many modern cameras have some kind of an inbuilt electronic level that can be viewed on the LCD monitor and through the viewfinder.
The electronic level will display the angle of tilt of your camera so that you can correct it and ensure that it’s perfectly level before taking your shot.
If your camera doesn’t have this feature, you should at least be able to enable your camera’s grid overlay. By aligning one of the horizontal gridlines with the horizon, you should be able to get it perfectly straight.
However, this only works well in situations where there is a clearly visible horizon line, like when you’re looking out across the ocean at the water. There will be many situations where there won’t be a visible horizon and where your camera’s grid overlay will not help much with correcting the tilt of your camera.
If you do end up with a crooked horizon (and everyone does), it’s not the end of the world, as you can always straighten it later using the straightening tool in image editors like Photoshop.
However, you should always try to get the horizon as straight as possible in the field, as straightening it on your computer will force you to crop the image, thereby causing you to lose parts of it that you may have wanted to keep.
Leave breathing room (negative space) around elements
The elements in your image need room to breathe.
This is achieved by avoiding crowding or overlapping between the various elements in your scene, and by leaving space between elements and the edges of your frame.
By keeping the borders of your frame free of distractions, you actually create a picture frame of sorts, which helps to draw the viewer’s attention to the central areas of the photo.
Another similar mistake is when an image of a single subject (i.e. a portrait) filling the frame is too closely cropped, so that there’s virtually no space between any part of the subject and the edges of the frame. This compositional error gives an image a claustrophobic feeling, as if your subject is confined inside a tiny box.
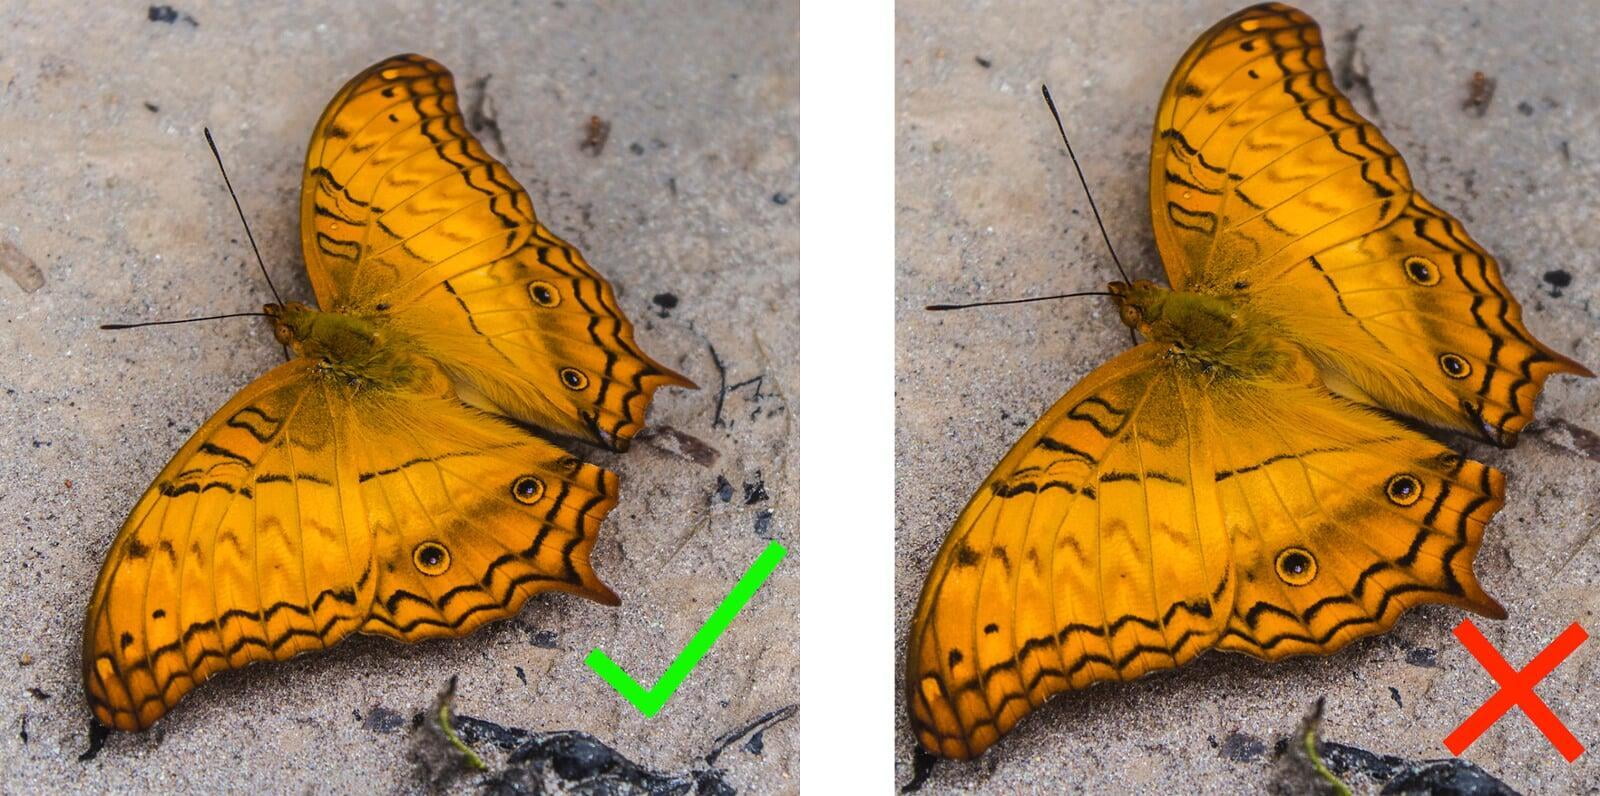
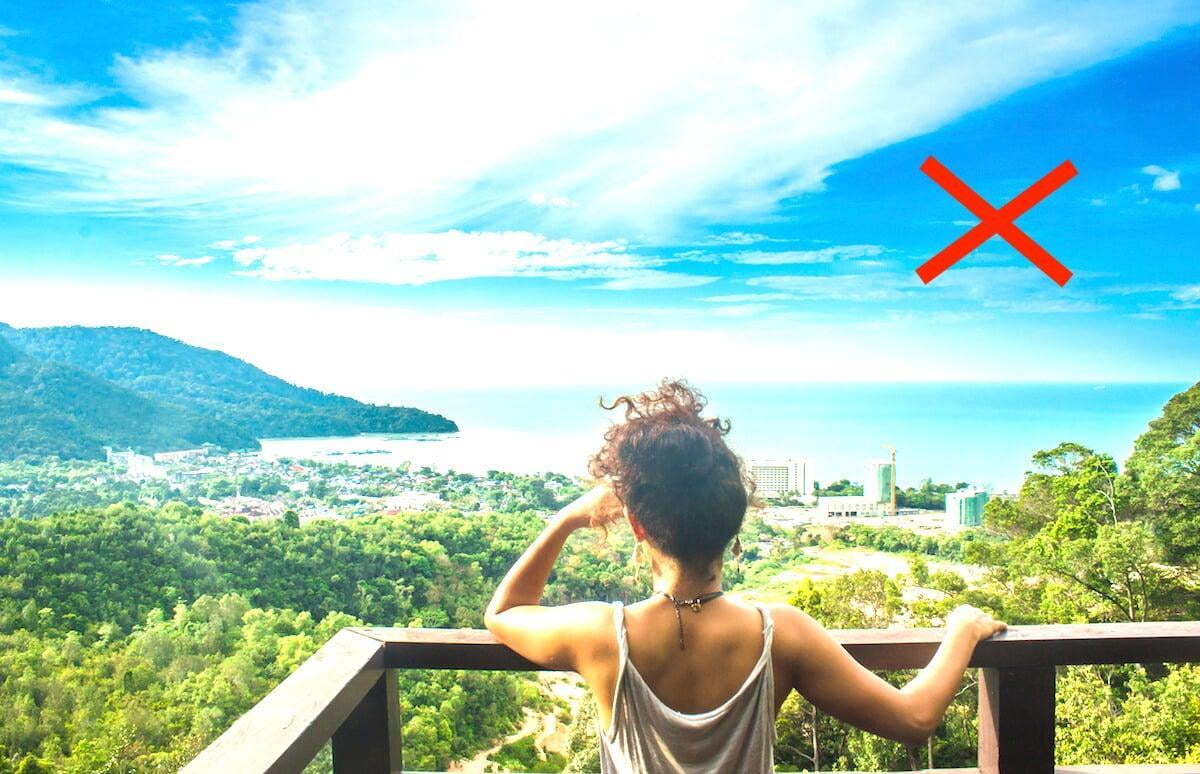
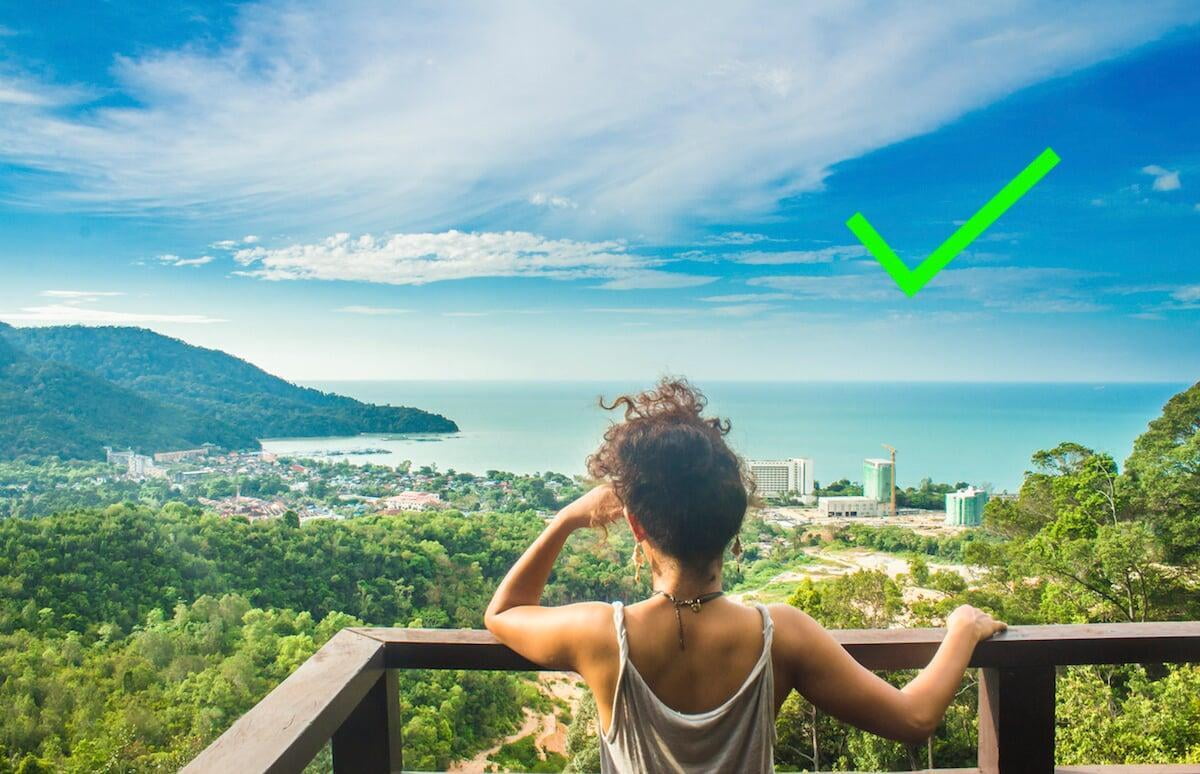
In some situations it's also possible to make the mistake of having the breathing room on the wrong side of the subject. We might call this the rule of space.
For example, if you are photographing a subject side-on, you should leave more space in front of the subject than behind the subject. "In front" here refers to the space in the frame that the subject is either looking or moving towards.
This rule works because of our subconscious tendency to want to see what lies ahead of a subject or what a subject is looking at; we are less interested in what's going on behind the subject, so there's no reason to dedicate most of the frame to that.
While leaving breathing room is really important, but you don’t want to get too liberal with it either – there’s a balance to be achieved, as having an excessive amount of negative space in your frame could make your subject appear small or insignificant, which would violate the first rule of composition - fill the frame with what you like.
Rule of odds

The rule of odds stipulates that when there is a group of similar subjects in an image, the composition will be more visually appealing to viewers if the group has an odd number of subjects like 3, 5 or 7 rather than an even number like 2, 4 or 6.
The reason for this greater appeal may have to do with the fact that the viewer is unable to mentally divide up the group into equal-sized or symmetrical subgroups when there is an odd number of elements in it.
This means that the image maintains more cohesiveness and creates a tension, drawing the viewer in as they search for that missing element that would make the group symmetrical.
#8 - Equipment matters
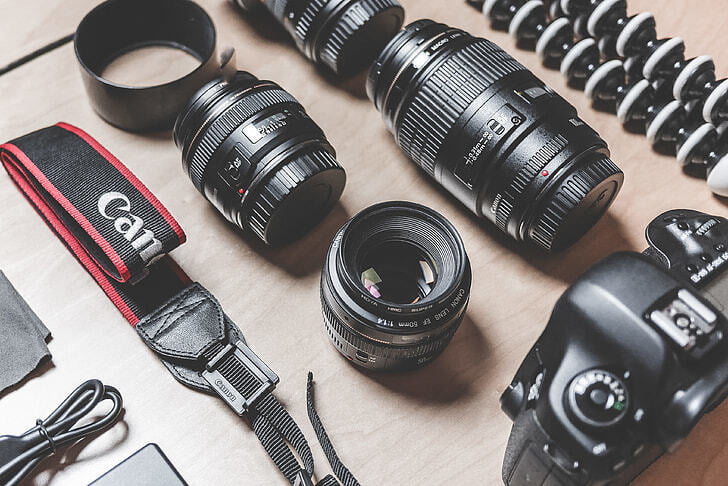
Equipment is just one of a multitude of factors that contribute to the quality and impact of your travel photos, but it is nevertheless a factor of critical importance that can’t be ignored.
Just as your ability to chop down a tree would be severely hampered if you were to use a blunted axe, shooting with an inferior camera will also rob you of the ability to fulfill your highest potential in the art of travel photography.
You don’t need to have the latest, best and most expensive camera on the market to capture beautiful images, but having a decent-quality, modern camera will allow you to benefit from all the latest technological advancements.
With a good camera in your hands, you don’t have to worry that it might be your equipment that’s holding you back if your travel photos look lacklustre. When your camera gear is top-notch you can confidently place the blame on your skill level and focus on improving it.
Both the camera body and the lens that it's attached to will have a significant impact on the type and quality of the photos you will be able to take.
The lens is the primary dictator of the sharpness of your images, as it has the very important job of capturing the light from the scene in front of you and focusing it onto the sensor, which is housed inside the camera body.
The grade of the materials used in the lens, the number of glass elements, the coatings used to reduce glare and enhance colour and contrast, built-in image stabilization and other factors in the design of the lens can all impact the quality of the images it can produce.
To get the highest image quality you will need to invest in a prime lens (as opposed to a kit lens), but bear in mind that prime lenses have a fixed focal length, so if you want to make your subject bigger or smaller in the frame, you’ll have to move your feet.
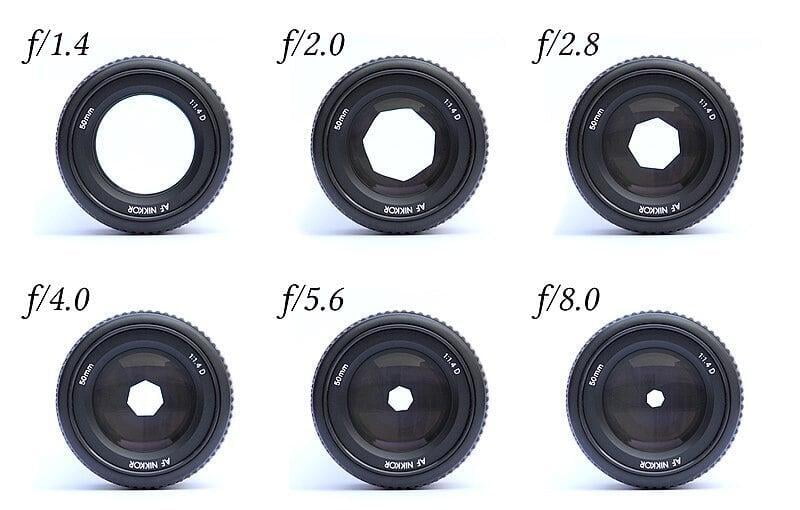
The camera lens will also determine the upper and lower limits of your aperture size, which can improve your camera’s performance in low light or very bright conditions.
Prime lenses typically have a much wider maximum aperture (i.e. f/2.8 or bigger) than kit lenses, making them much more suited to shooting in low light.
The lens also determines the range of focal lengths you will be able to shoot with. If you want to be able to take ultra wide-angle or highly zoomed shots, you may want to carry extra lenses to be able to cover these more extreme focal lengths.
Bear in mind however that lenses can be heavy (especially zoom lenses) and they take up space. Additionally, the vast majority of your travel photos will probably be taken at more middling focal lengths, so those extra lenses might stay covered in cobwebs during some of your trips.
That's why carrying a whole array of lenses might be out of the question and you might instead want to carry just one extra lens when you're travelling.
It really depends on your tolerance for carrying around a lot of heavy and expensive gear when you're travelling. For me personally, I'm happy to carry one extra zoom lens when I'm on the road, but no more than that.
Bokeh, or the blurred, out-of-focus areas of an image, and how they appear, also depends on the lens you’re using. Some lenses give a more appealing bokeh effect than others, although what's "appealing" is certainly subjective to an extent.
The starburst effect is another thing that can vary considerably between lenses and some lenses don't produce a good starburst at all. We cover bokeh and starbursts in Section 3.
The camera body that you choose is also very important, as it governs many of the camera’s capabilities that the lens does not play any role in.
The sensor is housed in the camera body and this extremely important element determines the camera’s megapixel count (max resolution), its dynamic range, its noise levels, its ISO range (light sensitivity) and more.
If the camera has a full-frame sensor (vs a crop-frame sensor), it will perform much better in low-light conditions and will also have a significantly wider field of view than a crop-frame sensor for a lens with a given focal length.
There are many other important capabilities of a camera that are dictated by the body rather than the lens, like the available shooting modes, creative filters and settings, the maximum continuous shooting (burst mode) rate and the length of time it can be sustained for, the maximum and minimum shutter speeds, the battery life, the number of autofocus points, and so on.
That being said, what will make the most noticeable impact on the look of your images will be the lens that you’re using, not the camera body and when photographers are looking to upgrade, they will usually buy a new lens and keep their existing camera body.
I currently travel with the Canon EOS 77D with the EF-S 18-135 mm (f/3.5 - f/5.6) zoom lens and I’m very happy with this setup.
For a full review of this camera and of all our other top travel camera picks, see our complete guide to the best travel cameras.
#9 - Know your camera like the back of your hand (and keep it well maintained)
I’m not sure that everyone knows the back of their hand all that well, but I’m using the idiom here anyway to make the point that you ought to learn everything there is to know about your camera if you want to improve your photography.
The first rule of any trade is to know your equipment inside-out. The more you know about your camera’s functions and capabilities and when to use them, the more you’re going to be able to get out of it and the better your photos are going to be.
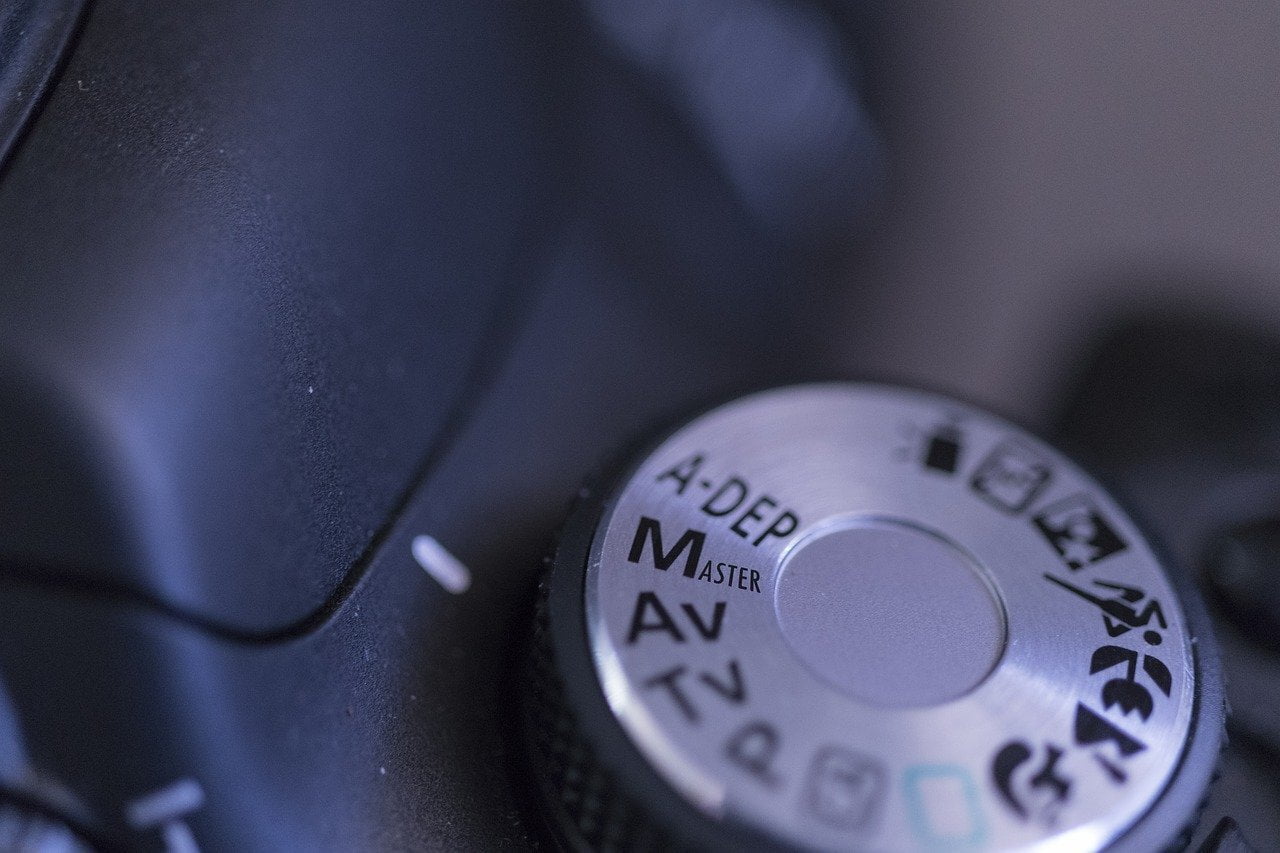
Start by figuring out what all the buttons, switches, dials and knobs on the outside of your camera body and lens are for.
Do you know the location and function of the depth of field preview button? What about the dioptric adjustment knob? The hot shoe? The back-button autofocus? The AE lock button?
Do you know how and when to use all the different shooting modes on your camera’s mode dial, like manual, aperture priority, shutter priority, intelligent auto mode and so on?
Many photographers who have been shooting with their cameras for years won’t even know what every single one of these external controls is for.
Once you understand what all the controls on the outside of the camera do, you can drill into the menu options and settings of the camera. If you can't figure out what a particular setting does it’s best to leave the default setting enabled.
The easiest way to learn the nuts and bolts of your camera is to consult the user manual that came with it. Although it might make for pretty dry reading, you should definitely discipline yourself to read through the manual; you’d be surprised what useful tricks and tips you might pick up there.
There are also several good YouTube channels where photographers go through the settings and controls of different cameras and explain what they do in a way that’s easy to understand. You might be able to find a tutorial for your camera model.
It’s also very important to know how to look after and maintain your camera. Again, your camera’s user manual will provide a lot of useful information here.
When you’re travelling you need to take extra care to protect your camera from rain, splashes, knocks, dust, extreme temperatures, theft and other threats to its survival.
Never leave your camera bag/case down on the floor of local buses, as I’ve travelled on buses in some countries where the patch of metal floor above the engine (near the driver) became hot enough to damage a camera, laptop or any other electronic device.
Don’t be the fool who leaves his camera unattended while mounted on an unstable tripod and then returns to witness the tripod topple over, smashing the front glass of the camera lens on the ground.
If you are changing lenses frequently, you will probably find that dust from the air will quickly get onto your camera sensor and will create dust spots in your images that can ruin them, especially if the dark spots appear in the lighter parts of the image, like the sky.
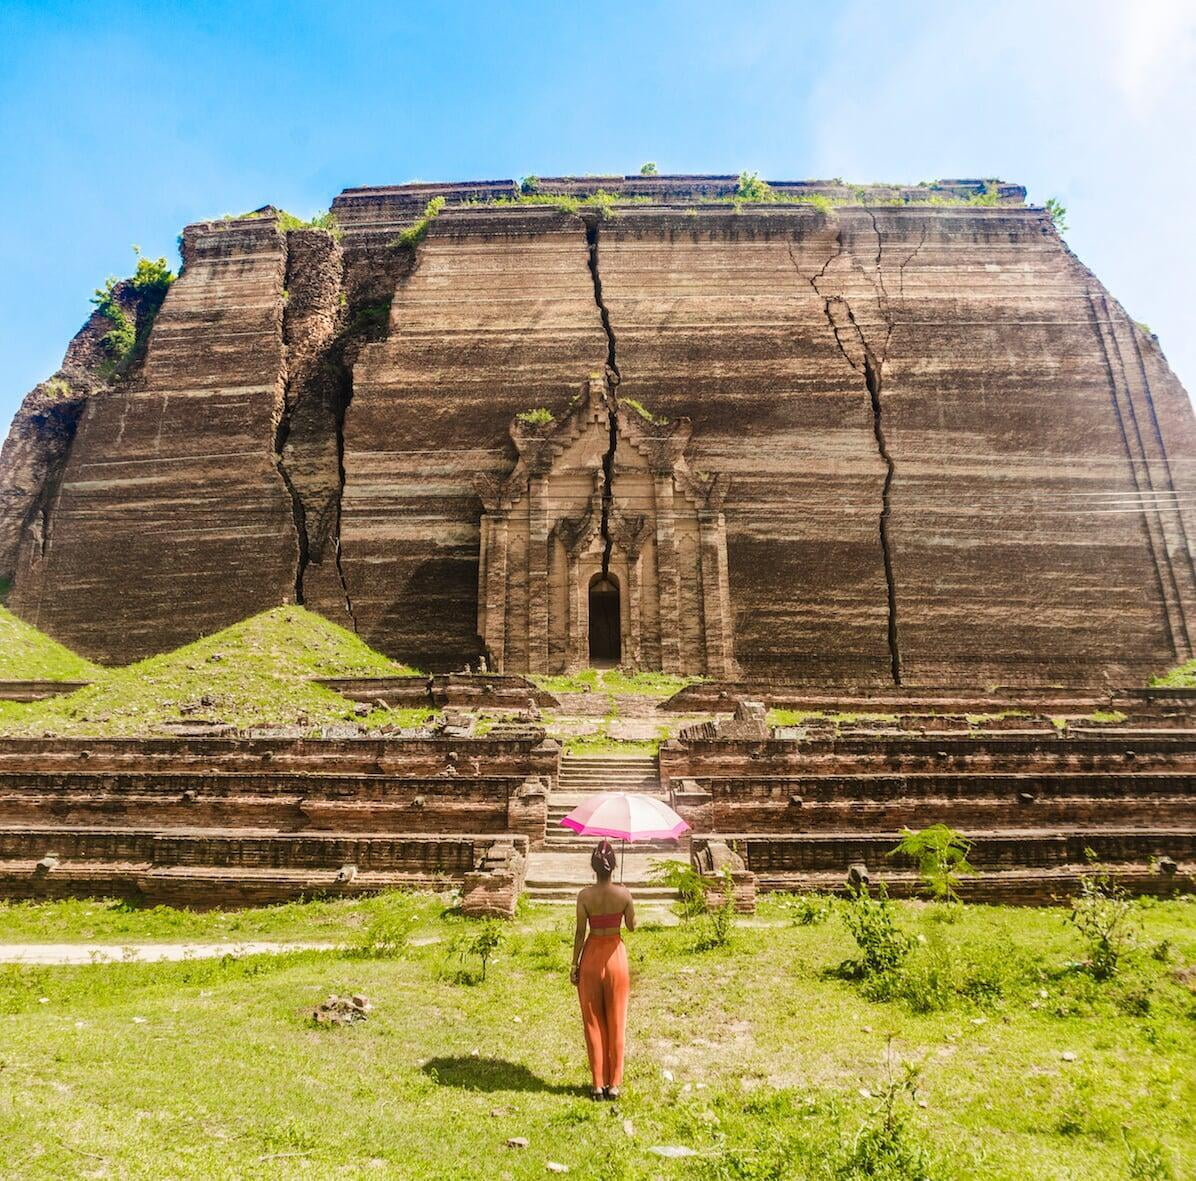
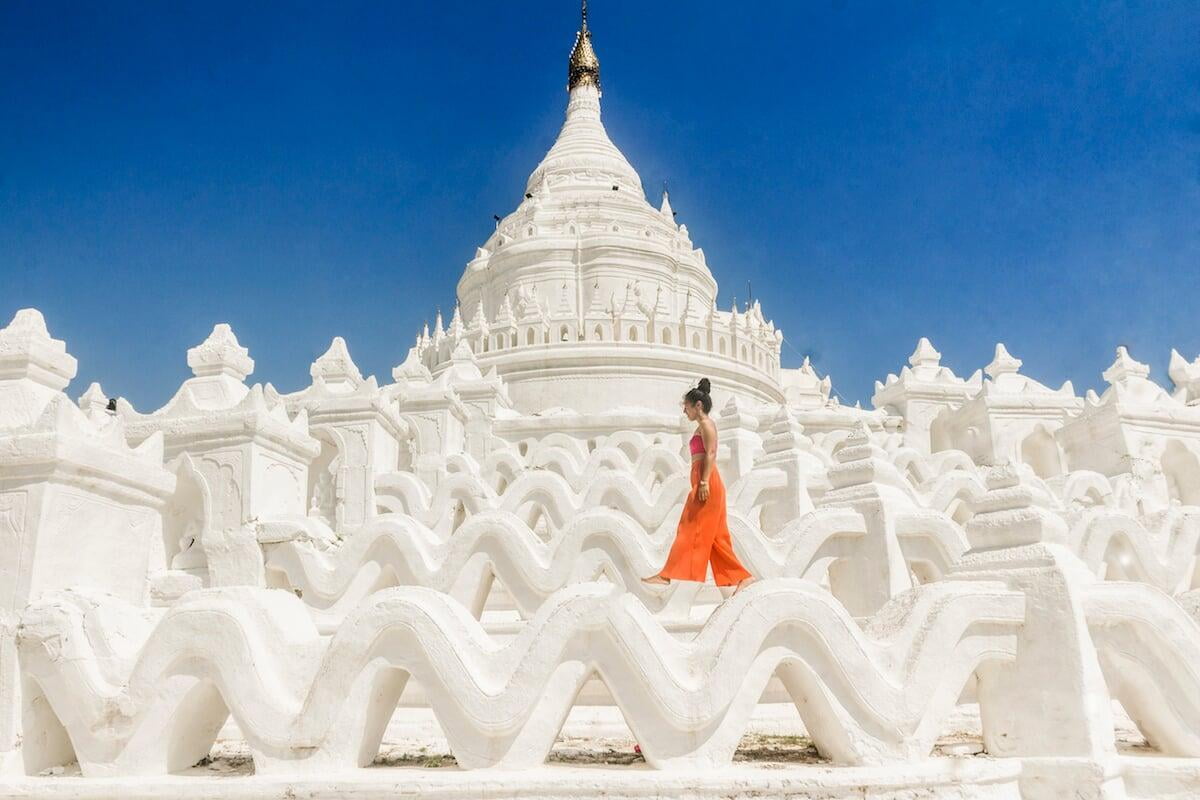
During a recent trip to Myanmar, I was shooting at one of most scenic locations in the country (the Hsinbyume pagoda in Mingun near Mandalay), but didn’t realize at the time that my camera sensor was covered in dust particulates.
When I later reviewed the images that I had taken earlier that morning, I realized to my horror that most of them were destroyed with dark spots everywhere and I had to spend ages editing out the blemishes in Photoshop afterwards.
If you face issues like this or other technical problems with your camera, you might not always be able to find somebody who can fix it or you might find (as I did) that some local camera repair shop owners are greedy and will try to rip you off.
During that same trip to Myanmar, two of the three camera repair shops in a laneway near our hotel in Mandalay were asking for exorbitant sums of money to clean our camera sensor, but the third shop was run by a kind-hearted old man with failing eyesight, who was happy to do it for free. In the end, it took the younger assistant in the shop about 60 seconds to complete the task.
In order to liberate yourself from dependency on local camera repair shops every time your sensor needs a cleaning, I recommend that you carry a basic camera cleaning kit so that you can keep your camera body, lens and sensor free of dirt, dust and fingerprints.
The bestselling cleaning kit we’ve linked to comes with a squeeze air blower (dislodges dust from the camera sensor), a soft brush (for dusting the camera body), a double-sided lens cleaning pen (removes dust and fingerprints from the lens), microfiber cloths, lens cleaning tissues and a bottle of lens cleaning fluid.

It’s very important to always remember to wipe the front glass of your lens before shooting so that there aren’t any fingerprints, dust, dirt, water droplets or condensation on it to impair the quality of your images.
If persistent condensation appears on the inside of your lens, you may be able to remove it by carefully and gently heating your lens with a hairdryer on low heat or by sitting for a while in a warm environment (i.e. a heated car) with the camera.
Just make sure that you don’t detach the lens from the camera body, as that could cause the situation to worsen.
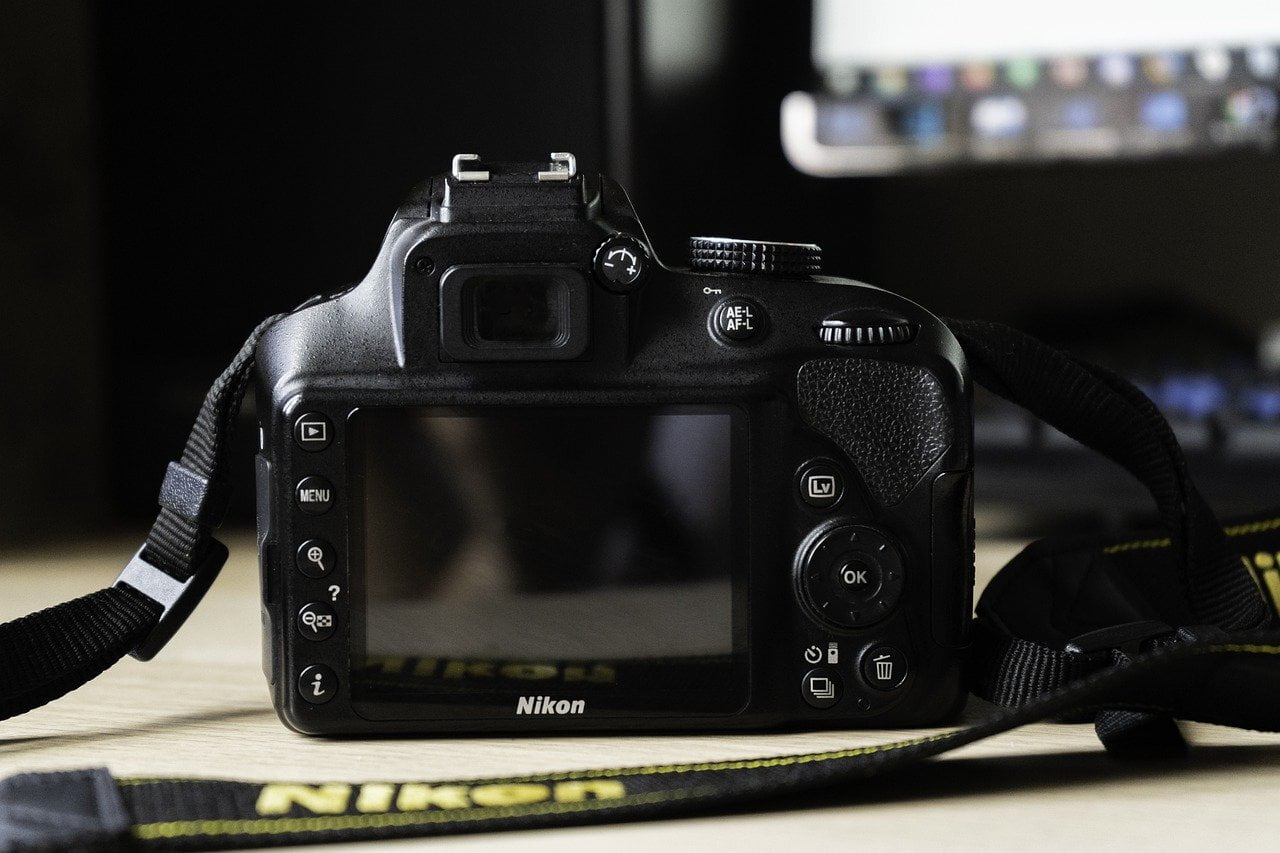
#10 - Don't neglect to use your camera's viewfinder
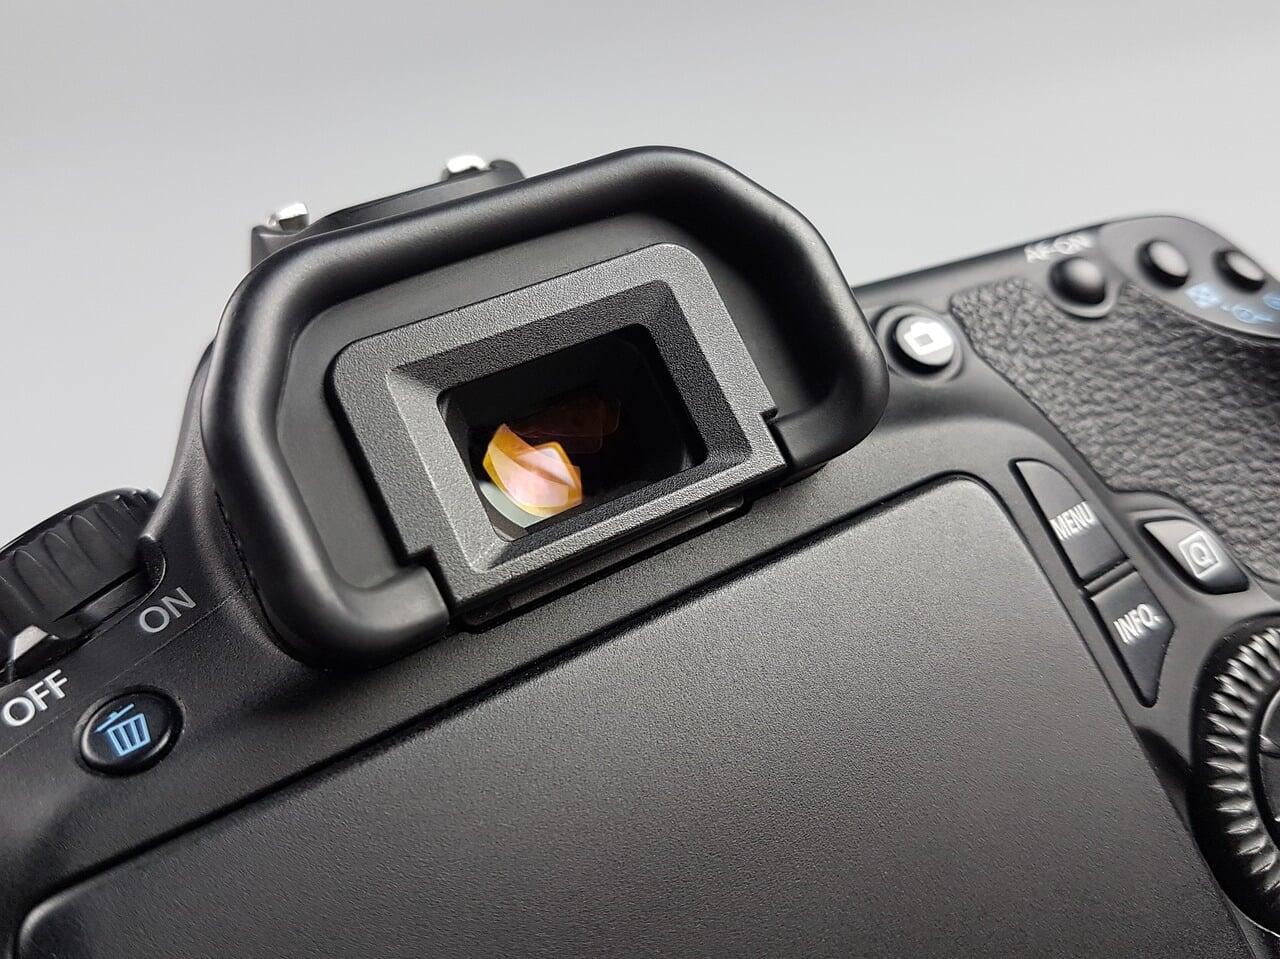
If you have a DSLR camera, you may have been neglecting to use the viewfinder to compose your photographs, whether due to a lack of understanding of why this camera feature is useful or simply out of habit of using the live view all the time.
The live view feature of DSLR cameras has several advantages over the viewfinder, such as showing you the live DOF (depth of field) without having to press a DOF preview button, as well as giving you 100% frame coverage, so that you can see exactly what your final image is going to look like on screen before you press the shutter button (viewfinders often offer less than 100% coverage and crop the field of view slightly, which can mean that elements near the edges of the frame can unexpectedly appear in the final image).
Another advantage of live view is the fact that you can compose your image without holding the camera up to your face, an action which isn’t feasible in many shooting scenarios, like when shooting subjects that are close to the ground.
A third advantage of live view is the ability to use on-screen tools that often aren’t available when shooting with the viewfinder. For example, you may not be able to zoom in on your focus point or display a grid overlay, electronic level or live histogram for the scene you’re shooting when looking through the viewfinder.
But there are also occasions when using your viewfinder to compose your image is more advantageous than using the LCD monitor.
For example, on a bright sunny day you might not be able to see your LCD screen properly due to the glare, and the viewfinder would be a far better choice for composing your image.
Also, if your camera battery is running low or you’re simply not carrying any spare batteries and you want to make sure that your single battery lasts you the entire day, the viewfinder is a far better option for shooting with, as it consumes a lot less battery power than live view.
The viewfinder also works better (in my opinion) for shooting a panorama sequence, as you can keep the camera steadier by holding it against your face.
Your viewfinder may also be better for focusing, especially when there’s fast action taking place; in my camera for example, the viewfinder focusing system is a lot more sophisticated and faster at locking onto targets than the live view focusing system.
Using the viewfinder offers a more immersive experience than using live view, as you're looking directly at the actual live image of the scene, whereas with live view you're looking at an electronic representation of the scene on a screen, and you're looking at that instead of at the scene itself.
Knowing the pros and cons of each system will allow you to choose the one that’s most appropriate for the situation at end, ensuring that you always get the best possible compositions.
#11 - Learn how to shoot in manual mode
I remember I was terrible at shooting in manual mode when I first picked up a DSLR camera over 6 years ago.
All my photos were coming out overexposed, underexposed, blurry, crooked horizons, badly composed - you name the mistake, I was making it.
But by reading a few articles about how to shoot in manual mode and then putting the information into practice, I soon got the hang of it, and you’ll undoubtedly pick it up very quickly as well.
When shooting in manual mode, you decide everything; the shutter speed, the aperture size, the ISO setting, the white balance, the metering mode, the amount of exposure and so on.
With that freedom comes a lot of responsibility, but also a lot of power and control.
But why not just make life easier for yourself and use your camera’s automatic modes instead? Because you don't always get the result that you want when you let your camera choose the settings.
Shooting in manual mode gives you more control over the look and style of your photos, which means more potential to experiment and express your creativity, which is what great photography is all about.
#12 - Improve the technical quality of your images
Technical quality is far from the most important factor governing the visual appeal of an image, but all other things being equal, a technically perfect image will usually be more desirable than a technically flawed one.
The aperture size, focal length, shutter speed and ISO number are all parameters that you have a degree of control over when taking a photo, and all can have a significant effect on the sharpness, noise level and other metrics that are used to assess the technical quality of the resulting image.
Regarding aperture size, most lenses have a “sweet spot” or a particular f-number that they are sharpest at. At f-numbers that are higher or lower than the sweet spot, there is a reduction in sharpness.
In the case of a lower-than-optimal f-number (wide aperture), the softening of the image is due to the reduced depth of field and also due to aberrations caused by light passing through the aperture at the edges not getting focused onto the plane of the sensor.
In the case of a higher-than-optimal f-number, the softening effect is due to the phenomenon of diffraction, where light spreads out after passing through the aperture.
The optimal f-number for sharpness is usually 2 or 3 stops down from the maximum aperture of the lens, so for a regular kit lens the sweet spot would normally be somewhere between f/8 and f/11. In practice, the easiest way to find the sweet spot for your lens is to Google it.
In practice when you’re shooting, you want to stay as close your lens’ sweet spot as you can to maximize sharpness, but there will inevitably be times when you will be forced to deviate from the sweet spot – for example, if you need more depth of field you might need to use a very small aperture or if you’re shooting in low light or you want to produce a blurred background, you may require a wider aperture.
The focal length that you choose for your shot can also have an impact on the sharpness of your images.
If you are shooting handheld, it will be more difficult to take sharp images at higher focal lengths like 150 mm, 200 mm and so on. This is primarily because the more zoomed in you are, the more that camera shake is amplified.
You can offset this effect to an extent by increasing the shutter speed but sometimes this isn’t possible and a tripod (or at least a monopod) then becomes a necessity.
Also, zoom lenses are not equally sharp across their range of focal lengths. You may find that your lens is sharpest at lower focal lengths and becomes less sharp when zoomed, although there shouldn’t be a dramatic difference in this regard.
The ISO number is always best kept as low as possible when the goal is to produce sharp images, as the higher the ISO, the more noise (those multi-coloured specks that mostly occur in the shadow areas of an image) that’s introduced into the image, and noise always reduces the quality of an image.
This is why it’s very important to carry a tripod, as it means that you don’t have to jack up the ISO number (or at least not as much) in low-light situations in order to obtain a sufficiently exposed image.
Selecting the appropriate shutter speed for the circumstances is also crucial for a technically sound image.
If you're shooting handheld, it's recommended that you don't let your shutter speed drop below the focal length of the lens. In other words, when you're shooting at 40 mm, your shutter speed should not drop below 1/40. If you're shooting handheld at 200 mm with a zoom lens, aim for a minimum shutter speed of 1/200.
Of course, this is only a rule of thumb and if your hands are particularly steady or shaky you will need to adjust accordingly, but the guideline will be helpful for most people.
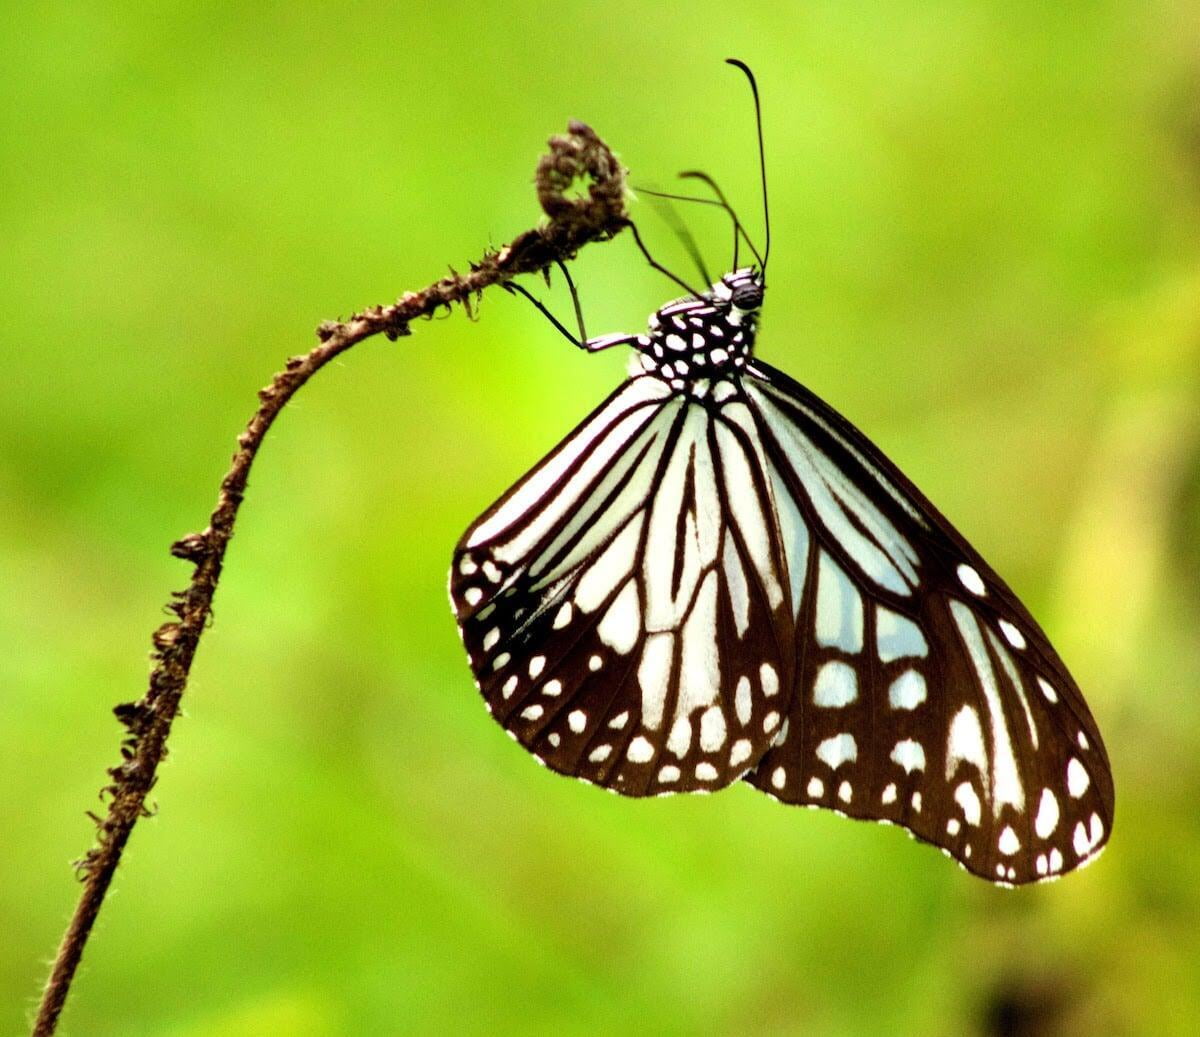
If you are trying to freeze something that’s moving very fast, like the wings of a butterfly or hummingbird in mid-flight, you will need to use a very high shutter speed like 1/500s to 1/2000s.
If you want to freeze a waterfall or crashing waves at the ocean so that the individual water droplets are clearly visible, you will also need to use a similarly high shutter speed.
High shutter speeds are also commonly required when capturing any kind of athletic or sporting activities, as well as moving vehicles.
Selecting a shutter speed that’s too slow for the occasion will only result in a disappointing image with a wholly or partially blurred subject.
Another critical thing to get right in your image is the exposure. An overexposed or underexposed image is usually to be avoided, although there are often times when you will want to deliberately overexpose or underexpose an image.
If shooting in automatic or semi-automatic modes your camera will usually take care of the exposure for you, but when shooting in manual, you’ll need to pay attention to the meter on your camera and make the necessary adjustments to the settings to attain the desired exposure.
Depth of field (DOF) is another technical aspect of shooting that you need to develop a clear understanding of. Your images can either have a shallow or a deep depth of field, depending on how much of the scene you want to be in focus.
A shallow depth of field will result in most of the scene being out of focus except for your subject (or a specific part of your subject). It can be achieved by using as large an aperture as possible (low f-number) and also by shooting at a longer focal length like 70-200 mm.
A deep depth of field will result in virtually every part of the scene being nicely in focus, from near-at-hand elements in the foreground all the way to distant mountains in the background. It can be achieved by doing just the opposite; using a small aperture (like f/16 to f/22) and shooting at short focal lengths like 18 mm or less. Wide-angle lenses will allow you to get the deepest possible depth of field.
#13 - Editing is a necessity, not a means of deception

Image editing or post-processing is an absolutely essential skill to master to improve the look and quality of your travel photos.
Just as many women would argue that their makeup is not about cheating or deceiving men, I would argue that neither is editing a photograph about cheating or deceiving the viewer.
The purpose of editing in photography is not to transform an image into something inauthentic that bears scant resemblance to the original photo as it came out of the camera.
Editing is really only there to compensate for the inherent shortcomings of cameras when compared to the marvels of the human eye. Cameras struggle with high-contrast lighting situations, often misrepresent colours, create aberrations and distortions, and so on.
Rarely does a photo in its raw, unaltered form do justice to the beauty and magnificence of a real-life spectacle but after subjecting it to some editing and tweaking, you can usually create something that approximates a reasonably accurate representation of the original spectacle.
The desktop editing programs of choice for most photographers are Photoshop and Lightroom. When you’re travelling, you can run these programs on a reasonably powerful travel laptop, and import photos into them from your camera for editing.
However, if you don’t travel with a laptop, you can still edit photos on your phone using an editing app like Snapseed (owned by Google). Snapseed even supports Adobe DNG RAW files and in many ways is just as capable as a desktop photo editor like Lightroom.
Speaking of RAW files, you always want to shoot in this format if you’re planning to edit your photos after shooting.
A RAW image file is one that is unprocessed or minimally processed (i.e. defective pixels may be removed or noise may be reduced) by your camera.
A RAW file contains all of the raw image data collected by your camera’s sensor, among other information like sensor and image metadata. If you're familiar with film cameras, you can think of a RAW file as the digital version of a negative.
This means that RAW image files are much larger (often 10 x bigger or more) than compressed image files like JPEGs, where some of the raw image data captured by the sensor is discarded and alterations are made to the image by the camera, including adjustments to the contrast, saturation, sharpness and white balance.
But because all the original data collected by the sensor is preserved in a RAW image file, they have many advantages over compressed file formats.
For starters, RAW image files preserve many more shades of colours (have a larger colour space) than JPEGs and yield the highest possible image quality.
They also offer the photographer more control over the final look of the image, as all of the processing is left up to the photographer, not the camera.
Additionally, RAW files allow for more fine-tuned adjustments to image parameters like exposure, white balance, shadows, highlights, vibrance, saturation, clarity etc. than files that have already been processed by the camera.
With RAW files, you can often bring a lot of detail from the highlights or shadows of a very overexposed or underexposed photo, which is something that doesn’t work so well if important data has already been discarded from the image through compression.
RAW photos can also be manipulated without producing as much luminance noise, colour noise, and other unwanted artefacts.
In reality, there are many different RAW file formats that are specific to camera brands and most of these formats are proprietary.
Canon, for example, has three RAW file formats (CR2, CR3 and CRW), while Nikon has two native RAW formats, NEF and NRW, with the latter being exclusive to Nikon’s compact Coolpix cameras.
RAW formats used by other major camera manufacturers include ORF (Olympus), PEF (Pentax), RW2 (Panasonic) and Sony’s ARW, SRF and SR2 formats. There are many, many others.
If your photo editing program doesn’t support your camera’s RAW file format, you should be able to convert the file into a format that it does support, such as the Adobe DNG (digital negative) format.
For example, if I want to process the RAW CR2 image files from my Canon EOS 77D in Lightroom or Adobe Camera RAW, I have to first convert the files into the Adobe DNG format using a free piece of software called Adobe DNG converter, which works with 500+ camera file formats.
If you are editing a photo and you want to be able to edit it again later without compromising the quality of the image, you should save the image as a TIFF (Tagged Image File Format) file, as this is a lossless file format that can be edited and saved over and over again without losing quality.
Contrast this with a JPEG image, which loses quality each and every time you edit and save it. You should only save your image as a JPEG if you are confident that it is the final edit.
Fully featured photo editors are pretty sophisticated pieces of software that can take years to fully master, but you can learn enough to start creating beautiful images in a relatively short space of time if you invest time and effort into educating yourself.
The best thing to do to accelerate your learning is to undertake a training course or two on an online learning platform like Udemy or Skillshare.
There are also gazillions of free tutorials on YouTube where you can watch free step-by-step tutorials describing the procedures that other photographers use to edit their travel photos in popular editing programs like Adobe Camera RAW, Photoshop, Lightroom and GIMP.
#14 - Don't be a photo sniper
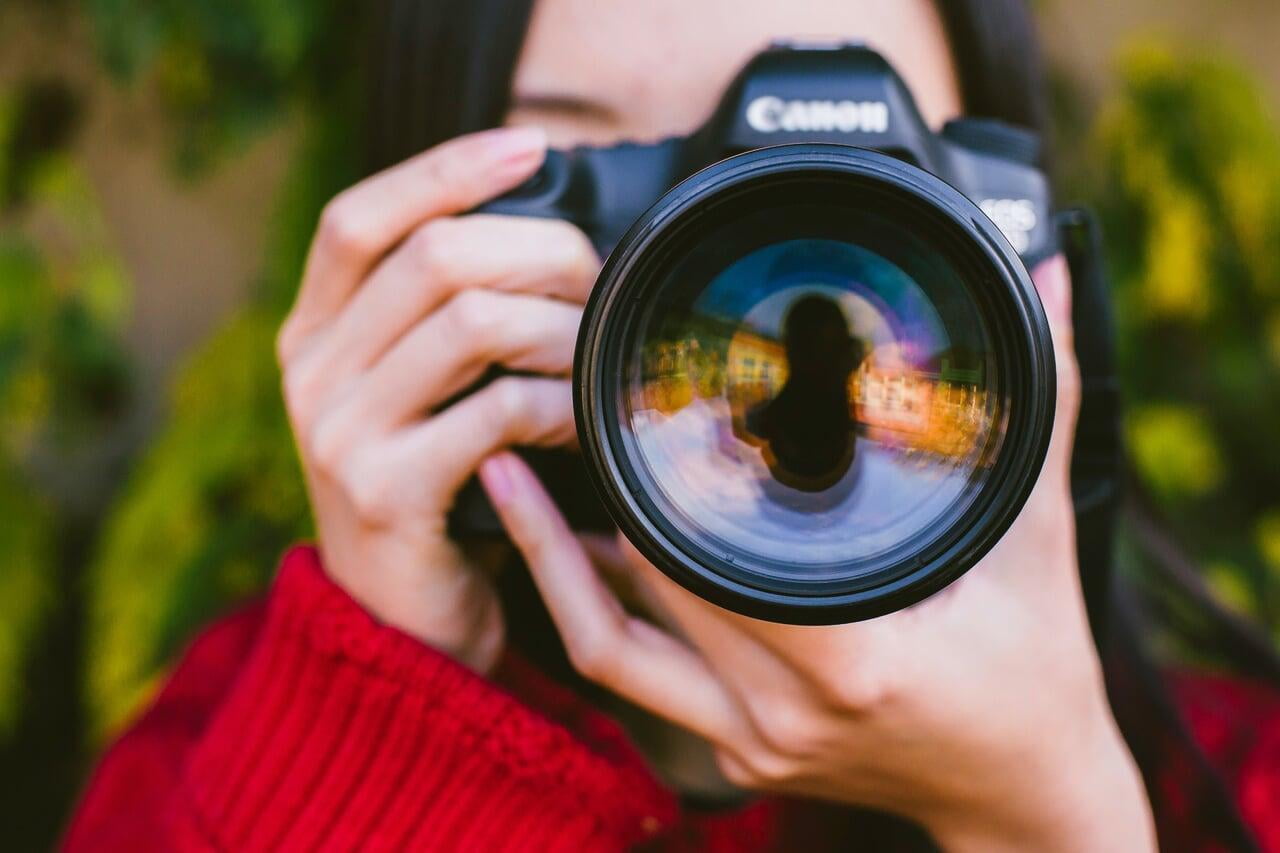
Back in the pre-digital days of film photography, it was typical for photographers to be very sparing with the number of photos they took.
They would try to ascertain the optimal shooting angle and the optimal arrangement of all the elements in the scene beforehand, get everything set up just right and then take a single photo.
This practice is often referred to as “photo sniping” because it resembles the way a sniper waits patiently until his rifle’s cross hairs are perfectly lined up with the target before firing off a single, lethal round.
Photo sniping made sense when you consider that shooting with single-use film was (and still is) rather expensive ($0.80 every time you press the shutter by some estimates), due to both the cost of the rolls of film themselves and the cost of developing and printing the images at the local photo lab.
But nowadays, in the age of digital cameras, the expenses and limitations of film photography are no longer a concern.
Photos do not have to be developed to view them and we have affordable, high-capacity, reusable memory cards that can hold hundreds or thousands of RAW photos and videos, so there is no longer such a pressing need to be economical with our ammunition.
We now have the luxury to take lots of experimental photos, playing around with different angles, perspectives and compositions of the same scene or subject. Even firing off a sequence of 30+ photos of a person that only vary negligibly from one image to the next can be justified in the age of digital photography.
But to really get the best results when taking multiple photos of a subject or scene, the key is that each photo is taken with intent or purpose. There should be a rationale behind each and every one of the photos you take.
Not being a photo sniper does not mean that you should take the polar opposite “spray and pray” approach, firing off shots randomly in every direction, as that strategy simply doesn’t work.
But photographing several variations of a scene or subject is a good thing when each of those photos were chosen purposefully, as the more purposeful photos you take, the greater the chances are that you’ll end up with something special.
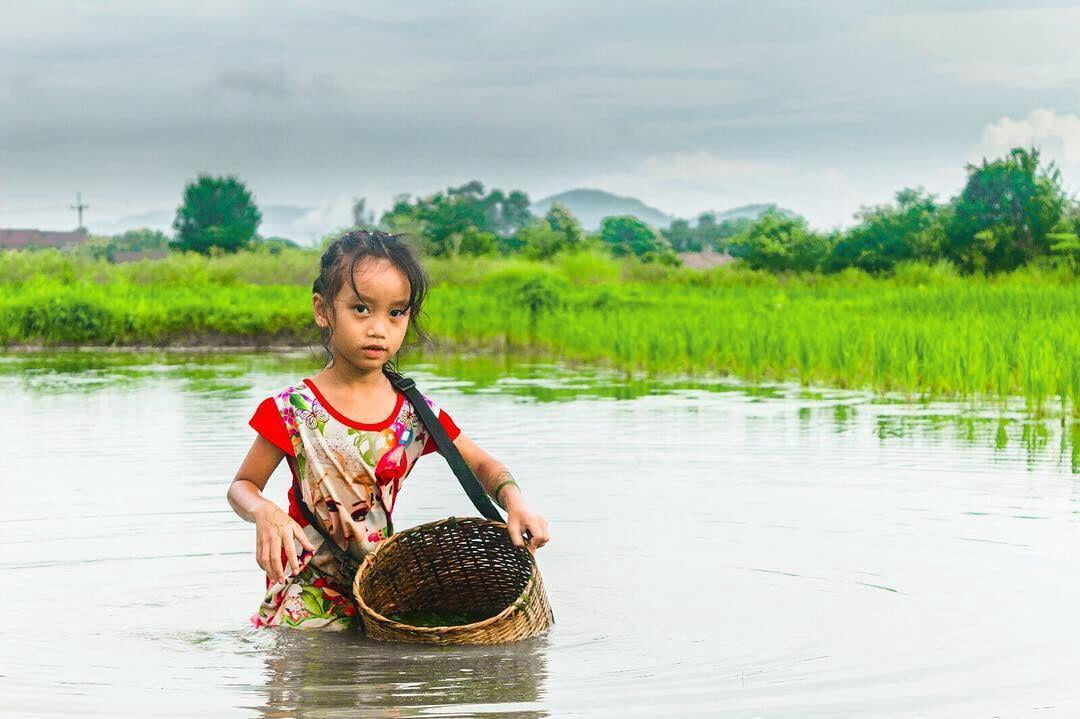
The truth is that there are just so many variables in photography that no matter how experienced you get, you can never be absolutely certain what the optimal angle or composition for a particular scene or subject will be until you try out a few different possibilities and compare the results.
Getting that one elusive shot that truly nails it will always be somewhat dependent on trial and error.
So I'm advocating that you aim for both quality and quantity rather than just one or the other.
The only downside with this approach is that you do have to later spend a bit of time sifting through a lot of similar looking images on your computer and deciding which versions you like best. However, I consider this a reasonable price to pay for getting better photographs.
#15 - Sometimes you need to think completely outside the box
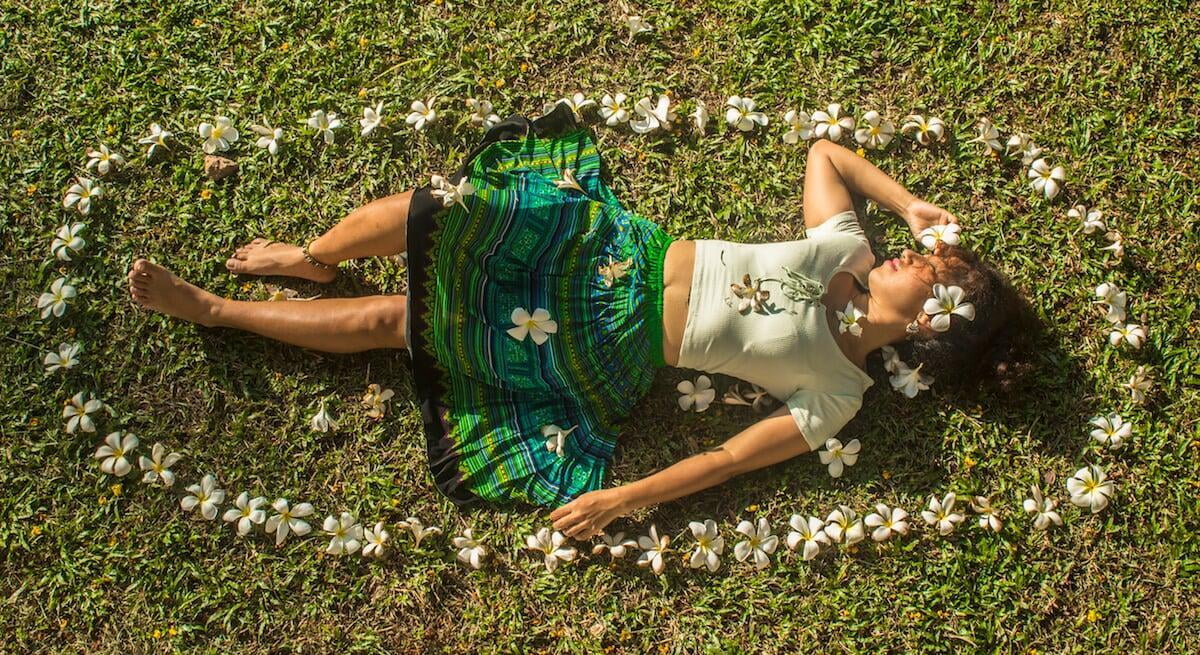
As we just discussed, you will start seeing better results in your photography when you stop being a photo sniper and get into the habit of photographing lots of variations of the same scene or subject, with intent and purpose behind each shot.
But sometimes the very best photos require a more radical, think-outside-the-box approach, where you try to come up with extremely creative ways of photographing a scene that other people would rarely think of.
In general, the less obvious a particular perspective or composition is, or the more imagination it requires on the part of the photographer, the more interesting the photograph will turn out to be, since it will look unusual and original to the viewer.
Although I don't encourage anyone to put their life at risk for a photo, sometimes you do need to be willing to stand, sit or lie down in fairly precarious positions to get a desirable perspective, such as when a composition requires you to peer over the edge of a cliff or waterfall or stand on top of a high wall with a big drop on one side.
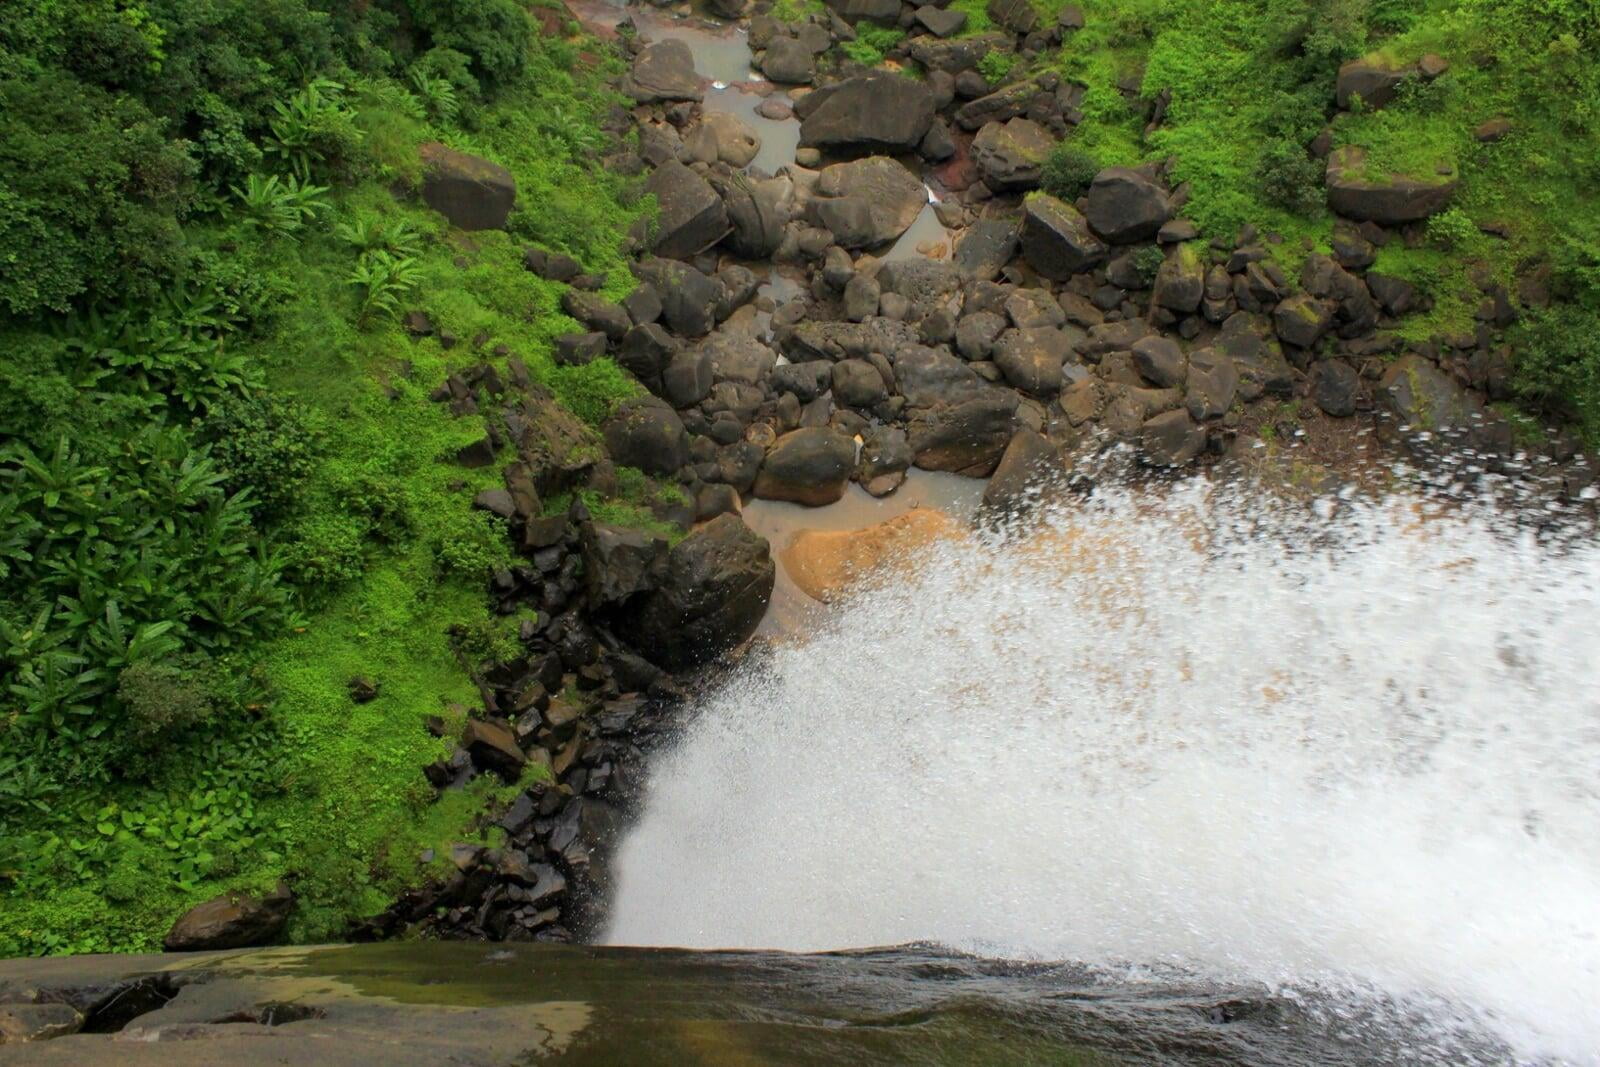
Other times, it’s just about getting that novel angle that nobody else has thought of before.
To find that creative angle you might have to lie down flat on the ground (who cares if people think you’re weird), climb a tree or monument, crawl inside a hole or even go to the rooftop or upper floors of a nearby building.
If there's nothing to climb up on and you want to get an overhead angle, you might have to hold your camera as high above your head as possible to get the shot you want. This will mean that you won't be able to see the LCD monitor, and will have to guess that you have the desired composition, unless your camera has an articulating monitor.
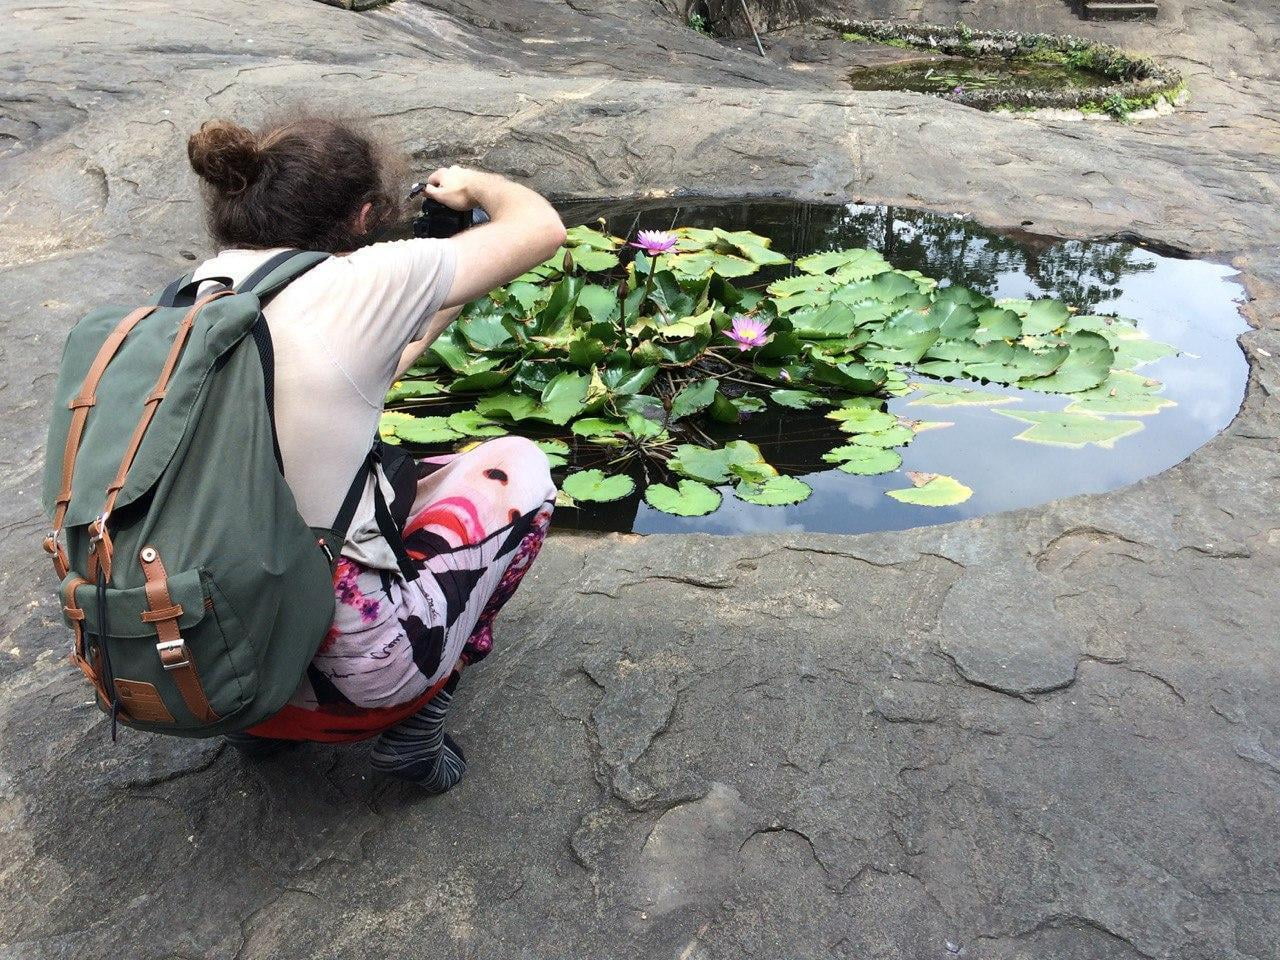
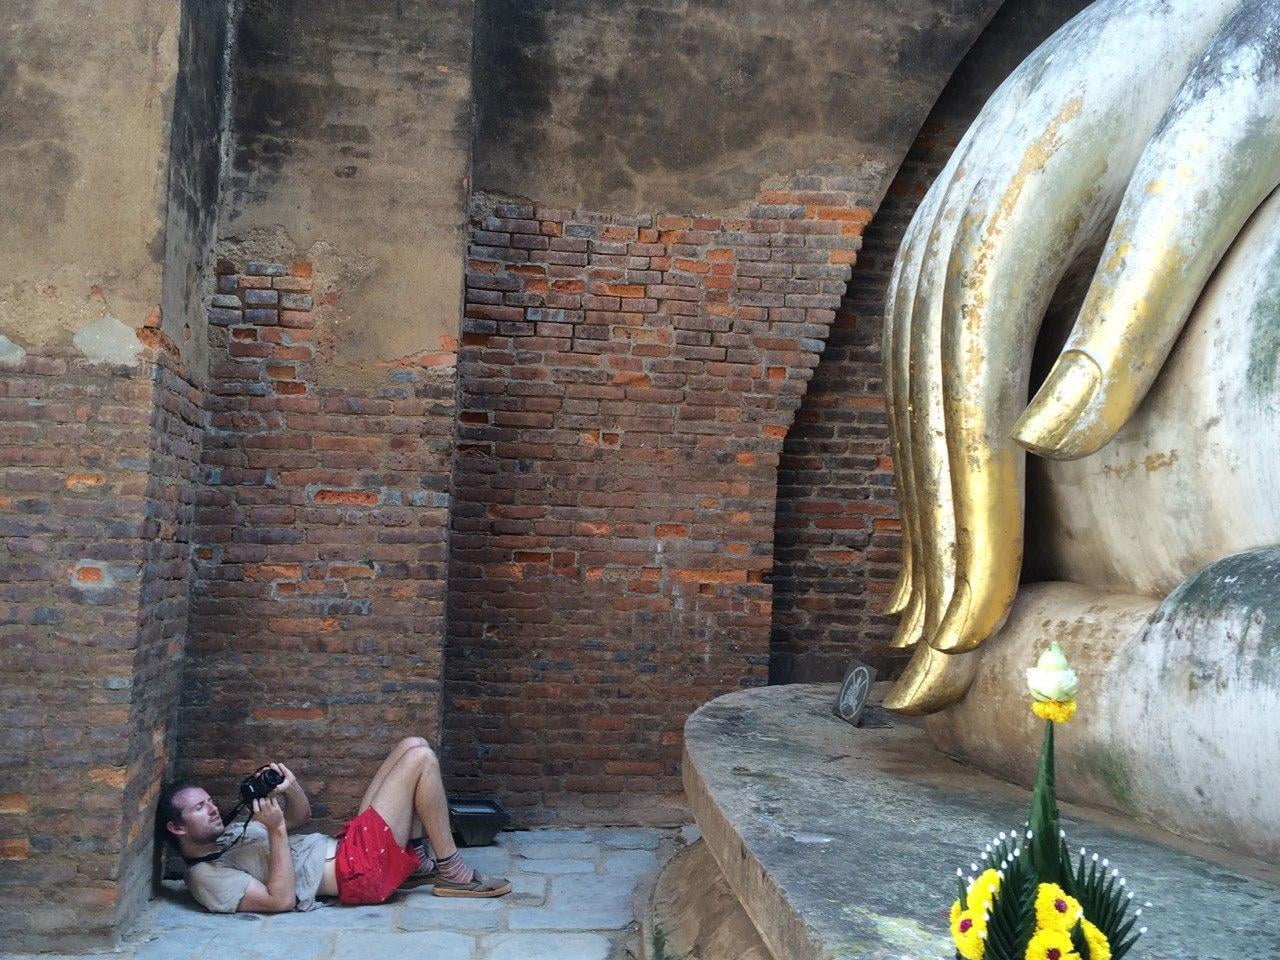
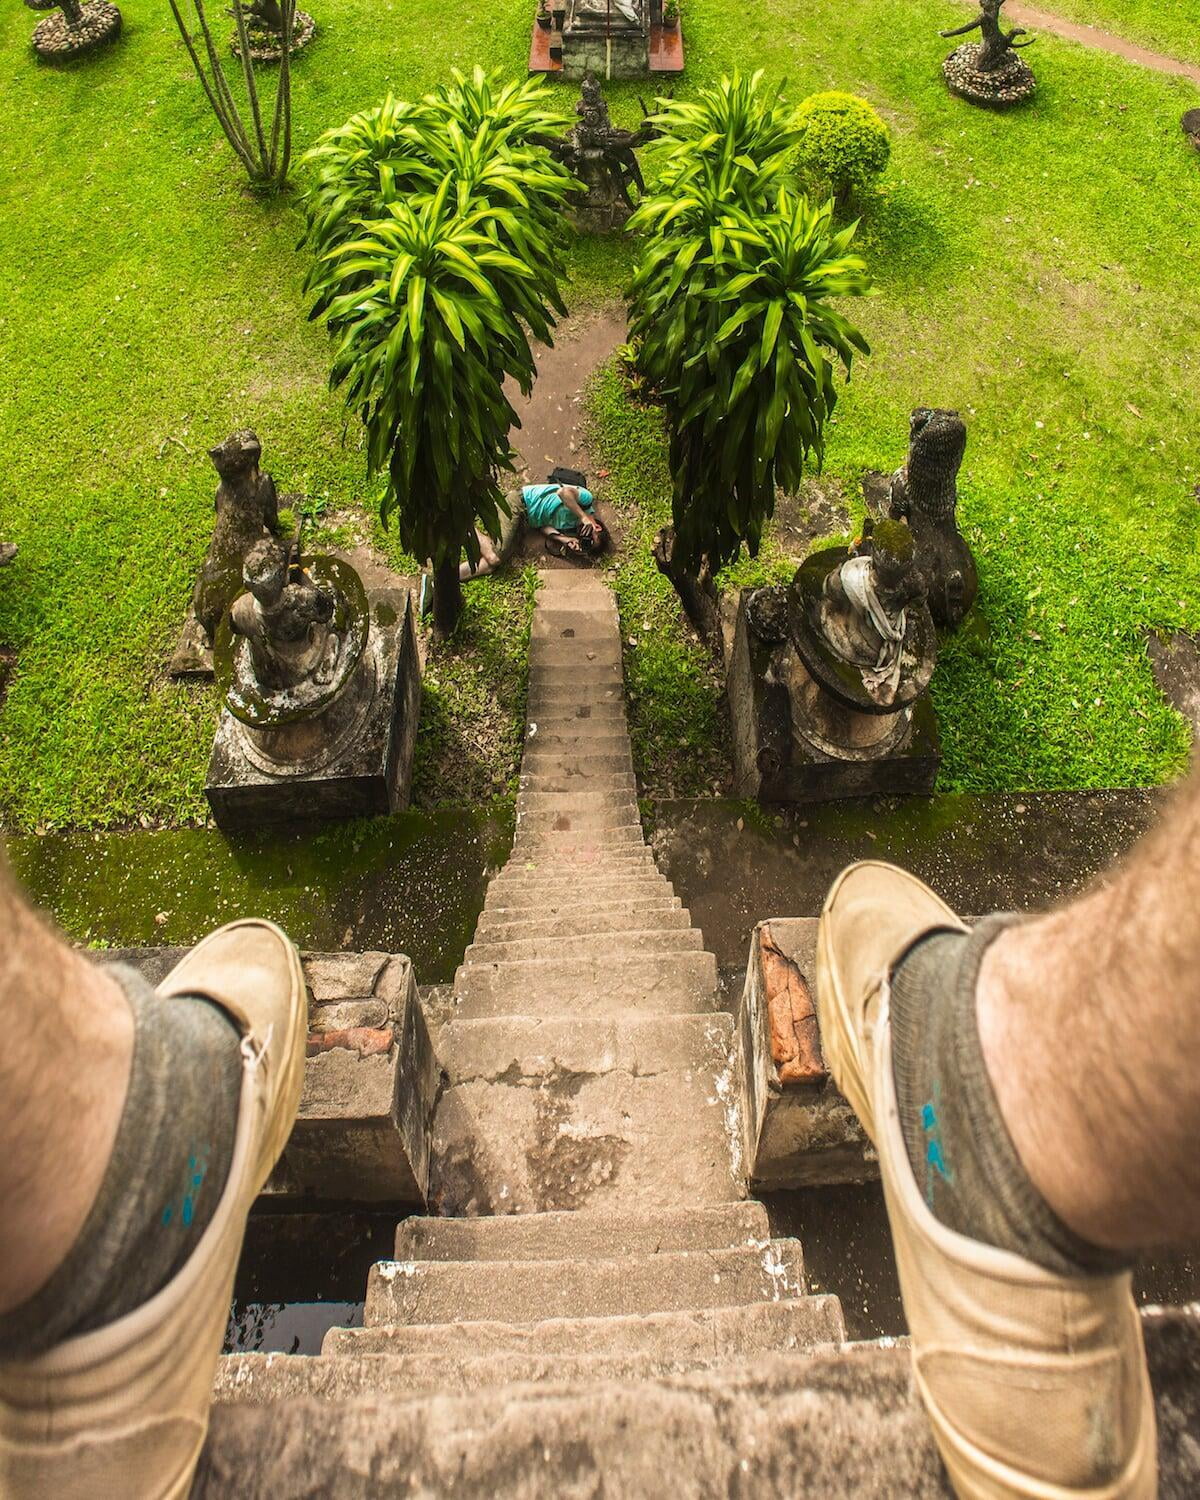
I know that it's not always easy to think creatively in real-world situations, especially when you might be under pressure to visit a lot of sights in a single day due to time constraints.
But this is why photography can’t and shouldn’t be rushed. Photography is an art, not a mechanical activity where you can just go through the motions and expect great results.
The secret to unleashing your creative juices is to pause, slow down and take full stock of the scene before even thinking about pressing that shutter button.
The more time you spend not shooting and fully evaluating the scene, the better your shots will be. Think deeply and try to come up with something really avant-garde.
If other tourists are around, look at how they’re photographing the scene. Chances are that they’re being reactive rather than proactive – they are just instinctively pressing their shutter button and are not in control of the situation.
After observing their reactive behaviour, you should then try to come up with something completely different. Copying others is the antithesis of thinking outside the box.
You may find however, that other tourists will begin trying to copy you and steal your ideas when they see you experimenting with original angles and compositions.
#16 - It's okay to do a little "gardening"

Although purists may baulk at this suggestion, I would contend that it’s often advantageous or necessary to re-arrange, reposition or remove certain elements from the scene you’re trying to photograph.
This way, you play a more active role in formulating the scene that you’re trying to capture and gain more control over how it appears, thereby bringing the final image closer to how you envision it in your mind.
For example, when taking gearing up to take a photo of a landscape, you might notice that there’s some unsightly pieces of litter or plastic lying on the grass in front of you that are spoiling the foreground of an otherwise-perfect image.
It would be perfectly acceptable to remove the ugly pieces of trash from such a scene, as leaving them in situ would seriously degrade the quality of your image.
Or, when photographing a beautiful delicate wildflower in a forest, you would probably want to brush off any small bits of debris or pine needles that might be clinging to the flower petals.
In this same situation you may also need to do some “gardening” to brush aside any encroaching vegetation that’s preventing you from getting an unobstructed shot of the flower.
Sometimes it’s also advisable to introduce new, external elements into a scene that weren’t naturally present.
In scenes where the foreground looks a bit bland or bare, you might want to procure an attractive-looking log or rock or other interesting object from a nearby location and plant it in your foreground.
For example, if you were at the beach photographing the sun setting over the ocean, you might find an interesting piece of driftwood on the shore that you could place in your image foreground to spruce it up. You could also deliberately make human footprints in the sand to make your photo more interesting.
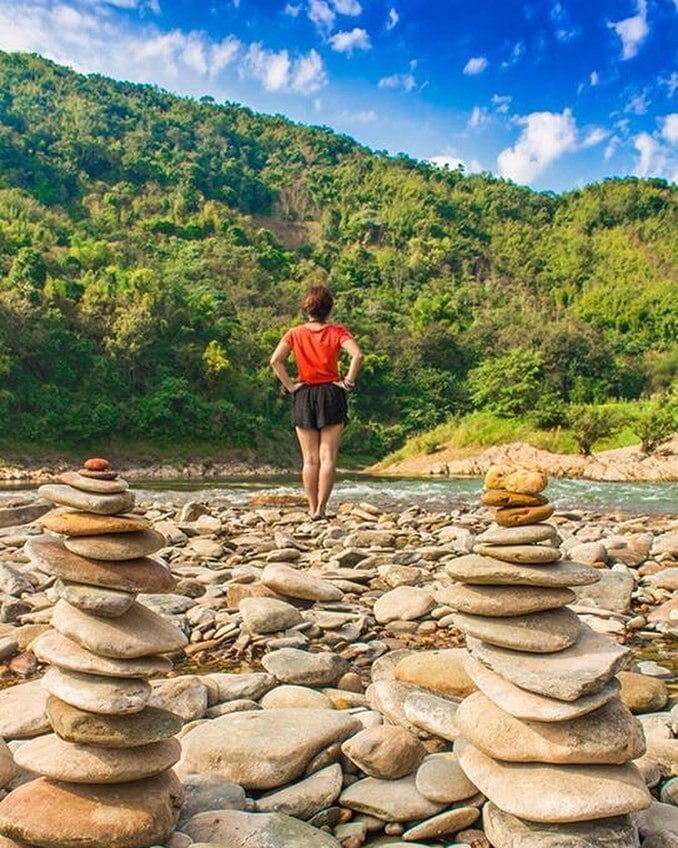
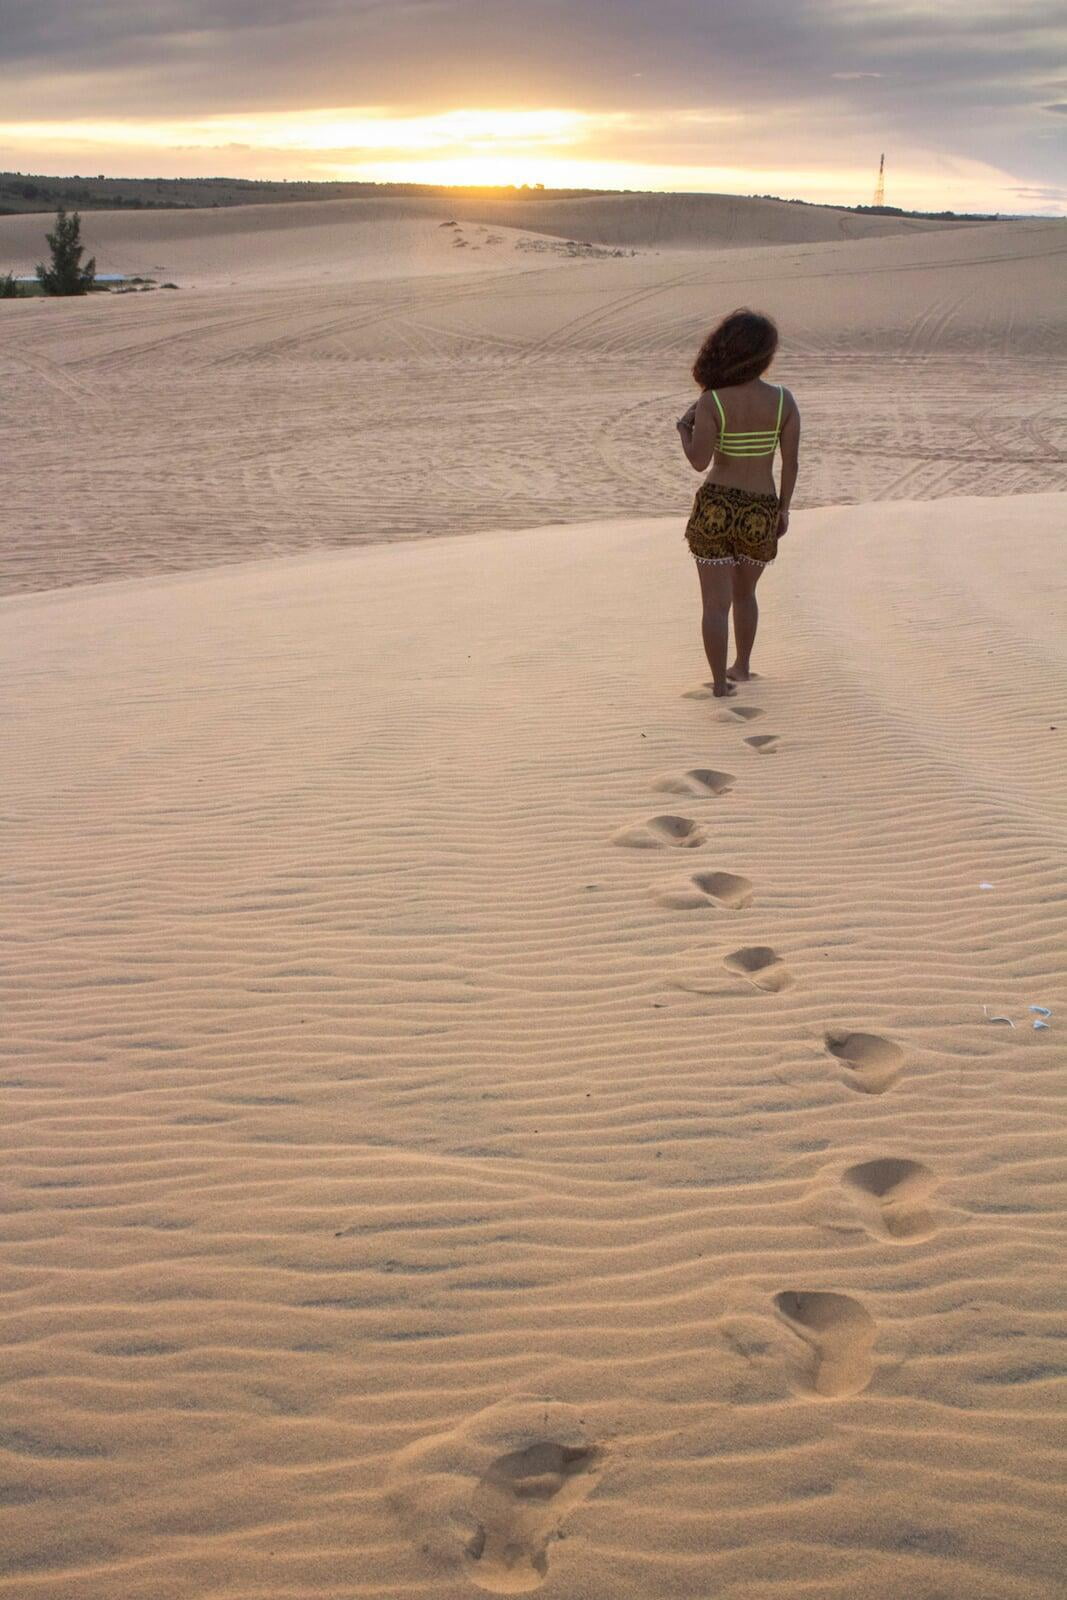
Another example of how you could add your own touch to a scene is by creating ripples in a still lake, pond or other water body. You could create these by throwing a stone into the water or by having your subject agitate the water with their hand.
A scene with a person standing in shallow water or swimming with ripples radiating outwards from their body looks a lot more interesting than one where the water is completely calm and still.
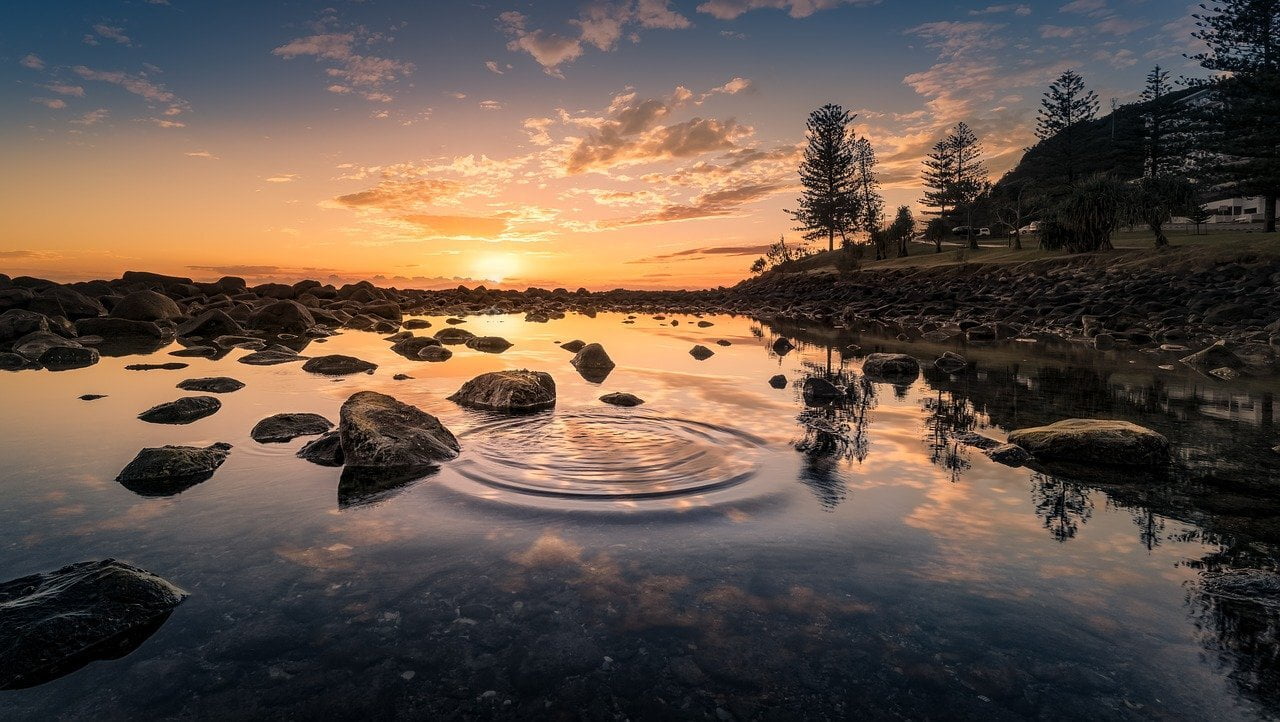
The point is that you don’t have to be a purist and photograph every scene exactly as you discovered it. You won’t be able to get the best possible results if you adopt that mindset.
Being willing to make a few small adjustments to a scene allows you to remove unsightly objects, reposition elements that look out of place and introduce new elements that can enhance the look and feel of the image.
#17 - Try shooting from moving vehicles to capture rarely photographed subjects
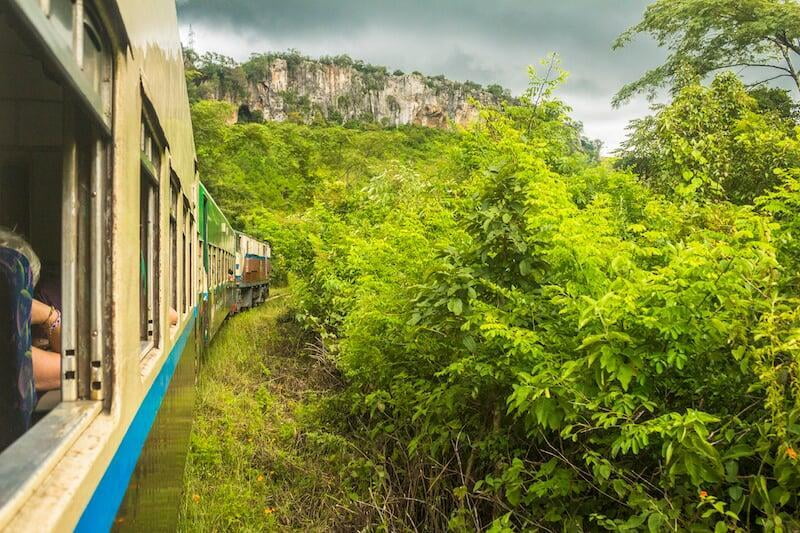
When travelling, it’s easy to get into the habit of only taking photos once you’re arrived at your destination. But a lot of the time we spend during travel is spent in moving vehicles like planes, buses, trains and taxis.
Sometimes the scenery floating by can be really picturesque, and interesting events may also be unfolding right by the roadside, next to the train tracks or outside the airplane window at certain points during the journey.
Of course, when you’re travelling in your own vehicle, you can normally pull over whenever you come upon an interesting roadside scene. Even while hitchhiking we have gotten opportunities to take photos of roadside waterfalls, as the drivers themselves often wanted to stop to take selfies.
But if you’re riding a bus or train, or hitchhiking, you won’t usually have that luxury (although a bus driver in Sri Lanka did once briefly stop the bus for us to take pictures of an incredible waterfall that was viewable from the road).
You might have a habit of putting the camera away whenever you’re riding a bus or train, because most of the time you’ve observed that the scenery and subjects are racing by too quickly for you to compose a good shot, let alone capture a sharp image that isn’t completely blurred.
But if you increase your shutter speed to 1/500 or higher, you will find that you can actually get very sharp landscape shots from the window of a moving vehicle. You may also have to increase the ISO along with the shutter speed to avoid underexposing the image.
There is potential here for some very unique photo opportunities that most people will ignore.
Of course, there still is the difficulty of composing images from moving vehicles and that is something that you can only improve upon with practice.
#18 - Look for interesting ways to frame your subject
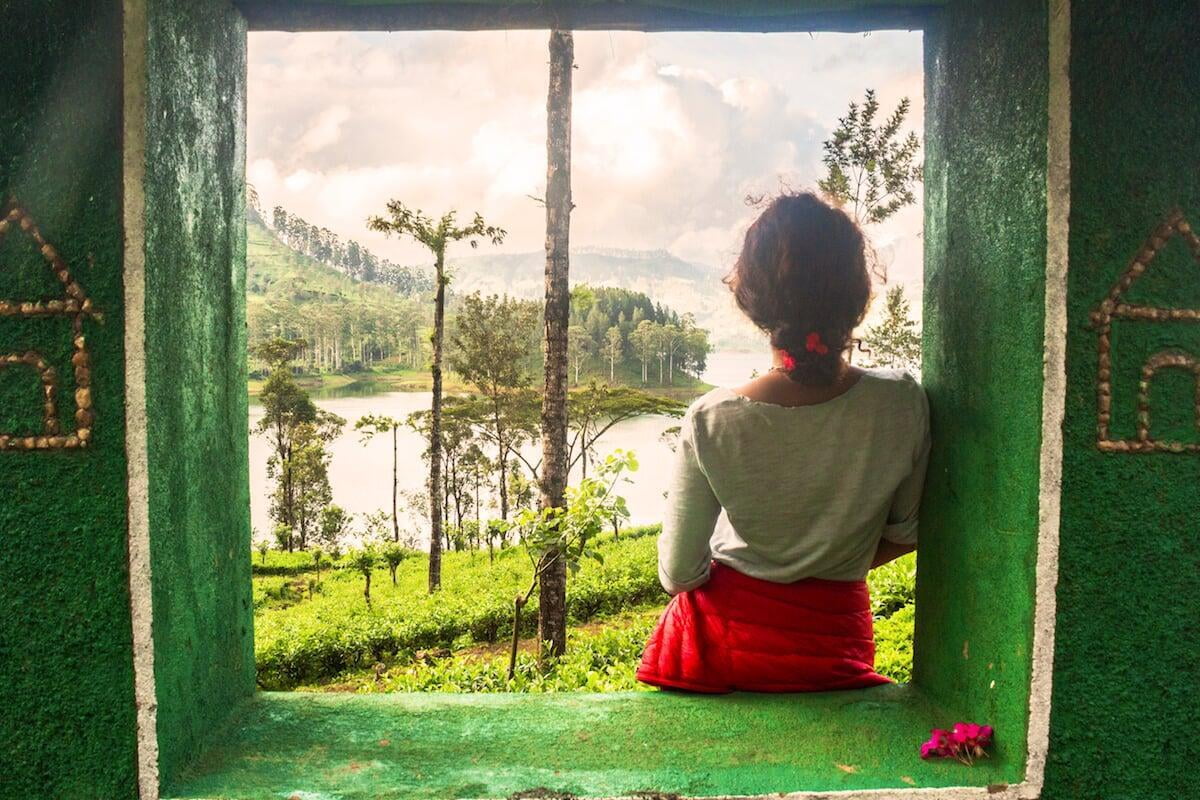
Framing a subject means creating some kind of a border or frame around it using elements that occur in the environment.
A frame helps to bring the viewer’s attention to the main subject of the photo and cuts out distractions around the edges.
Many scenes present interesting natural ways to frame your subject, whether that subject is a person, an animal, a waterfall, a monument, a bridge, a building or what have you.
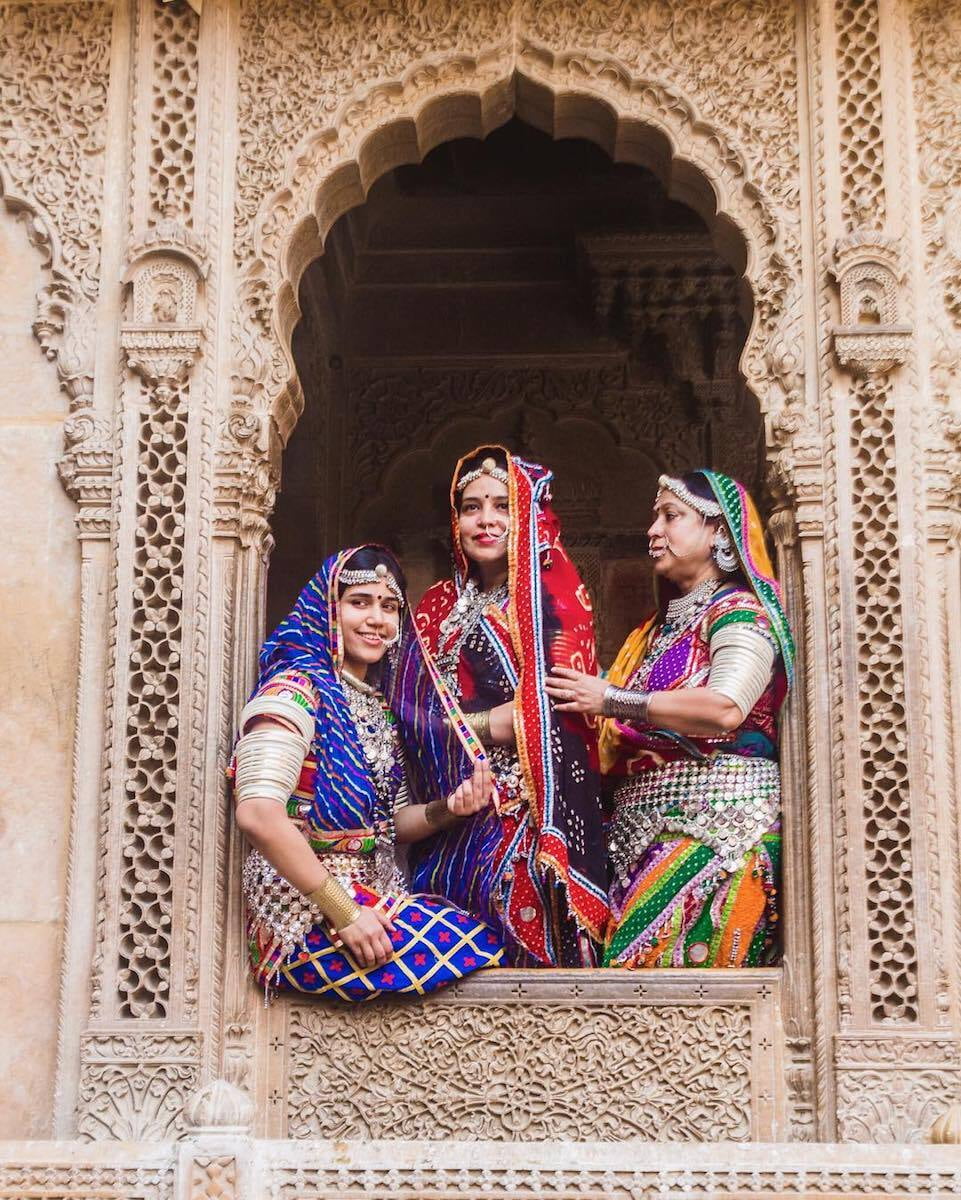
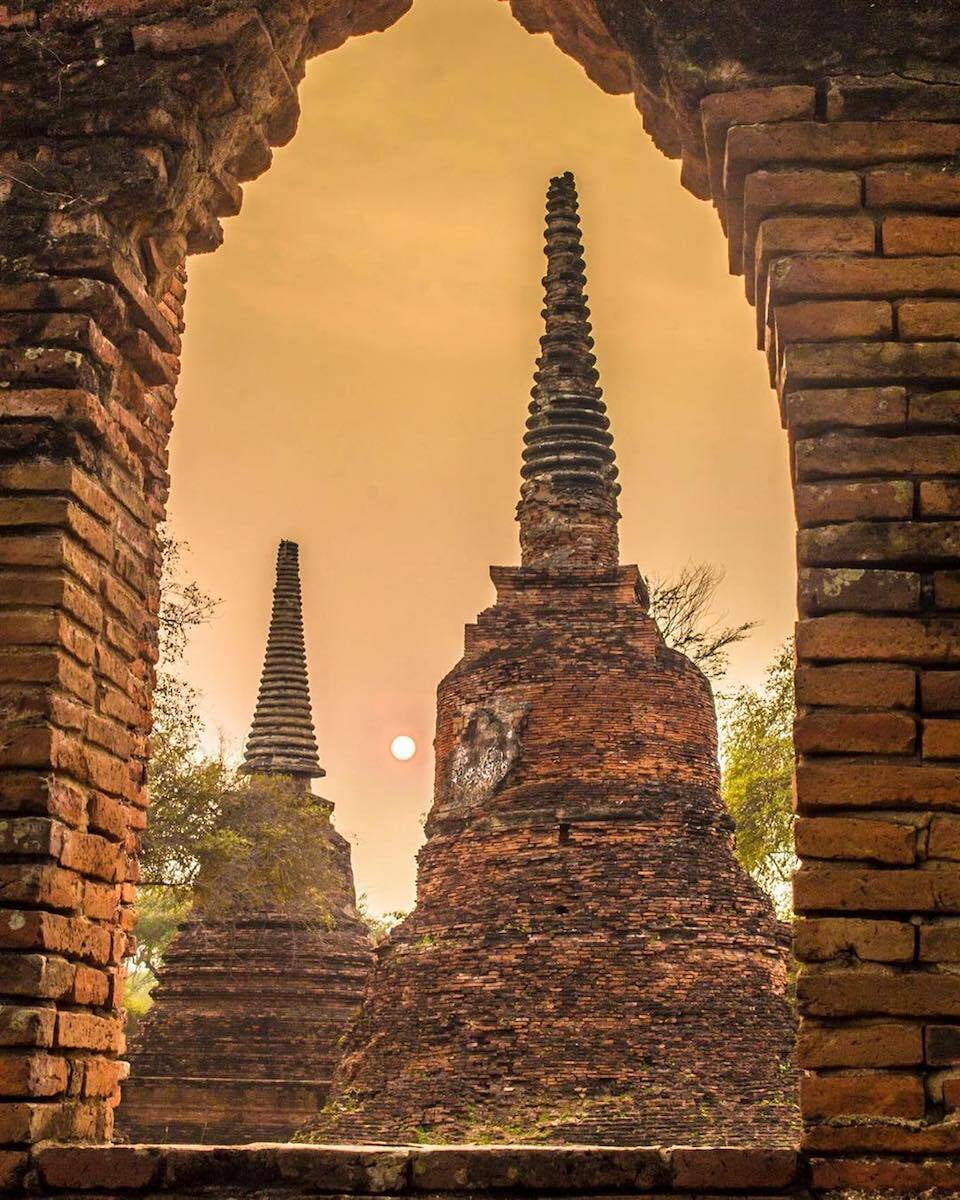
The mindset to adopt here is to look for some kind of an aperture, gap or opening through which your subject can be seen and then shoot through that, making sure that you include some of the material at the edges of the opening to act as your frame.
For example, you might discover a natural opening in the vegetation through which you have a perfect, unobstructed view of a waterfall.
The green vegetation around the opening creates a natural frame for your subject (the waterfall) and makes for a more interesting image than just standing out in the open and taking a normal photo without anything to frame the waterfall.
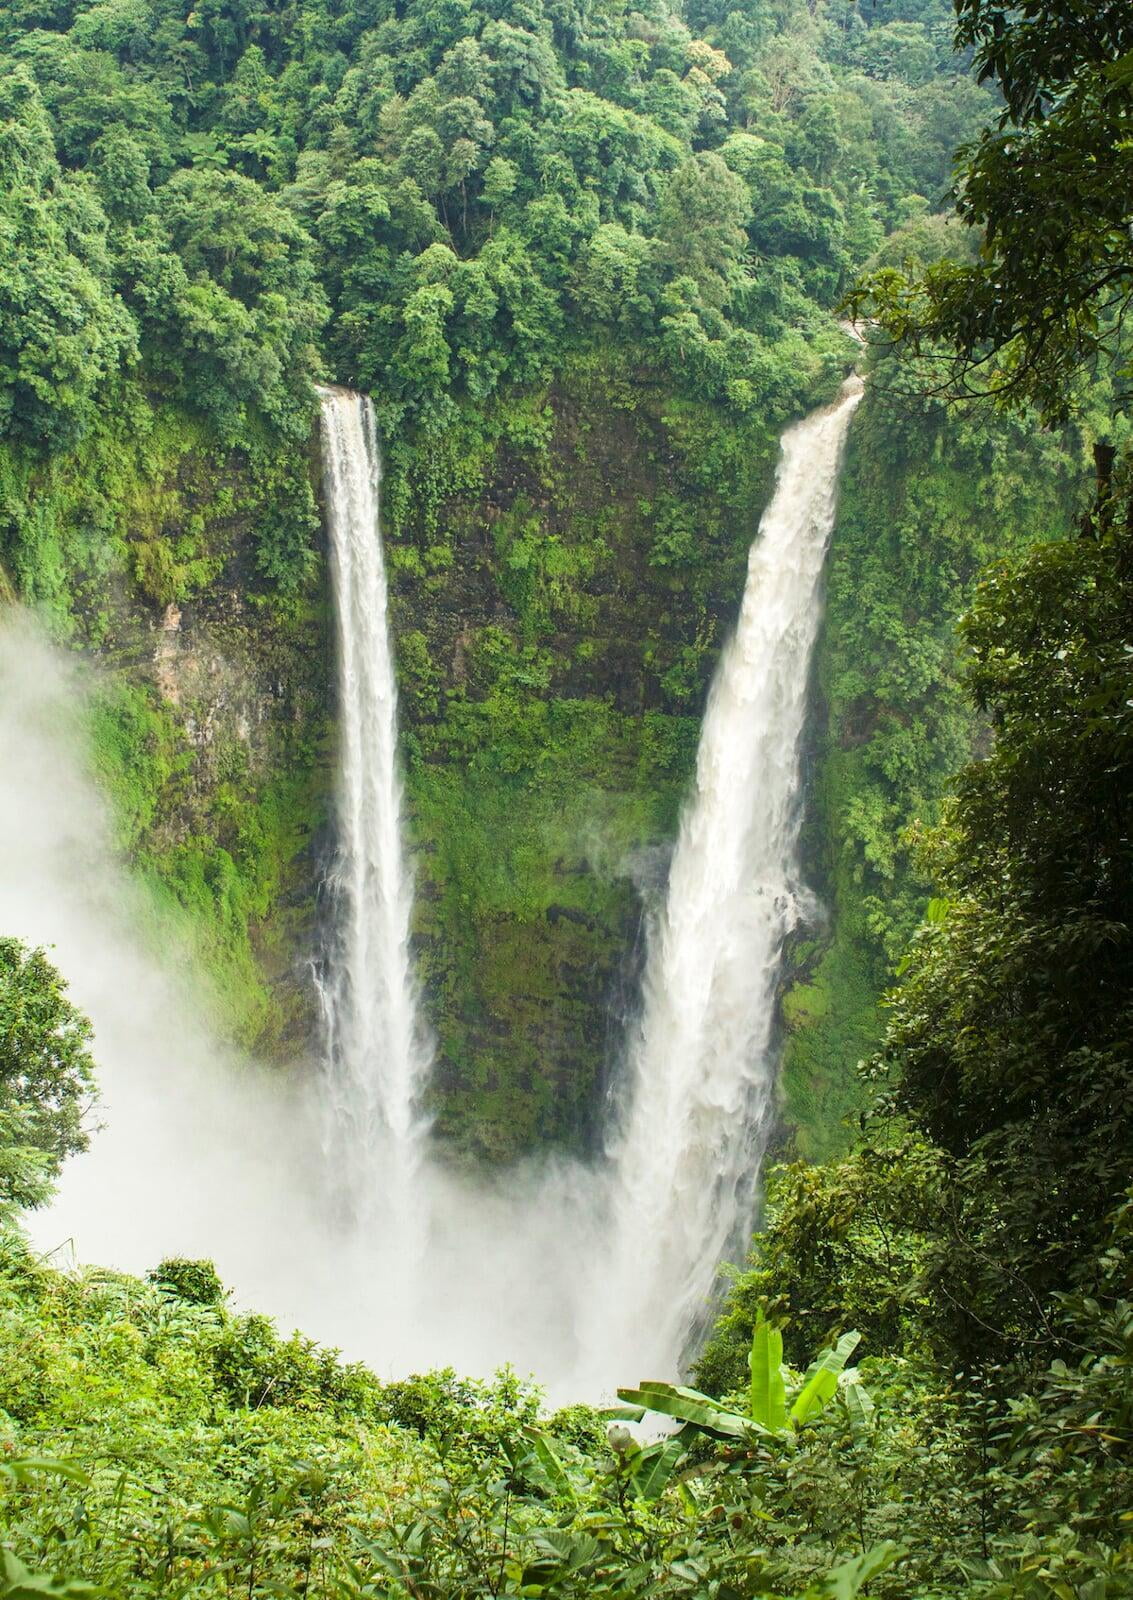
Trees that are closely planted in rows lining a road or path can also sometimes create a tunnel effect from their trunks and interlinking canopies, and this can tunnel can act as a natural frame for your subject.
Another interesting way to frame a photo is with flowering shrubs and trees. You can create an attractive frame using the leaves and/or the colourful blossoms and position your subject in the open space in the middle of the frame you've created.
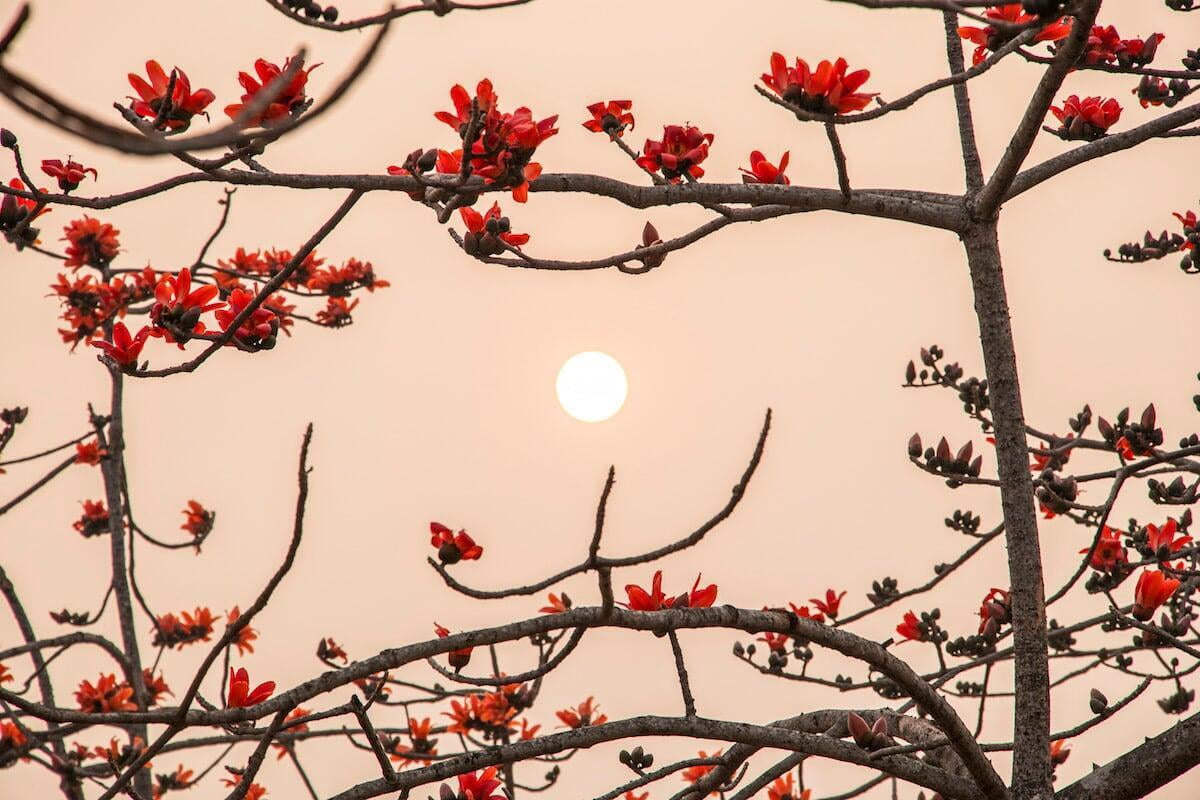
Decorative arches are very commonly used to frame subjects in travel photographs, since you’ll find them at so many interesting historical monuments and places of worship including churches, Hindu temples, Buddhist pagodas, mosques and synagogues.
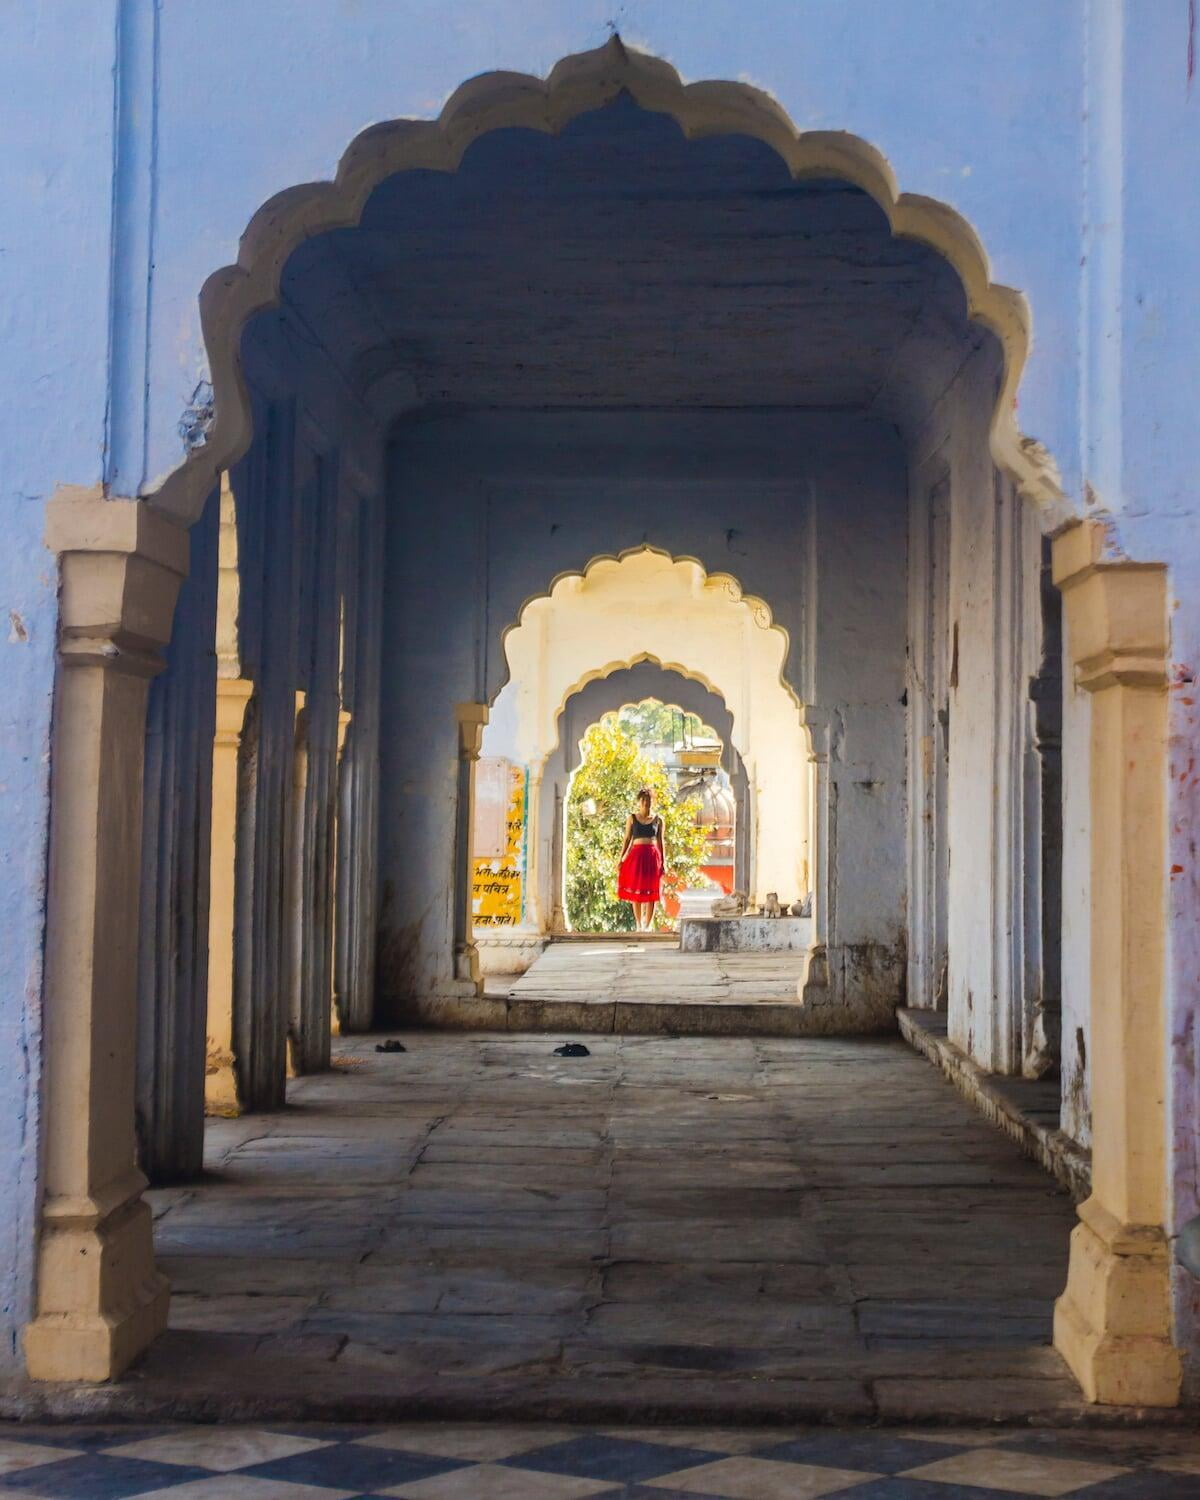
Window frames and doorways can also be used to frame photos with great effect, as can gates, fences, railings, parapets and other architectural elements. Again, the viewer should feel as if they’re peering through an opening and observing the subject through it.
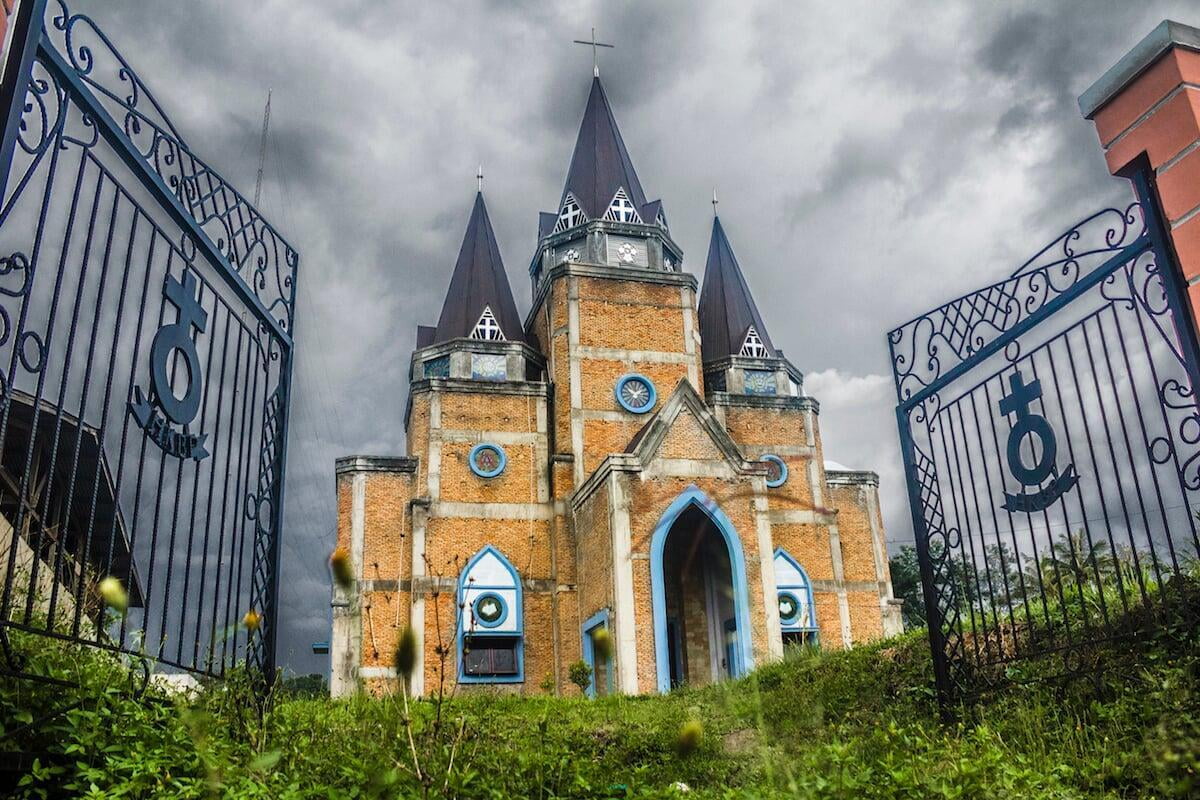
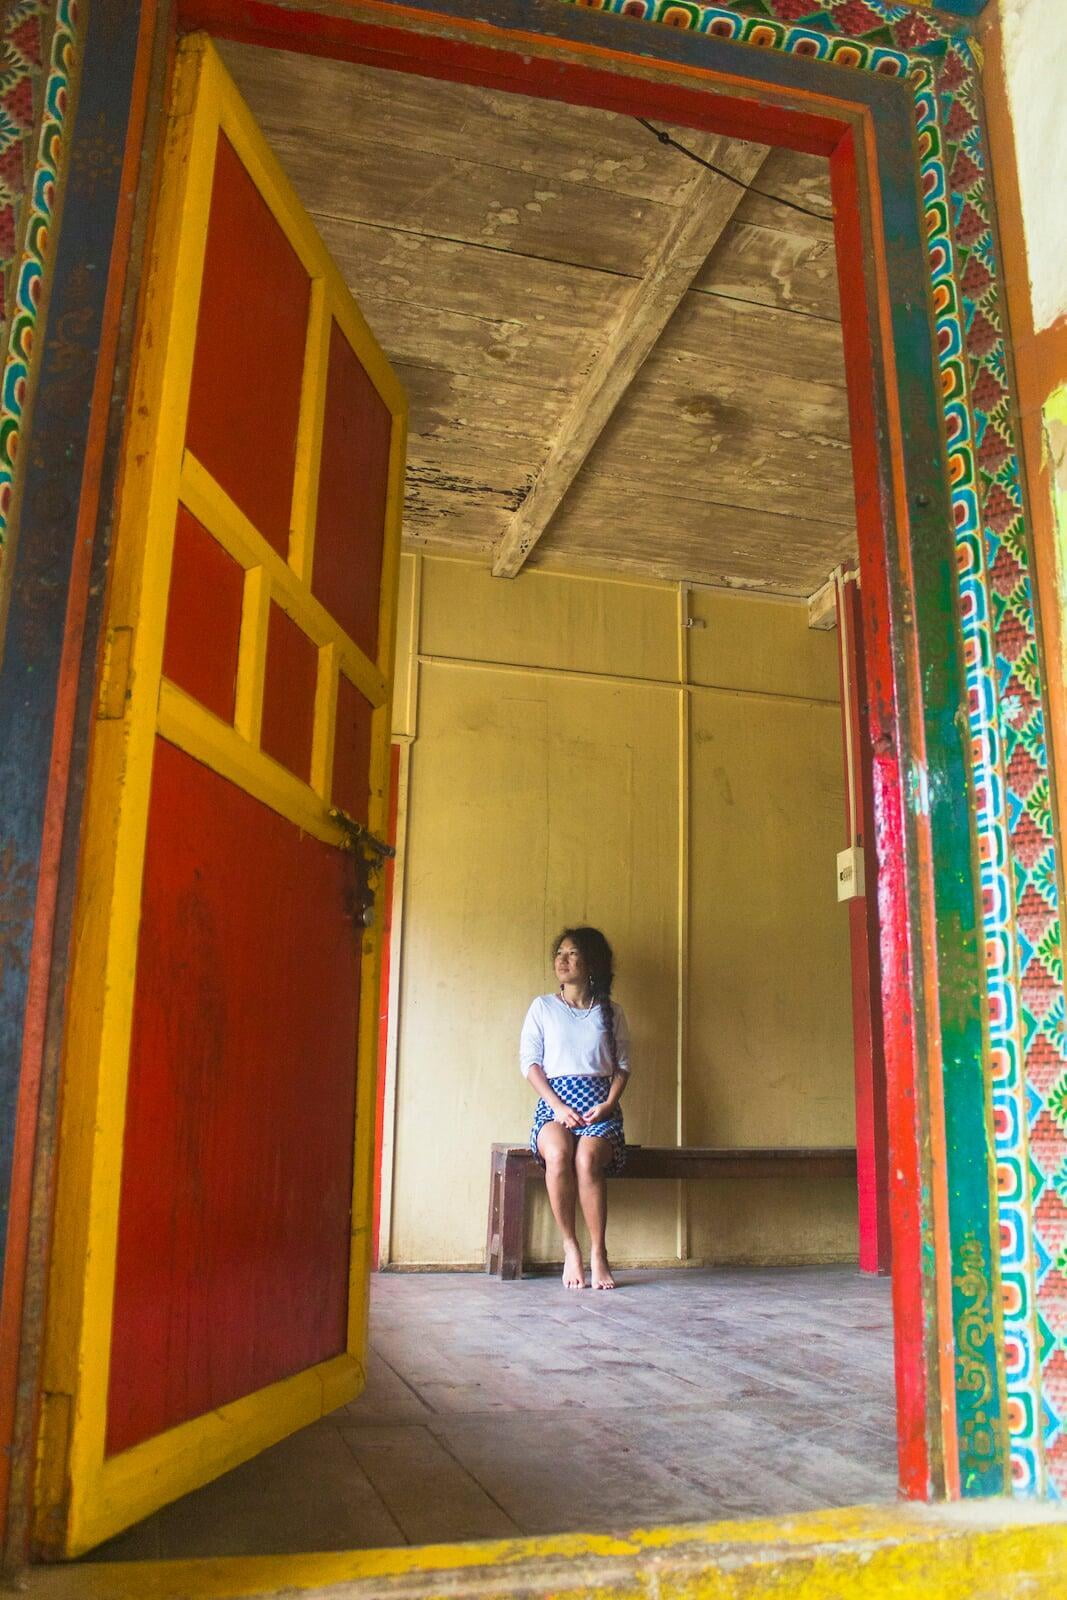
The perimeter walls of old churches, mosques, temples, forts and ancient cities sometimes have holes in them that you can shoot through as well. Some of these holes may be the result of damage, while others are there for practical purposes or merely for decoration.
These holes can have all kinds of interesting shapes; crosses, circles, squares, stars and so on. I was recently shooting an old mosque in Bangladesh and I noticed that there were several star-shaped openings in the outer wall that delimited the site of the mosque.
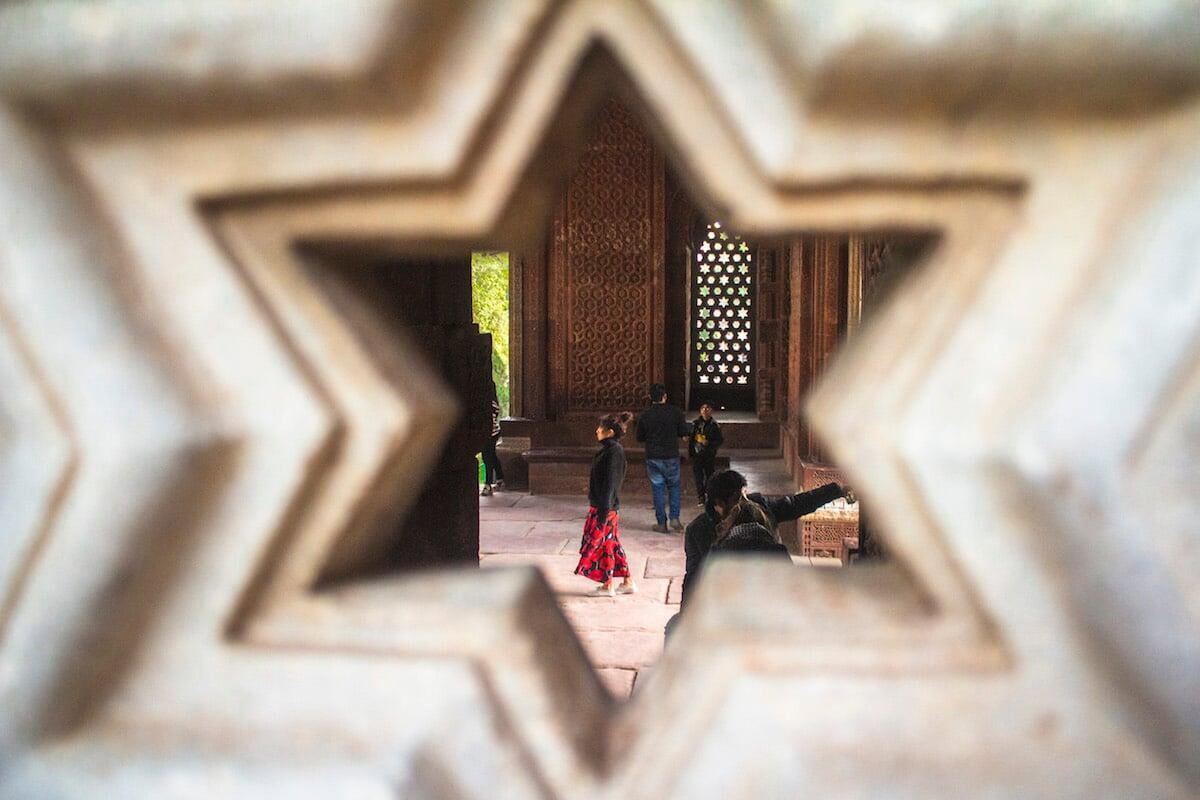
You may have also seen those really creative photos of a deer or some other subject shot through a curled up dead leaf lying on the forest floor.
You can also use the interplay of shadow and light to frame photos, where the shadowed area forms the frame of the photo and the subject is placed in the light, for example at the end of a dark tunnel.
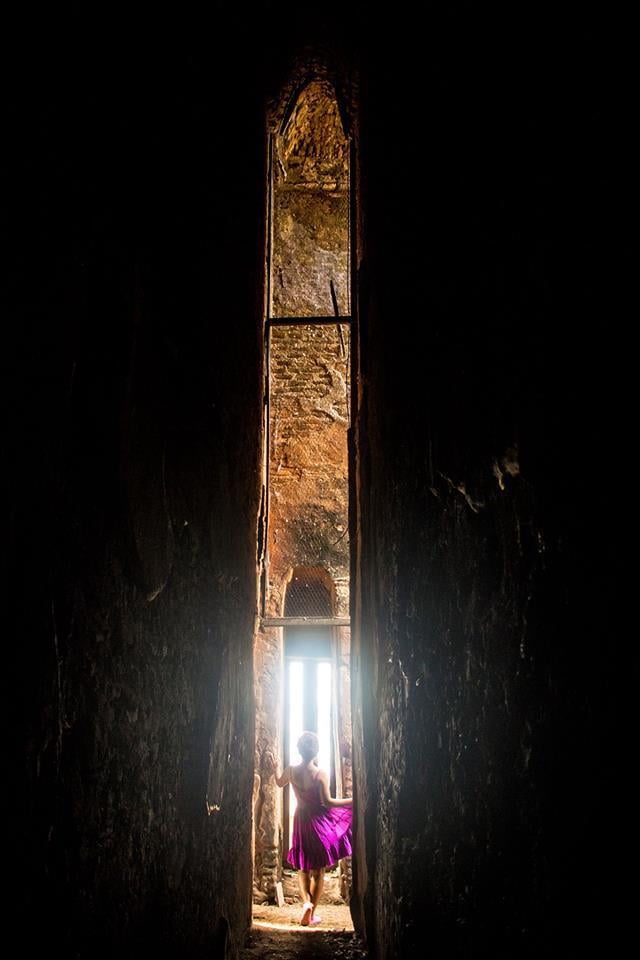
We’ve just highlighted a few examples here, but there are so many more possibilities for creatively framing your subject out there.
Admittedly, there isn’t always such an opportunity to creatively frame your subject, but once you get into the mindset of always seeking out ways to do so, you’ll be more likely to recognize an opportunity when one arises.
#19 - Use the power of storytelling to make your images more compelling

There are a lot of photographers out there that don’t create the most dreamy or technically sound images, like the ones you might see on postcards or might set as your desktop wallpaper.
Yet somehow, these photographers still manage to create incredibly engaging images that stir the viewer’s imagination, often to a much greater extent than strikingly beautiful images ever could.
This just goes to show you that aesthetic beauty is not everything in photography and isn’t even the most important thing when it comes to creating moving, captivating photos.
We witness the same phenomenon in movies and video games, where some of the older titles that were produced with lacklustre cinematography or primitive graphics, no special effects or CGI animation and other technical shortcomings can still hold the audiences of today enthralled, despite people being habituated to the technical prowess of today’s titles.
So, what is it that these photographers, filmmakers and video game producers are doing that enables them to capture people’s imagination without creating images of much beauty or technical mastery?
In short, they are using the power of storytelling.
Storytelling is an incredibly powerful medium of communication in human societies, as it’s literally programmed into our DNA.
Our ancient ancestors living in harmony with nature understood their world through stories rather than a body of scientific knowledge, and they passed down important knowledge through the generations through the medium of oral storytelling rather than the written word.
An image that uses the power of storytelling will be thought-provoking, sparking the imagination and causing the viewer to think more deeply about the subject matter in the photo. This causes the photo to hold the viewer’s attention for longer and gives it more impact.
The image that tells a story becomes more than just candy for the eyes, as it also conveys meaning, which may be obvious or subtle, but which always affords an image more power than one that’s meaningless.
Of course, a photograph can’t literally tell a story from beginning to end in the same way that a person or piece of writing or piece of music or movie can.
A story is a sequence of events or moments occurring over a span of time, but photos are limited to capturing a single moment of a story, whether it’s a story about a person’s life, an animal’s life, a country, the planet or whatever.
What we really mean when we say an image tells a story, is that it conveys a message and perhaps allows us to imagine the sequence of events that unfolded around it.
Now, if you really want to show a sequence of events through photography and tell a story in the literal sense, you can also do that quite effectively by taking a sequence of photos of a given scene over a period of time and then publishing them together as an album, or perhaps as a photo blog.
But even a single photo can tell a story in terms of its ability to convey a message and spark the viewer’s imagination.
For example, a photo of an adult bird delivering a beakful of worms to its hungry chicks in the nest prompts us to imagine the backstory that culminated in that special moment.
We might concoct a story in our minds about how the mother heroically ventured out into a world fraught with danger that morning to hunt for worms, succeeding in luring a few of the less wily younger worms out of their holes in the soil to be seized in the bird’s beak and brought back to the nest, all because of a mother's love for her progeny and her instinct to feed them.
As you can see from this example, an image does not need a human subject for it to have storytelling power, although many images that tell a story do have a human being or several human beings in them. After all, we are biased towards the stories of our own species.
In an image that tells a story, the person or people in the image might be going somewhere, actively doing something, interacting with something, observing something, or expressing emotion.
The presence of action is important for an image to be able to tell a story, as stories always involve something that is happening, changing.
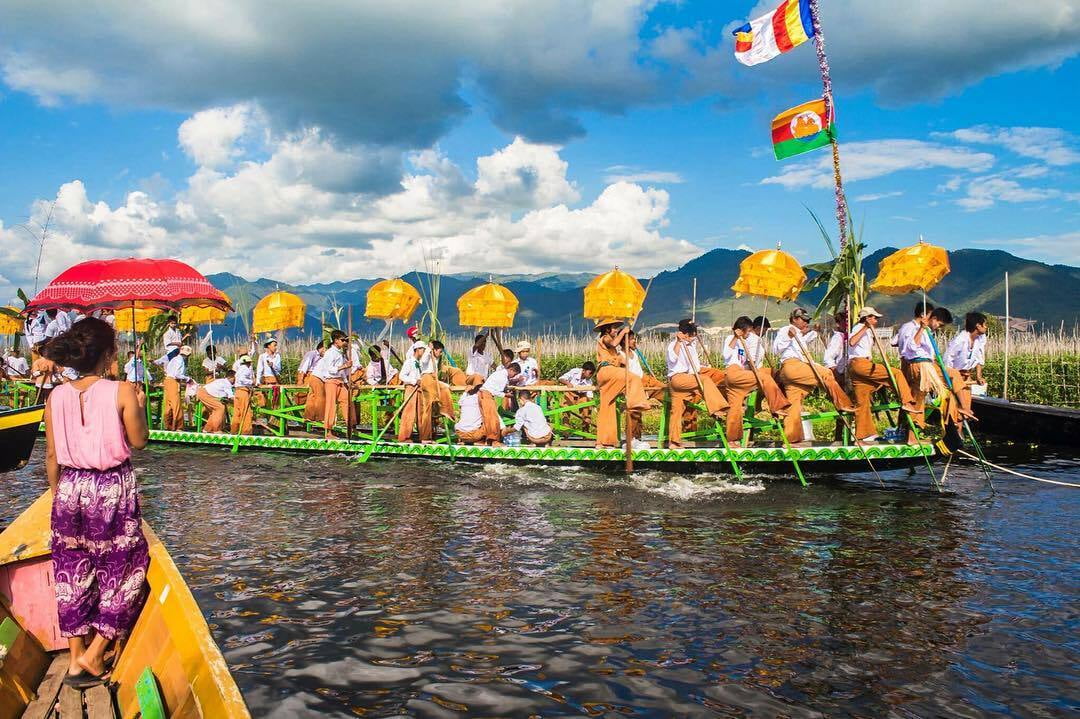
Giving the image context or a sense of a place also helps tremendously to give it storytelling power. A story is easier to convey if the viewer has a sense of the surrounding environment.
For example, a photo of a single boat taken out of context does not give the viewer much room for imagination.
But if we zoom out a bit and show that same boat sitting next to five other boats filled with fresh fish, sitting on the shore of a lake beside a group of happy looking men, it allows us to imagine the story of the fishermen going out on the lake that morning and bringing home the catch of the day.
Storytelling through photography is about capturing a scene in such a way that the viewer is able to imagine how the events of the scene would have played out, even though he wasn’t there to witness the entire sequence of events like you the photographer were.
Start approaching more of your images with this intent to convey meaning and story, and I guarantee that your travel photos will make a leap to the next level.
#20 - You miss all the shots you don't take
I’ve lost count of the number of photo opportunities I’ve missed because I wasn’t expecting anything photo-worthy to crop up at that particular time, and therefore didn’t have my camera at the ready to take the shot.
Great photos aren’t always planned and opportunities don’t only arise when and where you might expect them to.
Sometimes it isn’t until the very end of a day of shooting, when you’ve already put your camera back in its case, that the very best photo opportunity of the day arises.
You frantically reach into your bag and pull out your camera at warp speed, but by the time you’re ready to press the shutter button it’s already too late and the special moment has passed.
You admonish yourself for thinking that you could always predict when a great photo opportunity would arise and you vow to always keep your camera locked and loaded and ready for action henceforth.
Yes, it definitely helps to always have your camera around your neck and ready to shoot, even during those lulls in the trip when you don’t expect to get too many chances to take photos.
Another thing that can help you to capitalize on more of the gifts that the universe throws your way is if you carry two cameras.
You see, if you only have one camera, you’ll often blow photo opportunities because of the time you inevitably waste in switching to the lens that’s required for that particular photo.
That’s why it can be very advantageous to have one camera that’s permanently fitted with a general-purpose lens and another that’s always fitted with a zoom lens for wildlife photography and long-range shots.
I was recently on a jeep safari in an Indian wildlife sanctuary and some of the animals and birds that we encountered in the park were at close range, while others were far off in the distance and photographing them required a zoom lens.
Whenever we spotted a herd of animals or flock of birds from the vehicle, the driver would usually stop for a few moments to let us snap a few photos and take a closer look with our binoculars.
But there wasn’t enough time to be changing lenses if you didn’t have the appropriate one, so it was a good thing that I brought along two cameras for that safari – one with a general-purpose lens and another with a longer zoom lens.
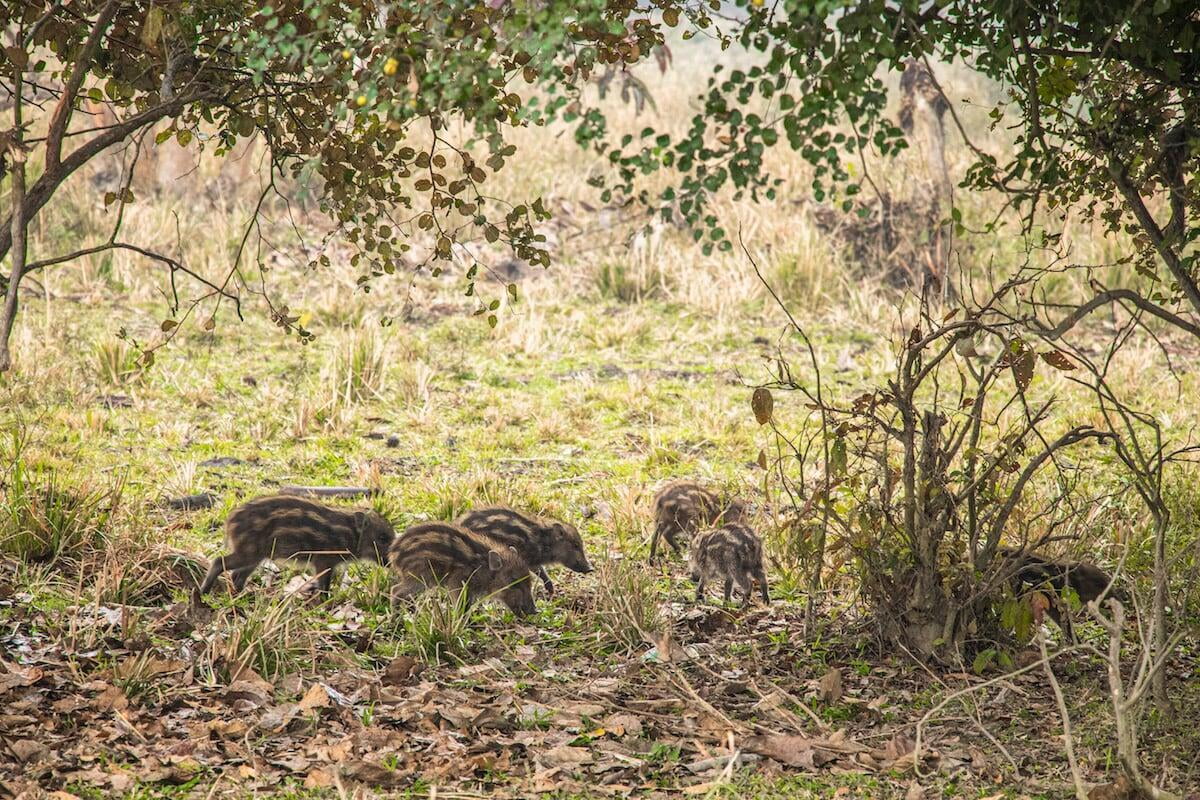
The last thing I would say for now on this subject is to choose your camera shooting mode carefully.
Shooting in manual mode gives you more control but it is usually a lot slower than shooting in fully automatic or semi-automatic camera modes.
If you are in a fast-paced situation where time is critical for each shot and having to manually adjust the settings each time will cost you photos, it’s advisable to choose a more automatic camera mode where you only need to aim and press the shutter button to get the shot.
#21 - Carry plenty of spare memories cards and batteries
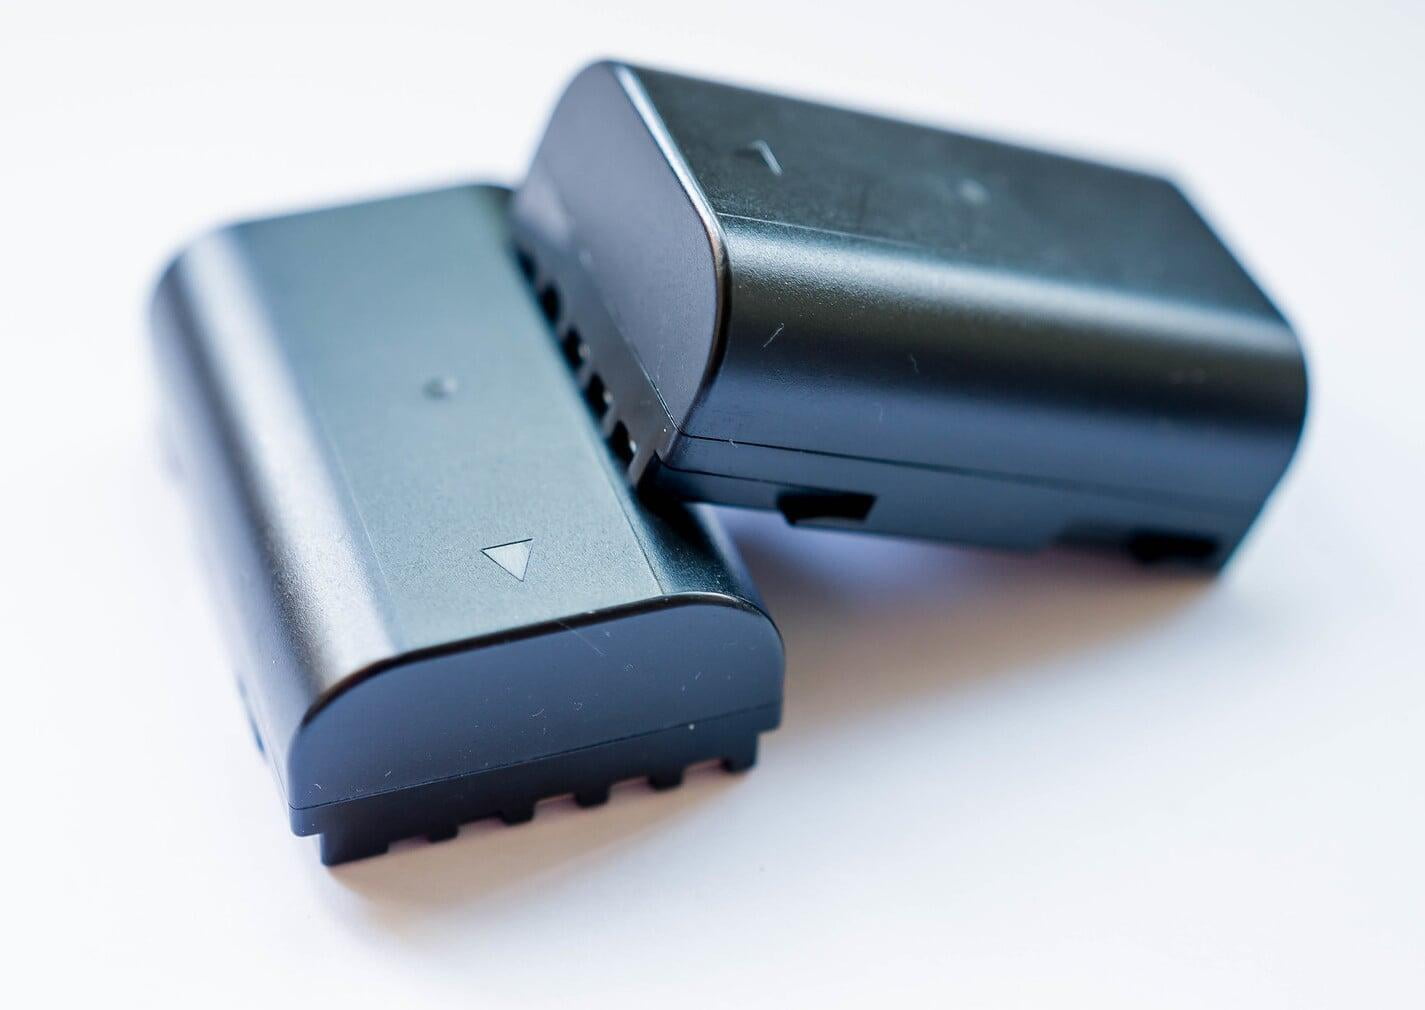
There are two things you must not run out of during a day of travel photography; battery life and memory space to store the photos you’re taking.
Prematurely exhausting your camera battery at a spectacular tourist spot or important event or festival, when there are still so many more incredible photos to be taken, can feel like an unmitigated disaster.
You would likely suffer from a severe case of photographer’s FOMO (fear of missing out) and you could end up regretting the unfortunate incident for a long time afterwards, wondering what could have been, if only you’d carried a spare battery or two.
For my very first travel camera, I had to actually carry three spare batteries to ensure that I would always get through a day of heavy shooting.
This was partly because two of the spare batteries that I was using were cheap knock-offs made by a third-party manufacturer (the original batteries last longer) but also because the batteries for that particular camera (the Canon EOS 100D) don’t last very long anyway.
For my current travel camera (Canon EOS 77D), I have yet to need to use a spare battery, even on days of very heavy shooting, but I do still carry a spare one just in case.
Your mileage will vary depending on what camera you have, but it’s always recommended to carry at least one spare battery as a backup.
Card memory space is the other thing you don’t want to run out of. If you’re shooting in RAW format (as we recommend you do) and/or capturing a lot of videos with your camera, it wouldn't be impossible to fill a 16 GB memory card during a full day of heavy shooting.
The results from my recent trip to Bangladesh might give you an idea of how quickly you could expect to go through camera memory cards during your next trip.
The Bangladesh trip I’m referring to lasted for 30 days and I travelled the length and breadth of the country (well, not quite), visiting as many places of interest as I could during the time that I had.
It was quite a hectic trip with very few off days and I consider myself quite a fairly heavy shooter when I travel.
In the end, over the 30 days, I took about 80 GB worth of RAW photos and 82 GB of videos, so on average, I went through about 5 GB per day, so I was filling a 16 GB memory card every 3.2 days. However, if you’re shooting in JPEG, a 16 GB card could last you for an entire trip.
If you’re on a short trip, I recommend carrying enough memory cards to hold all the photos and videos that you expect to take over the course of your trip, so that you don’t have to delete anything midway through the trip to make space for new files.
The logic behind doing this is that the memory cards hold all the original files, and you then keep creating backup copies of each photo on an external hard drive, USB flash drive or other storage device as the trip proceeds.
These backups should ideally be created at the end of each day of shooting and the original files should not be deleted from any of the memory cards until you get home and create a second backup.
If you’re travelling long-term, it’s a bit impractical to never delete files from memory cards, as you would need to carry an awful lot of regular capacity SD cards or a small number of very expensive, high-capacity cards to hold all the photos.
What you can do in the case of travelling long-term is delete files from your memory cards as needed to make room for new ones, but only after you’ve made at least two copies of all the files you’re deleting and stored them in safe locations.
For a full discussion on how to back up your photos and videos while travelling, see our in-depth guide here.
#22 - Ask local people for permission before taking their photograph
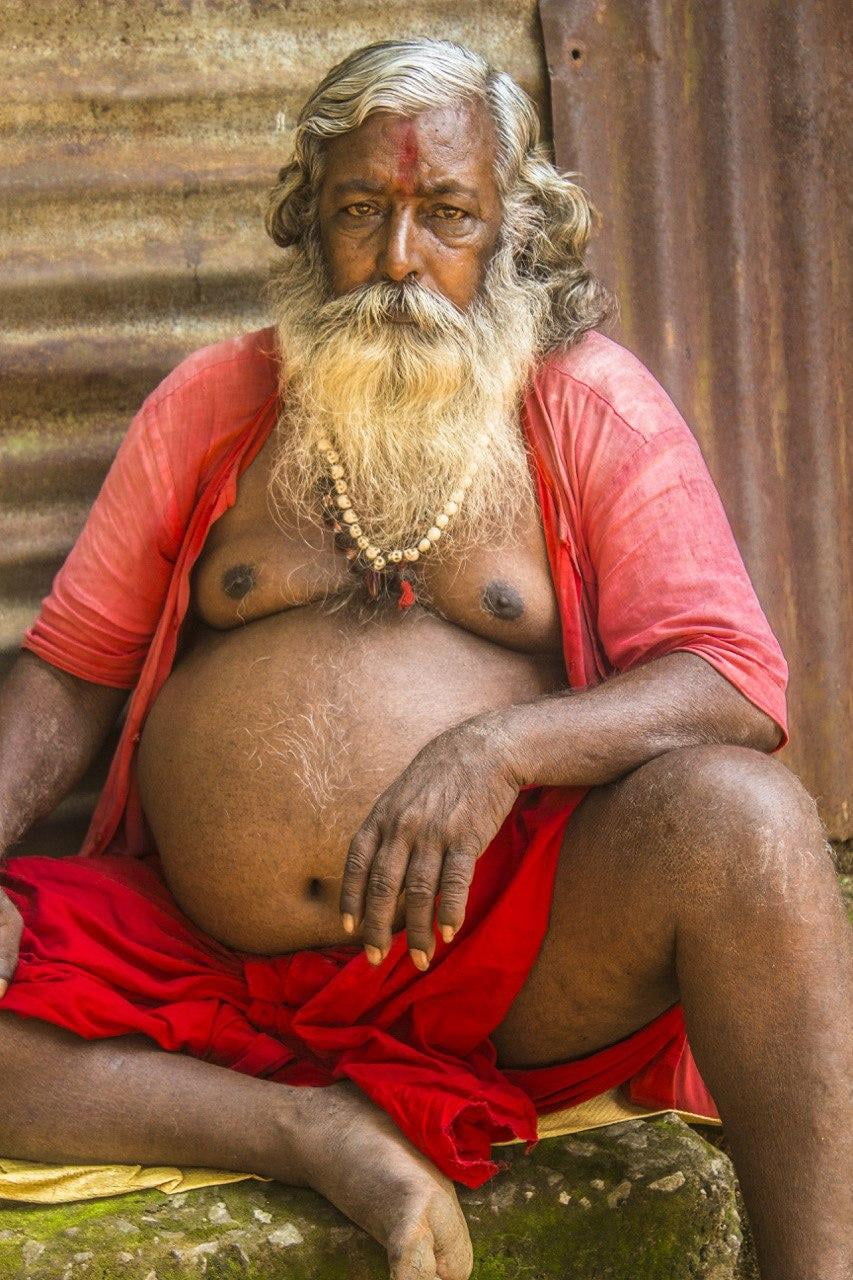
Some of the local people that one encounters while travelling make for very interesting subjects in photos, but you must be careful not to treat them like exhibits on display in a zoo or a museum.
If you take the time to build a little rapport with the person you wish to photograph before asking them to pose for a picture, you will find that they will be much more receptive to your advances.
Not only that, but because they are feeling good about being photographed (because you took the time to connect with them), they should give you a warm, genuine smile, which makes for a much better image than the scowl you might get from a person whom you tried to photograph against their will.
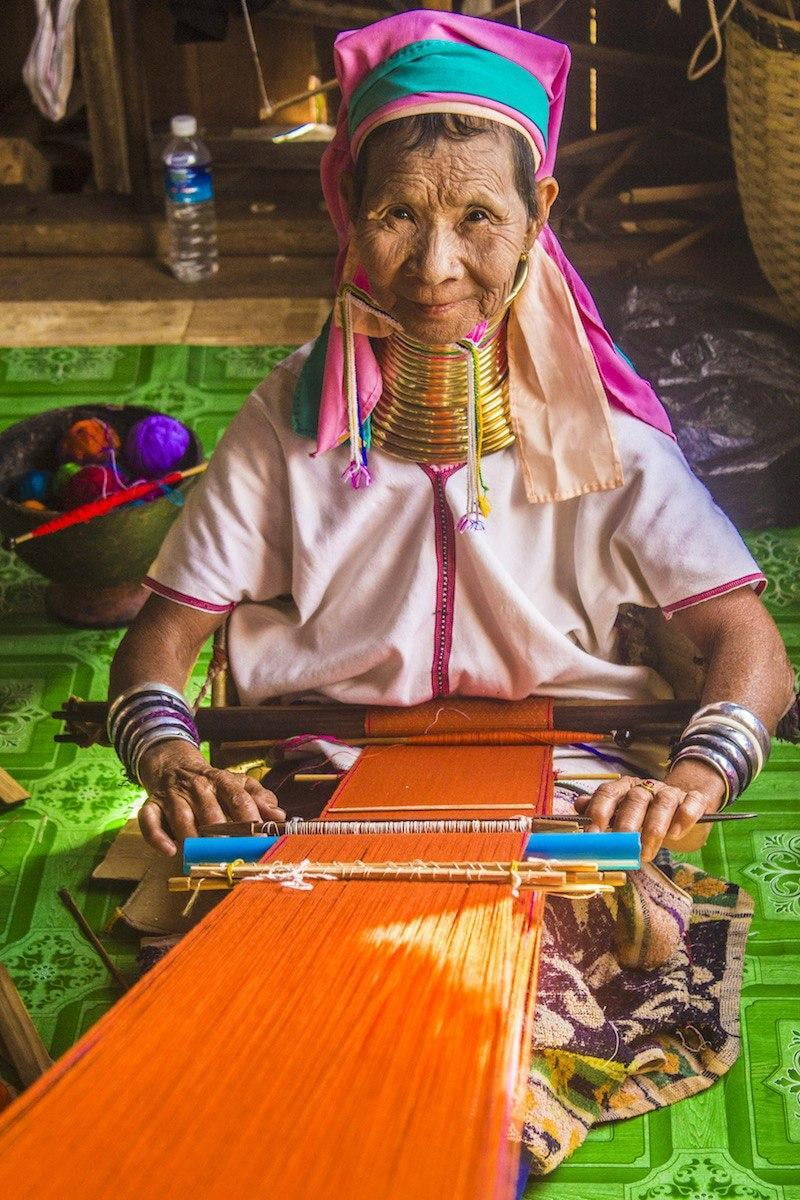
If you want to photograph local people without their awareness to get those much-coveted candid shots, you have to be discreet about it and use a zoom lens, as the further away you are from the subject, the less likely they are to realize that you’re photographing them.
To be discreet, you can pretend to be just casually looking at your camera’s LCD monitor when you are actually taking photos. Bringing the camera up to your face and looking through the viewfinder makes it much more obvious that you’re actively shooting.
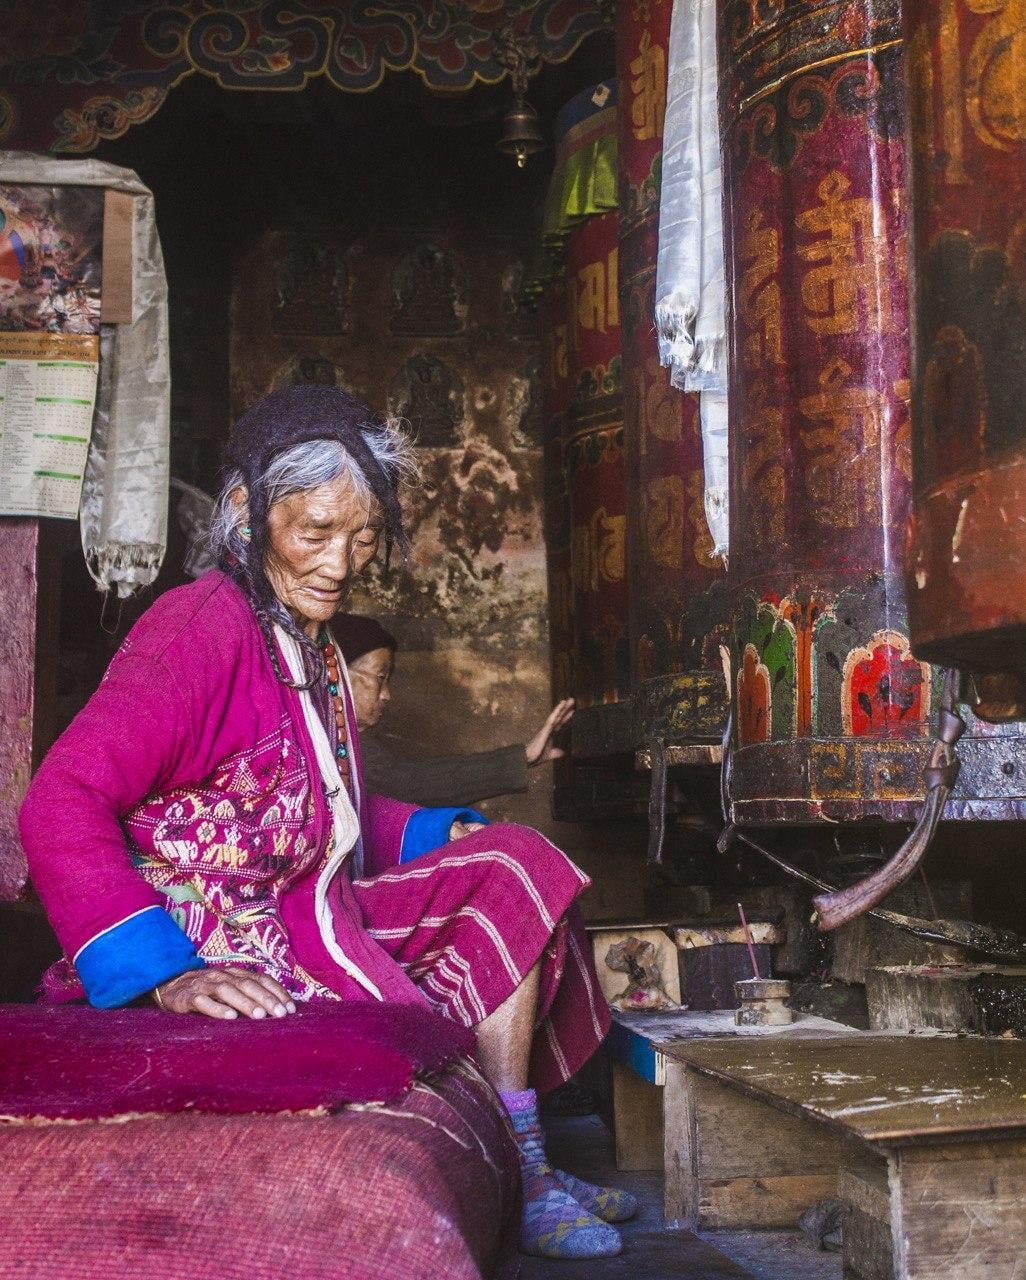
In locations that see a lot of tourists, certain visually attractive local people may have been bombarded with requests for photographs so many times that they have started to capitalize on the demand by asking for money in exchange for their portrait.
If the person is demanding payment or trying to negotiate a price with you before you’ve taken the photo, then you will have no choice but to pay if you want the image.
If the demand for photos is lower, locals in fancy outfits might excitedly invite you to take a photo with them and then as you try to exit the scene they will pressure you to pay a small gratuity in exchange for the favour they believe they have done for you. In India for example, this tip is known as baksheesh.
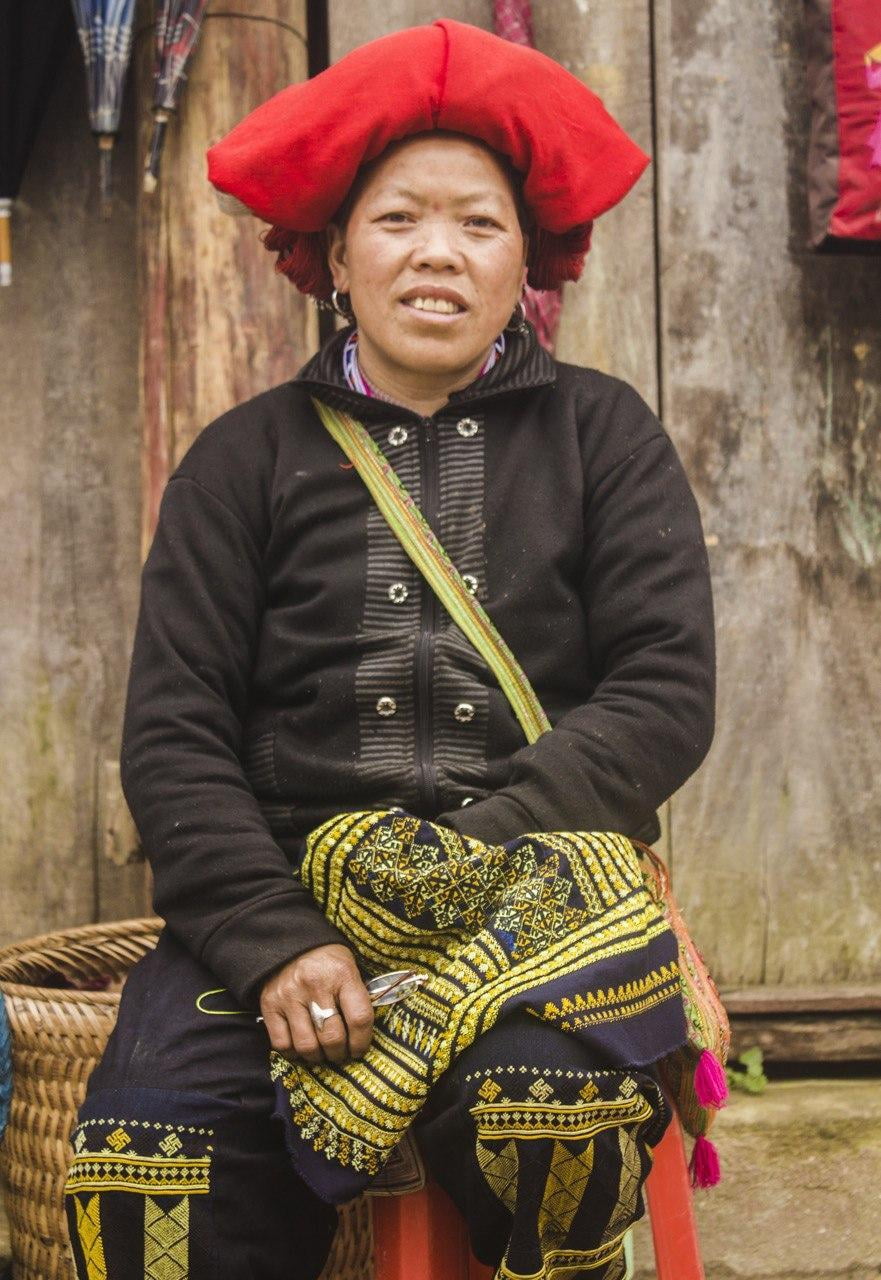
In this second case, you could take the photo and avoid paying the fee afterwards by simply not caving in to the pressure. In either case, it’s your choice whether you want to pay local people for photos or not.
I usually don’t like to pay people for photos, as it turns them into commodities and goes against the spirit of photography, while also incentivizing them to renounce their existing occupations to exploit the tourism bonanza. With that said though, if it’s an image I’d really love to have and the price is nominal, I’ll pay.
#23 - Every photographer needs a muse
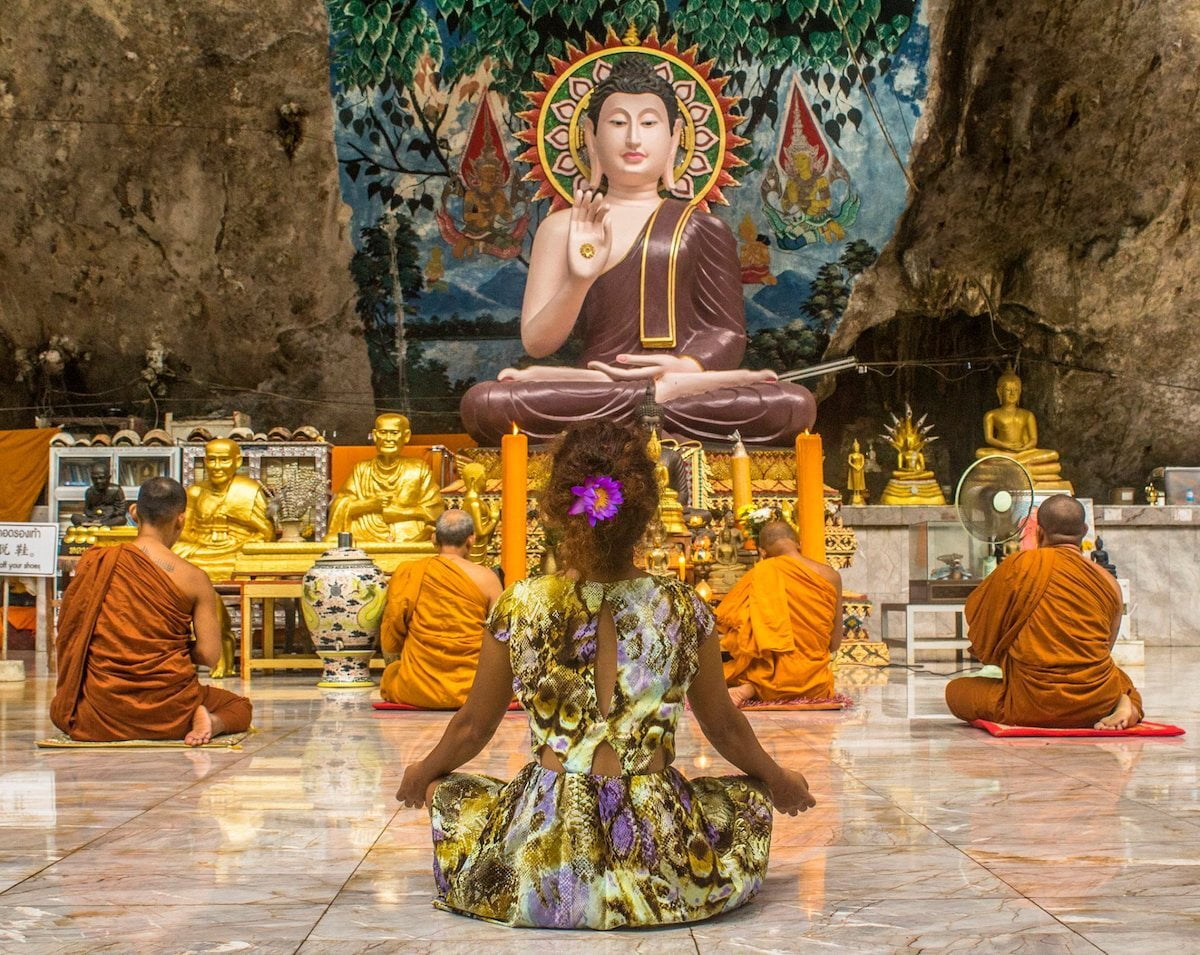
Back in 2015, an article was published in Medium entitled “Why Every Photographer Needs a Muse”.
The author was correct; every photographer does need a muse. A muse is that person that always inspires you and sparks your creativity when you shoot them, no matter what the circumstances.
You never run out of new ideas while photographing your muse and you learn new lessons every time you shoot with them.
Your muse only wants to be photographed by you and nobody else and you can’t think of anyone you could replace him or her with.
I’m lucky to be able to travel with my partner Jili, who is also my muse in photography. When she slips into a beautiful dress, she can add a touch of magic to any scene and I get really excited to shoot.
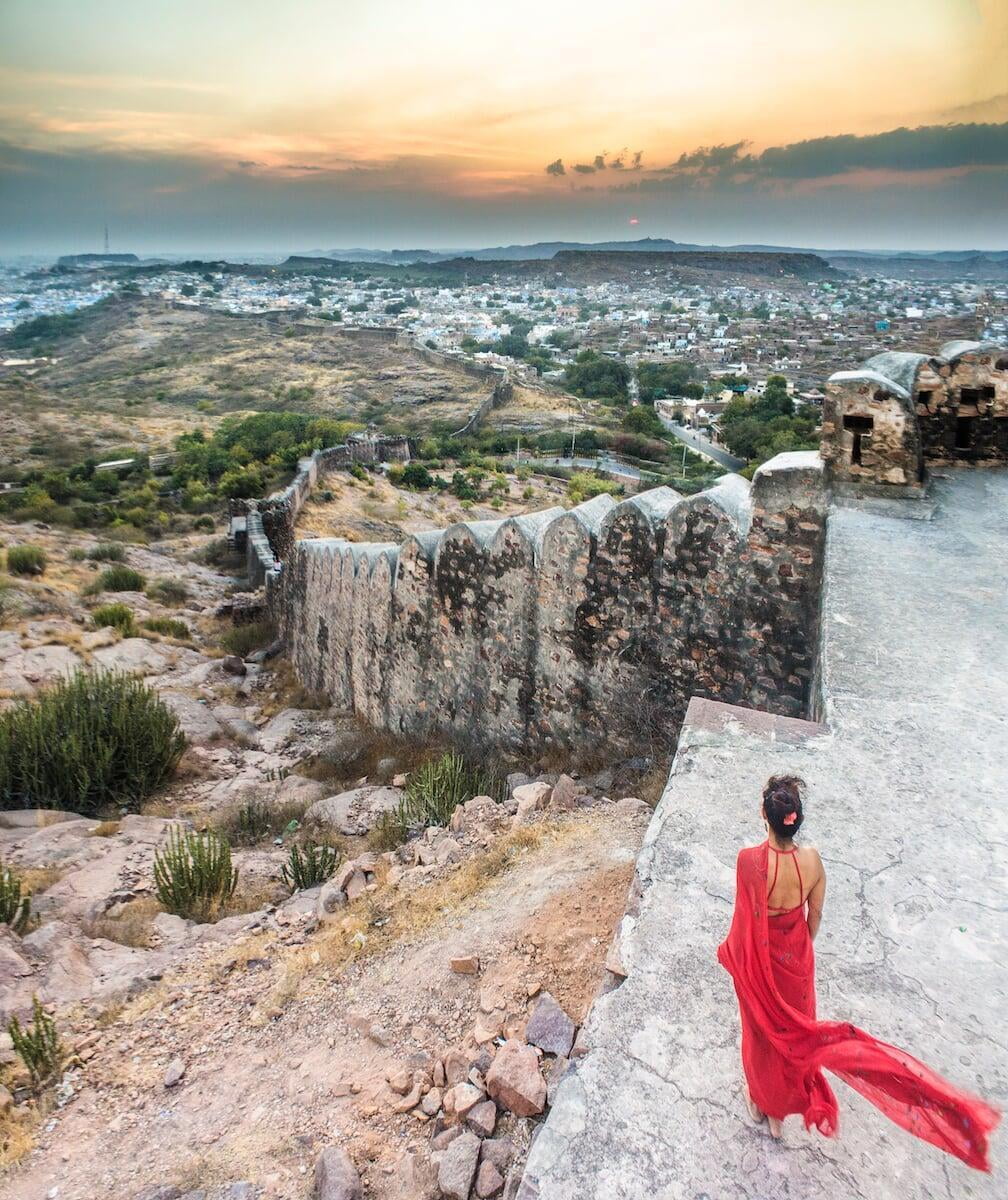
If there’s a stunning location that I want to photograph, I always insist that she comes along and feature in some of the photos that I take at that spot, as shooting just isn’t the same without her.
I’ve travelled solo without my muse and felt that something was missing from many of the shots that I took during those trips, especially the shots where I would normally call upon her to be part of the scene.
Your muse is always there to act as a subject in your photos when you need one. Some scenes can look very bare and desolate without a human being to enliven them, and it’s easier to convey a message or story through such images.
Sometimes there’s a vacant-looking spot in a scene that you need your muse to fill, to asymmetrically balance an imbalanced composition. You can also vary the colour of your muse’s outfits to restore colour balance to a scene where one colour carries too much visual weight.
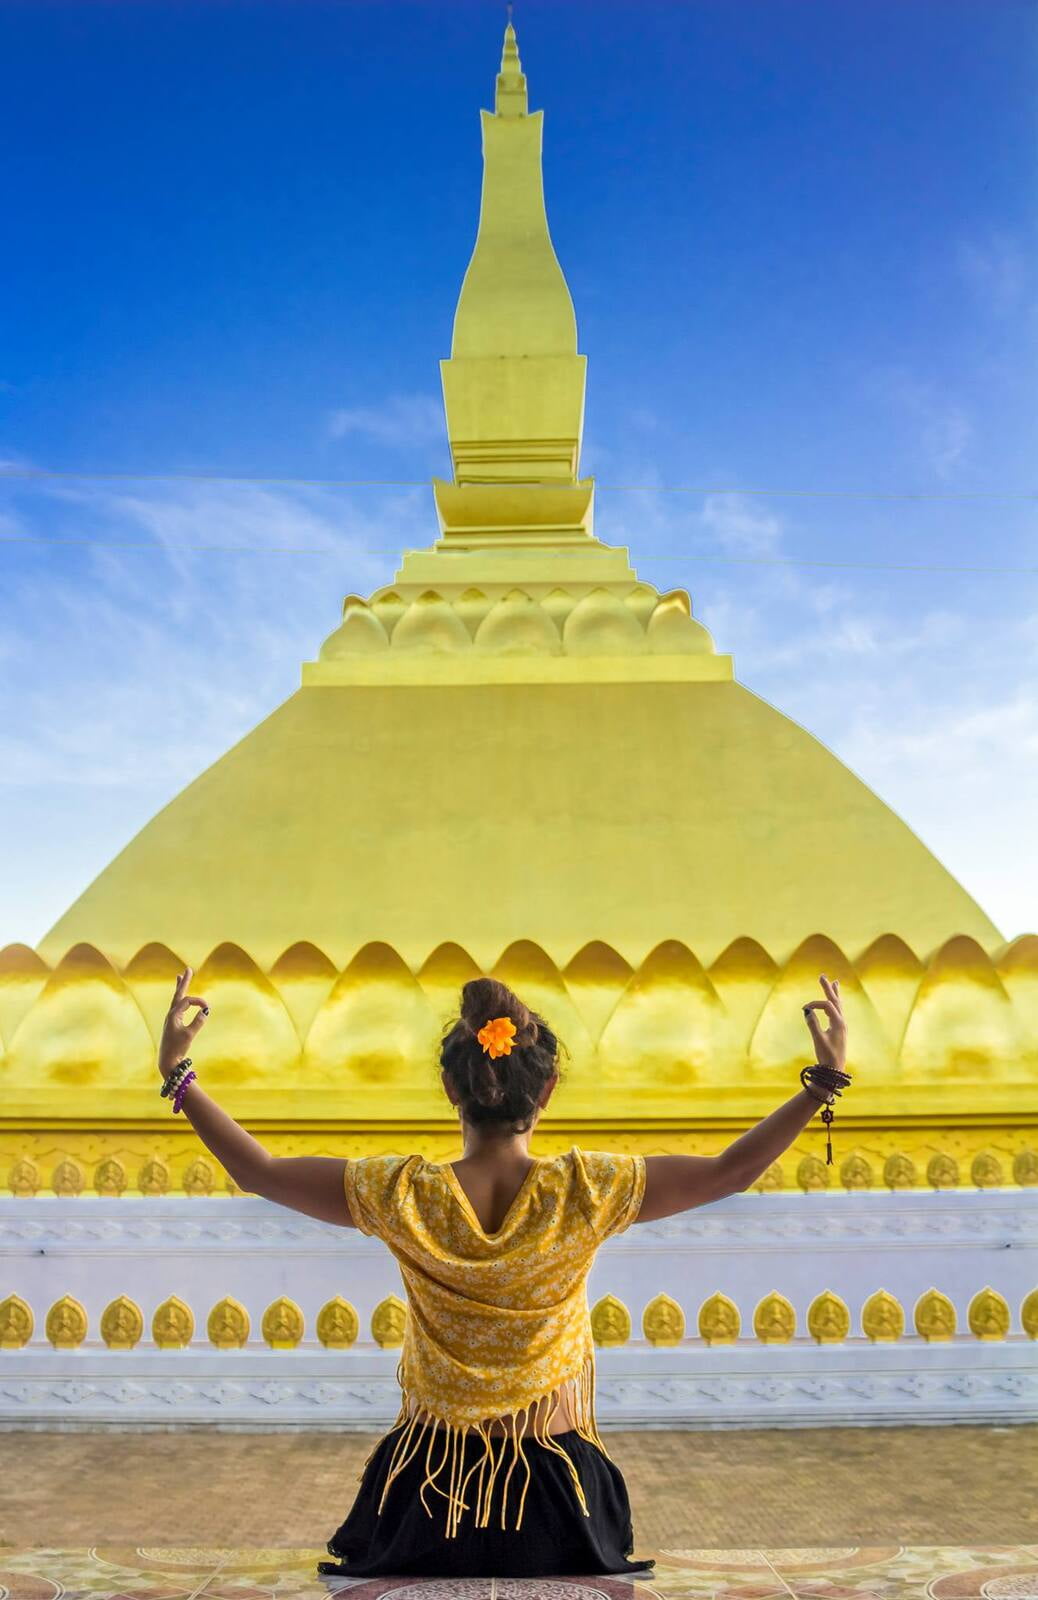
You can also use your muse to add scale to your images, something we discuss in detail in Section 3.
Your muse can also take pictures of you if you should ever so desire to be photographed (i.e. as proof that you summited a mountain), which is a lot easier than using your camera's self-timer mode with a tripod.
There are lots of other things that your muse can do to improve your travel photography, not least of which are the lessons your muse can teach you about photographing people and directing them on how to pose, how to dress, where to position themselves and so on.
#24 - Slow down and try to live more in the moment
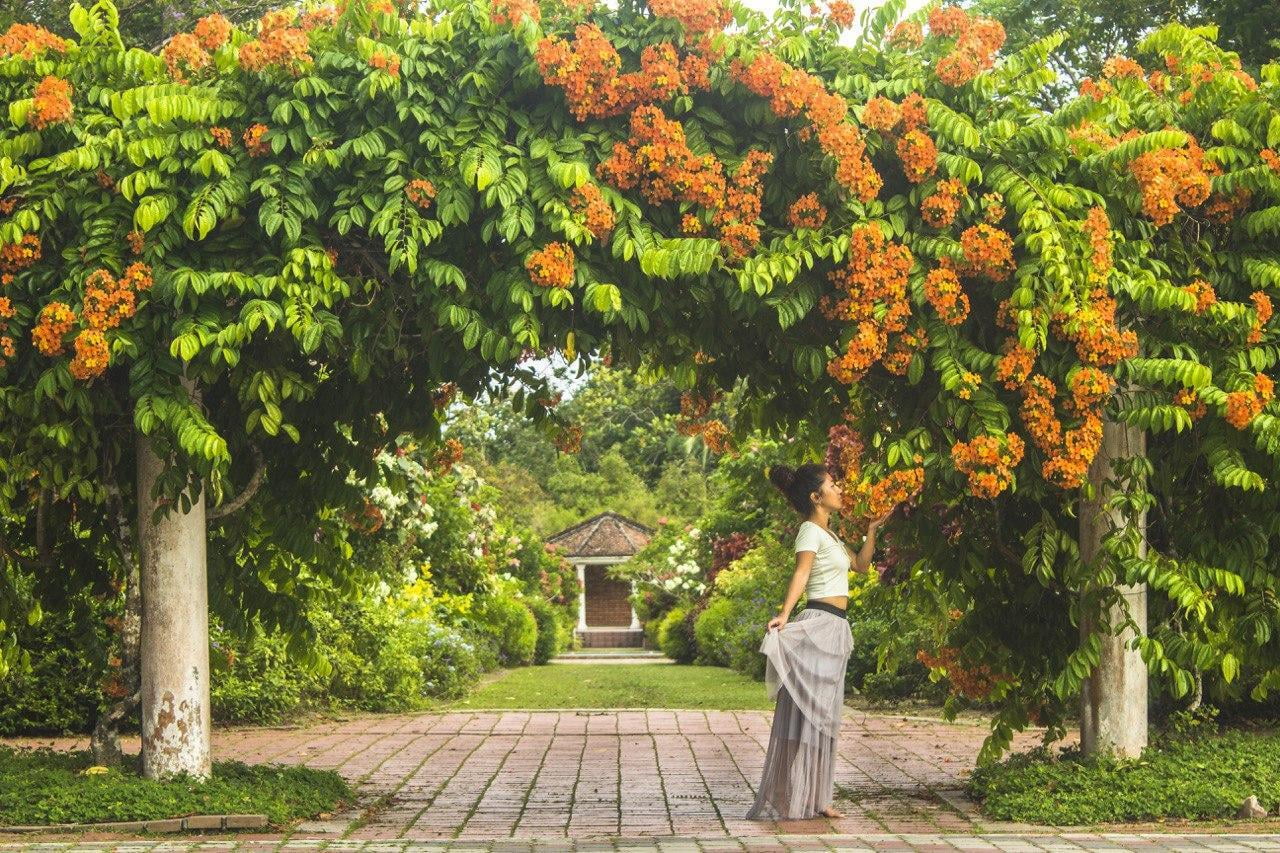
Being a photographer should never detract from your ability to be able to enjoy the moment and be fully present during an experience.
It’s often claimed that our efforts to capture an experience through photos or videos prevents us from being able to truly live and experience that special moment through our own five senses.
This might be true for moments that are very short-lived, but often we are not photographing or filming the entire sunset or the entire experience, so we frequently have enough time to capture the images we want and then put the camera down, relax and then fully experience the unfolding event.
If you find that you are failing to personally witness some of the best moments in your life because you just have this irresistible compulsion to capture everything on camera, then maybe you need to try to let go of that frantic impulse to document everything and instead just let some moments be captured in your mind’s eye.
Slowing down is not only important in order to be able to fully experience the world around you through your own senses, but also because it will help you to take better photographs.
When you first arrive at a scene you don’t want to immediately take out your camera and tripod and rush into taking photos without any thought or planning. This is a sure-fire way to end up with substandard images.
Instead, you should slowly walk around the location and take stock of everything to get an idea of how you might best compose your shot.
As you survey your shooting location in a mindful manner, you’ll be able to compare how the scene looks from different angles and perspectives and you might unexpectedly stumble across interesting elements in the environment that you could include in your composition.

It’s also very important to slow down and try to fully live in the moment when you’re on the way to a shooting location.
Having that acute awareness of your environment at all times is key to recognizing opportunities when they arise; you don't want to be that photographer who fails to notice the majestic stag crossing the path in front of him because he was zoned out of reality.
This can be a major challenge for many photographers at times, especially when there’s a time constraint.
If you’re trying to get to a particular location like a waterfall and you only have a few minutes to get there before the sun sets and the light fades, it’s very easy to get into “tunnel vision” mode, where you essentially create an imaginary tunnel between you and the destination.
You then focus exclusively on the end of the tunnel and completely filter out everything else going on around you as you make a beeline for the target. This is a classic example of prioritizing reaching the destination at the expense of experiencing the journey.
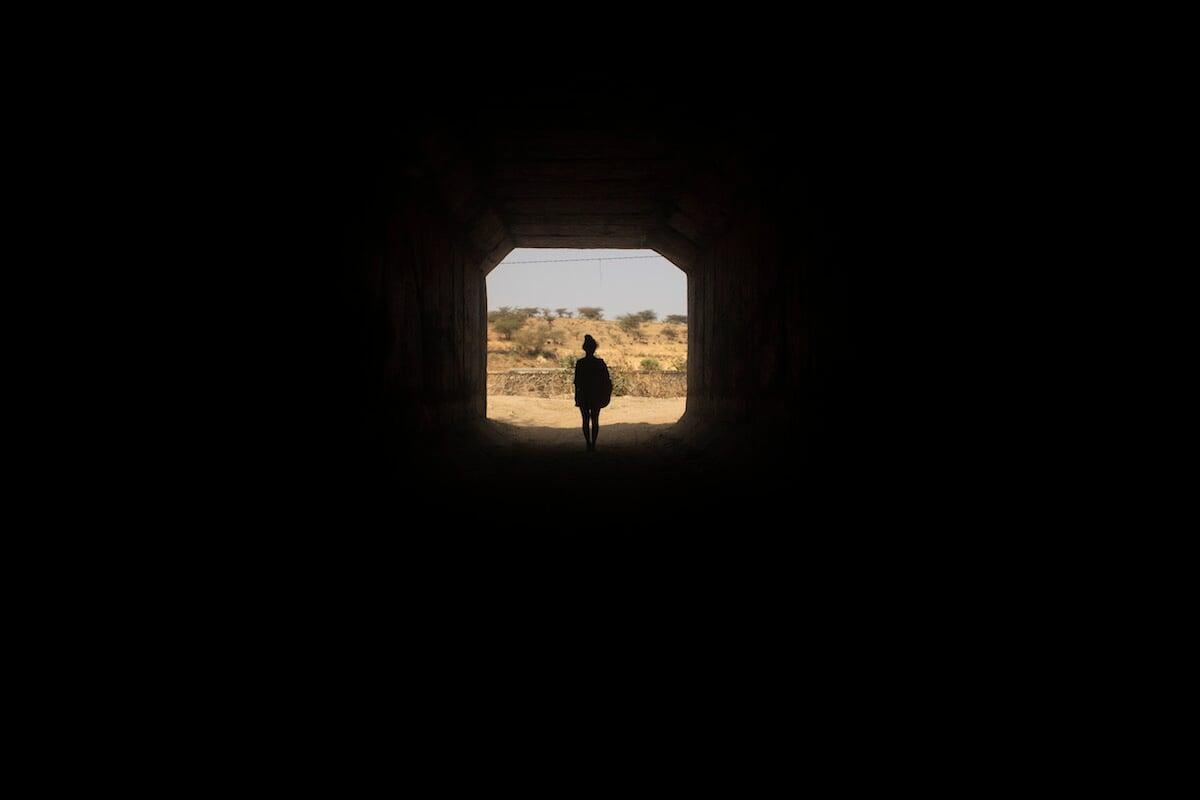
While this tunnel vision can pay off on many occasions and might allow you to reach the shooting location in time to capture the shot you had in mind, the destination can also sometimes betray us.
You might arrive only to find that the lighting conditions are unfavourable or the thundering cataract you had imagined would greet you is reduced to a pathetic trickle due to low rainfall, or the attractive building you were hoping to photograph has been demolished.
“But the beauty is in the walking – we are betrayed by destinations”
Gwyn Thomas
Meanwhile, there might have been a number of truly excellent photo opportunities en route, but because of your one-track mind you raced right by them and perhaps failed to notice them at all.
Remember, the trail or the way itself can hold many surprises and can present some fantastic photo opportunities we were not expecting during our all-out sprint for the destination.

You can avoid getting into a situation where you’re forced to rush to a shooting location by setting out early and leaving plenty of time to allow for unanticipated occurrences and photo opportunities that might materialize en route.
Other than that, it’s about training your mind not to be so narrowly focused on getting to a specific location and getting a specific type of shot in order to call the day a success.
Can you learn to forgive yourself and not deem the excursion a flop if you didn’t make it all the way to that mountain lake that you were trying to hike out to?
What I’m trying to say is that, photography should be something enjoyable and you shouldn’t allow it to steal your peace of mind.
If you’re feeling anxious about getting to a specific shooting location to get a specific photo and if the entire success of the mission hinges on that one thing alone, are you making it too much about the photos that you come away with rather than the quality of the experience that you have?
Can you still be at peace with yourself if you come back from an outing with nothing to show for it at all?
Once you have reached that point in your journey, you will also have mastered the mental game of photography.
#25 - Always stay true to yourself
The wonderful thing about photography is that there’s endless scope for originality and for adding your own personal flair to your images to make them your own.
Everyone has their own unique way of seeing the world, of composing their images and of editing them afterwards, and it’s important to embrace this to develop your own distinctive style.
If you reject your own unique style out of fear that other people will reject it, and only ever play it safe by imitating the styles of others or by fashioning your images to satisfy some generic, socially accepted formula, you will end up producing nothing remarkable or distinctive.
A lot of the travel photos on Instagram and Facebook can appear very repetitive for this very reason; so many of the uploads follow the same jaded formula of: aquamarine water glittering in the hot sun, arcing white-sand beach backed by coconut palms and blonde girl wearing a bikini.
There are dozens, if not hundreds of other clichés too, from the flower petal baths in Bali to the woman holding her hat on her head with one hand just for the sake of it.
This article provides commentary on some of the latest Instagram copycat trends and you also must check out an Instagram account called @insta_repeat, which has posted more than 250 collages of repeating photo tropes that plague the platform.
It’s understandable why social media users keep repeatedly posting these kinds of photos; it's because they do particularly well on the platform, garnering a lot of engagement and generating ample likes, shares and comments. This positive feedback then reinforces posting that type of image.
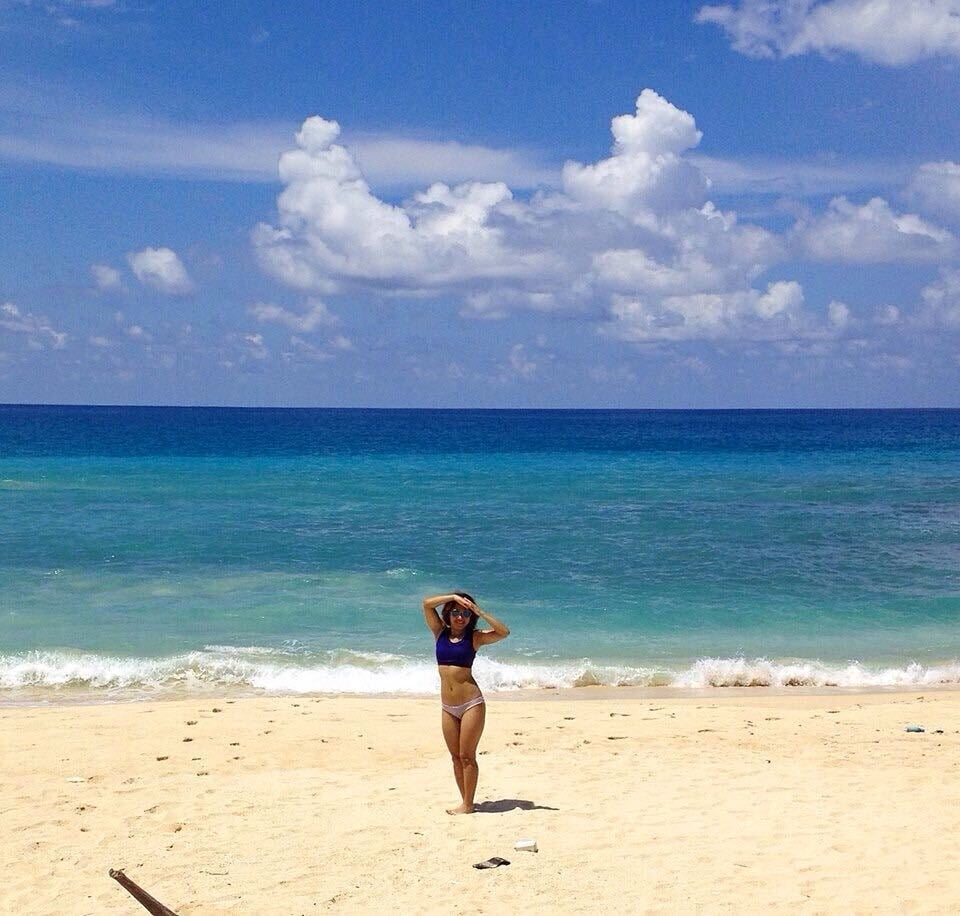
But unless you genuinely love shooting this type of beach scene (or any other clichéd scene) over and over again and never get tired of it, it’s not good for your soul to keep taking photos just because they appeal to the masses and will allow you to quickly accrue a large following.
I have fallen into this trap before myself and I think many travel photographers do.
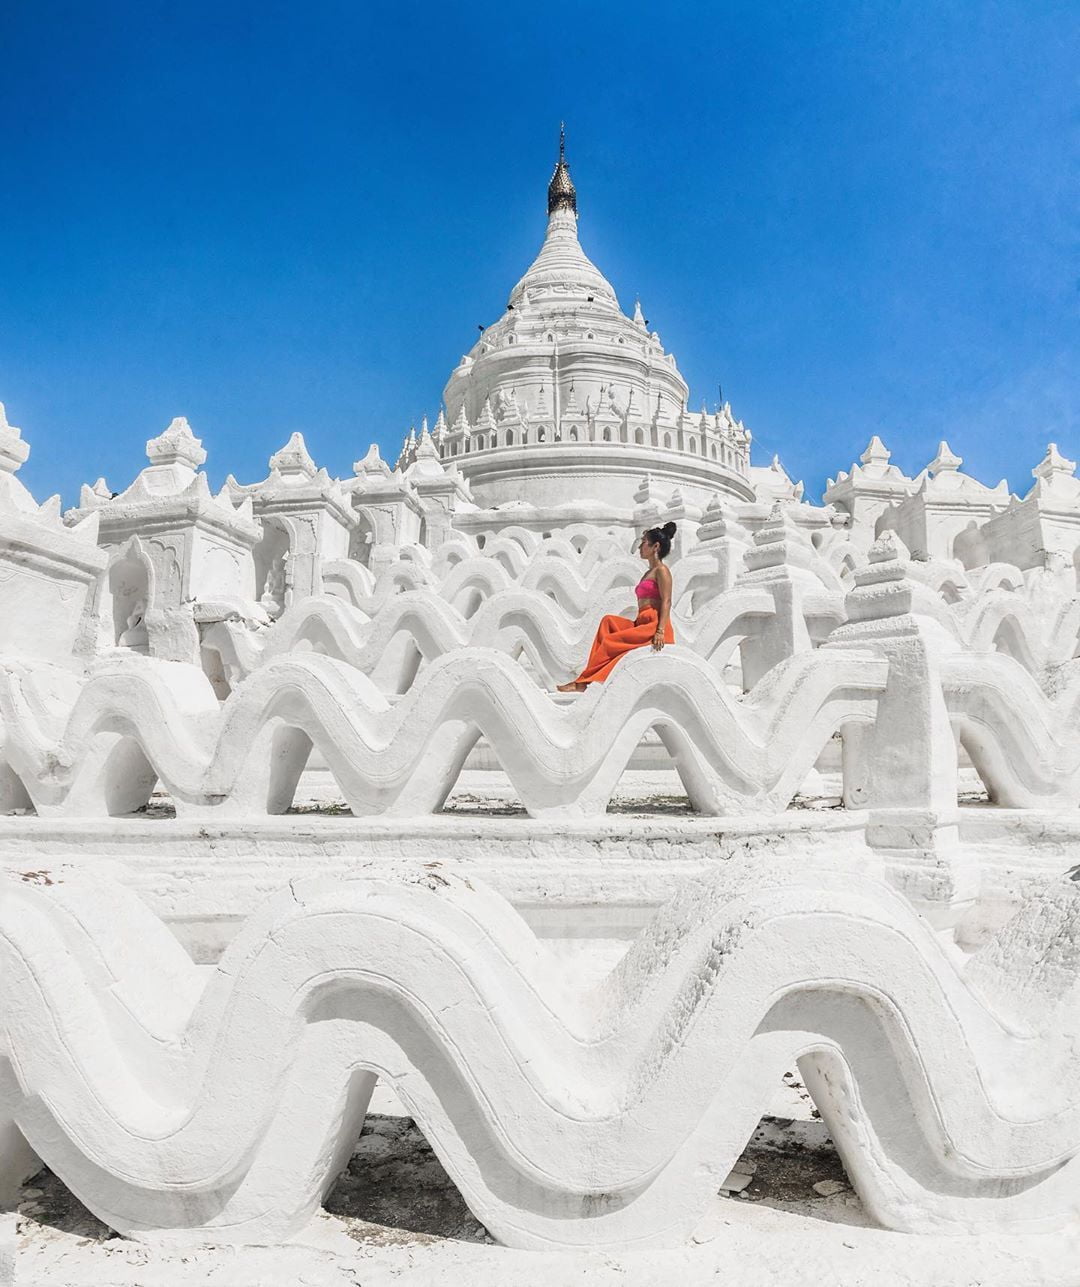
In a lot of cases you might not even be consciously aware that you’re losing touch with your unique photography style, so I think it’s useful once in a while to ask yourself what really motivated you to take a particular photo; was it because you were really excited about the scene or subject that you were photographing or was it because you were driven by the lure of some extrinsic reward like money or social media fame?
It’s true that money and fame are the biggest potential corruptors of any photographer and if you’re chasing either through your photography, it may be impossible for you to remain completely true to yourself, which is why photography is at its purest and most creative when it’s just a game or a hobby that you practice solely for enjoyment.
Approach your photography with the mindset of play rather than that of work and you will always be able to maintain that authenticity in your images that is becoming increasingly rare in today’s world.
#26 - Make the most out of every opportunity (always give 100%)
Sometimes a photo opportunity will come your way and you’ll feel tempted to bypass it, telling yourself an excuse like “I’ll get the shot on the way back” or “I’ll photograph it when I return here next year for a second visit”.
It’s especially easy to make these excuses when you’re feeling fatigued at the end of a long day, when you’re burnt out from shooting too much or when it’s a photograph that can only be obtained by exerting a lot of physical effort or enduring a substantial amount of pain.
For example, it would be easy to back out of a shot that requires you to wade in an icy stream in your bare feet in winter, or to climb up onto a high branch of a tree.
It’s easy to get lazy and to give less than 100% at times, but remember that the more effort you put into your photography and the more opportunities that you take full advantage of, the better your images will be.
In my experience, the same opportunity rarely presents itself twice. You might think that you’ll be able to photograph that cool building or that amazing tree on the way back (they won’t move after all) but will the lighting conditions be the same when you get back later?
What if it’s already dark by the time you get back? I’ve made this mistake so many times that I’ve lost count.
If you’re willing to go that extra mile and keep giving 100% even when you don’t have the enthusiasm for it anymore; if you’re able to keep forcing yourself to perform your absolute best even when you want so badly to quit, it’s going to show in your images when compared to the guy who half-asses it and starts skipping opportunities because he doesn’t have the motivation to do the hard work that it takes to get that really compelling photograph.
#27 - Practice makes perfect
You can read all the tips on the Internet that you want, but at the end of the day, you really need to put in the hours in the field if you want to improve your travel photography.
There’s only so much that you can learn before you actually go out and try to apply the information that you’ve absorbed.
Trying to put ideas into practice will expose the weaknesses and the gaps in your existing knowledge and will teach you other important photography lessons that can only be learned through personal experience, like how to change the settings on your camera and how to make your tripod stable on different surfaces.
You need to travel to a wide variety of interesting places (they don’t necessarily have to be far-flung) and get lots of practical experience taking photographs in diverse situations and then analyse your shots at the end of each day of shooting to see what worked and what didn’t, and then try to figure out why.
It is this process, repeated over and over again, that will make you a better travel photographer more than anything else.
Section 2: Photography Gear & Accessories
#28 - Get a tripod (+ a remote release)
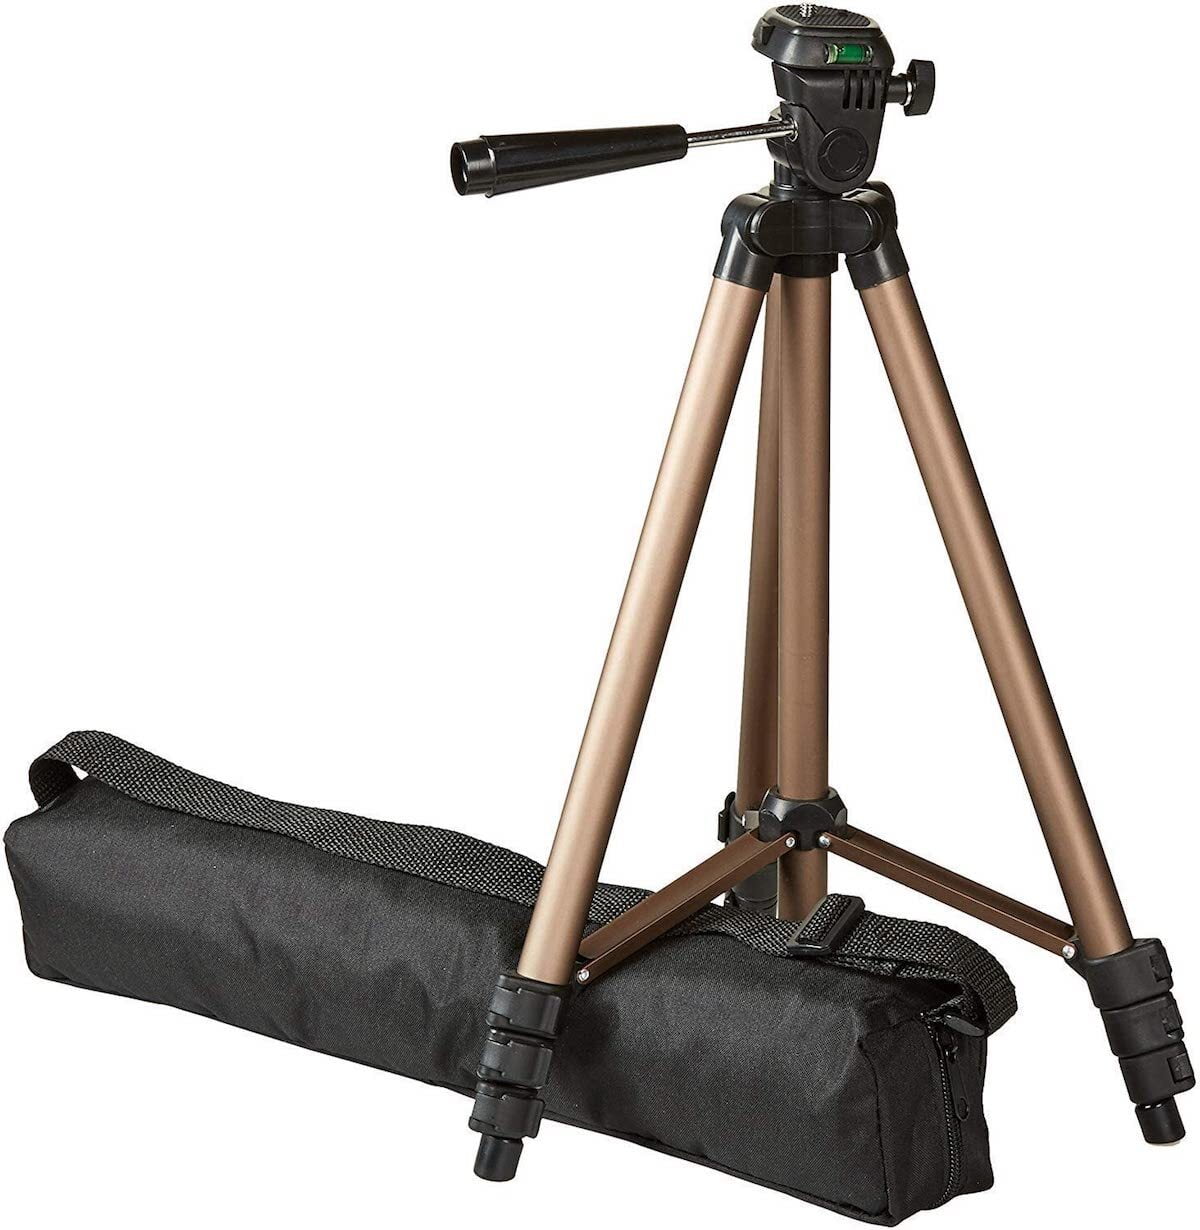
Off-the-cuff, handheld shots are the bread and butter of my travel photography, but there are also occasions when I consider it worthwhile or necessary to set up my portable, travel-friendly tripod.
One of the most compelling reasons to shoot with a tripod is that doing so virtually eliminates the possibility of camera shake and results in pin-sharp images.
The improvement in sharpness will be especially noticeable to those that have shaky hands, though a steady-handed shooter will also probably notice an improvement, particularly in low-light situations.
A tripod is usually an absolute necessity for shots that require a long-exposure (slow shutter speed), like if you’re creating light trails from moving traffic at night or trying to create smooth, silky water or streaking clouds in the sky.
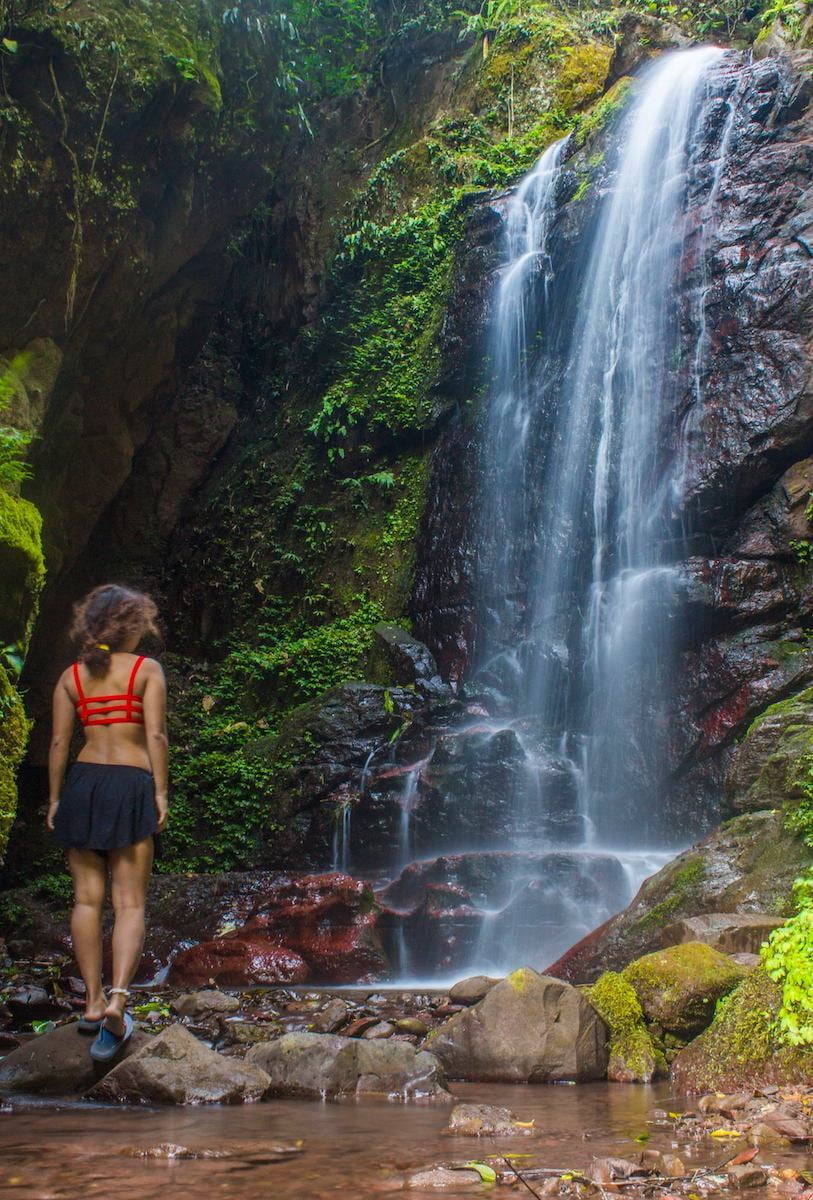
Such shots are impossible to execute handheld, even if your hands are as steady as those of a surgeon or sniper that's taken a dose of propanolol or some other anti-trembling drug.
A tripod is also a very important accessory for those that are travelling solo and who like to be in their photographs, since there won’t be a willing bystander that you can ask to take a photo of you in every situation, and in any case, would you always trust handing your camera over to a complete stranger?
A tripod also very useful if you’re travelling with your partner or friend or with a group. You can use the tripod to take couple or group photos without the need for a photographer, and therefore every member of the group can be included in every single one of the photos.
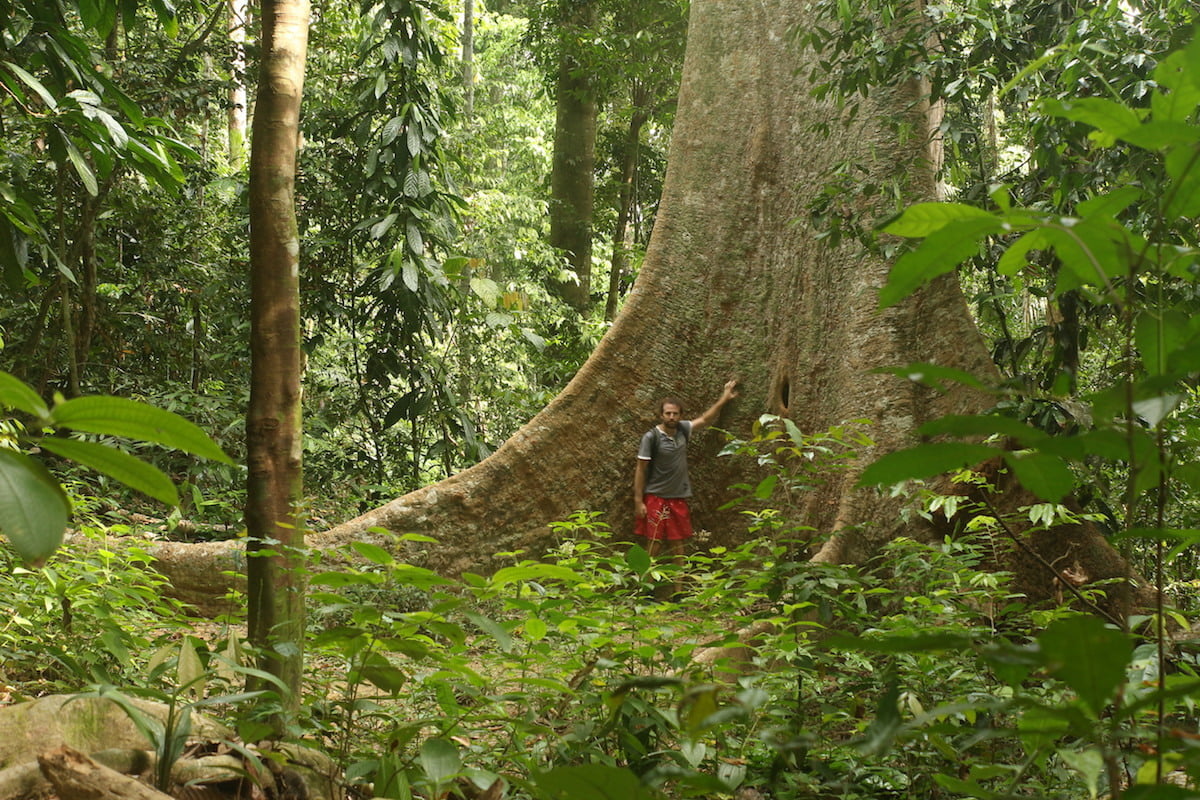
By mounting your camera on a tripod and setting it to self-timer mode, you can set a countdown of 10 seconds and then quickly position yourself in the frame before the camera takes the photo.
With many cameras you can also use a special infrared or Bluetooth-enabled device that will release the shutter remotely. This saves you from having to frantically rush to get into position before the countdown reaches zero.
If you have a Canon camera, your camera may be compatible with the popular Canon BR-E1 Wireless Remote Control, which runs on one CR2032 lithium battery (should last at least a year) and communicates via Bluetooth once it’s paired with your camera.
The remote has a range of up to 5 metres (16.4 feet) and doesn’t require line-of-sight communication with your camera within its range.
It has separate modes for picture and video and can even remotely control the focal length of your lens by pairing it with the Canon Zoom Power Adapter PZ-E1 , although this adapter only works with the Canon EF-S 18-135mm f/3.5-5.6 IS USM lens.
If your camera has built-in Wi-Fi capability, you may also be able to remotely take control of your camera from your smartphone. For example, using the Camera Connect app from Canon, I can remotely control my Canon EOS 77D from my phone.
My phone displays what my camera sees and I can make the camera focus where I want by tapping the screen of my phone. I can also remotely control all the important shooting settings like ISO, shutter speed, aperture size, white balance, autofocus mode and so on. Very handy.
A tripod is also essential for multi-frame action sequences, exposure bracketing and other techniques where you need to take multiple, identically framed shots of a scene and then blend them together afterwards using an editing program. We cover these techniques in Section 3.
When I’m travelling, I find that I most often use my tripod for photographing waterfalls, which I love chasing and which I always like to take long exposures of to get that silky effect that gives the illusion of motion.
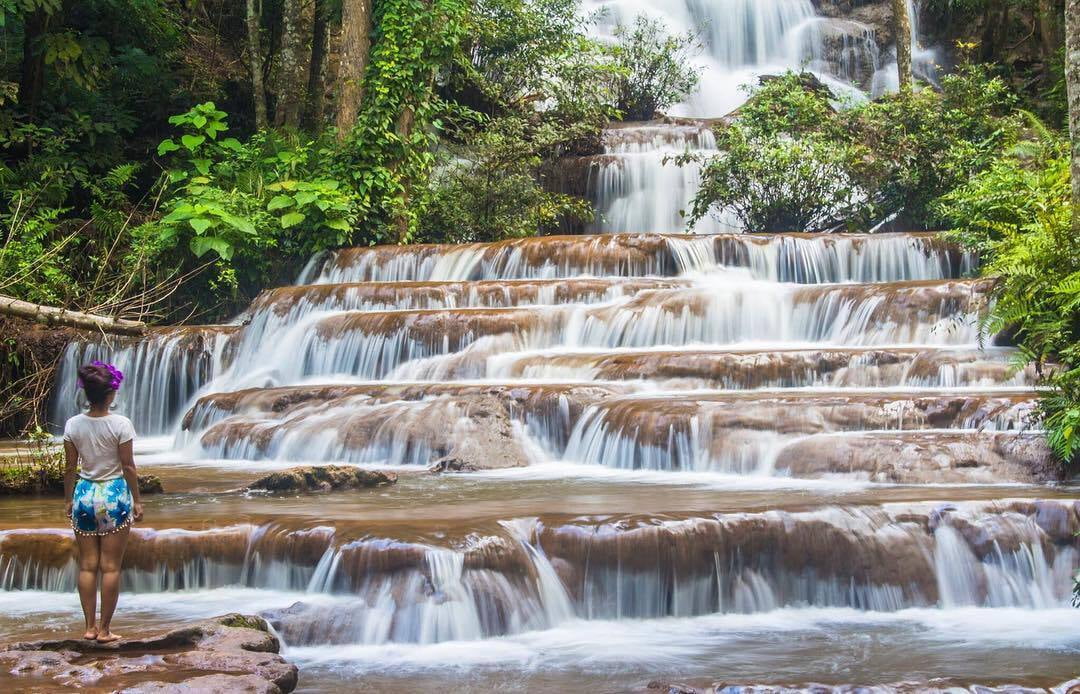
Although you can sometimes find somewhere suitable (the ground, a rock, a tree stump, a wall, your backpack etc.) to set the camera down when you’re not carrying a tripod, you have much more options when you have a tripod and you can always compose the photo the way you really want, not just in the way that the circumstances dictate.
I’m currently travelling with the Amazon Basics tripod, which is constructed from lightweight aluminium (weighs just over a pound) and packs down really compact into the zippered bag that comes with it, making it perfect for travelling.
Despite the compact size and lightness, it’s as sturdy a tripod as any and it holds my Canon EOS 77D DSLR camera (which weighs 0.54 kg) with no trouble at all.
The legs are fully adjustable and can be extended to a maximum height of 50 inches, or a little over 4 feet. Some tripods do extend higher than this but they’re bigger and heavier, so not as suitable for travel. This tripod also has a quick-release plate so that you can mount your camera or remove it quickly without fiddling around.
Another popular mini-tripod with travel photographers (and travel vloggers) is the Joby Gorilla Pod 3K Kit.

This is an unconventional tripod that uses flexible legs made of rubberized ball joints, allowing the legs to be bent and wrapped around fixtures in the environment like trees, fences, metal railings, lampposts, benches and so on.
The unique design allows for a camera to be positioned in unusual places, which can make for some interesting perspectives and angles.
However, if you can’t find anything to wrap the legs around you won’t be able to get your camera very high off the ground, as the tripod itself only achieves a maximum height of 38.5 cm (about 15 inches).
“Kit” here means that you get both the legs and the ball head when you buy it. The tripod itself weighs just 393 g (0.86 lbs) and can support cameras up to 3 kg, (6.6 lbs) so it’ll handle most DSLRs and mirrorless cameras without any issue.
The ball head is fitted with a spirit level, which helps to ensure that your horizons are always straight. There’s also a quick-release plate which you can always keep attached to your camera for fast mounting and release.
Note that if, you have a very heavy full-frame DSLR and you plan to use it with a big heavy zoom lens, you might be better off with the GorillaPod 5K, which is bigger and almost twice as heavy as the 3K (739 g).
#29 - Invest in the right filters
There are many different kinds of filters that you can buy for your camera, but the two that I consider to be indispensable to my travel photography are the neutral density filter and the polarizing filter.
Neutral density filter
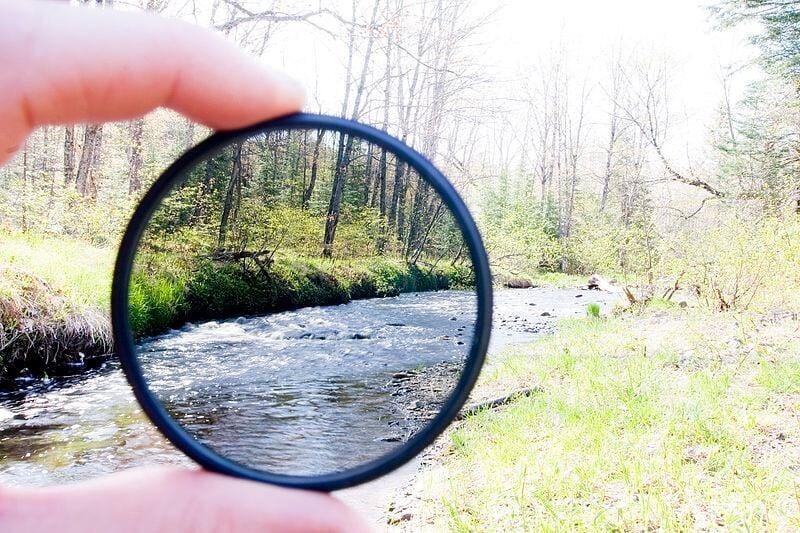
A neutral density filter acts much like a pair of sunglasses, allowing you to reduce the amount of light entering the camera lens. This is often necessary to be able to take long-exposure photos in brightly lit environments, like when you’re trying to photograph a waterfall on a sunny day.
If you try to take a long-exposure photo in bright conditions without this filter, you will find that no matter how small you make your camera aperture (even if you go to the highest f-stop number), the photo will still be overexposed.
Filmmakers who have to keep their shutter speed at 1/50th of a second also find ND filters very useful, as it means that they can use a wide aperture on a bright day instead of having to stop down to f/22 or smaller.
A neutral density filter theoretically shouldn’t change the hue or colour temperature of the light entering the lens (although in practice some do cause a slight chance), and is only designed to diminish the intensity of the light.
There are two main types of neutral density filter; the fixed type and the variable type.
Fixed ND filters
Fixed ND filters reduce the amount of light entering the lens by a fixed amount. These filters are made from a single layer of darkened glass and can be 1-stop, 2-stop, 3-stop, 4-stop and all the way up to 16-stop and beyond.
The number of stops refers to the number of times the original amount of light entering the lens is halved, so a 3-stop filter means that only 1/8 of the original light passes through the filter, while a 10-stop filter means that 1/1024th gets through.
You will usually see ND filters labelled as ND2, ND4, ND8, ND16, ND32, ND64, ND128, ND256, ND 512, ND 1024 and so on, where ND2 means 1-stop, ND4 means 2-stop, ND8 means 3-stop, ND16 means 4-stop and so on.
Fixed ND filters come in both a square variety and a circular variety.
Square ND filters
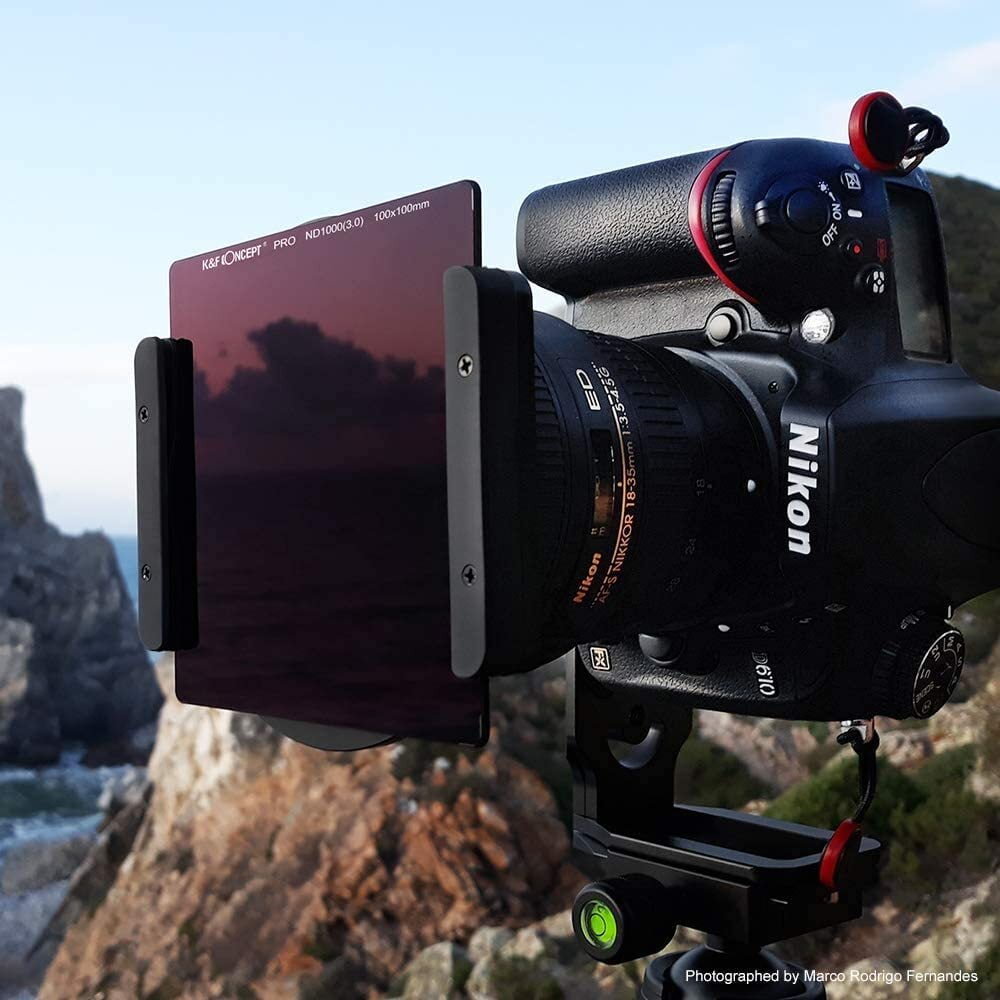
The square ND filters have to be used with a special filter holder, which attaches to the end of your camera lens via an accessory ring.
The filter holder will have a number of slots into which the filters can be quickly and easily inserted. This setup makes it easy and quick to swap and change filters.
Another advantage of square ND filters is that they can be stacked in various combinations in the filter holder, which makes it easy to control the amount of light being blocked.
The disadvantage of square ND filters is that they can result in light leakage, they’re not very securely attached (not so good if you’re moving around a lot) and they’re also quite big and require extra accessories, which are also quite big and therefore are not ideal for travel.
One special type of square ND filter is the graduated ND filter, which instead of uniformly blocking the same amount of light throughout its entire area, gradually fades from dark at one end to transparent at the other.
Some photographers like to use these graduated ND filters in situations where exposing correctly for the foreground results in a blown-out sky, or overexposing correctly for the sky results in a dark and underexposed foreground - a common problem at the beginning and end of the day, which is caused by shortcomings in the dynamic range of modern cameras.
Although the technology is always improving in this regard, and there are other ways to deal with this problem (such as by taking multiple exposures and blending them together in an editing program), a graduated ND filter is still one of the best-known solutions to this common conundrum, as it allows you to get the desired image in camera in a single exposure and saves you time while editing later.
Circular ND filters
The circular ND filters either screw on or attach to your lens magnetically (quick swap). The magnetic type are quite quick and convenient to use but the screw-on filters are a bit inconvenient to screw on and off each time.
The advantages of circular ND filters over square ND filters are that they are securely attached, don’t leak light and they also arguably help to protect your lens somewhat.
Photographers who use any type of fixed ND filters will normally carry a set of 3-4 filters of differing stops (i.e. a 3-stop, a 5-stop and a 10-stop) to cover all the possible lighting conditions.
Variable ND filter
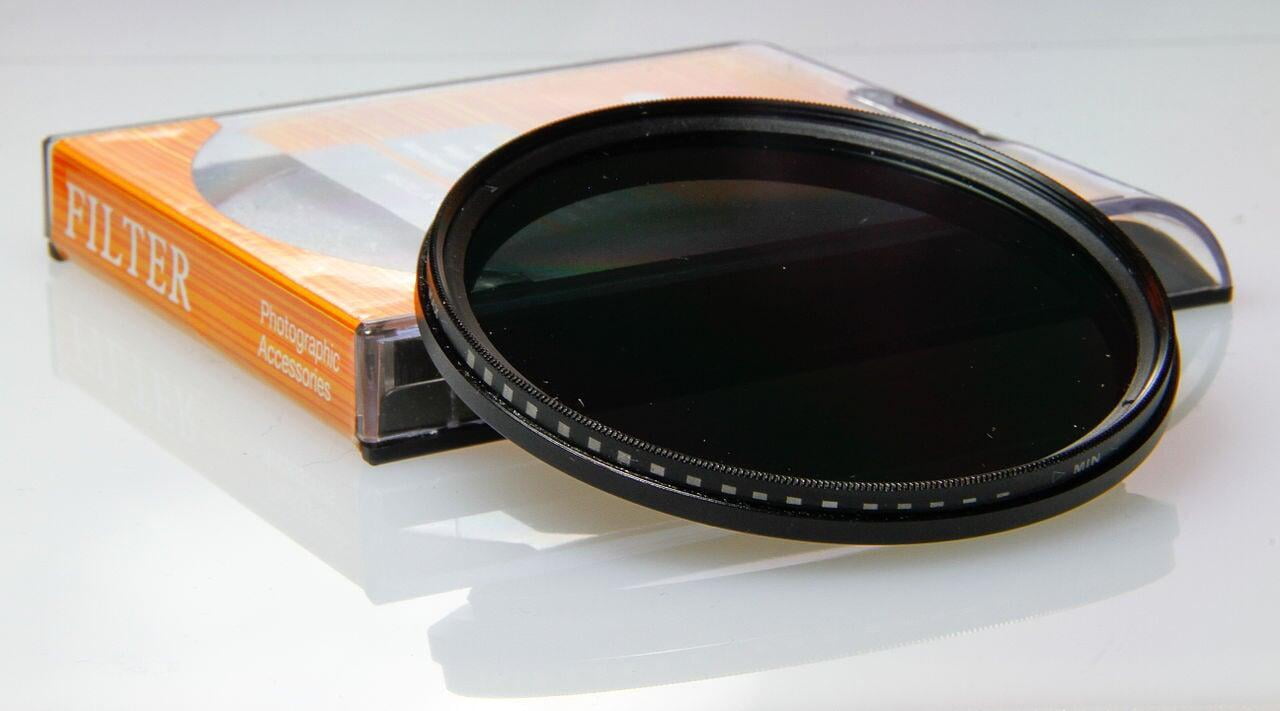
Variable ND filters are made up of two pieces of polarized glass and are almost always of the circular variety (threaded or magnetic).
They work a bit like a dimmer switch for a light; once you’ve dialled in your desired camera settings, you can then just rotate the filter ring to fine tune the amount of light entering the lens instead of being limited to a fixed amount of light stopping power.
While this sounds like a very desirable, convenient, all-in-one solution in theory, the lower quality variable ND filters can cause some unwanted issues like vignetting, polarization, colour cast and the dreaded “X-pattern” of darkness in the middle of the photo, which is exacerbated when using wider angled lenses.
However, most of these issues disappear with high quality variable ND filters and it’s as true here as ever that you get what you pay for. I personally use a high-quality variable ND filter and find it ideal for my needs. Nothing would persuade me to switch to a fixed ND filter at this point.
Polarizing filter
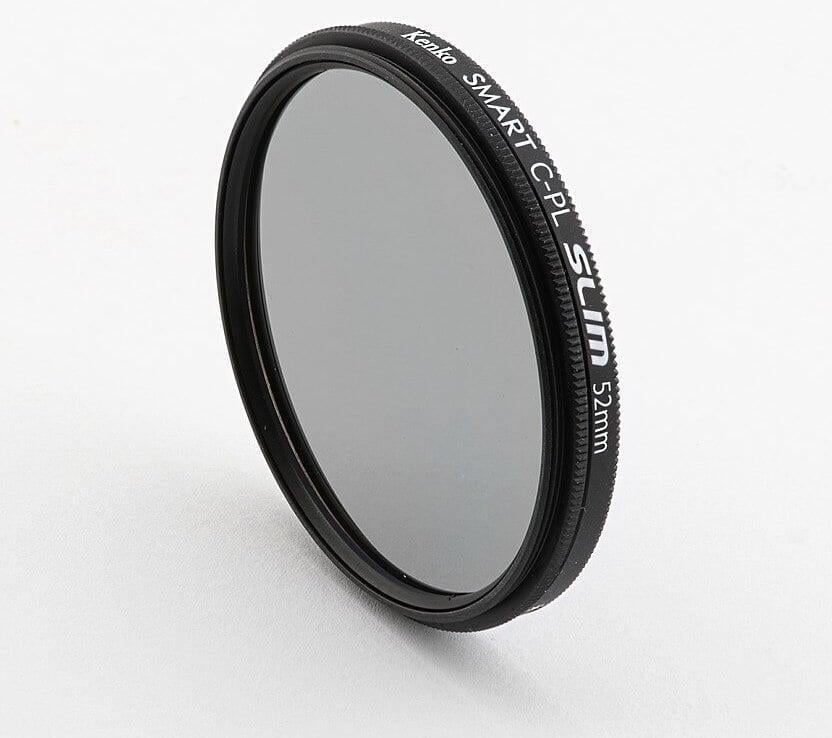
A circular polarizing filter is another type of filter that you can screw onto the front of your camera lens to achieve certain attractive effects. It’s an important filter to have, as it’s virtually the only filter whose effects can’t be replicated in editing programs like Photoshop.
The main reason to use a circular polarizing filter is to reduce or completely eliminate the glare that results from light being bounced off reflective surfaces like roads, water, snow and glass.
The same technology is used in polarizing glasses, which are worn by fishermen who want to be able to eliminate glare from the surface of ponds, lakes and rivers so that they can see where the fish are lurking and whether they’re taking the bait.
Another (usually desirable) consequence of using a polarizing filter is that it can remove haze from your photos and improve colour saturation; the sky becomes a deeper blue and greens become noticeably more vibrant.
The reason that a polarizing filter only blocks reflected light is because light becomes polarized when it reflects off most surfaces (metals are an exception). On the flip side, direct light from a source like the sun is unpolarized and will not be blocked by a polarizing filter.
But what is polarized light and why does it get blocked by a polarizing filter?
To understand that, you have to first understand that light merely consists of electric and magnetic fields that constantly oscillate in all possible directions or “planes”.
But once light hits a reflective surface, all the vertical components of the light get absorbed, leaving the reflected light horizontally polarized.
The reflected light is now oscillating in one plane only (horizontally) and when it meets the polarizing filter, it can be blocked by orienting the filter in the correct direction.
This is because the filter consists of a PVA plastic absorbing layer sandwiched between two layers of glass, and this absorbing layer consists of parallel chains of molecules with tiny gaps between them, which act like “slots” to let the light pass through.
If these molecular chains are perfectly aligned with the direction of oscillation of the incoming polarized light, all of the light will be absorbed or blocked. By rotating the polarizing filter, you can therefore control the amount of polarized reflected light that enters your camera, which affects the look of the scene by varying the amount of reflected light and boosting or diminishing the saturation of the colours.
What about UV filters?
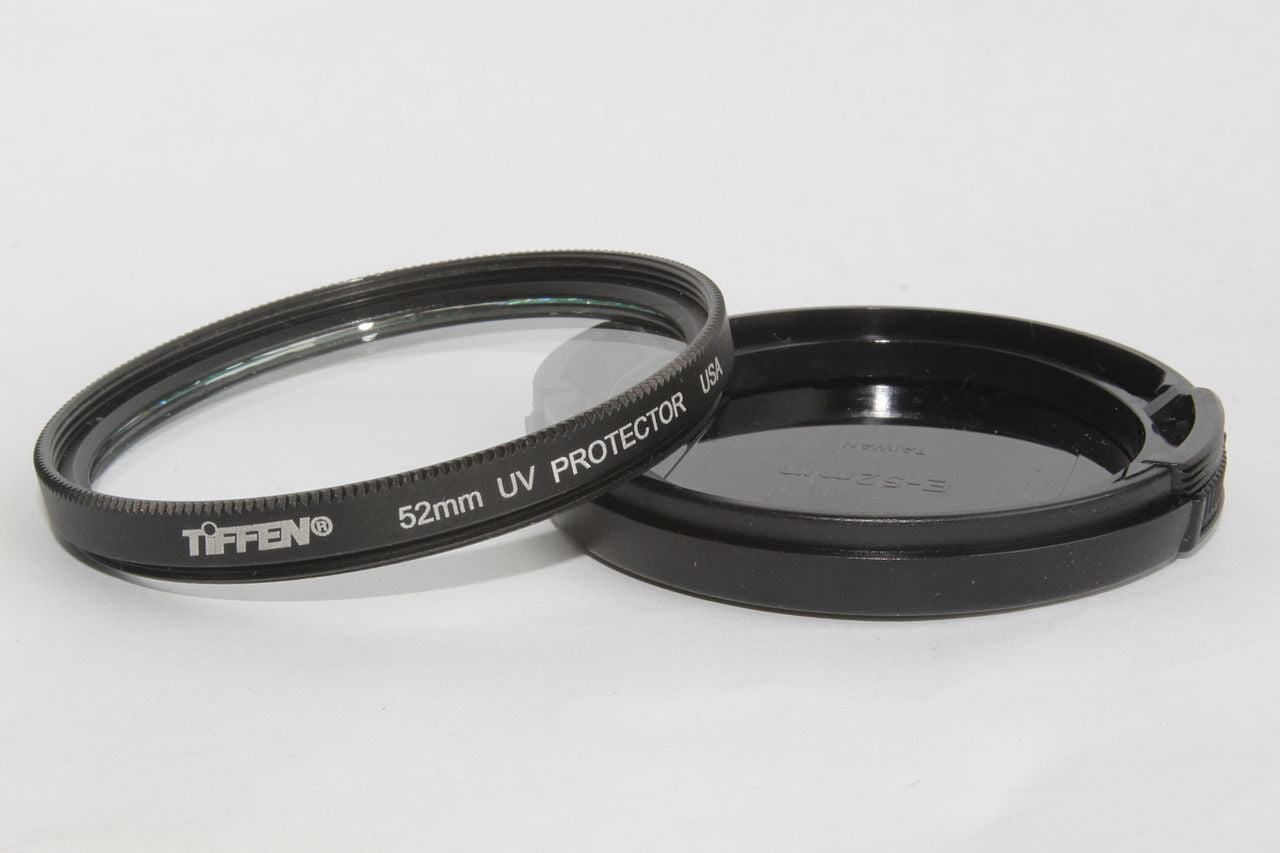
Although they seem to be the most commonly used, I consider UV filters to be the least necessary of all the camera filters and I personally don’t even own one. In fact, UV filters are quite a polarizing topic in photography and views on them can vary widely among photographers.
UV filters attenuate or block the UV light entering your lens from the sun and other sources. If an ND filter is the sunglasses for your lens, then a UV filter is the sunscreen. But do you actually need to block UV light entering your lens? Is there any benefit?
Well, UV filters are actually relic from the age of film photography, where they were used to prevent the formation of an unwanted blue haze in the image, which resulted from the fact that old camera film was often very sensitive to UV light.
But the sensors in today’s digital cameras don’t suffer from this same high sensitivity to UV light, and so this effect is not nearly as problematic as it was for film photographers.
Nowadays, photographers really just use UV filters to protect their lenses, but even this practice seems to have little merit, as the glass in them is so weak that it wouldn’t save the front element of your lens anyway if it did hit something hard enough to crack it.
This is according to the results of drop tests done with different lenses and lens filters by Steve Perry from Backcountry Gallery.
UV filters might still be useful in a sandstorm or to protect your lens from scratches, dust, smudges and ocean spray, but there’s also the lens cap for that.
There’s also the fact that using a UV filter will slightly reduce the sharpness and contrast of your images, and can also exacerbate negative artifacts like lens flare and ghosting, especially when you’re shooting a scene with a bright light source. These adverse side effects are more dramatic in the poorly made filters.
For all of the above reasons, I personally don’t bother with them.
#30 - Use a lens hood to block stray light and prevent washed out images
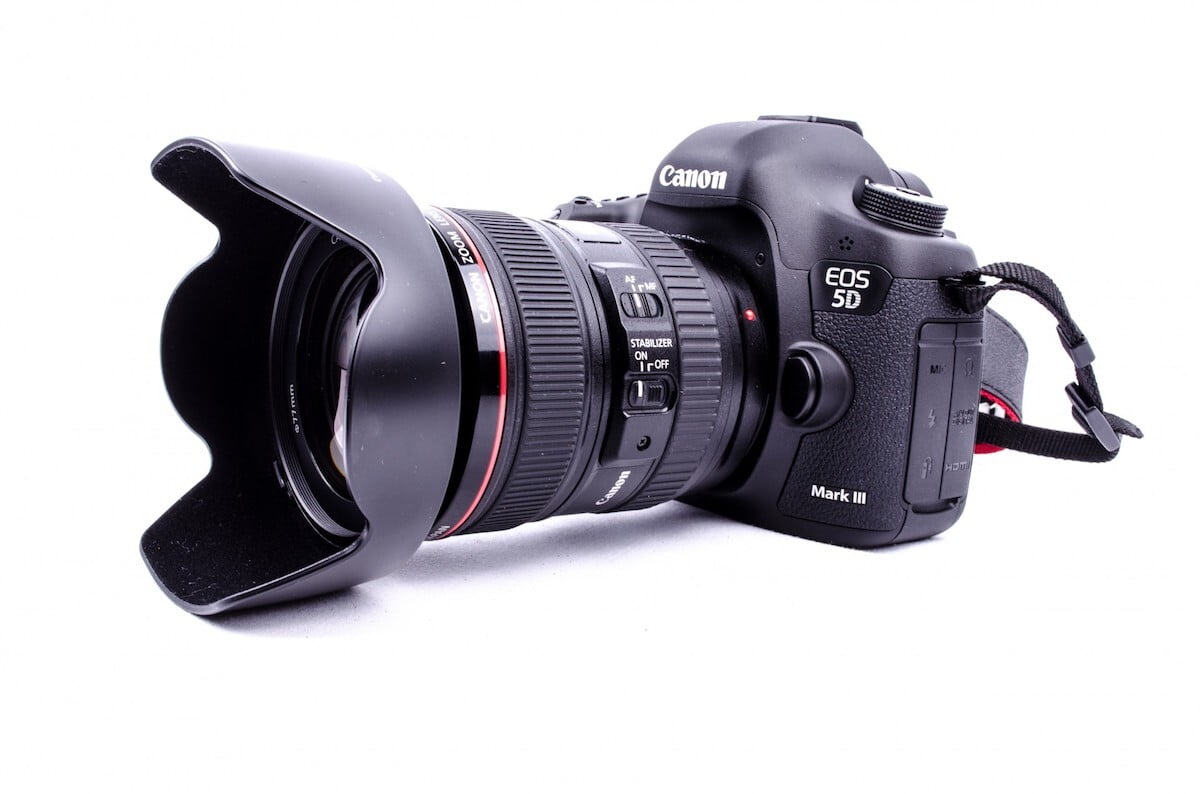
A lens hood is an inexpensive plastic accessory that you can attach to the front of your lens in order to reduce any unwanted sun flare, glare or ghosting effects caused by stray light in the environment, which can be an issue when you’re shooting into the sun or near strong artificial light sources.
A lens hood works similarly to the way you’d put your hand over your eyes or pull down the sun visor in your car to see the road ahead more clearly when the sun is getting in your eyes. People often wear caps or sports visors to achieve the same effect.
Now, there are times when you might actually want to have lens flare in your photo, like when you’re trying to achieve a creative effect, but a lot of the time, you’ll get a much more desirable image if you use a lens hood to eliminate the distracting glare.
A scene can appear washed out when there’s too much glare and using a lens hood will help to bring back the clarity, contrast and the vibrance of the colours in the scene.
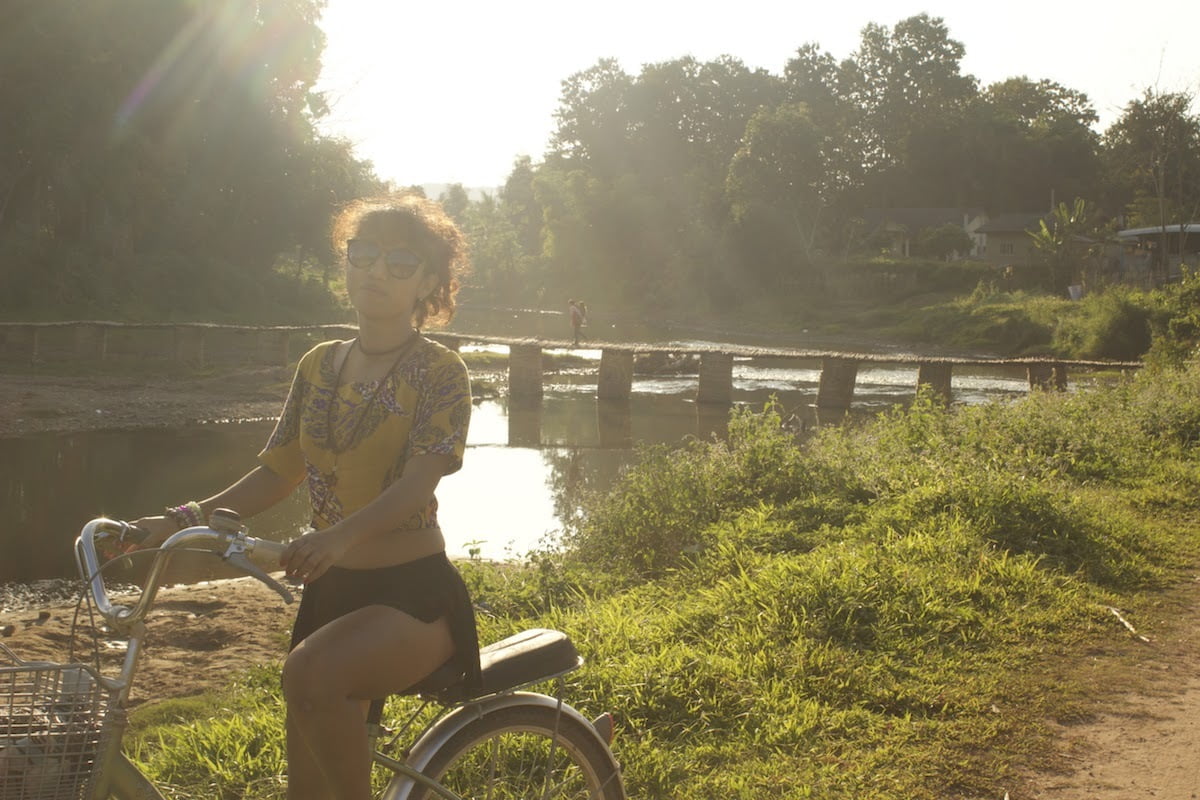
Another benefit of using a lens hood is that it helps to protect your lens from knocks, scratches, fingerprints and even falling snow if you’re shooting in such conditions. A lens hood offers better protection than a lens cap or UV filter because it extends some distance beyond the end of the camera.
If you were to accidentally drop your camera lens-first or your tripod was to keel over (it happens), the lens hood will help to save the front glass element by taking the brunt of the impact.
Many photographers will keep their lens hood on all the time while actively shooting for the added protection that it offers, and also because it means that they don’t have to fumble around and lose time trying to remove a lens cap when a fleeting photo opportunity arises.
However, there are times when you would definitely want to take your lens hood off, like when you’re using your camera’s pop-up flash, as the flash is so close to your lens that the hood can cast a shadow over your subject.
If you’re trying to shoot discreetly it’s also best to remove your lens hood. You may also need to remove your lens hood when shooting in windy weather, as the hood can easily catch the wind and increase unwanted camera movement.
Lens hoods usually attach directly to the front of your camera lens and come in two main shapes; cylindrical and petal-shaped (also known as a tulip or flower lens hoods), with the latter having a number of alternating curved notches and “petals”.
The petal lens hoods are used when shooting with a wide-angle lens or when shooting at shorter focal lengths, as their deep notches are designed to prevent the unwanted vignetting that occurs when the lens catches the sides of the lens hood.
The cylindrical or tubular lens hoods are more commonly used with fixed focal length lenses or long-range zoom lenses. Some photographers will only use a lens hood when shooting at longer focal lengths.
Many lens hoods are reversible, which means that you can turn them around and put them on your camera backwards for storage.
You may not have much of a choice when it comes to lens hoods for your lens, as there’s often only one type of hood available for each lens. If you get a petal-shaped hood, you’ll need to rotate it in such a way that the petals don’t end up in the frame.
If you don’t have a lens hood, there are still some ways that you can reduce the amount of stray light entering your lens, such as by holding your hand just above the lens or by moving behind an object like a tree or building that’ll block the offending light source.
But a lens hood is the most reliable solution and having one will ensure that you’re always able to get the best possible shots in any scenario where stray light or lens flare is an issue.
#31 - Convert your standard lens into a macro lens with a macro reversing ring
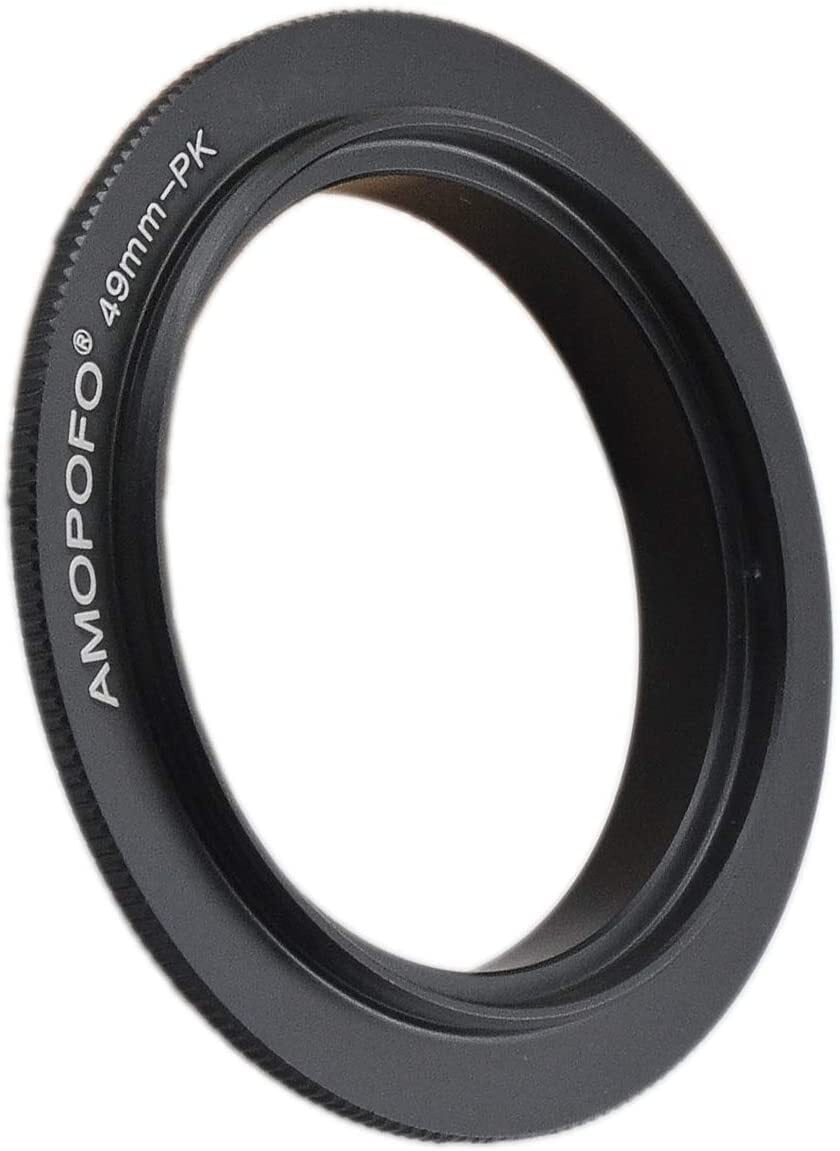
If you’re a minimalist traveller that would like to give macro photography a go, but you don’t want to go out and buy a specialist macro lens and add yet another piece of equipment to your already-cumbersome camera bag, you’re in luck.
There is a low-tech accessory you can buy for your camera lens that allows you to “cheat” your way into the world of macro photography. It’s called a macro reversing ring.
A macro reversing ring is a thin, inexpensive (costs around $10) metal adapter ring that screws onto the filter thread on the front of your regular camera lens. There are reversing rings made to fit all the different lens diameters.
Once the reversing ring is screwed on (make sure you buy one that’s the right size for your lens), you can then invert your lens and attach it to your camera body backwards, so that the front glass is facing in the opposite direction to normal.
When your camera lens is inverted in this way, you can use it for macro photography. There are some things to be aware of however.
First of all, autofocus and automatic shooting modes are out of the question, as the gold contact pins at the back of the lens are no longer in touch with the electronic contacts in the camera body when the lens is inverted. You will need to shoot in manual mode and focus manually using your lens’ focusing ring.
Additionally, you won’t be able to adjust the aperture size when the lens is inverted, so make sure you set the f-number to what you want (I recommend a low f-number) before you invert the lens.
Some lenses have a manual switch that you will need to hold open (you can use a bit of sticky tape or blue tack for this) to prevent the aperture from stopping down to its smallest size when the lens is inverted, but my lens luckily retains the last f-number that I dial in before inverting it.
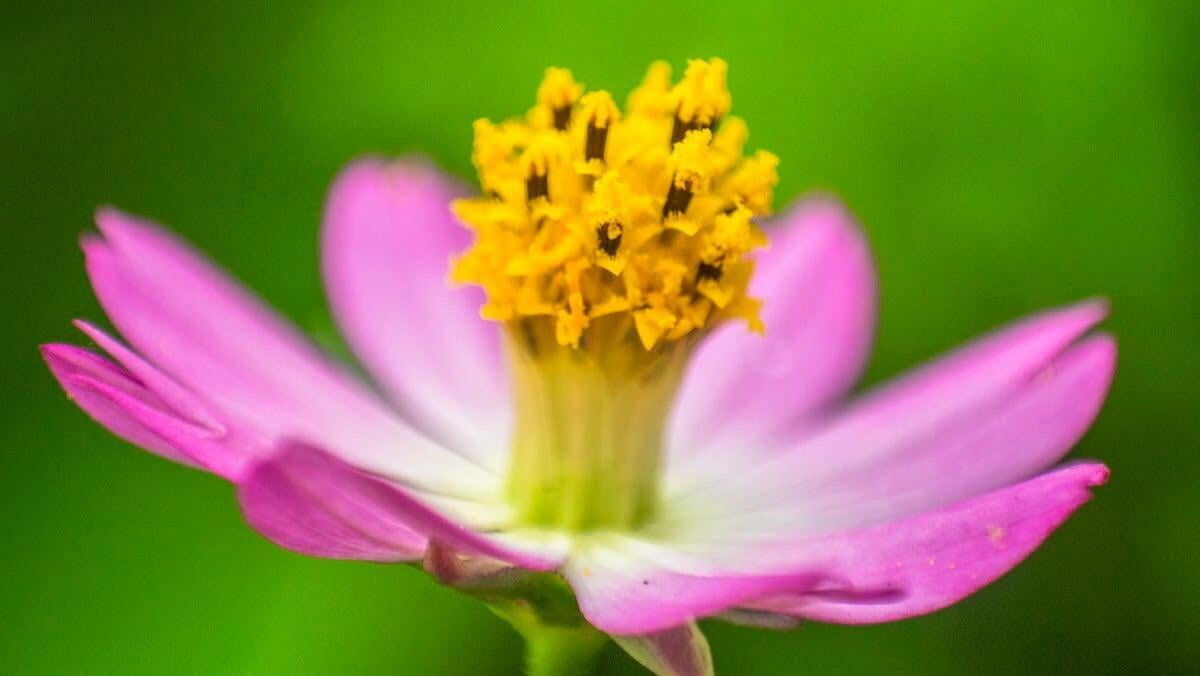

When your lens is inverted you will be able to change the ISO and the shutter speed, you will be able to see your exposure meter and you’ll still be able to zoom in and out to make your subject bigger or smaller, even though the lens is on completely backwards.
What you’ll find is that your lens will be fully zoomed out at its maximum focal length (i.e. 55 mm) and will be fully zoomed in at its minimum focal length (i.e. 18 mm). It’s exactly the opposite of what you would expect.
Macro photography requires lots of ambient light if you don’t want to shoot with slow shutter speeds and/or a high ISO setting. If you’re not shooting in a brightly lit environment, you will need to use a tripod or set the camera down on a flat surface to avoid camera shake and blurry images.
You'll find that the trembling of your camera is amplified when you zoom in on your subject, as is the case when shooting normally. Also, you will find that zooming in darkens the image significantly and requires you to use a slower shutter speed or higher ISO.
Fotodiox is a popular brand that makes macro reversing rings. On this page you can view their selection of reversing rings for all the major camera manufacturers and lens diameters.
#32 - Buy a drone for aerial photography
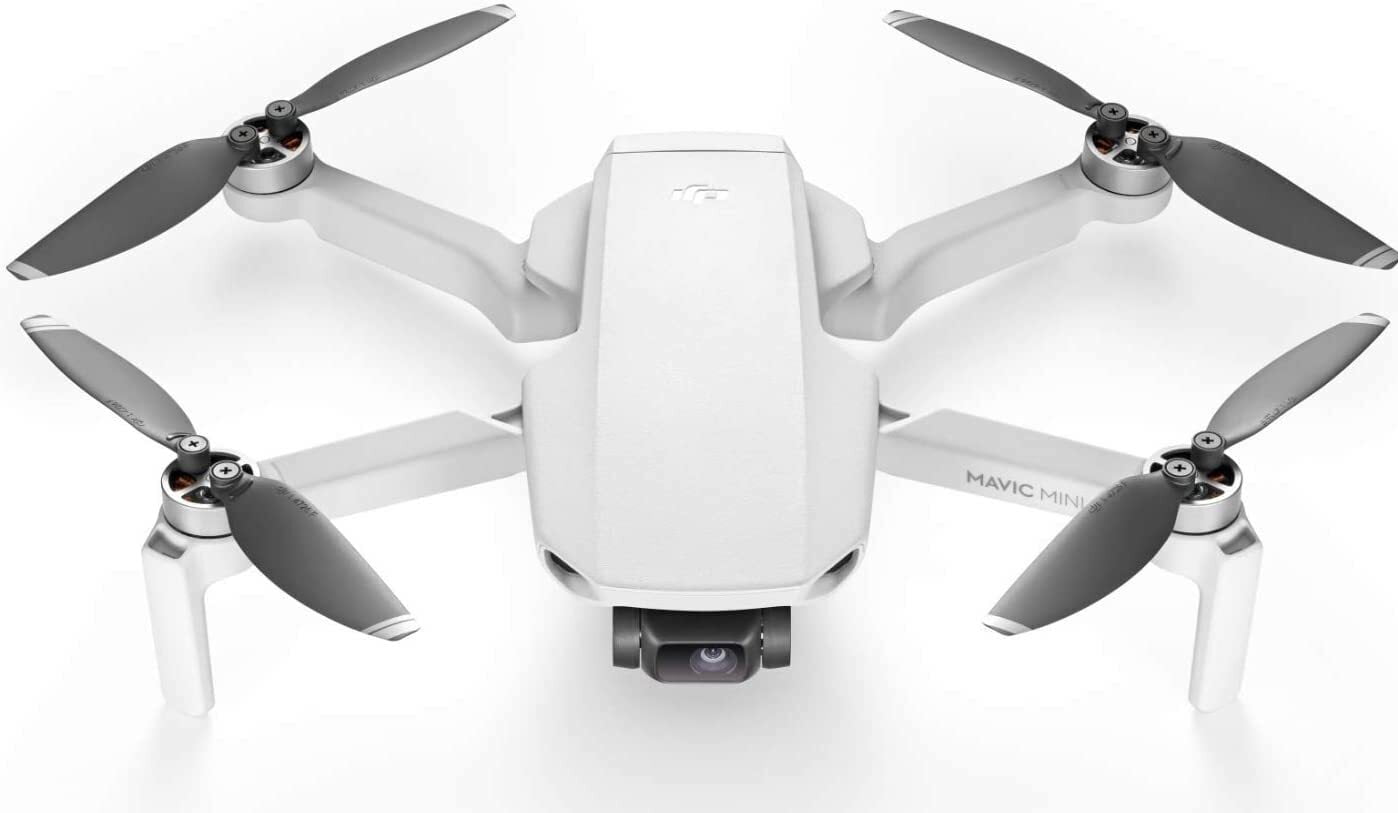
I don’t personally travel with a drone because I like to travel as light as possible, but I won’t deny that a drone will add an entirely new dimension to your travel photos.
The aerial perspective afforded by a drone is unusual and allows you to capture tourist sights and other interesting locations that have never been photographed from that bird’s eye viewpoint before in an entirely new way.
There are some things you need to know before you make the leap and decide to travel with a drone.
Firstly, a drone is an extra piece of equipment to carry and it is not the smallest or lightest piece of kit in the world either.
A portable drone can weigh anywhere between a few hundred grams for mini-drones to more than a kilogram for a regular-sized drone.
The best portable drones on the market today are foldable and compact, but remember that you’ll also have to carry the remote control, spare batteries, spare propellers, the charger and the charging cables. You will also probably need to buy a dedicated carry case for your drone and all of its accessories.
Flying on a plane with a drone isn’t too difficult.
Although it is permitted to have a drone in your checked luggage, it’s best to put it in your hand luggage, as you can better protect it that way and you won’t have to worry about it being mishandled by airport personnel or exposed to extreme temperatures down in the belly of the plane.
If you do decide to put your drone in your checked luggage, you will probably have to take any spare batteries on board the plane, as most airlines don’t allow spare lithium-ion batteries in checked luggage.
The battery inside your drone is considered okay however, as that’s installed in a device and is not considered a safety hazard.
For safety reasons and to improve your chances of getting the drone past security, it’s also recommended to keep your spare drone batteries inside special fireproof LiPo safe bags, which make it difficult for the batteries inside to ignite if they get damaged or punctured.
It’s also advisable to discharge the batteries down to around 30 or 40% before boarding the plane. This reduces the amount of stored energy in the batteries and makes them less liable to ignite or violently explode.
You also need to be aware that some countries have banned drones and other UAVs (unmanned aerial vehicles) outright, out of concern for national security, for environmental reasons or as a temporary measure until regulations for drones have been put in place.
These countries include Algeria, Antarctica, Bhutan, Brunei, Cuba, India, Iran, Iraq, Ivory Coast, Kuwait, Kyrgyzstan, Madagascar, Morocco, Nicaragua, Saudi Arabia, Senegal, Syria and Uzbekistan.
If you try to enter any of these countries with a drone it will probably be confiscated at customs. If you get past customs with your drone and start flying it in the country, there’s a good chance that you could be arrested or even go to jail.
Several other countries make flying a drone so difficult or have such strict flying regulations that you probably wouldn’t want to bother importing a drone.
You might have to jump through a lot of hoops, apply for permits or temporary licenses and pay a fee before you can fly a drone in such countries. Some countries only permit commercial flying of drones.
The information on this topic is always in flux so I recommend checking a site called uavcoach.com for up-to-date information, and also cross-checking that information with the CAA (Civil Aviation Authority) website.
See also this useful post for a detailed list of countries where drones are banned or their use is restricted.
Even in countries where flying drones is permitted, authorities will not allow you to fly your drone everywhere, as there are many no-fly zones in areas like airports, international borders, military installations, government buildings and other sensitive locations.
This is because aerial photos are very valuable to terrorists or enemies planning an attack on a country.
Drones are also banned at many tourist sites around the world. Back in 2017, the FAA banned flying drones within 400 feet of numerous major US tourist attractions, including the Statue of Liberty in New York, Mount Rushmore National Memorial, Boston National Historical Park, several dams and other locations.
It’s prohibited to fly a drone within a 500-metre radius of India’s Taj Mahal monument, and several tourists have already been apprehended for breaching this regulation, often unwittingly.
Most recently, it was a Chinese tourist who got arrested for flying a drone in a garden called Mehtab Bagh that lies to the north of the Taj Mahal on the opposite side of the Yamuna river, and falls within the no-fly zone around the monument. He was later released after submitting a written apology.
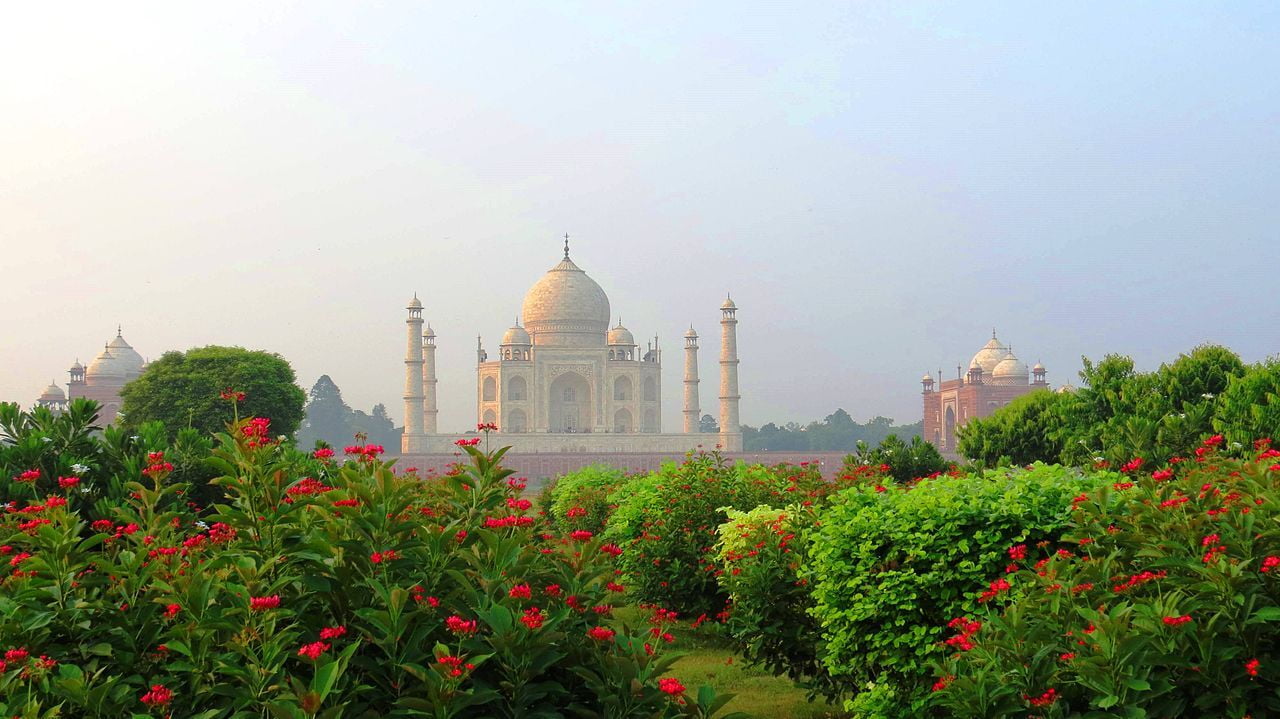
This is why you should always carefully research the local regulations for flying drones before travelling to a country with one. Some countries have very lax drone laws while others have much stricter ones.
There are usually limitations on how high you can fly the drone (i.e. many countries won’t allow you to fly above 400 feet) and some countries require you to display the registration number on the outside of the drone.
Germany, for instance, requires you to have proof of insurance to fly a drone and the registration number must be displayed on a fireproof metal plate on the vehicle, along with your contact details.
Another issue with drones is that it's quite easy to lose or crash them, especially if you're not an experienced pilot.
Some of the common obstacles you need to watch out for when flying your drone are overhead power lines, lampposts, trees, people and vehicles.
Drones are not easy to control in windy conditions and can easily be blown off course to collide with cliffs, buildings or trees. Remember that the higher you fly your drone, the stronger the wind becomes.
During a recent jungle trek in the hills around the town of Hsipaw in Shan State, Myanmar, we chatted with a German couple who were part of our trekking group and they told us that they’d bought a drone for their round-the-world trip, but had lost it due to a mishap.
During one particular flight the battery died and they weren’t able to retrieve the drone, nor were they able to recover any of the precious travel photos and videos that were stored on it.
When you consider how expensive the really good drones are, this is something you really wouldn’t want to have happen to you.
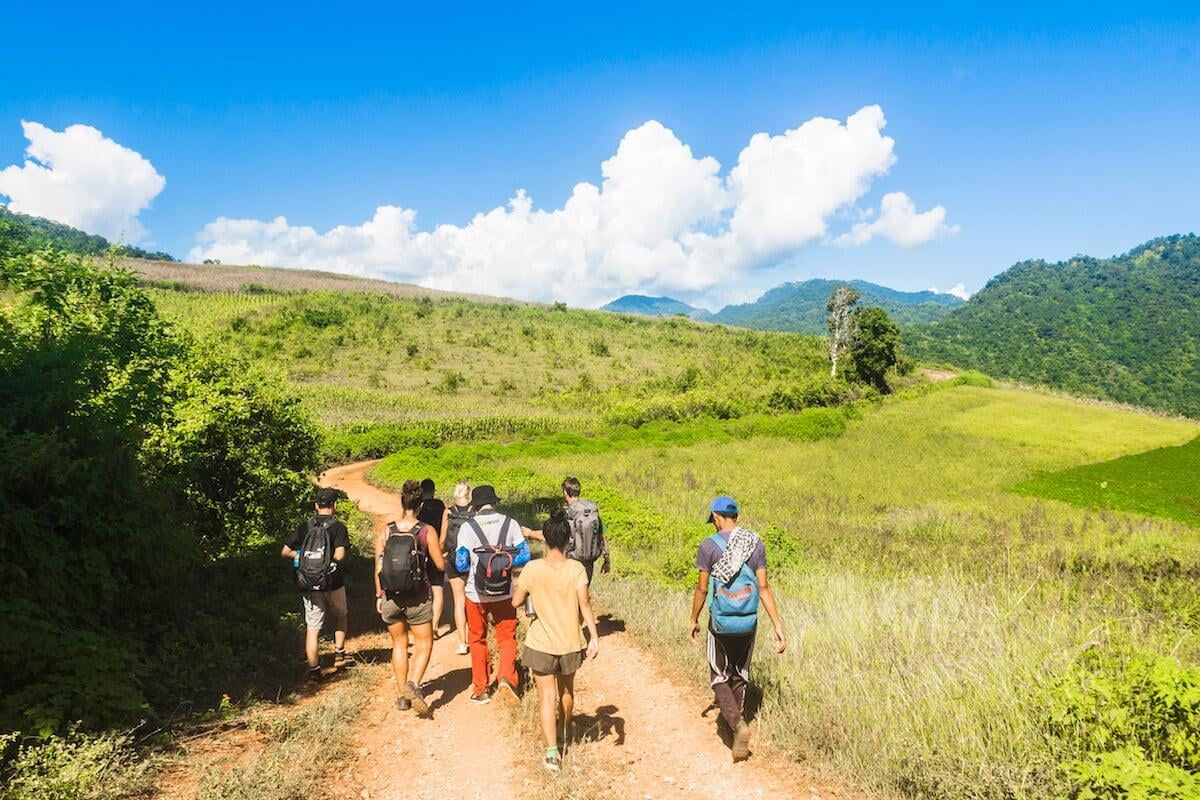
Now, if you’ve read through all the foregoing caveats and you’re still dead set on travelling with a drone, then I’d recommend the DJI Mavic Mini.
When you’re travelling you want something really lightweight and compact, and this drone definitely fits the bill in that regard.
Weighing just 8.8 oz (249g), the DJI Mavic Mini is incredibly light and is also small enough to fit inside your jacket pocket.
The low weight also means that this drone is exempt from the normal drone regulations in many countries, as they often only apply to drones that are 250 g or heavier.
The remote controller for the DJI Mavic Mini is about the same weight and size as the drone itself and together, they come in at about a pound in weight, which isn’t bad at all.
Despite its compactness and lightness, the performance of this drone is certainly nothing to scoff at, with an impressive max flight time of 30 minutes, a range of about 2.5 miles and a max altitude of 1,600 feet.
True, it won’t handle strong winds very well due to its light weight, but that’s the price you pay for extreme portability.
The DJI Mavic Mini is also equipped with an automatic return home feature in case it loses signal, although it doesn’t have collision avoidance sensors, so care is required if flying it in congested environments.
As regards the camera, which has a 24 mm lens and fixed f/2.8 aperture, it won’t shoot 4K video, but it does do 2.7 K/30p (also 1080/30p), which is good enough for most. The camera can also do 12 megapixel JPEG still images, but RAW images are not supported, unfortunately.
The camera is stabilized in flight by a 3-axis gimbal, which improves the watchability of the footage. It also performs well in low light.
This is also one of the least intrusive drones money can buy, being much quieter and less easily spotted than most other drones out there.
You can buy the DJI Mavic Mini separately or with a “Fly More” kit, which is about $150 dearer.
The kit comes with 2 spare batteries, 2 pairs of spare propellers, an additional Micro USB cable, 12 spare screws, a 360 propeller guard (protects your drone from destructive falls), a two-way charging hub, an 18W USB charger and a carry case.
You actually save a lot of money by going for the Mavic Mini Fly More combo, as all of these accessories would cost more than $180 if purchased individually (although some of the items in the kit can’t be bought separately).
However, if the only extras you plan to purchase are a few spare batteries, then the regular Mavic Mini package will be a better choice.
#33 - Pack a selfie stick (maybe)
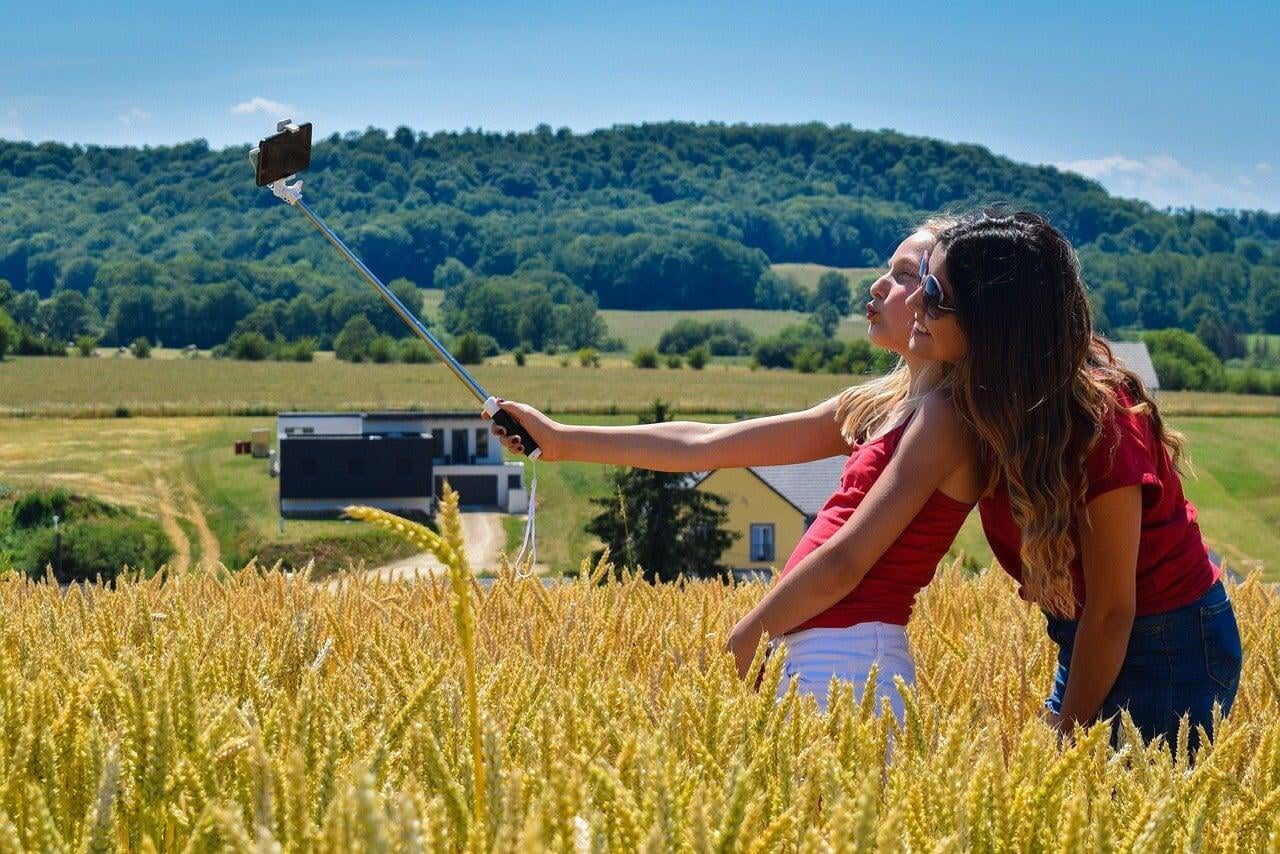
Although they’ve really taken off in places like Southeast Asia, South Korea and Japan since they first appeared on the scene back in 2014, selfie sticks and the selfies (self-portraits) they are designed to capture are definitely not for everyone.
Many people see these long, telescopic rods as instruments that promote and encourage narcissistic, self-obsessed tourist behaviour and wouldn’t be caught dead with one of these "Narcissisticks" near their grave.
Even several well-known tourist attractions, stadiums, museums, art galleries, beaches and other venues around the world like to ban them or require users to obtain prior permission to use them.
They are often forbidden on the grounds that they are anti-social and can pose a danger to other visitors, especially when they're being unwittingly flailed around near a person’s head. (See here for a list of 17 popular tourist destinations that have restricted the use of selfie sticks).
They can also pose a mortal threat to the person wielding them, especially when that person is trying to compete with other users on social media platforms like Instagram and Facebook for the most extreme or unique selfies, by standing in perilous locations like on the brink of a smoking volcanic crater, at the edge of an intimidating waterfall, outside a burning building or in the middle of a railway track when there's an oncoming train.
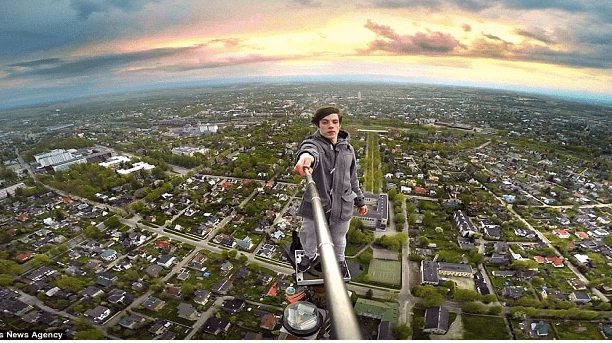
This desperation for likes, comments and followers has led to several prominent social media personalities, travel bloggers and Instagrammers losing their lives in the pursuit of the perfect selfie over the past years.
Some waterfalls and other high-risk tourist spots around the world consequently now display signs that read "selfie danger zone", "no-selfie zones" or similar.
Interestingly enough, India is the world capital for selfie deaths or "killfies", reporting about half of all 259 reported selfie-related deaths between 2011 and 2017, and most of the victims are Indians as opposed to foreigners taking a holiday in the country.
This may stem from India's strongly stratified social structure, which results in low-ranked individuals taking risky selfies as means of increasing their social standing.
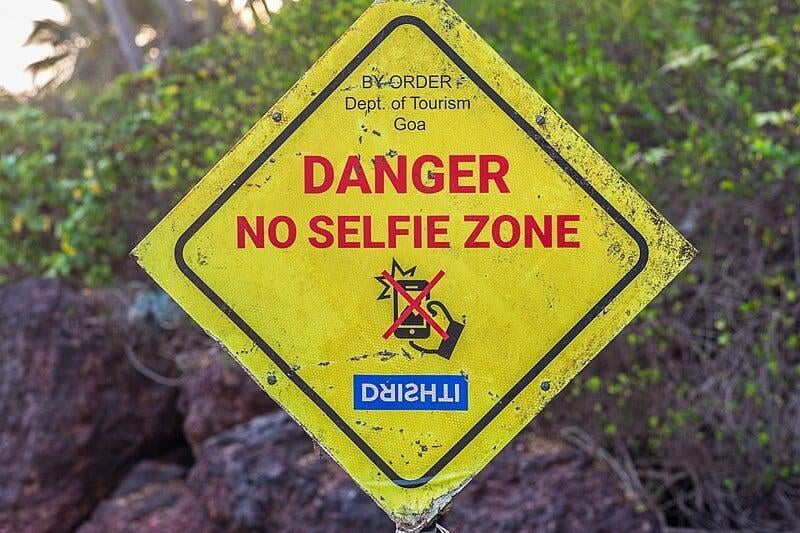
Nevertheless, if you enjoy taking personal selfies or group selfies, then a selfie stick is an important accessory to add to your travel packing list.
A telescopic selfie stick is essentially a modified monopod with a handle at one end and a holder at the other for securing your camera or phone.
It acts as an extension to your arm, allowing you to hold your camera or phone further away from your body when taking a selfie than you otherwise could.
This results in a wider field of view and in selfies that give more context, since more of the surroundings appear in the frame when the camera is held further away. When using a selfie stick, you can have your entire body (or most of it, at least) in the frame instead of just your face and shoulders.
A long selfie stick also makes it a lot easier to include everyone’s face in the frame if you’re taking a big group selfie with 5, 10, 15 or more people standing behind and around you.
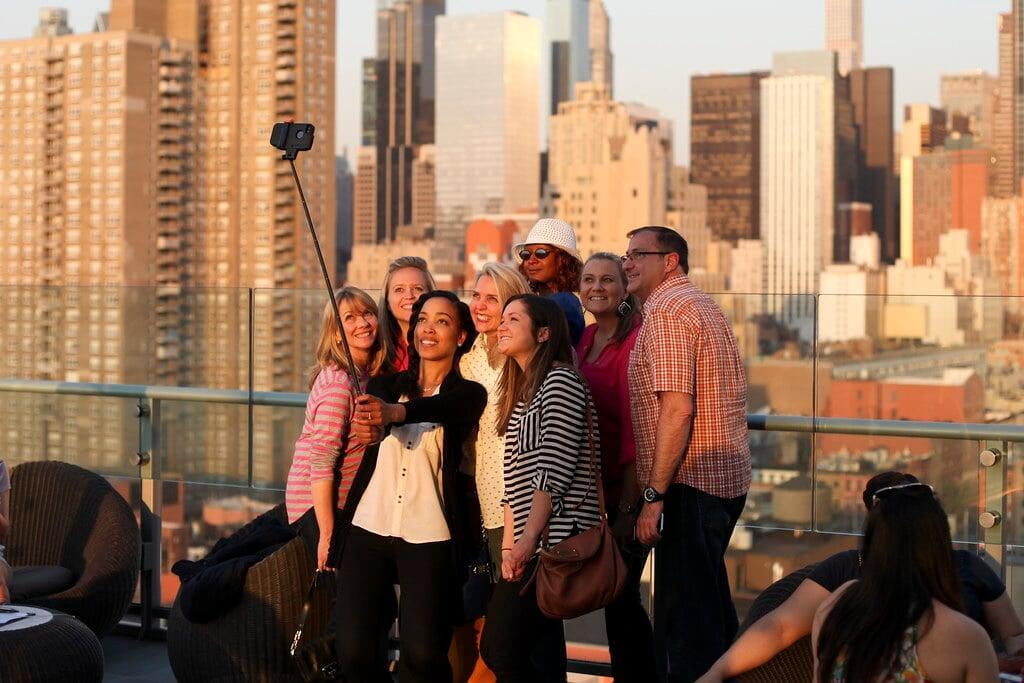
Another advantage of using a selfie stick is that it reduces the risk of dropping your phone while trying to take a selfie.
If you’re ever tried taking a regular selfie with your camera phone, you’ll probably have found it quite challenging to hold the phone at the desired angle and press the shutter release button on the screen without the device slipping out of your grip.
A selfie stick also allows you to shoot steadier videos and lets you take selfies in scenarios where you wouldn’t want to risk holding the phone in your hand.
A selfie stick is better when you want to hold your phone out the window of a moving train or three-wheeler, or when you want to take selfies while you’re partaking in adventure sports and activities like cliff jumping, snorkelling, diving, paragliding, snowboarding, skiing and so on.
(Incidentally, selfie sticks were originally popularized by extreme sports enthusiasts before they began trending with Asian tourists).
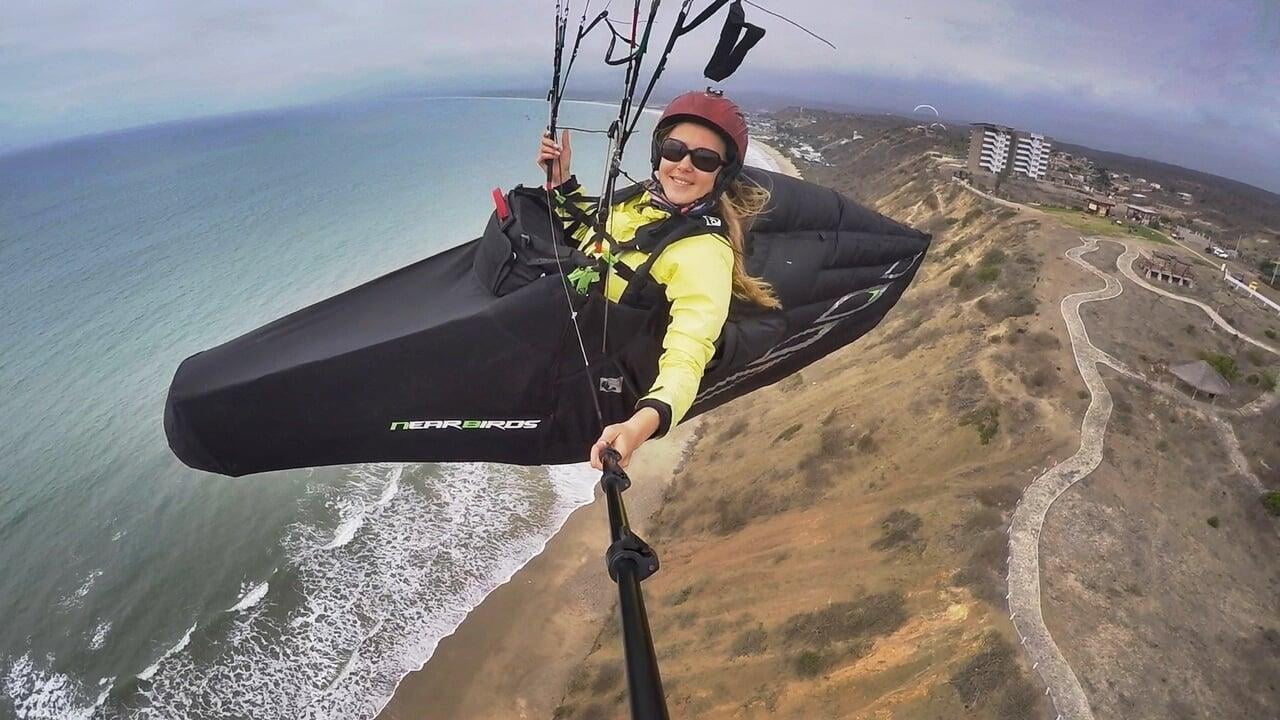
I wouldn’t say that a selfie-stick is a replacement for a tripod, as shots taken with selfie-sticks have a different feel (since the stick always appears in the photo) to those taken with a tripod, but many selfie sticks also have integrated tripods, so you can switch between the two functions as you wish.
Selfie sticks are mainly only compatible with camera phones, action cameras and small point-and-shoot cameras.
There aren’t really any selfie sticks made for heavy DSLR or mirrorless cameras, as they would be too difficult for most people to hold and the stick would also need to be a lot stronger and therefore heavier too.
You could theoretically mount your full-size camera on a tripod or monopod and use it like a selfie stick, but you would need to have pretty decent upper body strength to hold it like that for very long, and the experience wouldn’t be very enjoyable.
Most telescopic selfie sticks can extend to around 30 inches or longer, with some, like the Mighty Selfie Stick, even extending as much as 10 feet (305 cm).
Many models will have a wrist strap or loop attached to the handle for added security; you can pass your hand through this loop to ensure that you don't accidentally let go of the stick or drop it out a window (oops!).
To use a selfie stick, you have to first mount your phone, action camera or compact camera in the cradle or phone holder. These holders usually have an adjustable clamp to accommodate many different types of phones and cameras.
Since you won’t be able to reach the phone or camera when the stick is extended, there’ll usually be a button on the handle of the selfie stick that you press with your thumb to trigger the phone or camera to take the photo.
For this to work, your phone or camera has to be paired with the selfie stick via Bluetooth or via a cable that plugs into the headphone jack of your phone/camera. Some selfie sticks come with a separate Bluetooth remote that’s not built into the handle.
The selfie sticks with built-in Bluetooth have a rechargeable battery that’ll usually last for 20 hours or so, which should give you about 3,000 photos per charge.
For most travellers, we recommend the Mpow Selfie Stick Tripod, which is a bestseller on Amazon.
The six-section telescopic pole of this selfie stick is made from a lightweight aluminium alloy and is super compact when folded down (only 6.5 inches long or about the length of your hand).
With a maximum extended length of 29.5 inches, it functions not only as a selfie stick but also as a sturdy little tripod, thanks to three little retractable and lockable legs that fold out of the handle.
The 270° neck rotation of the head gives you plenty of latitude to adjust the angle of your shot, and the 360° clamp rotation allows you to orient your phone/camera in either landscape or portrait mode.
The phone clamp is fully adjustable, so it’ll securely hold most iPhones, Android phones, small cameras (less than 500 g) and GoPro cameras (via the universal ¼” screw).
When you want to use the stick in tripod mode, the Bluetooth remote on the handle can be fully detached and can communicate with your phone or camera from of up to 10 metres (33 ft) away.
The Bluetooth remote has a 55mAh battery, 30 mins charging time, 30 days standby time and will take 50,000 selfies after a full charge.
Another nice feature of this selfie stick is the 3-level adjustable fill light, which brightens up your face in poorly lit environments. The light also supports a flashing mode.
#34 - Bring a good camera phone

If you’re not quite a shutterbug, but you do want to be able to take a few nice photos as a way to document or remember your trip in the future, you can probably make do without a dedicated or standalone camera.
The cameras built into some of today’s smartphones are extremely capable and can produce images that are often indistinguishable from those taken by full-frame DSLR cameras across many quality indicators like sharpness, colour uniformity, noise levels, distortion and so on.
Although they have some physical handicaps, smartphone cameras have the ability to compensate for these with the aid of computational gymnastics and machine learning algorithms.
Images captured on a smartphone also have the advantage of being very easy to instantly share with friends and family on social media and messaging apps.
True, dedicated digital cameras with Wi-Fi and Bluetooth connectivity have made it easier to quickly transfer images from a camera to a smartphone or personal computer, but that's still an extra step to go through when you want to get an image uploaded to the web as quickly as possible.
You also can’t beat the sheer portability of a smartphone camera; a dedicated camera (plus the other trappings that go with it, like a tripod, lenses, filters, camera case, charger, spare batteries, etc.) is a fairly bulky and heavy piece of kit to have to carry around with you during your trip.
Nonetheless, standalone cameras are still superior to smartphone cameras in many ways.
Some of their advantages over phone cameras include more manual control over shooting settings (focal length, shutter speed, ISO, aperture size, white balance etc.), optical zoom (instead of the inferior digital zoom that most smartphones use), changeable lenses and a viewfinder, which helps conserve battery and compose shots when it’s too bright to clearly see the LCD monitor.
Dedicated cameras are also generally far more capable in low light conditions, especially where moving subjects are concerned.
But if you’re just getting started with photography and you don’t need all of the extra capabilities, a smartphone with a high-quality camera may be all you really need to capture the images you want.
Even if you have a dedicated camera it's smart to have a good camera phone as a backup in case your primary camera malfunctions (it happens) or the battery dies at an inopportune moment.
The Google Pixel 4 has one of the best smartphone cameras out there, its secret weapon being the machine-learning software that it uses to enhance the images.
The phone has a main 12.2 MP rear camera , a 16MP, 2x telephoto camera and an 8MP front camera for selfies. It works great for portraits and has a night sight mode for turning night into day.
But the major hype surrounds its astro mode, which no other phone currently possesses. Astro mode automatically activates from night sight mode if its dark enough and if the phone is stable enough.
The Samsung Galaxy S20 Ultra also has a great camera, with a 108 MP pixel sensor, a 100 x digital zoom and the ability to do 8K video.
If you’re an iOS user, the iPhone 11 Pro is known for its realistic-looking, minimally processed images and has a triple-camera array (ultra-wide, wide and telephoto). The new ultra-wide f/2.4 lens is superb for travel photography, affording a 120° field of view.
There’s also the iPhone 11 Pro Max, which is all the same cameras but is a bit bigger, while the regular iPhone 11 lacks the telephoto lens.
You can compare other great camera phones here.
#35 - Supplement your primary camera with an action camera
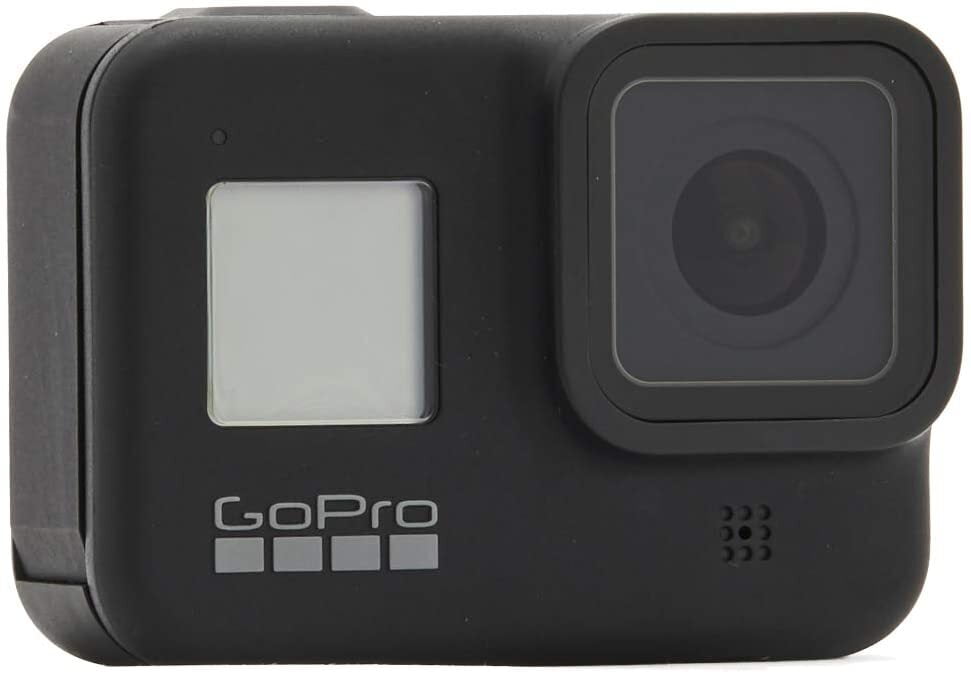
If you’re an adventurous traveller that likes to seek out novel thrills on the road, your photography has the potential to reach new heights if you add an action camera in your toolkit.
This camera will act as a compliment to your primary DSLR or mirrorless camera by allowing you to take photos in places where your normal camera can't go or where you wouldn't want to bring it.
Action cameras are designed to endure a bit of rough and tumble and have waterproofing to boot, which makes them great substitute during those heroic travel escapades where you’d prefer to leave your $1,000 primary camera back at the hotel for fear of damaging it or getting it wet.
I’ve been on stretches of hiking trails where it was too dangerous to manoeuvre a DSLR camera because I needed the use of both hands to maintain balance or to hold onto tufts of grass while hauling myself up vertiginous terrain.
One of the major advantages of a GoPro is that it can be used handsfree, allowing you to fully devote your concentration to the perilous task at hand while obtaining the footage or images that you want.
I recently went gorge walking with a group of other tourists in a tributary of the Gomti river in the tribal state of Tripura in northeast India.
It wasn't long before we came to a bottleneck in the gorge, which could only be crossed by first scaling a slippery bamboo ladder and then using man-made footholds cut out of the rock walls of the gorge to pass through the bottleneck into the upper section of the gorge.
Regrettably, I only brought along my DSLR camera on that occasion, and was consequently quite limited in the range of scenarios that I was able to capture photos in.
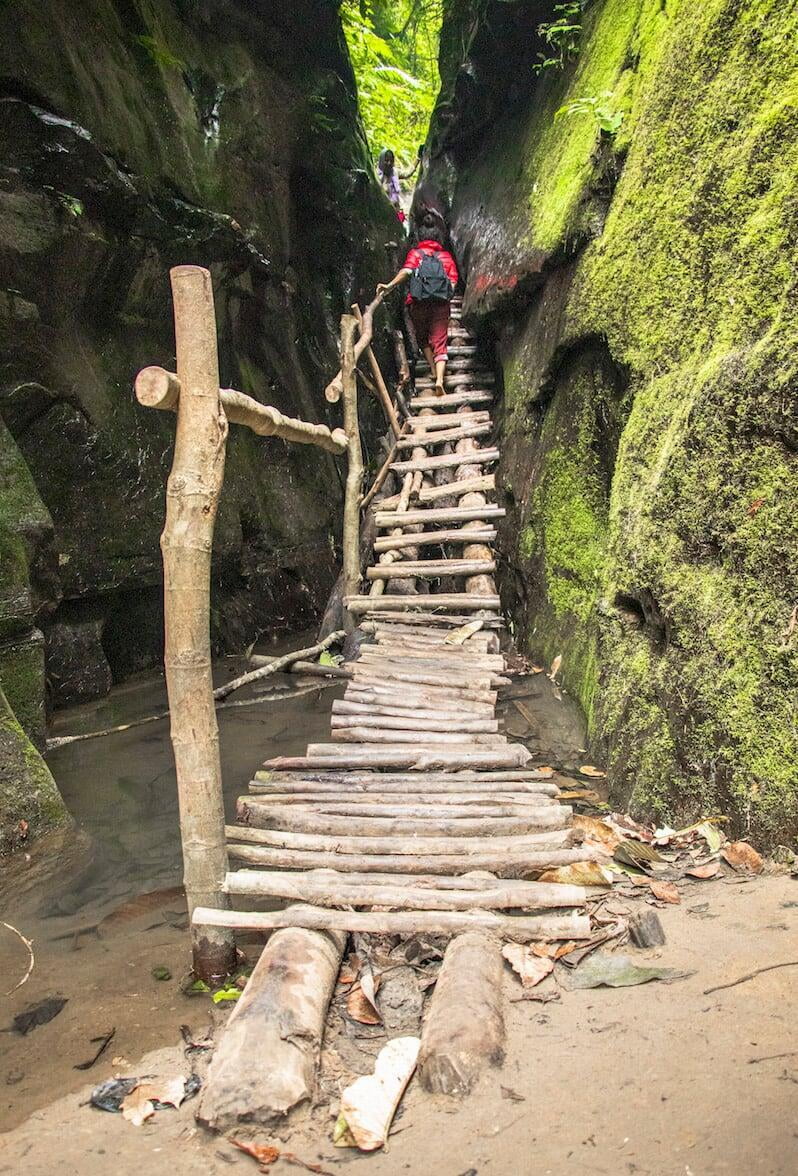
Although there are now a number of action camera brands out there, for many people the genre is still synonymous with the GoPro brand, which first popularized and practically invented the concept of the action camera for travel, sports, and adventure activities.
In recent years, a number of other manufacturers have attempted to emulate the company’s success by developing their own GoPro lookalikes and while many of these alternatives are budget-friendly, the original GoPro cameras have proven difficult to surpass in terms of features and quality.
All GoPro models from the Hero 5 upwards have native waterproofing to a depth of 10 metres, and additional waterproof casings can be bought separately if you want to dive deeper than that.
This means that GoPro cameras can be used for underwater photography while snorkelling or diving, allowing you to take snapshots of vividly colourful coral fishes, sea turtles, whale sharks, sea anemones, sea urchins, and other interesting marine life you encounter.
For underwater photography with a GoPro camera, it's a good idea to buy a snap-on red filter to make your photos look more natural by counteracting the filtering of red light by the water, an effect that increases with depth.
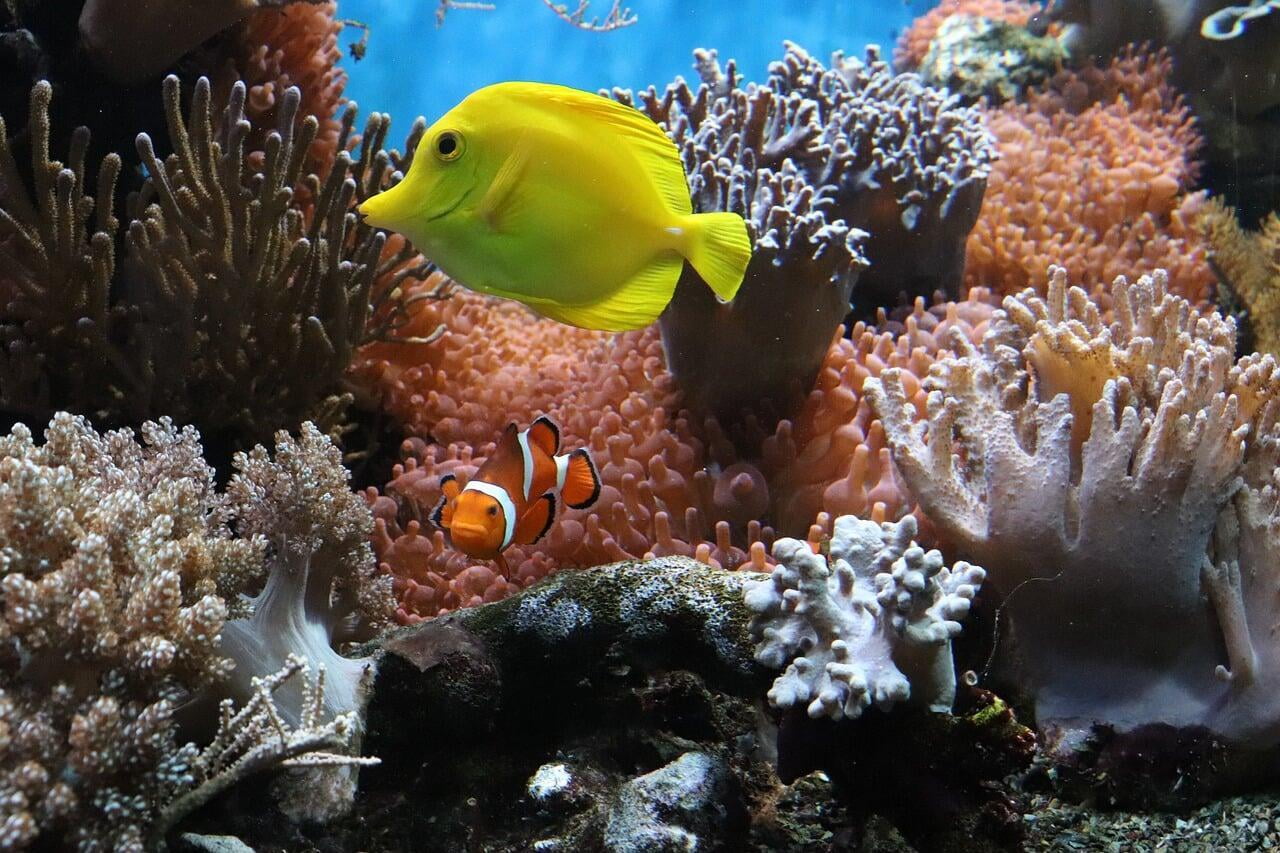
With a GoPro action camera you’ll also be able to take those ever-fascinating shots that capture the scenes above and below the water line in the same shot, where the lower half of the image reveals the mysterious submarine world while the upper half captures the more mundane world above the water.
These photos are known as over-unders or split-shots (also splits) and are taken by aligning the centre of the action camera lens with the surface of the water. We’ve provided some pointers for these shots in our discussion about dome ports directly below.
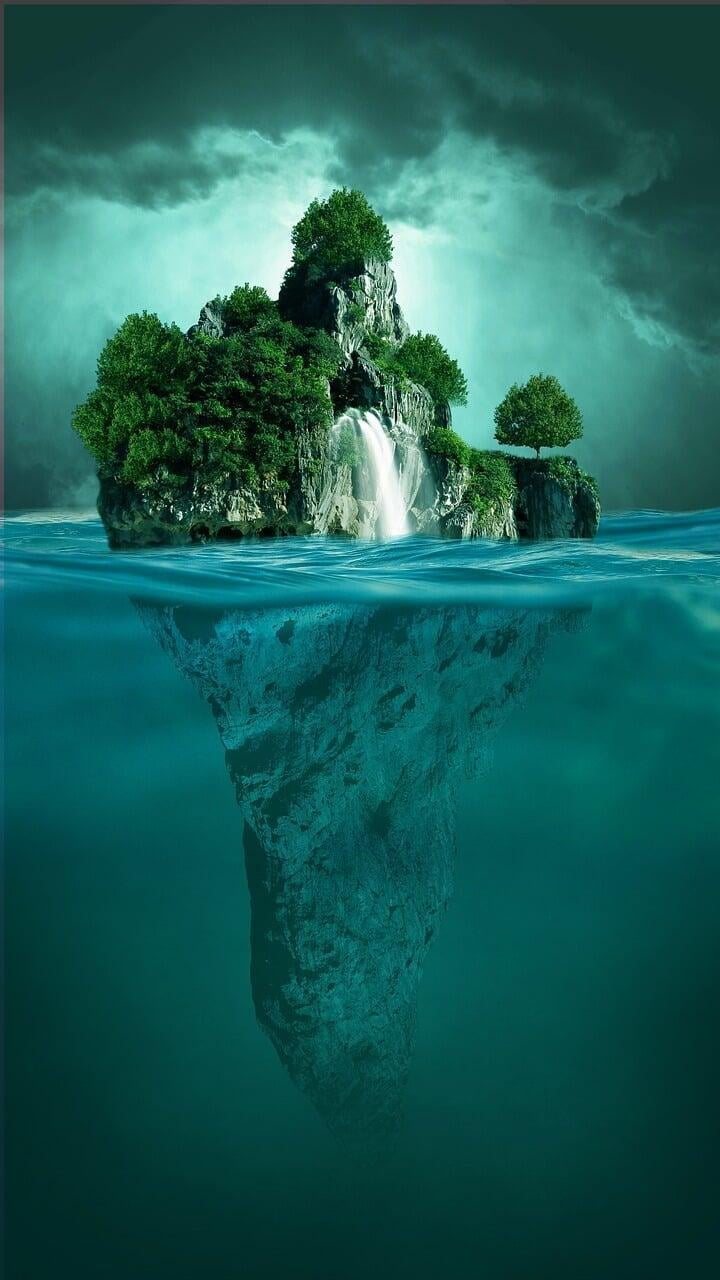
Or maybe you’d like to take a selfie of yourself in mid-air while leaping off the top of a waterfall or when hurling yourself off a cliff into the inviting waters of a lake below. All of these things are possible with a GoPro.
Because GoPro action cameras have an wide-angle lens, they are also perfect for those first-person perspective or point-of-view shots taken while riding a bicycle, driving a motorcycle or paddling a kayak.
The field of view is so wide that even the arms and legs of the photographer, the handlebars of the vehicle or the kayak paddle can be captured in the photo along with the rest of the scene.
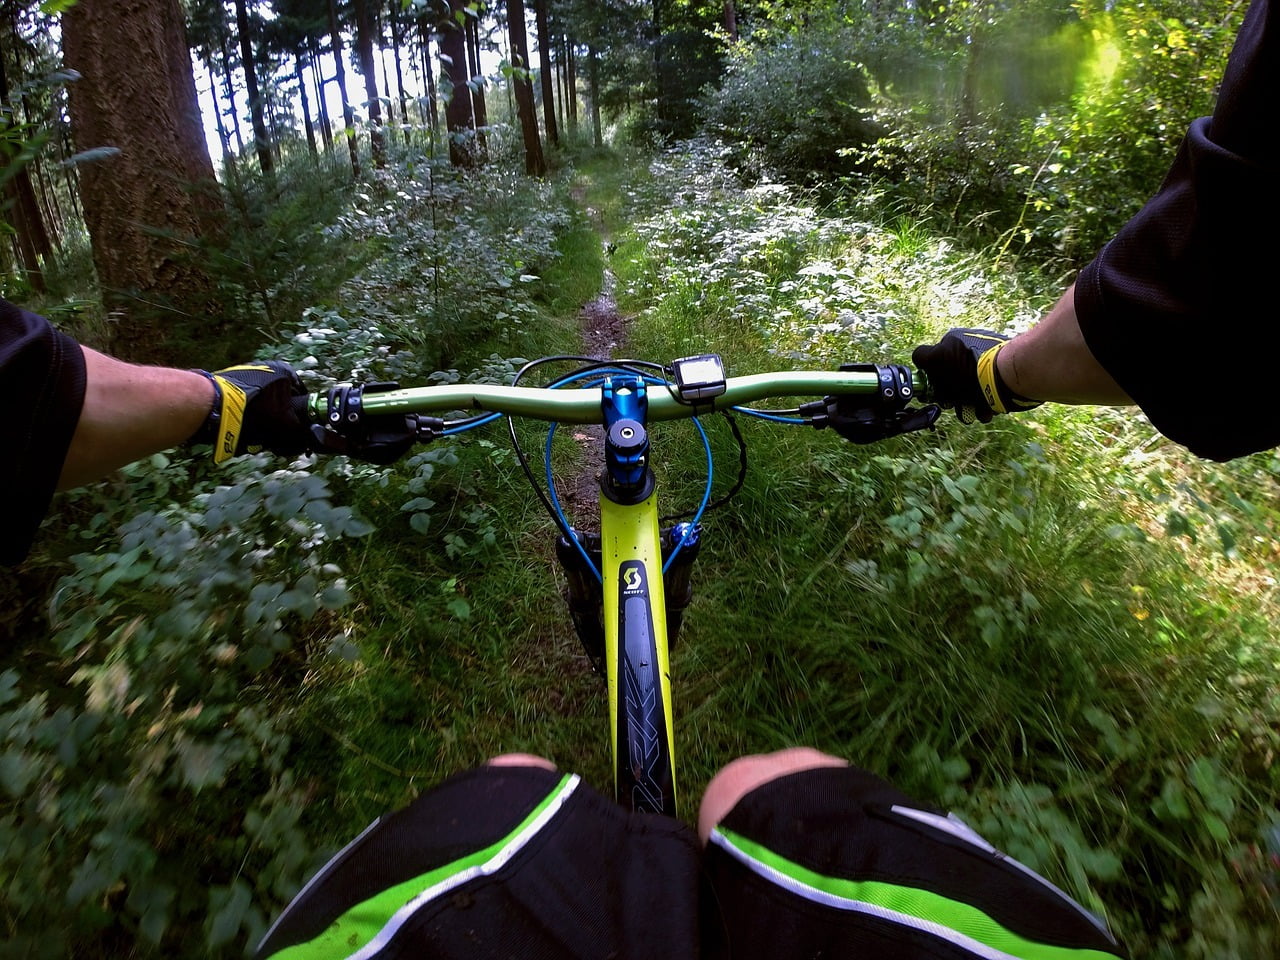
And it goes without saying that a GoPro action camera is ideal for capturing photos and videos in most of the different types of extreme sports and outdoor activities that you are likely to partake in during your trips.
You can use a GoPro while skydiving, parasailing, paragliding, potholing, kayaking, canoeing, sailing, skiing, snowboarding, rock-climbing….. the list goes on.
To get the most of your GoPro camera and to be able to use it handsfree in the throes of battle, you’ll need to be equipped with the right accessories and mounts such as chest harness mounts, head mounts, helmet mounts, handlebar mounts, surf mounts, suction mounts, adhesive mounts and so on.
Popular GoPro accessories include wrist leashes, waterproof remotes, screen protectors, selfie sticks, waterproof lights, directional microphones, tripods, extension poles, gimbals, solar chargers, spare batteries, waterproof housings, buoyancy aids, media mods, flip-up screens, carry cases, card readers and more.
Which accessories you carry will depend on what situations you intend to use your GoPro camera in, as well as your degree of tolerance for travelling with a lot of extra equipment.
GoPro accessories and mounts deserve a dedicated article and we won’t be covering them here, but you can take a look at this list for some great ideas.
The latest GoPro model is the GoPro HERO 8 Black.
It’s waterproof down to 33 feet (10 metres) and supports 4K/60p, 2.7k/120p and 1080/240p video (up to 100 Mbps bit rate), 12 MP photos (like the iPhone 11 and Google Pixel 4 cameras) and 1080p live streaming to platforms like YouTube, Facebook and Twitch.
As well as the regular photo mode, the HERO 8 also has Superphoto mode and HDR mode, which both use in-camera processing to enhance the image before saving it. There’s also a night mode where you can choose extra-long shutter speeds up to 30 seconds.
There are three fields of view that you can choose from with the HERO 8, namely wide (the default fish-eye look), linear and narrow.
Linear FOV tries to eliminate the optical distortion caused by the camera's fisheye lens and is useful when you don’t want curved horizons or other curved lines in your photo. It also crops the photo a bit. Narrow FOV is supposed to be the equivalent of a 27mm lens on a full-frame camera.
You won’t have full manual control when shooting still photos with the HERO 8, but you can adjust the ISO, shutter speed, white balance, sharpness, colour mode and a few other parameters. The aperture is fixed at f/2.8, so you can’t control that.
As with many previous GoPro models, you can shoot in GoPro’s native RAW format (file extension .gpr), which is based on the Adobe DNG format, although this format isn’t supported by many image editors (you can however convert it to DNG using a free app).
In any case, a JPG version of every image you take will be saved along with the RAW file, so there’s nothing to worry about. Note that you can only choose the RAW file format when shooting in wide field of view, but not in linear or narrow.
One of the big selling points of the HERO 8 is a feature called Hypersmooth 2.0, which delivers impressive image stabilization while filming videos. There are three levels (on, high and boost) of stabilization depending on how much you want, although the boost mode isn’t available at 4K/60p.
The HERO 8 also supports a new LiveBurst shooting mode (in addition to Burst and Continuous Photo modes), where the camera will take photos 1.5 seconds before and after you press the shutter, allowing you to choose the best frame from 90 rapid-fire still images. This mode is handy when you’re not exactly sure when the action is going to commence.
The HERO 8 can also be kitted out with a flip-up LCD screen add-on (display mod) and an add-on frame (media mod) that gives you HDMI out, a 3.5 mm microphone jack and an additional microphone.
Other features of the HERO * Black include Wi-Fi and Bluetooth connectivity, integrated mounting fingers that fold out from the base of the camera, a self-timer (up to 10 seconds) and a digital zoom (only works with JPG images).
#36 - Get a dome port for your GoPro if you're into underwater photography
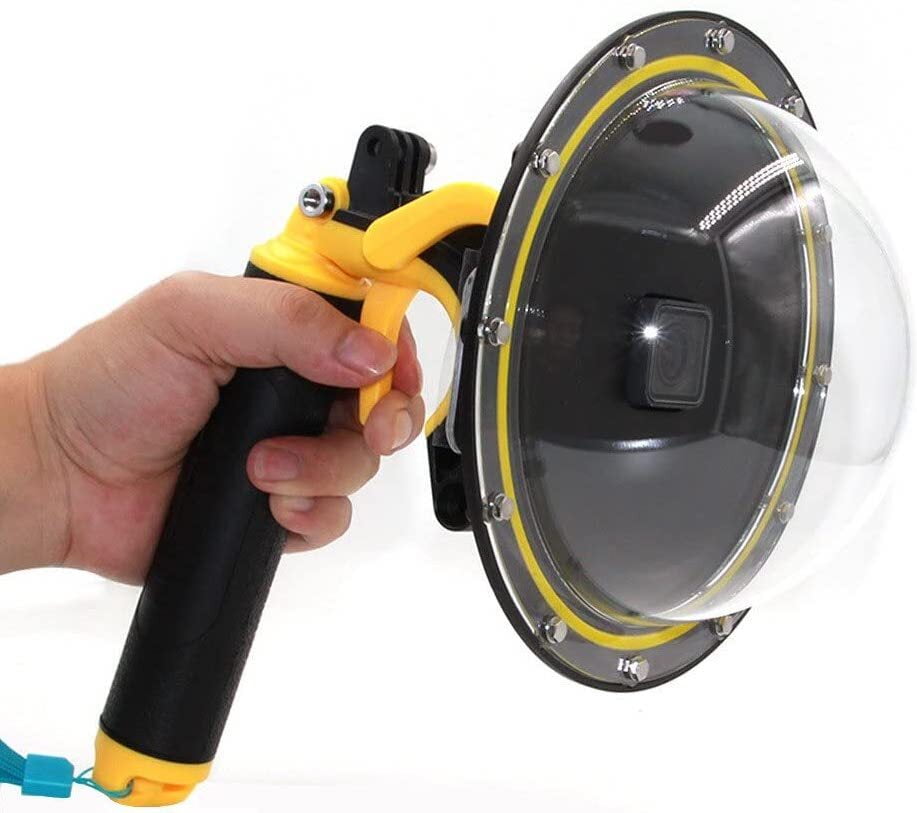
We briefly mentioned over-unders (split-shots) above while discussing some of the advantages of travelling with an action camera.
The effect created by these photos that are partly in water, partly in air, is quite surreal because they allow us to accomplish something that’s not possible in real life; to observe the above-water and underwater worlds at the same time with a high degree of clarity.
However, you will struggle to get good over-under shots in anything except completely calm water unless you use your GoPro inside an extra piece of kit called a dome port, which is basically a watertight, transparent acrylic or glass hemispherical dome that’s attached to a backplate.
On the rear of the backplate there’s a housing to secure your GoPro camera, and there’s also a hole in the centre of the backplate that allows the light from the scene to reach your GoPro lens.
The Vicdozia Telesin dome port we’ve linked to is a bestseller on Amazon and is compatible with the GoPro Hero 5, 6, 7, 8 and the GoPro Hero 2018.
All of the amazing split shots that you might have seen online are actually shot using one of these.
Over-under shots work best in shallow, perfectly clear water with a white sand bottom and in bright, midday sunshine when there’s plenty of light penetration to illuminate the underwater scene.
It’s also advisable to shoot in burst mode in order to increase your chances of getting a well-timed shot, as there can be a lot of unpredictable movement of waves and other elements in the scene. Selecting a wide-angle shooting mode will also yield better results.
You should also try to keep water droplets off the dry portion of the dome port while you’re shooting; one trick that helps with this is to spit on the port and then use your tongue to spread the saliva over it.
Make sure that you don’t rub the spit into the dome with your fingers, as the natural oils in your fingers will actually work against you here. Also, it will be more effective if you wait a few minutes before entering the water after treating the dome port with your saliva.
After shooting, it’s a good idea to rinse the port in clean freshwater to help prolong its lifespan, especially if you've been using it in saltwater.
The dome port should also be kept in the provided cover when not in use to avoid scratches, which will start to show up in photos if your dome port develops too many of them and especially when you’re shooting into the sun.
Section 3: Useful techniques to enhance your travel photography
#37 - Become a master of time with long exposure photography
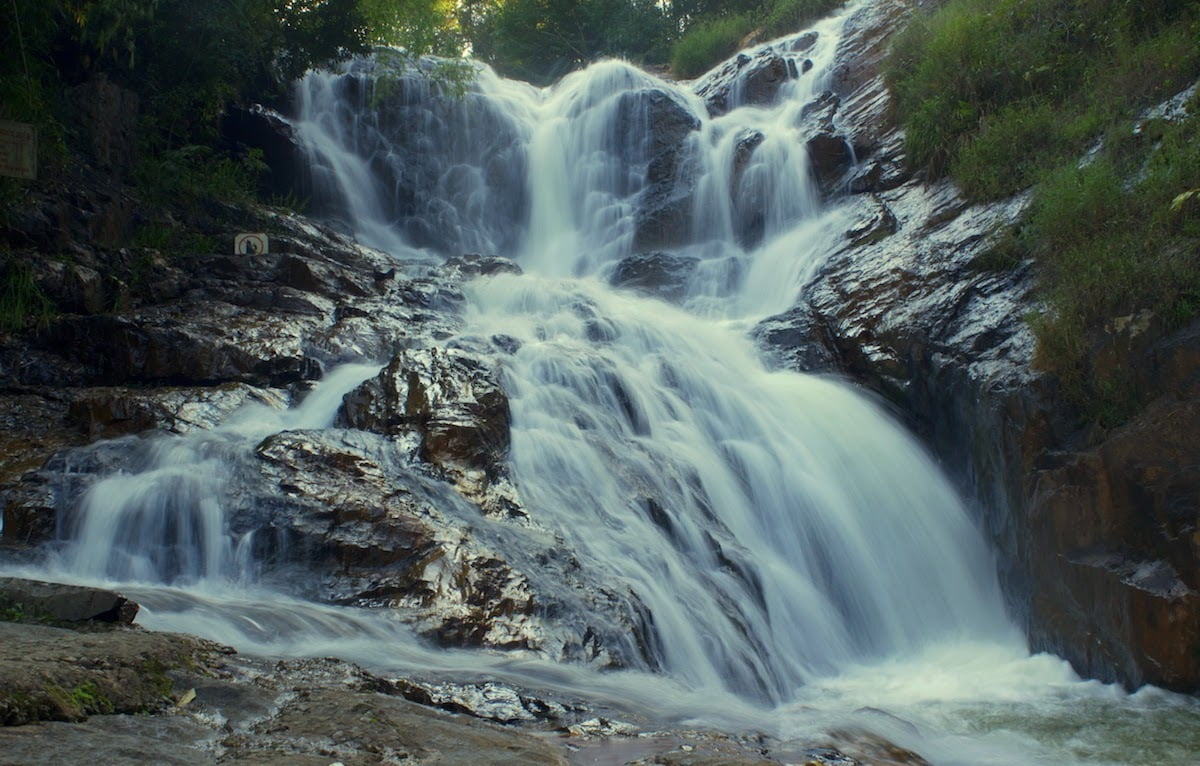
If you haven’t already tried it, long exposure photography will open up a whole new world of possibilities for your travel photos, and will enable you to immediately begin creating much more professional looking images.
A long exposure photo is one that’s taken at a very slow shutter speed, where the camera shutter remains open for a much longer period of time than usual.
A long exposure will usually last somewhere between 1 and 30 seconds, but there are certain situations where you might leave the shutter open for minutes or even hours.
There is no precisely defined cut-off point at which a photo changes from being a short or regular exposure to being a long exposure, as the term is entirely subjective.
Nevertheless, the way a lot of photographers define a long exposure is as one where the shutter speed is slow enough that the shot cannot be effectively executed handheld.
What is the advantage of taking long exposure photographs?
Well, there are actually three main reasons that you would want to use a slow shutter speed when taking a photograph and they are as follows:
1) When it's necessary due to low light levels
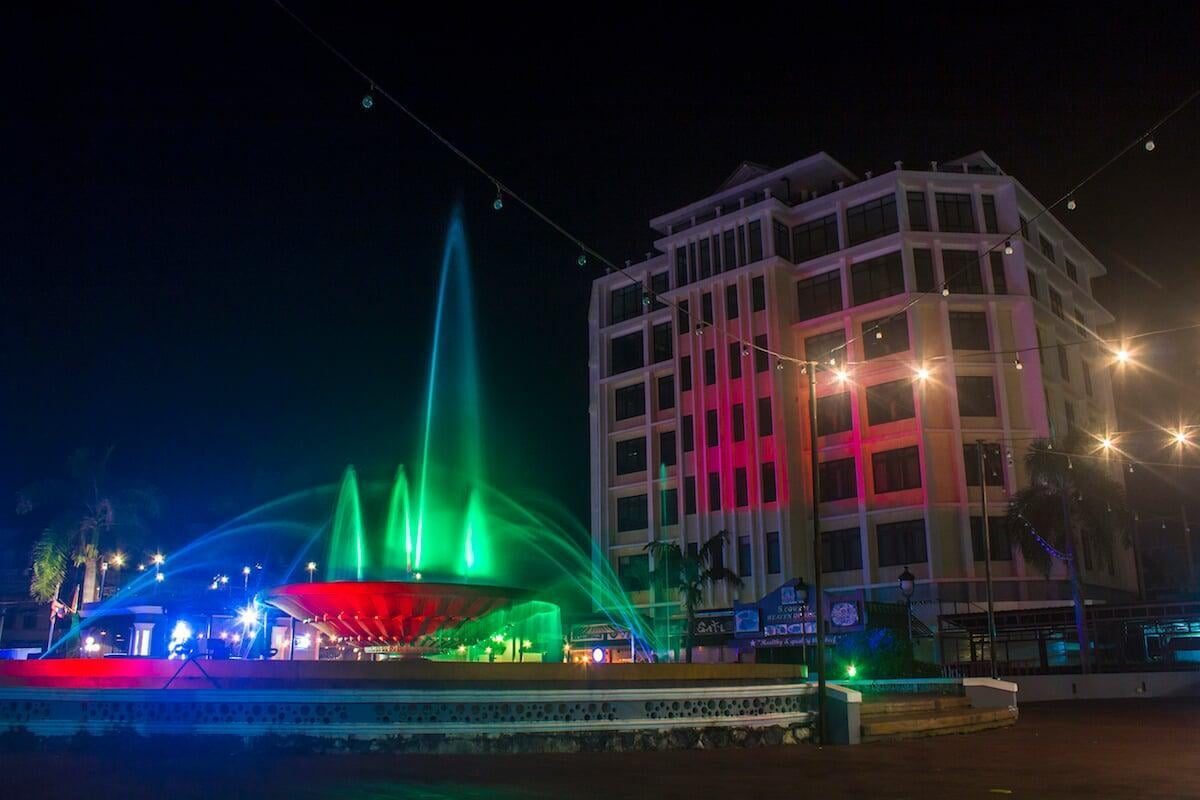
Long exposures are commonly used when shooting night scenes like night markets, streets at night, moonlit scenes, night skies and so on.
If you want to take amazing photos of the milky way or create star trails, you will need to become very well acquainted with long exposure photography and more specifically in this instance, with the techniques of astrophotography.
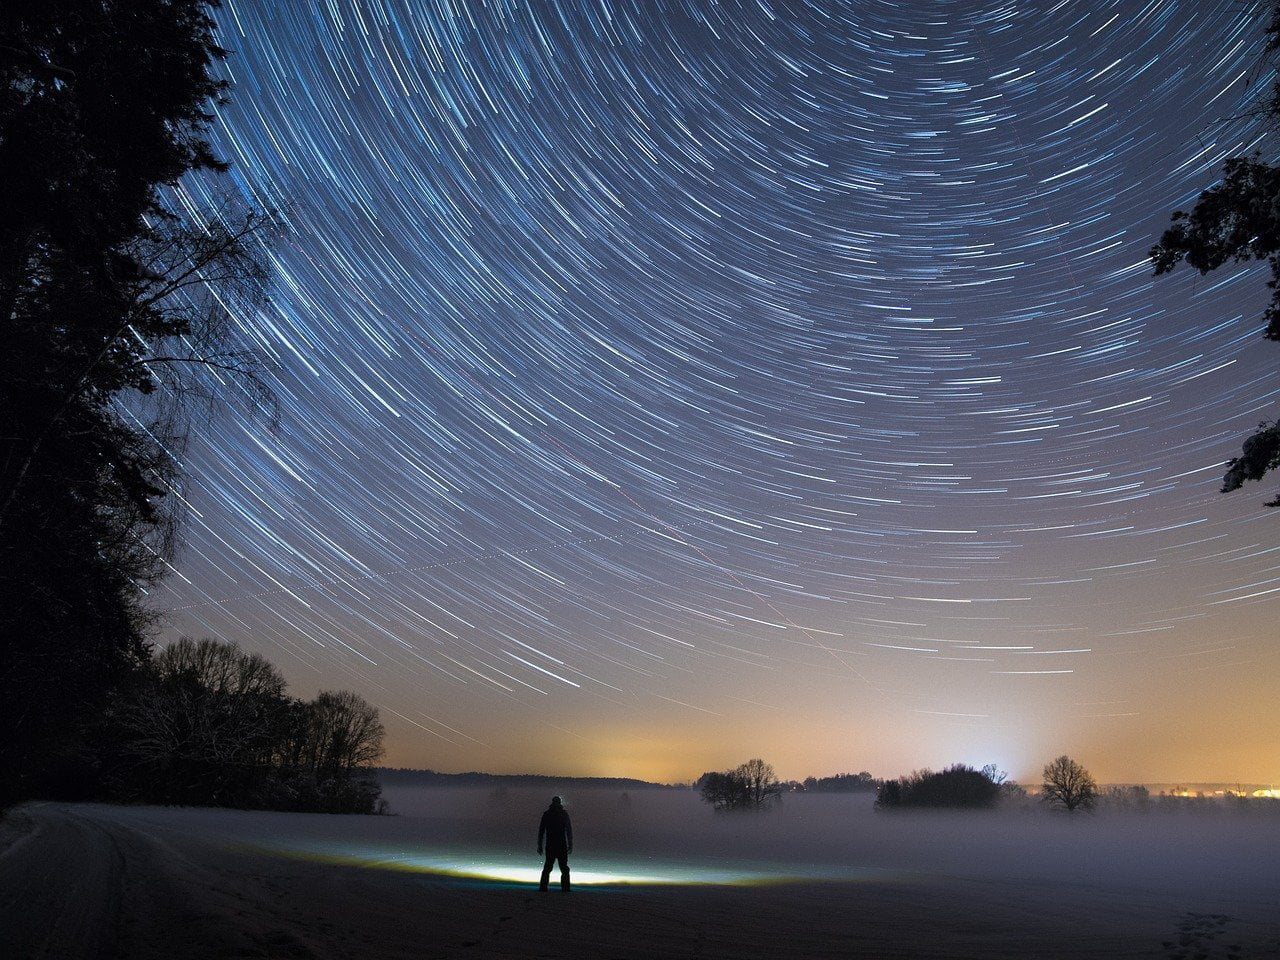
Long exposures may also be used when shooting in low-light environments during the day like inside caves, buildings with no windows, densely canopied forests and so on.
I have been inside a lot of poorly lit caves and temples during my travels where I needed to take a long exposure to reveal the exquisite murals, ancient artifacts, idols and other interesting elements inside.
Sometimes your camera’s built-in flash doesn’t achieve a desirable result in these situations, as a flash tends to illuminate the nearby elements while failing to light up the background elements, since they are too far away to be much affected by the flash.

If you were to use a regular shutter speed like 1/60 in some of these scenarios your images might remain underexposed even when your camera is set to the widest possible aperture and the highest ISO setting.
In some instances you could crank up the ISO to get a correctly exposed image, but that would introduce a lot of unwanted noise, so it’s usually preferable to decrease the shutter speed and do a long exposure instead.
2) To deliberately achieve a creative motion blur effect
Long exposures are a great way to impart a sense of motion, continuity and the passage of time to an image, which contrasts with a regularly exposed photo where the scene is captured at a very precise moment in time.
When taking a long exposure photograph, moving elements in the frame will either become blurred or will completely vanish from the image, while stationary elements will come out looking crisp and sharp, provided that your camera remains stable and motionless throughout the duration of the exposure.
It is this contrast between blurred moving elements and distinct stationary elements that results in a very appealing long-exposure photograph.
Long exposures are frequently used to create a beautiful motion blur effect in landscape scenes that possess moving water, so it works great for scenes with waterfalls, creeks, rivers, ocean waves and so on.
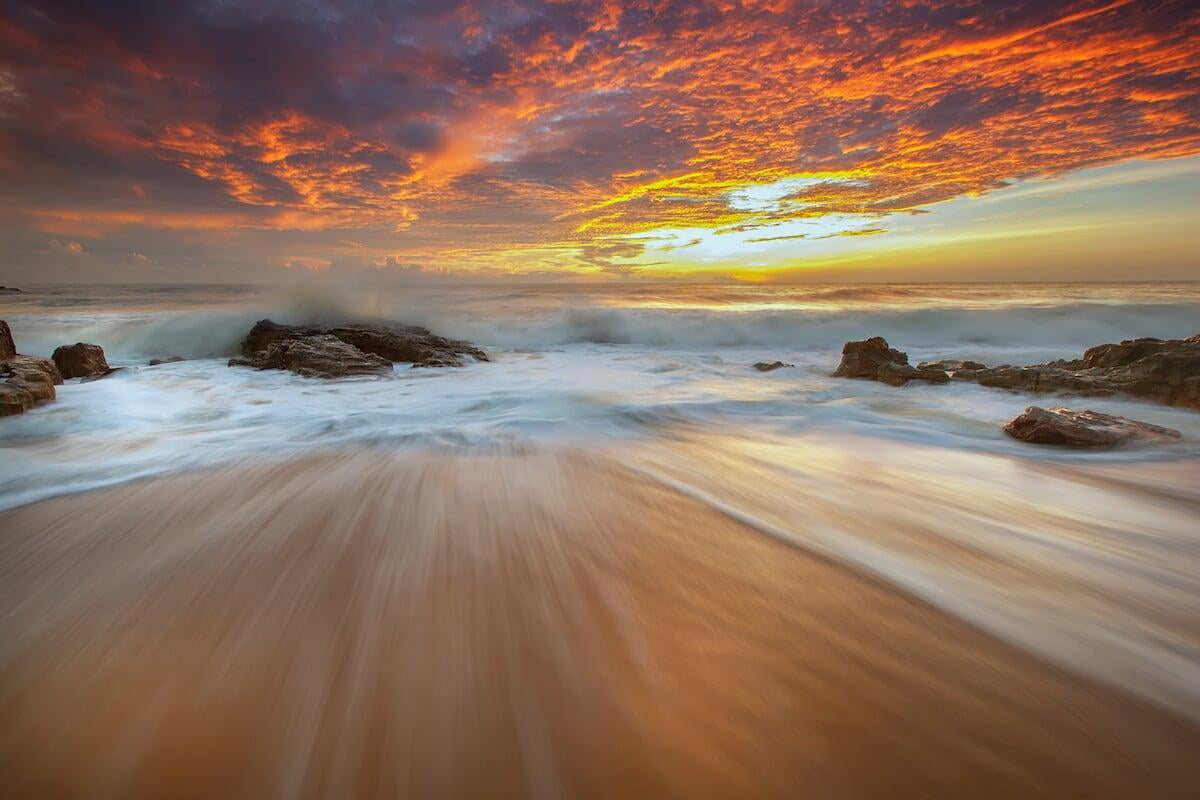
Another common application of the technique in landscape photography is in creating an appealing smearing or streaking effect in the clouds, which is only possible on days when the clouds are drifting across the sky. When there is no movement in the clouds the motion blur effect is not achievable.
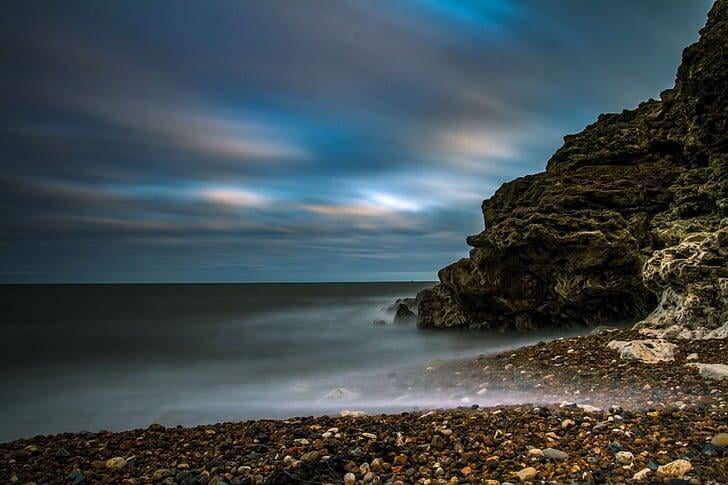
We mentioned in Section 2 that achieving this silky water or blurry clouds effect in daytime landscape scenes often requires you to attach a neutral density filter to the front of your lens to reduce the light intensity, as using the smallest aperture and ISO possible can still sometimes result in an overexposed photo.
Long exposures are also great when photographing a subject on a busy pedestrianized street, in a town square, in a crowded railway concourse or in any other situations where a lot of people are going to and fro.
If your subject remains completely motionless while all the people are moving in the frame, it creates a pretty cool image where only your subject is sharp and in focus and all the passers-by that were moving are blurred or have a ghost-like appearance.
You can also use long exposures to capture light trails at night, like those created by the white headlights and red taillights of vehicles moving on opposite sides of a busy road or highway.
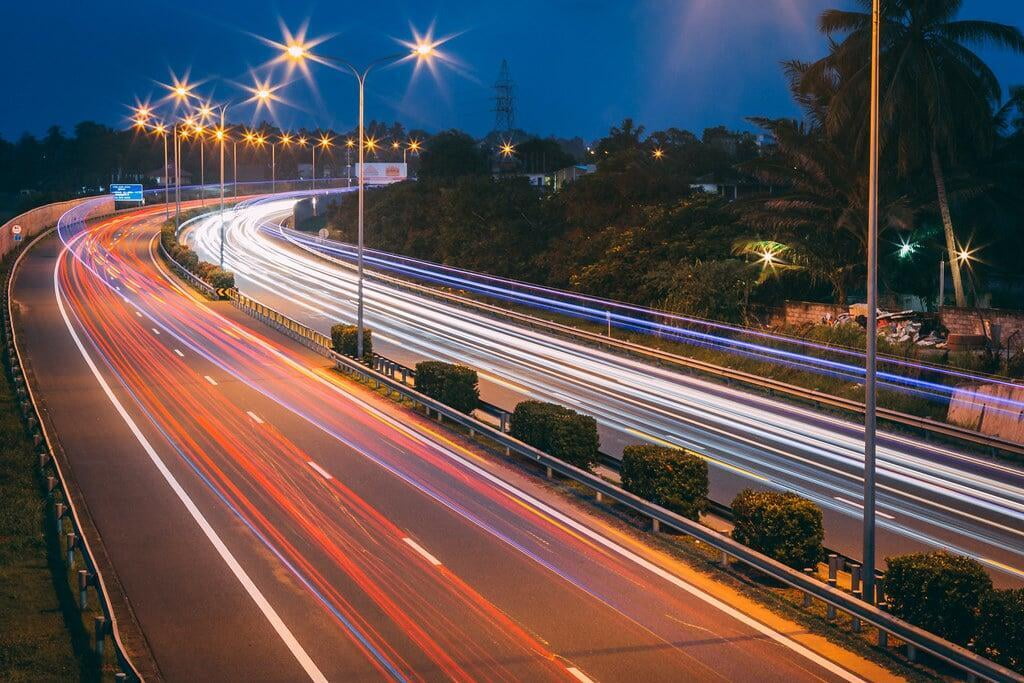
3) - To "paint" with light
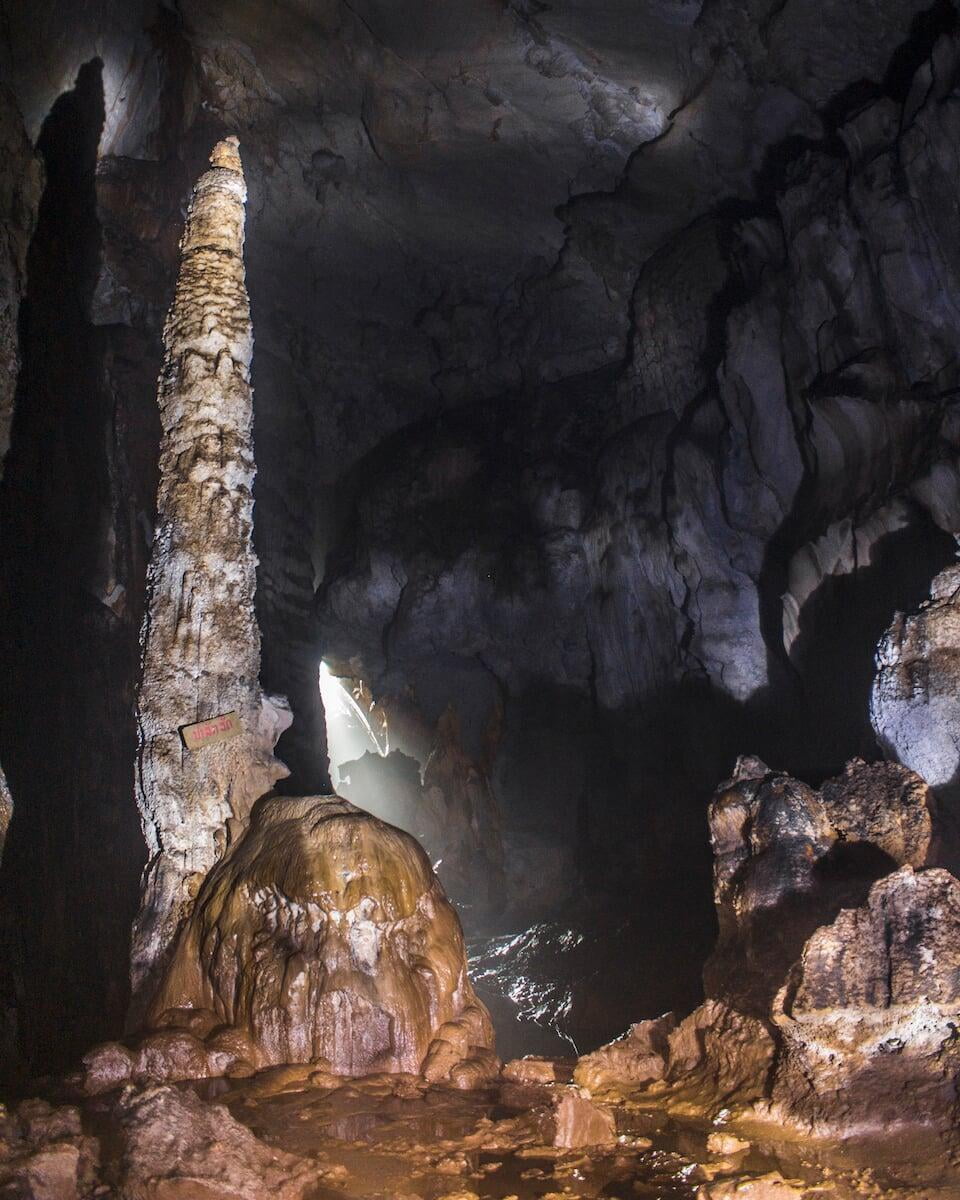
Another lesser known effect that can be achieved with long exposures is what’s known as “painting with light”. This technique works best in dark or dimly lit environments.
One application of the technique is to “paint” the wall of a dark cave with the light from a flashlight or headlamp while your camera is taking a long exposure shot.
When you view the image afterwards you will notice that the parts of the cave wall where you shone or “painted” the light will be illuminated in while the areas that you didn’t paint will be dark.
Another thing you can do is hold the light source in your hand and “paint” various words, shapes, symbols or patterns in the air with it. You could draw a circle, a spiral, a figure of 8, a love heart, your name or anything else that comes to your mind.
You can also attach a length of string to the light source and swing it around in a circular motion to get interesting results. The light trail in the resulting image will reflect the way in which the light source was moved during the exposure.
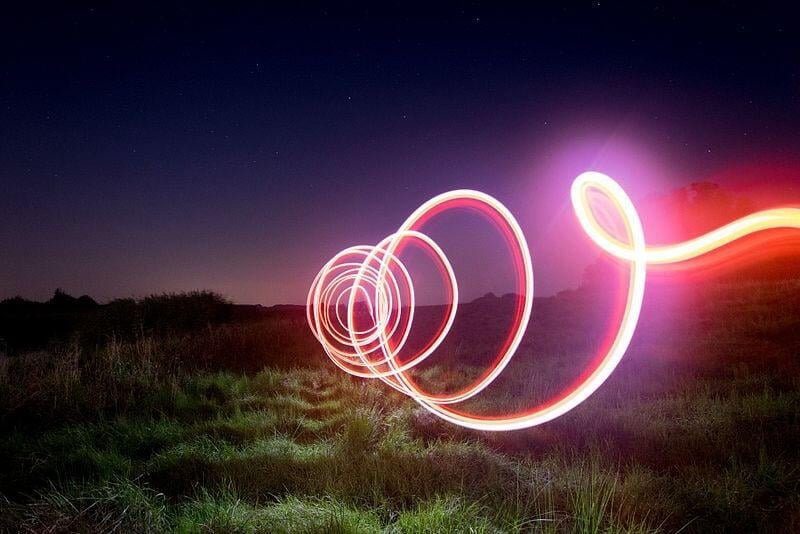
A tip for light painting is to wear dark-coloured clothes and shoes, as anything brightly coloured might show up in the image and spoil the light trails.
Light painting is a whole area of photography in itself and has innumerable applications. As for the light source, you can use glow sticks, smartphones, candles, torches, laser pens, string lights, light sabers and many other light sources to create all kinds of cool effects, so it’s well worth experimenting.
4) To make people disappear from your photos
Often, you want that post-apocalyptic, deserted or “ghost town” look when you’re shooting streets, tourist attractions, buildings and other places.
The problem is that if you’re not shooting in the early hours of the morning, there will often be crowds of people moving about in your frame, obstructing your subject and spoiling your compositions.
If you’re on the street you might also have to contend with motor vehicles that are coming and going and that keep interrupting your shot of that colourful temple on the opposite side of street every time you go to press the shutter button.
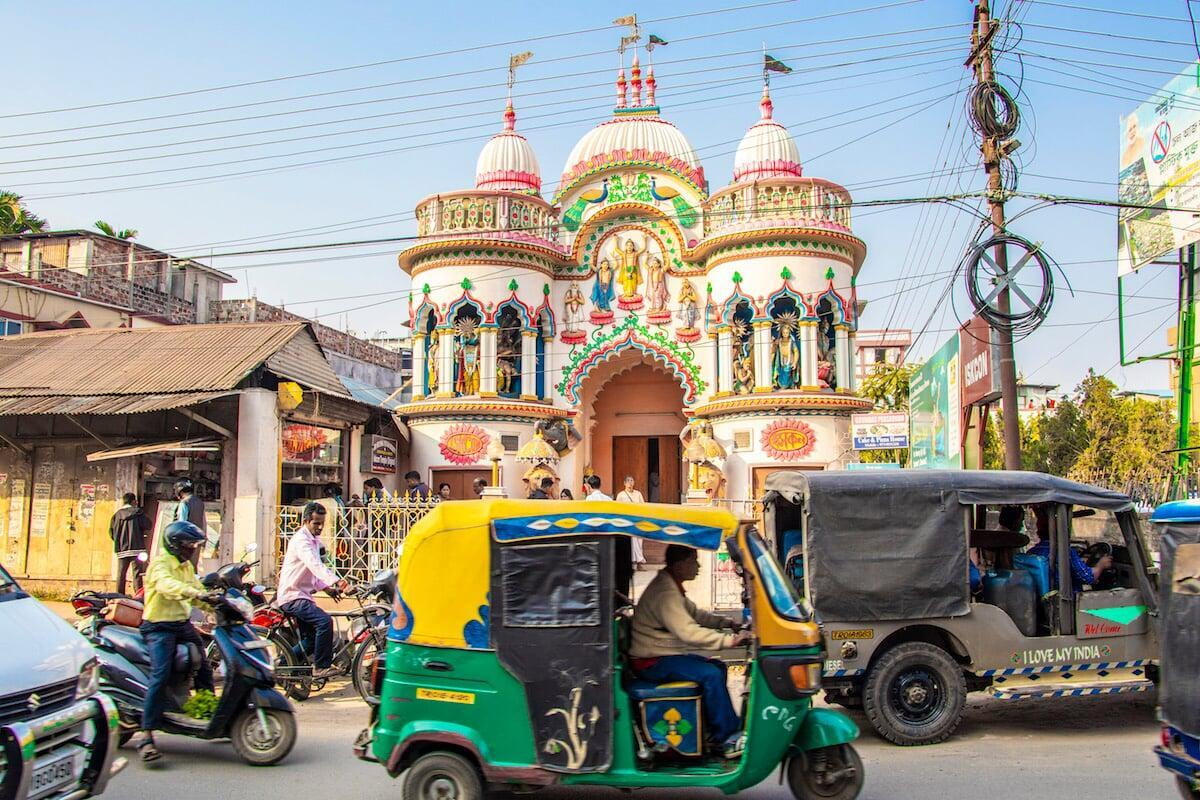
Sometimes you can wait a little while for the crowds to clear or for a gap in the traffic, but this isn’t always an option if it’s really busy.
A lot of people think that in that kind of scenario they’ll just have to bite the bullet in the hope that they’ll be able to remove the distracting elements from the photo later on by meticulously using a cloning tool in Photoshop or some other software editor.
But did you know that you can also make moving objects disappear from your photos in the field by using long exposures?
This technique works because a moving element only remains in the frame for a small fraction of the total exposure time during a long exposure and it doesn’t register in the final image as a result.
For this technique to really work though, you’ll often have to leave the shutter open for a considerable length of time - often for several minutes.
The shutter speed will depend on how fast the elements are moving in your frame and whether they’re stopping and starting (i.e. cars stopping at traffic lights for a few seconds and then driving off again).
In some scenarios you might have some people or vehicles remaining stationary for a long enough period of time for them to be recorded in the image.
Sometimes you will get ghosting (where people appear as ghost-like figures) if they move a little bit during the exposure but not enough to vanish completely.

If this happens you may need to do a retake or you wish to take several shots with the same composition and camera settings each time, and then use your editing program to create a composite image using the empty areas from each photograph.
Because fairly long exposure times are required for this technique to work, when shooting outdoors in bright conditions you’re going to need to use a strong neutral density filter (i.e. a 8-stop or higher), and you may also need to use a very small aperture to get an exposure that’s long enough to make any pedestrians, traffic and other moving elements completely vanish from the image.
Practical pointers for shooting long exposures
When taking a long exposure photograph, there are a couple of pointers to keep in mind.
Firstly, you need to keep the camera stock still throughout the exposure period; if the camera moves or shakes during the shot you will probably end up blurring parts of the image that you didn’t want to blur, so you won’t be able to take long-exposure photos handheld.
Most travellers will invest in a sturdy tripod (see Section 2), but if you don’t want to travel with one, you may on some occasions be able to find somewhere to set your camera down (i.e on the ground, a backpack, a tree stump, a wall) that still allows you to achieve a nice composition.
This approach however is much more limiting and will often make it impossible for you to achieve the composition that you really want, since the environment is dictating where you can and can’t position the camera.
Anyway, once you’ve got your camera rock steady (preferably on a tripod), you then need to think about your camera settings.
It may be easier to put your camera in shutter priority mode, where you choose the shutter speed and the ISO, while your camera decides the aperture size.
If you’re not happy with the depth of field, you can increase the ISO in order to reduce the aperture size, but try not to crank it up too high, as that will introduce noise into your image.
The shutter speed that you choose for your long exposure shot is critical and will vary depending on the nature of the scene and what effect you’re trying to achieve.
If you’re trying to create motion blur in moving water or clouds, you will often need to experiment with several different shutter speeds in order to get the best result.
If shooting a waterfall for example, the “right” shutter speed will vary depending on the volume and speed of the moving water, as well as the kind of effect you’re trying to create.
If you want to preserve some of the detail in the water, you shouldn’t keep the shutter open for too long, but if you want to give the water a formless, amorphous appearance you would keep it open for longer, although I don't consider the latter to look as attractive.
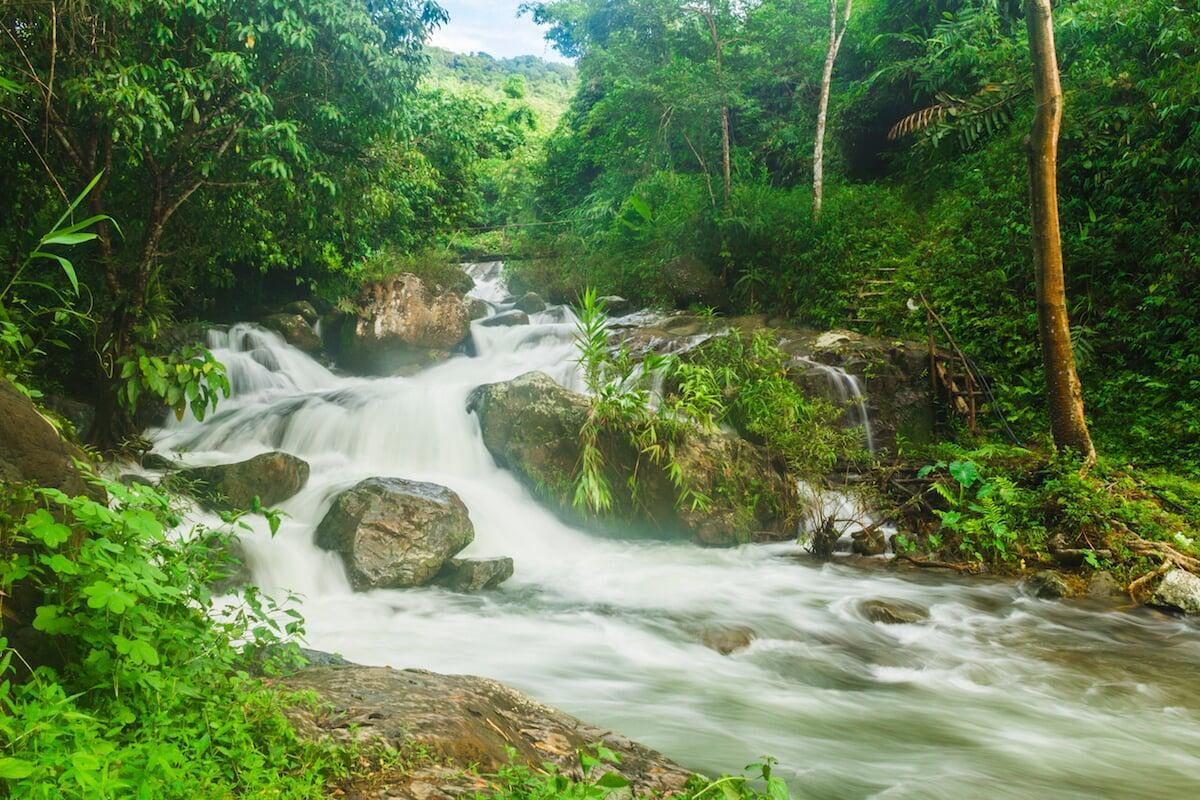
You won’t always get it right first try, but here are a few general guidelines for exposure times in typical scenarios where you’d use the long exposure technique:
Waterfalls & rivers – ¼ to 2 seconds
Ocean waves – ¼ to 2 seconds
Fast-moving clouds – 10 seconds
Slow-moving clouds – Several minutes
Light trails at night – 10 to 30 seconds
Of course, you can and should experiment with shutter speeds outside the ranges that we’ve specified but the sweet spot will normally be found within these ranges.
You’ll know you’ve found the sweet spot when you have just the right amount of motion blur, where there’s a sense of movement but still some detail remaining in the water, clouds or other moving element in the image.
When it comes to taking your long exposure shot, you can either use the camera’s self-timer or a remote release (see Section 2).
If your camera has Wi-Fi or Bluetooth connectivity, you may be able to use a smartphone app to control it and release the shutter remotely.
If you want to take an exposure for longer than 30 seconds, you will have to use your camera’s “bulb” mode, which gives you manual control over the exposure time and lets you end the exposure whenever you like.
When shooting in bulb mode, you should always use a remote release method, because otherwise you will have to physically hold down the shutter button on your camera for the entire duration of the exposure, which is not only inconvenient but will also probably result in unwanted camera shake.
It’s a little trickier to work out the shutter speed in bulb mode because your exposure meter actually stops working.
Luckily, you don’t have to guess the exposure time because there is a simple mathematical way to calculate it precisely.
Let’s say you’re shooting a long exposure at ISO 100 and f/16 and you’re shooting in bulb mode, but you don’t know exactly how long your exposure needs to be. We can call this exposure where you don't know the shutter speed the new exposure.
What you can now do is increase the ISO to say, 800, and then make a note of the shutter speed that gives a correctly exposed image at ISO 800. Let’s say it turns out to be 8 seconds. We can call this the current exposure.
Now, because you went from ISO 100 to ISO 800, you effectively made the camera sensor eight times more sensitive, which means the shutter speed was reduced by a factor of eight to compensate.
So, to work out the unknown shutter speed for the new exposure at ISO 100, you just have to multiply 8 seconds by 8, which gives you an exposure time of 64 seconds.
If you hate maths you can just use a smartphone app like Exposure Calculator to calculate the shutter speed for the new exposure by inputting the known parameters for the current and new exposures.
When shooting in bulb mode you should be able to see a timer somewhere that allows you to keep track of how long the shutter has been open for.
On my camera, there’s a little LCD panel on the top right that acts like a stopwatch during a long exposure in bulb mode. The mobile app with which I can remotely control my camera also shows how many seconds the shutter has been open for.
If you’re using a remote release, it might have an LCD screen that counts the seconds or will have a built-in timer that allows you to select a preset exposure time, like 5 minutes.
If you have none of these options, you can just use the stopwatch on your watch or smartphone to keep track of the exposure time.
Troubleshooting common issues with long exposures
One issue that may crop up for you while capturing a long exposure is vibration due to movement of the mirror inside the camera.
You see, when you release the shutter of a DSLR camera, the mirror inside flips up and out of the way to allow the light passing through the lens to reach the sensor.
This movement of the mirror inside the camera creates a small amount of vibration, which could adversely impact the sharpness of your image during a long exposure.
Of course, this will not be an issue if you're shooting with a mirrorless camera but it could be an issue if you're using a DSLR.
In practice however, the small amount of vibration from the movement of the mirror is unlikely to cause any noticeable difference to the sharpness of your images, unless you’re shooting with a telephoto lens at very long focal lengths or with a macro lens.
If you are finding that your images aren’t looking as sharp as they should, despite the fact that you’re using a tripod, you can try addressing the mirror shake by shooting in live view, since in most cameras the mirror will always remain in the up position during live view shooting (since light has to be able to reach the sensor to create the live view image on the LCD monitor).
If you can’t shoot in live view for whatever reason, you will have to use your camera’s mirror lock-up setting; when this is enabled the camera flips the mirror up and out of the way before your camera initiates the exposure, ensuring that the vibration has dissipated by the time it begins taking the photo.
To find this mirror lock-up setting, you may have to dig deep into the options in your camera menu or there may be a button on the camera itself (consult your user manual). In my Canon EOS 77D, it’s under Custom Function No.10.
If you’re using an ND filter for your long exposure, you shouldn’t run into too many complications until you start using the really high-density filters like ND 10 and upwards.
What you’ll find is that these high-density filters are so dark that when they’re placed over your camera lens you won’t be able to see the scene you’re shooting through your camera viewfinder or in live view mode.
The consequence of this is that you have to compose your shot and set the focus before you put the ND filter on the camera lens.
You will also need to switch the focus mode from auto to manual before the filter goes on, as if you don’t do this your camera’s autofocus won’t be able to see anything and will start hunting around in the dark after you put on the filter. This will ruin your shot.
Since your camera won’t be able to see anything once the ND filter is on, you will also not know what shutter speed to use to get a correct exposure.
This problem is easily remedied by taking note of your current exposure (or baseline exposure you could call it) settings (aperture, shutter speed, ISO) with the filter off and then using an exposure calculator (like the app we linked to above) to find the new exposure settings with the filter on.
The calculator allows you to input the number of your ND filter (ND 4, ND 6, ND 16 etc.) for the new exposure and spits out the new shutter speed based on that and all the other parameters you entered.
Actually, the maths is pretty simple here: to get the shutter speed with the filter on, you just multiply the shutter speed with the filter off by 2n , where n is the number of stops of your ND filter.
This means that if you have an 10-stop ND filter, you would multiply the current shutter speed by 1024 (= 210) to get the new shutter speed with the filter on.
Another way to determine the correct new shutter speed is to manually count the number of clicks made by your camera’s shutter speed adjustment dial as you rotate it.
On most cameras, three clicks of the dial will alter (increase or decrease) your exposure by one full stop (plus or minus 1 EV).
This means that if you have a 10-stop ND filter, you will need to increase your exposure by 10 stops to compensate for the light blocking effect of the filter, which means you will need to count 30 clicks as you turn the shutter speed dial. After counting 30 clicks, you should have landed on the correct shutter speed.
Sometimes, even when using a very high-density ND filter, you will still have the problem of not being able to achieve long enough exposure times to get the motion effect blur that you want in camera.
For example, if the clouds are moving really slowly and the sky is really bright, you might not be able to get a long enough exposure time to make them streak across the sky.
In this case, there's one very clever solution that allows you to simulate a much longer exposure by taking a sequence of back-to-back, long exposure photographs (with as short a time gap as possible between the individual shots) and then averaging them together into a single image in Photoshop.
This achieves the exact same visual effect that you would get by taking a single continuous long exposure photo with an exposure time equivalent to the sum total of the exposure times of the individual photos in the sequence.
An easier way of explaining it is if you took ten consecutive 15-second exposures and then blended them together in Photoshop using this technique, the blurring effect would be visually identical to that of a single 150-second exposure in camera.
As for the actual blending technique, there's an easy automatic way of doing it in Photoshop that works very well, although if you have an older version of the software you may need to use the manual method. Both methods are fully explained in this excellent tutorial.
One last pointer I want to give you for long exposure photography, if you’re not shooting in live view, is to cover the viewfinder during the shot.
This doesn’t have to be done when shooting normally, but during a long exposure there’s more time for your image to be affected by any light leaks that can enter the camera through the viewfinder.
Light leaks can cause a purple haze or other unwanted artifacts to appear in your image and are especially likely to be an issue if there’s a strong light source behind you when you’re taking a long exposure photography.
The easiest way to cover your viewfinder is with a small piece of sticky tape. If you don’t have any, you can also cover it with a microfiber cloth, a small piece of cardboard, a custom viewfinder cap or even your thumb (least desirable option).
#38 - Create motion blur without long exposures
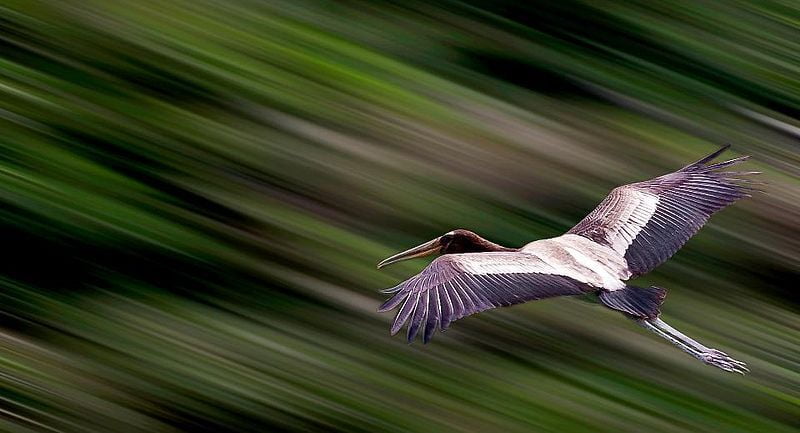
Long exposures are not the only way to create motion blur and portray a sense of motion and aliveness in a static photograph.
In a long exposure photograph the camera normally remains motionless throughout the shot and the motion blur is created by the elements in the frame that are moving in relation to the camera.
But we can also create the motion blur effect when our camera is the element that’s moving in the relation to the surrounding environment, which is motionless.
For this type of photo to work, we need at least one of the elements in our frame to be moving at the same speed as the camera, so that that element will appear sharp in the image, while everything else will be blurred.
A classic example is when you stand at the side of a road or close to a railway track and take a photo of a passing motor vehicle or train while you’re panning the camera from left to right (or vice versa) to keep the moving element in your frame.
If you pan your camera at the correct speed during the time that the shutter is open, the moving element will appear sharp and in focus in the image, while the static elements in the scene will be blurred (since your camera was moving in relation to them). This effect gives the impression that the vehicle is in motion.
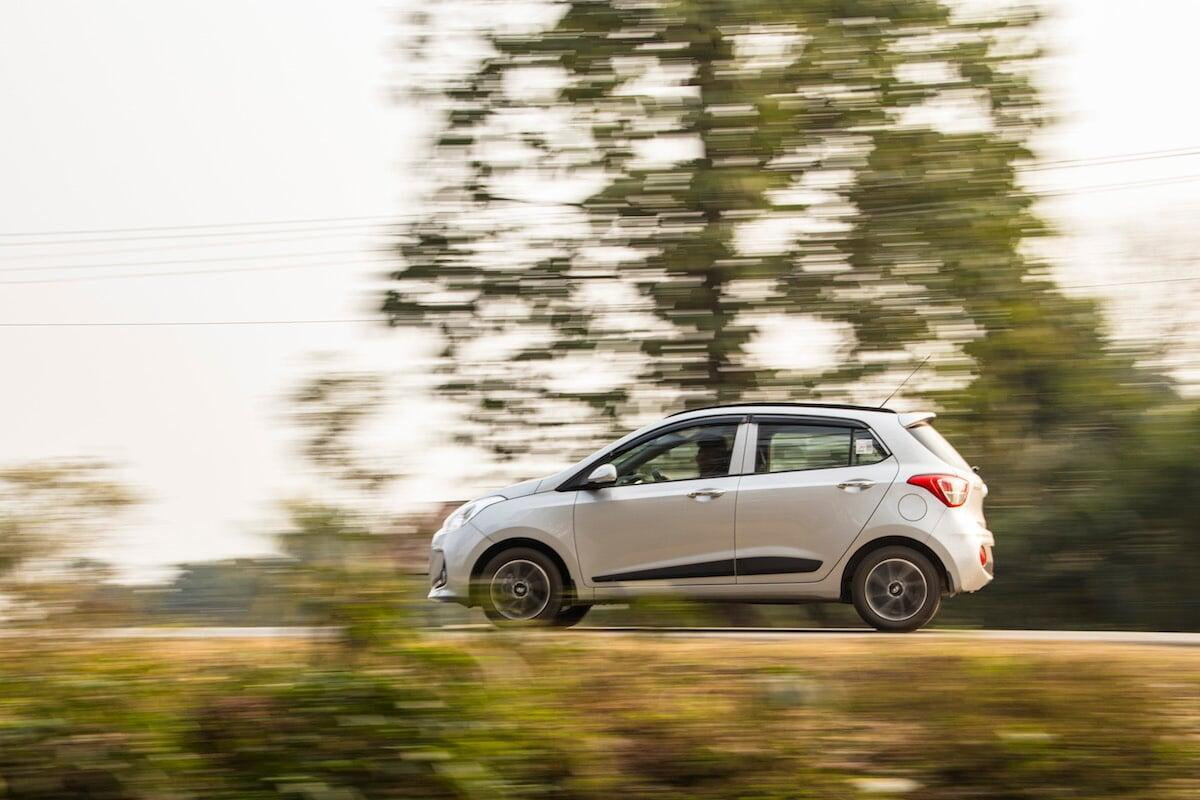
To create this panning motion blur effect you need to first set your camera shutter speed slower than you normally would – I find that 1/20 or 1/30 is a good starting point, but you need to play around with the shutter speed for optimum results. If you’re having to pan your camera really fast to track the moving subject you can increase the shutter speed a bit.
I also recommend putting your camera into burst or continuous mode so that your camera captures photos of the vehicle at different angles as it passes you. Having a sequence a photos will allow you to choose the best and sharpest one afterwards.
Once an interesting or unusual vehicle comes along, you need to start tracking it by panning your camera in the direction the vehicle is moving, keeping its position within your frame as fixed as possible.
While you're pressing the shutter button and the camera is taking photos you need to continue to track the vehicle with the camera until the photo is taken. It’s a bit like how you’re supposed to follow through when hitting a ball in any sport.
The technique works best when the vehicle is moving quite fast because when it’s moving too slowly your camera will also pan too slowly and you won’t get the dreamy, blurred background effect.
You may be able to counter this by using a very slow shutter speed, but in that case it may be more difficult for you to prevent the vehicle from also becoming blurred, which defeats the purpose.
If the vehicle is moving very slow, the best thing is to try to move closer, as the the closer you are to the vehicle, the faster you will have to pan your camera to track it.
You can also create a motion blur effect without using a long exposure when you’re in or on (if you like riding on the roofs of vehicles) a moving vehicle, which could be a train, bus, taxi, three-wheeler, horse-drawn cart or whatever.
The idea here is again the same but this time the execution is even simpler; just select a slower-than-usual shutter speed and take a photograph while holding the camera out the window or door of the moving vehicle, making sure that you have the side of the vehicle in your frame.
If you’re on the roof of the vehicle, you just need to make sure you include part of the roof in the frame. Some vehicles might be open top or have very open sides (i.e. safari jeeps, e-rickshaws, carts) in which case you may not have to stick your camera out any door or window.
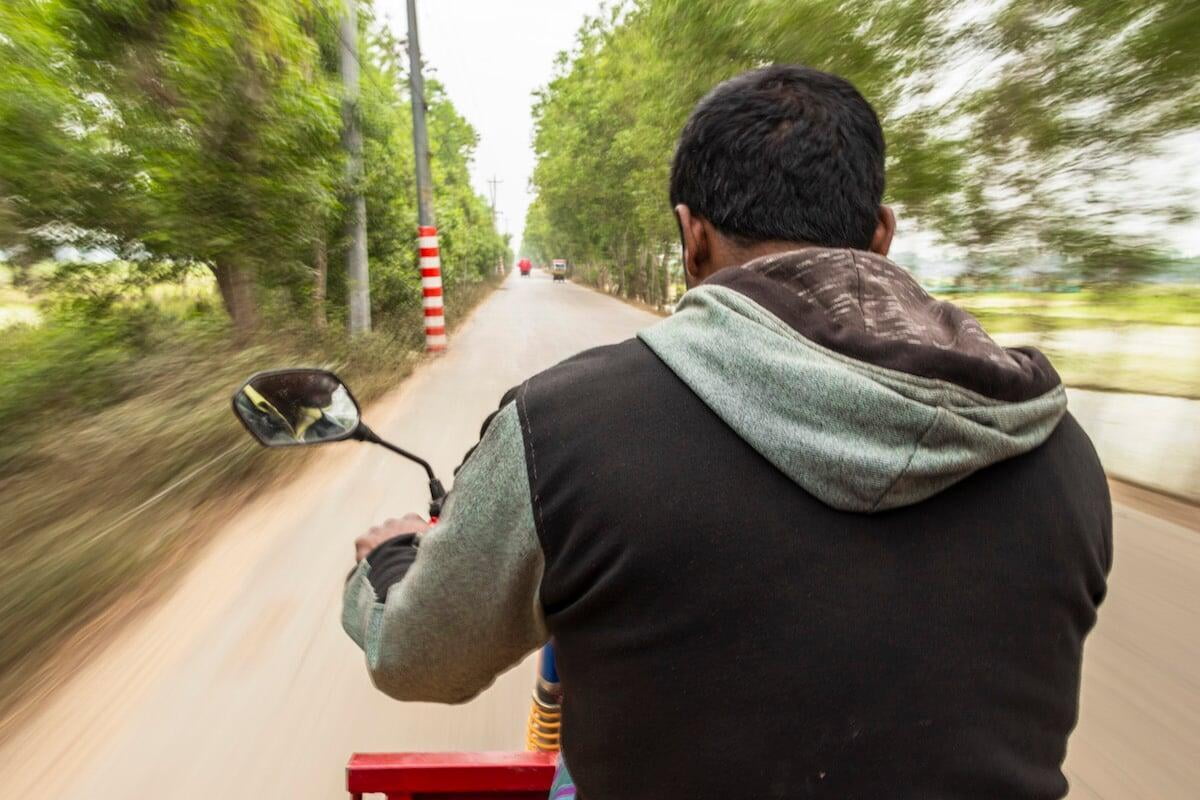
If you’ve executed the shot correctly, the roof or sides of the vehicle you’re in or on should be sharp and in focus, while the scenery racing past should be blurred.
In my experience, these shots work especially well on moving trains, since trains tend to offer a fairly smooth ride.
The best time to take these kinds of shots on trains is when the train is going along a curved section of track, as all the carriages in front or behind yours will look a lot more interesting when they form a long arc.
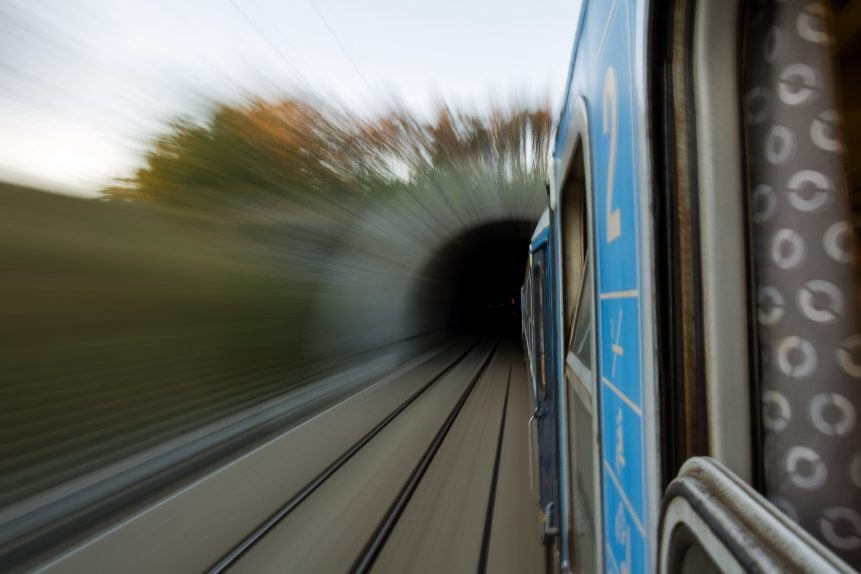
To get good results from road vehicles you need to be on a smooth stretch of road, as any bumps or potholes in the road will make it very hard to stop your camera from shaking in relation to the vehicle during the exposure.
As with the panning technique, you’ll get the strongest motion blur effect when you’re in a vehicle that’s moving at a decent pace.
If the vehicle is moving too slow, you won’t be able to achieve a decent blurring of the background and if you try to slow the shutter speed to compensate for this you will usually end up also blurring the elements in the photo that you want to be in focus.
You can also get a nice background motion blur effect on some trains (i.e. the ones in India, Bangladesh and Sri Lanka) by taking a photo of your travel partner standing in the open doorway of the carriage (or maybe even partly leaning out the door if they’re courageous) while the train is moving quite swiftly.
If done correctly, the backdrop that's visible through the open doorway of the train becomes a pleasing blur while the person standing in the doorway remains sharp and in focus.
This type of photo works best when the train is passing through a narrow ravine or other hemmed-in stretch of track where there is vegetation or rock walls flanking the train.
This is because the backdrop is very close to the train in such circumstances, which makes it appear to rush by at a blistering speed, thereby producing a more pronounced motion blur effect.
Background elements that are at considerable distance from the train (fields, trees, rocks etc.), on the other hand, appear to move much more slowly in relation to the train and aren’t as apt to become blurred while shooting them through the door or window of the moving vehicle.
Another interesting motion blur effect that can be created with trains is when you use the side of a moving train as the backdrop for a photo of a person standing motionless alongside it.
This type of photo is easiest to execute at a train station where you can have your travel partner stand still on the platform while a train is rolling into the station or departing from it.
You will want to set your shutter speed so that you get just the right amount of blur; too little and it won't strongly contrast with your motionless subject, too much and nobody will even be able to distinguish that the moving object is a train.
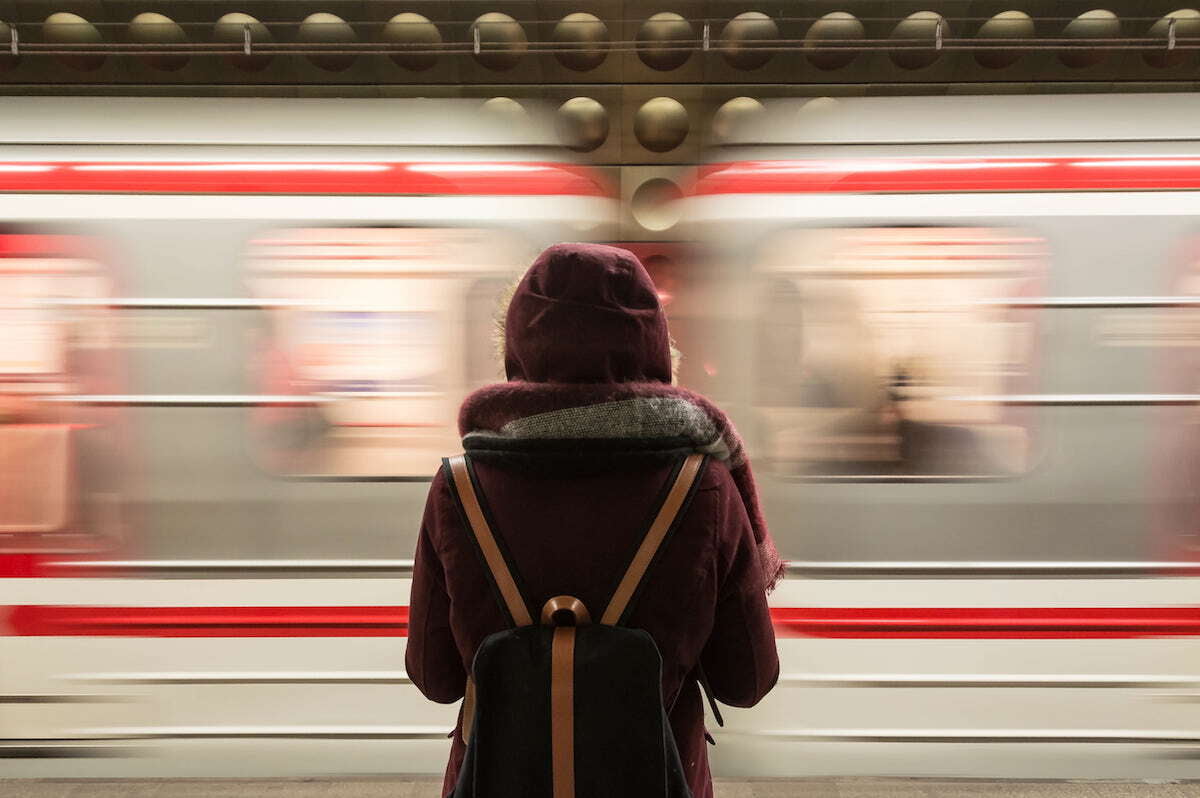
#39 - Add beautiful sun stars and starbursts to your images
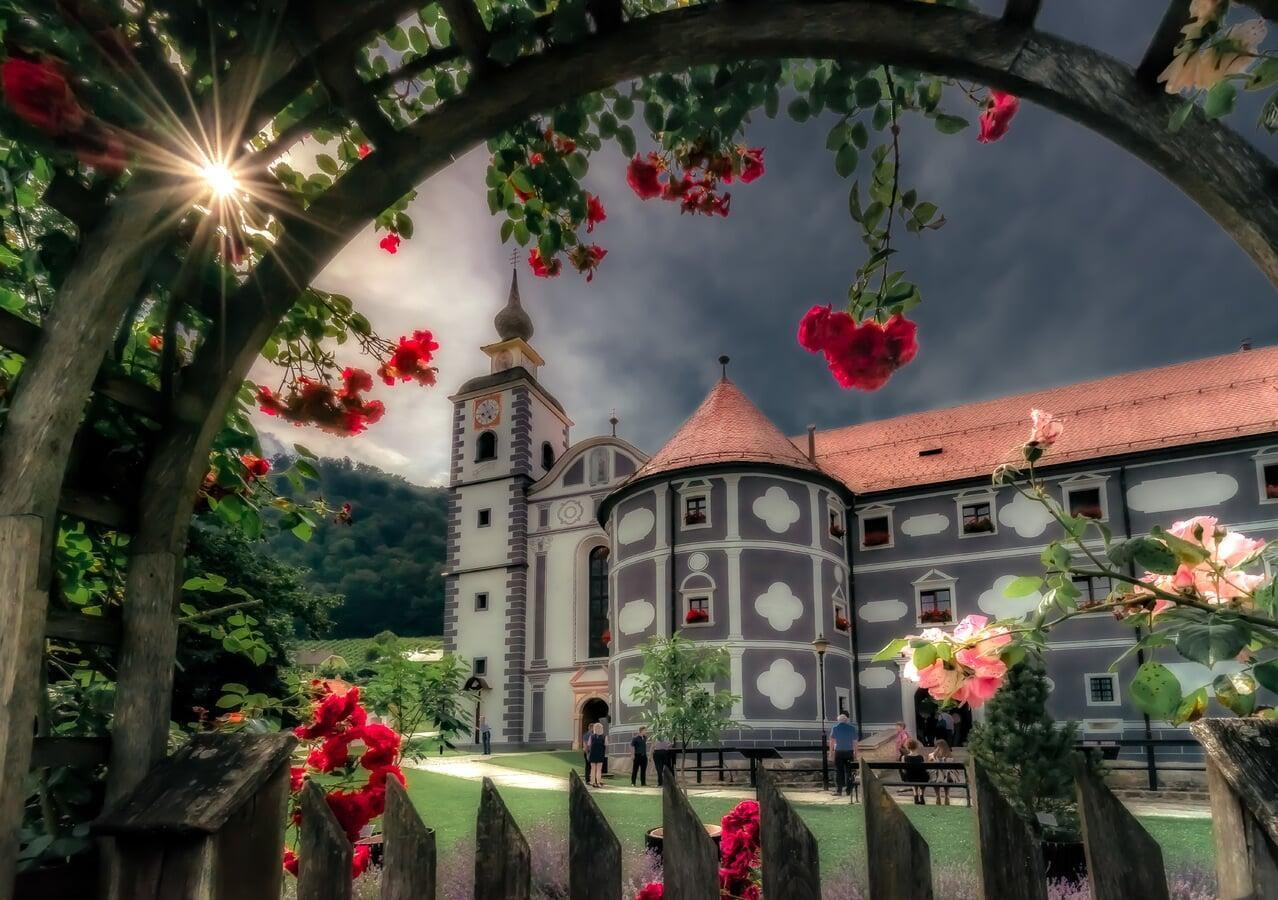
You’ve probably seen the sun star or starburst effect in photos before, where light rays radiate outward from the centre of a light source like the sun.
This is a very interesting special effect that can enhance the value and beauty of your images, although you do need to be careful to employ it in moderation, lest it begins to lose its charm and starts to be considered a gimmick.
Provided that your lens has the means to produce them (more on that in a minute), starbursts will be created whenever you point your camera at or near any point source of light such as the sun, burning candles, car headlights or streetlights.
Starbursts can be created at any time of the day, with both natural and artificial light sources, but most photographers prefer sun stars and especially the orange-hued ones that are created during the magic hour when the light has a higher colour temperature and is coming in at a low angle.
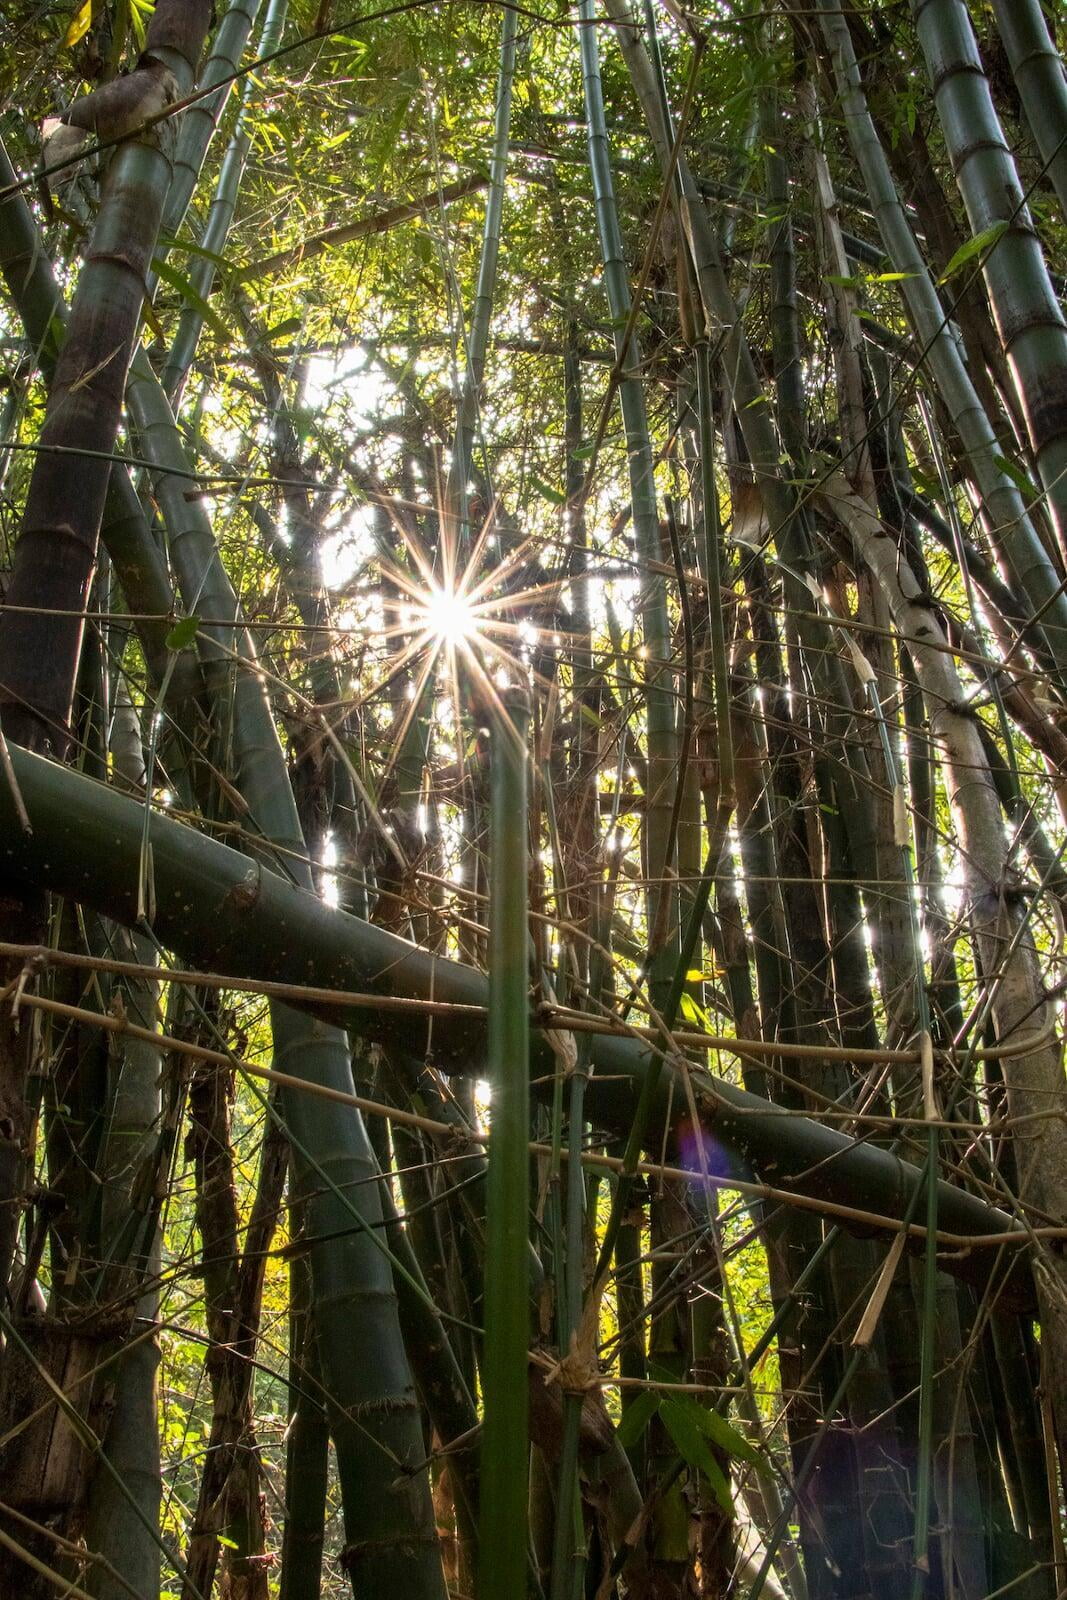
Here are a few key tips for creating awesome starbursts in your travel photos:
Choose the right lens
Some lenses simply lack the ability to create proper starbursts. For example my very first lens, the 18-55 mm kit lens from Canon, couldn’t create a starburst no matter what I tried.
But there are many lenses out there that have the ability to create very pleasing starbursts. The number and shape of your lens’ aperture blades both play a very important role in determining how your sunbursts look.
Indeed, the less rounded the aperture blades and the less circular the aperture, the more pronounced the starburst effect will be.
If you lens has an even number of blades, you will see the same number of rays in the starburst as the number of aperture blades that your lens possesses.
This means that a lens with eight (an even number) aperture blades would produce sun stars with eight rays emanating from the centre.
But a lens with an uneven number of aperture blades, will actually produce twice the number of rays as its number of blades. This means that a lens with seven aperture blades will actually produce starbursts with fourteen rays.
One lens that’s well-known for creating very pleasing starbursts is the Canon EF 16-35 mm f/2.8 L II USM (ultrasonic motor) wide-angle zoom lens, although it’s not recommended that you go out and buy a lens for the sole reason that it creates fantastic starbursts. For more on the best lenses for starbursts see this article.
If you’ve tried creating starbursts with your existing lens and you didn’t get the results you were hoping for after applying all the tips outlined here you might still have luck using a star filter, albeit with a slight reduction in image quality.
Tiffen sells a range of high-quality star filters, although they’re not the cheapest option on the market.
If you want something a bit cheaper, a brand called Fotover makes an inexpensive set of three star filters (a 4-point, a 6-point and an 8-point) that easily screw onto Canon and Nikon lenses of all different sizes ranging from 40.5 mm up to 82 mm.
These star filters from Fotover have female screw threads on one side, which allows them to be stacked together to create unique star patterns. Included with the set of three star filters is a centre-pinch lens cap, a 3-slot nylon pouch and a microfiber lens cleaning cloth.
Use a small aperture
To get the best starburst effect, you’ll need to stop down your aperture so that your f-number is somewhere in the range of f/16 to f/22. This is because the smaller the aperture, the more the sun’s rays will diffract (spread out) to create the burst effect after passing through the opening.
The light needs to be high-fidelity
Sunlight that’s been filtered through clouds or atmospheric haze produces poor sunbursts – you need unfiltered, clean, high-fidelity light to get the desired effect.
So, if sunset is approaching and there’s a lot of cloud over the horizon that’s partially blocking the light coming from the sun, you’ll need to wait patiently until the sun drops down into an opening or horizontal slot between the clouds.
Once unimpeded light from the sun is reaching your camera, you can take your shot and you should be able to achieve a much better starburst.
Play peek-a-boo with the light source
You’ll get the best starbursts when you play a game of peek-a-boo with the light source.
So, if you’re trying to create a sun star, you’ll want most of the sun to be hidden, with just a small sliver of light glinting through gaps in the foliage or clouds, over the top of the mountain, around the side of the rock outcrop or whatever. The more pinpoint the light source, the better your starburst will be.
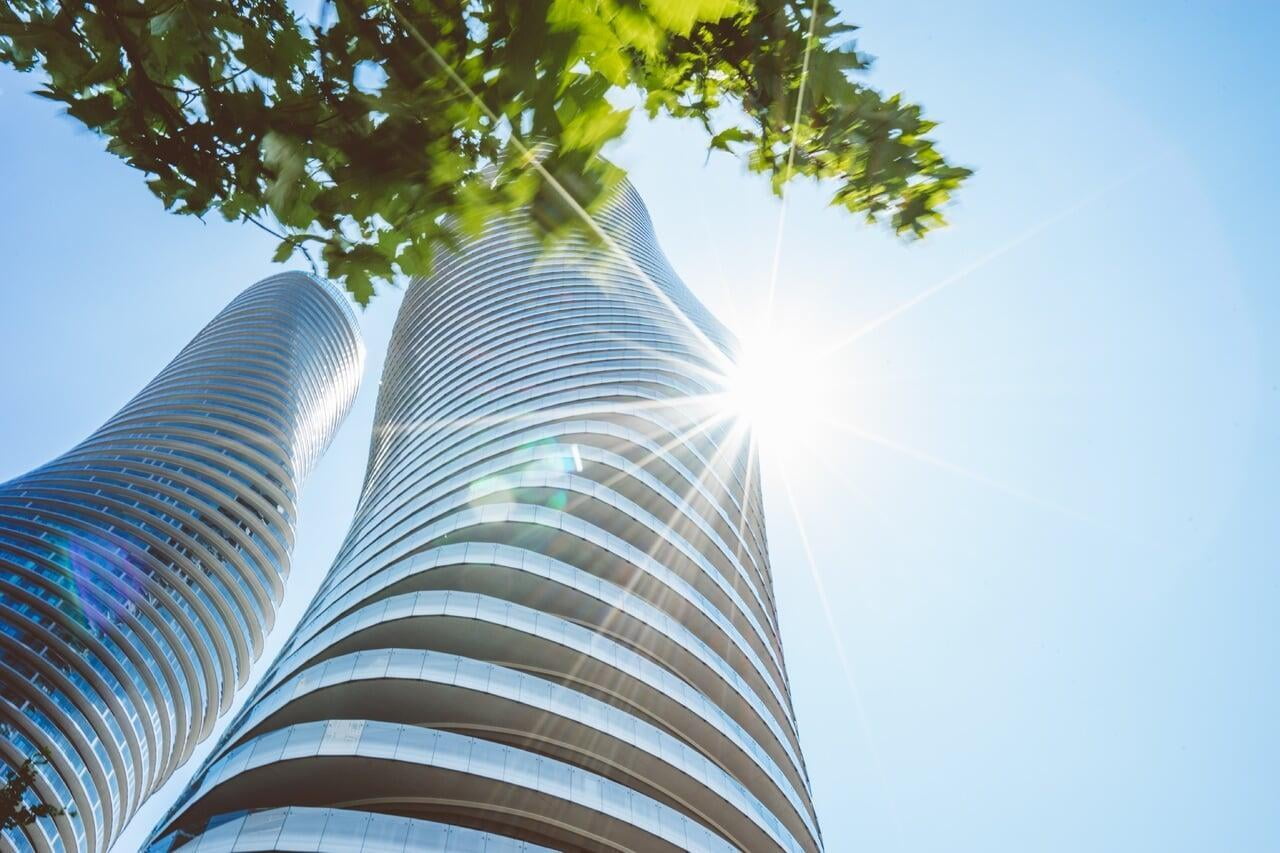
Pay attention to your exposure
You need to tame the brightness of the light source, otherwise you’ll just get a blown-out patch of whiteness in your image.
This means that in some cases you might need to underexpose your image by at least two stops in order to be able to see the starburst.
Don't worry, because you can redress the underexposed parts of the image in post by lifting the shadows with an editing program like Lightroom.
#40 - Use the power of scale to surprise and impress your viewers

Scale is an underutilized photography technique that’s used to give the viewer a better sense of the dimensions of certain elements in a photograph.
You see, certain objects can vary greatly in size or they might be objects that are so exotic and unfamiliar that even their "typical" size is unknown to the viewer.
For such objects, it’s not always obvious just how big or small it really is if there isn’t a familiar object of known or approximately known dimensions in the photo to act as a frame of reference.
For example, if a photographer was shooting a miniature toy car, he could carefully select the backdrop and keep the camera low to the ground so that any viewer looking at the photos of the toy car would mistake it for the real thing.
But if that photographer were to place a box of matches next to the miniature toy car and then take the same photos, the game would be up and the viewer would realize it’s a toy car.
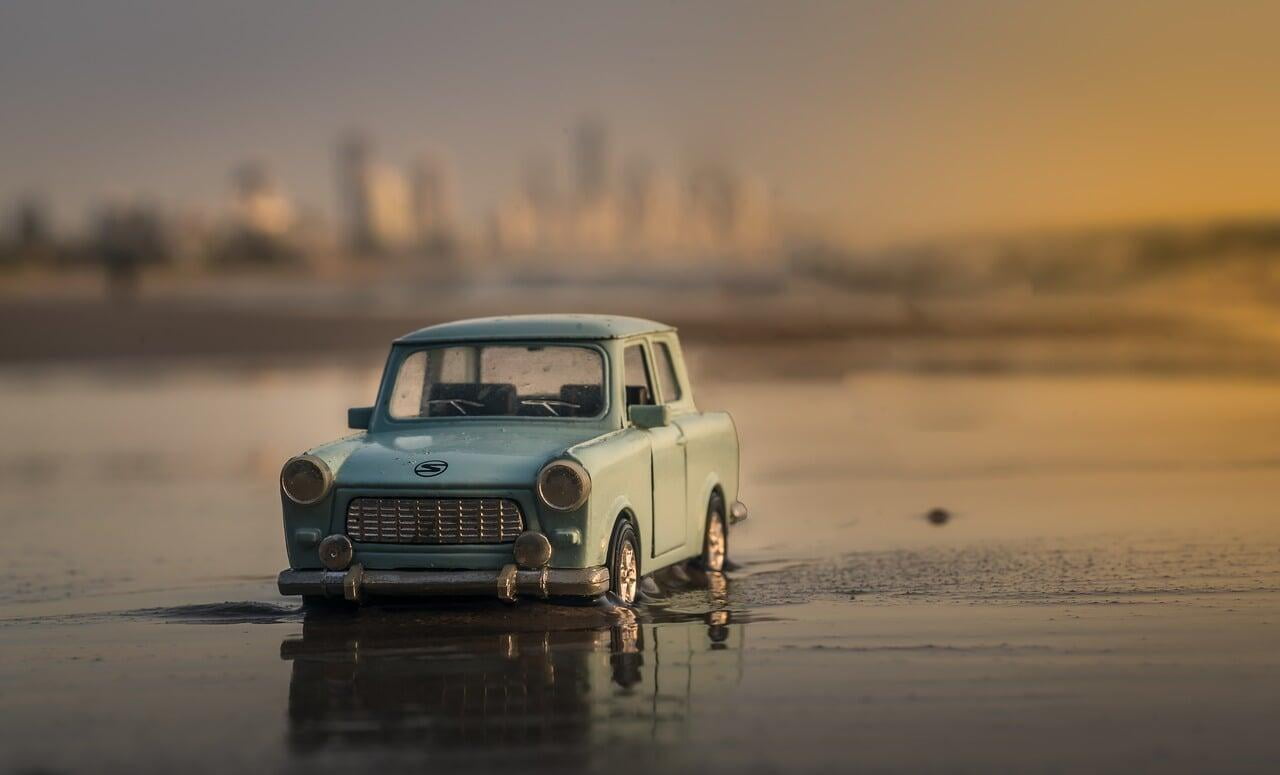
The problem is that when we have no way of knowing the true scale of an object in a photo, we often assume it to be much bigger or smaller than it really is.
We have a tendency to assume that things are their “typical” size when we can’t tell for sure how big they really are.
For instance, if we see a ship in a photo with no frame of reference we don’t expect it to be a miniature model of a ship, nor do we expect it to be as large as the Titanic.
This phenomenon can mean that photos with objects that are extremely large or extremely small can often fail to impress people when they really ought to.
On the flip side however, this natural inclination to assume things to be their “typical” size can cause the viewer to be very pleasantly surprised or to be left completely dumbfounded when the reference object reveals just how colossal or minuscule the subject truly is.
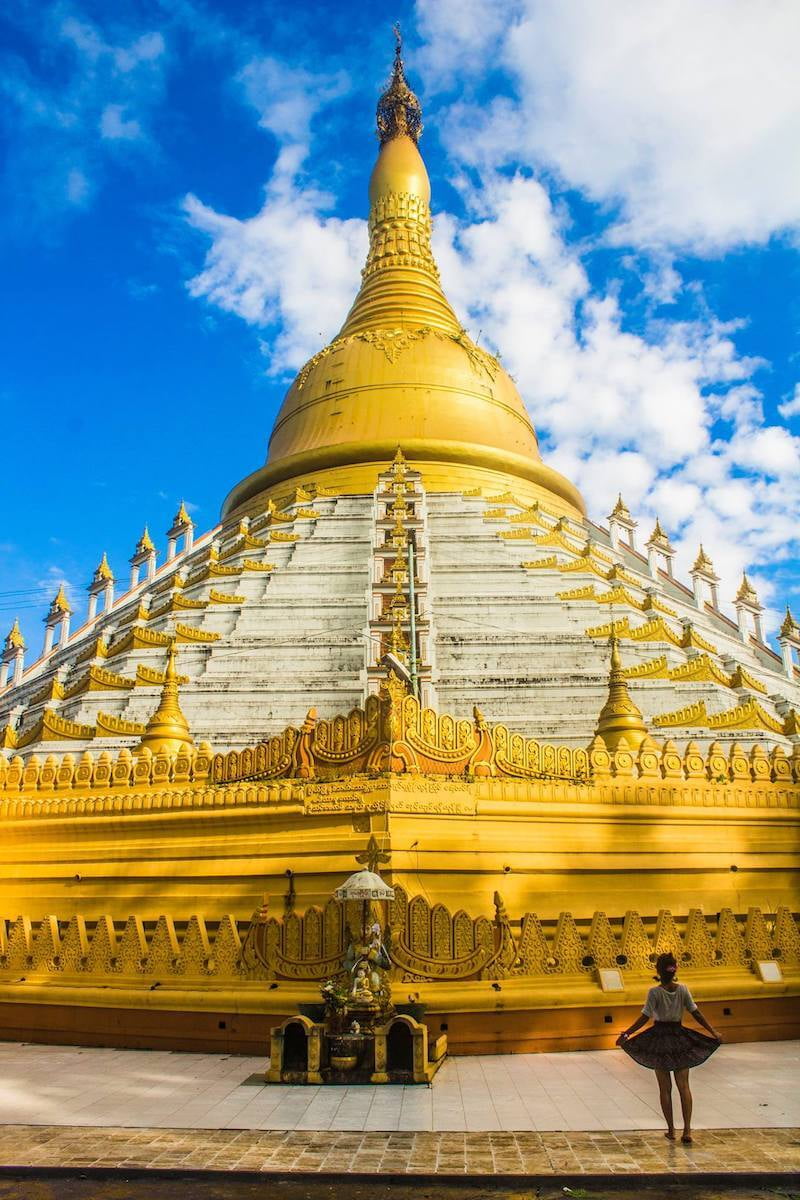
How big is that lake really? It’s easier for the viewer to tell when there’s a tiny fishing boat out in the middle of it.
How tall is that waterfall? It’s hard for the viewer to know unless you placed a person standing near the foot of it.
What’s the girth of those redwood trees? Well, that’s easier for the viewer to figure out when you shoot a tree with a road passing through it.
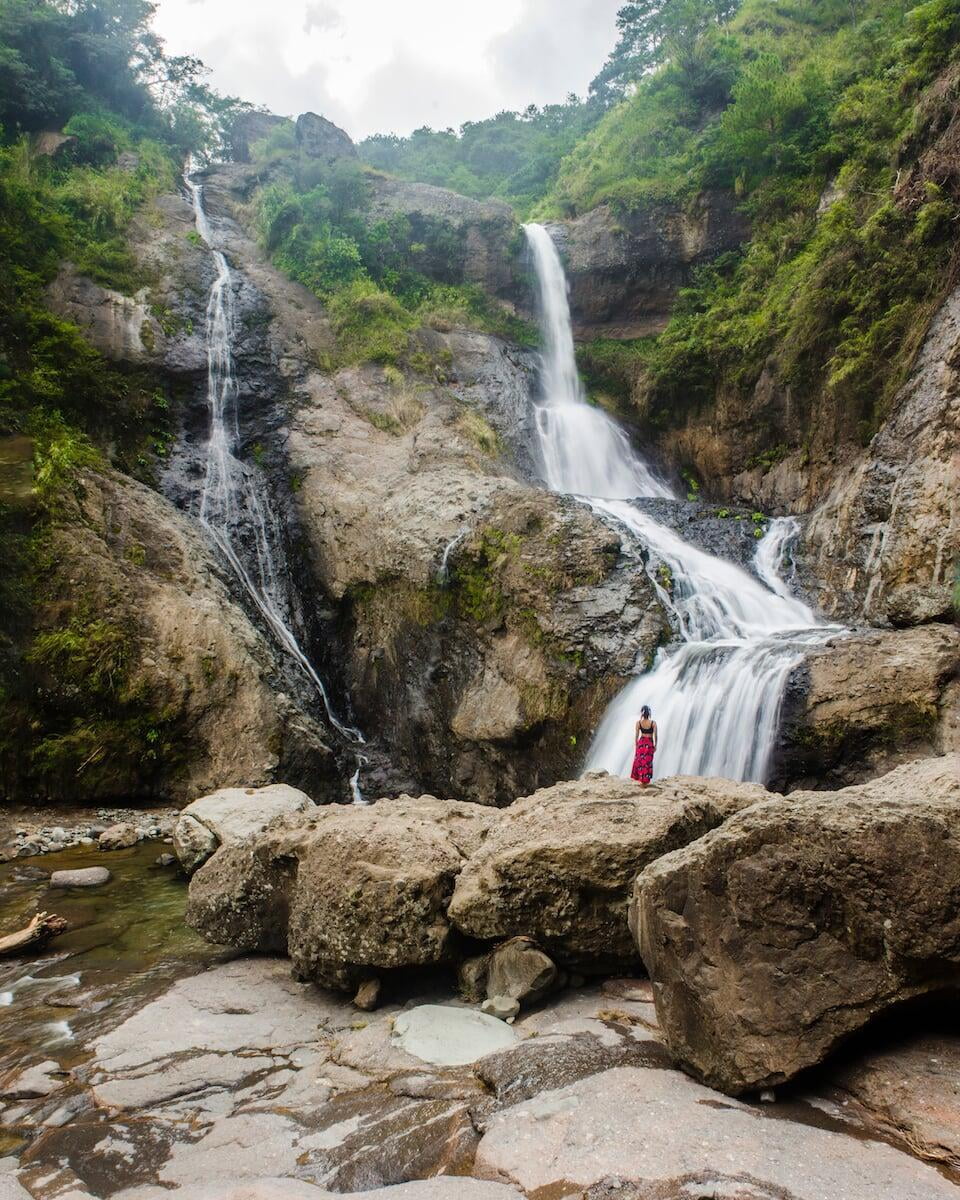
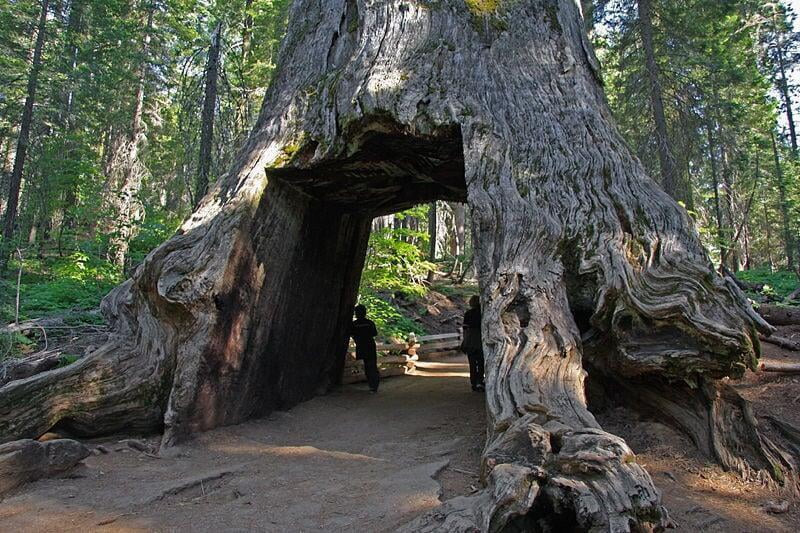
One of the best ways to give your image a sense of scale is to include people in your images, but they should also be strategically placed for maximum effect.
For example, if you want to give the viewer an idea of how tall a building really is, you should position the person very close to the building and then back away and take your photo from a distance.
If you were to position your subject close to you with the building far away in the distance, your subject could end up looking taller than the building itself, thereby belying the true size of it!
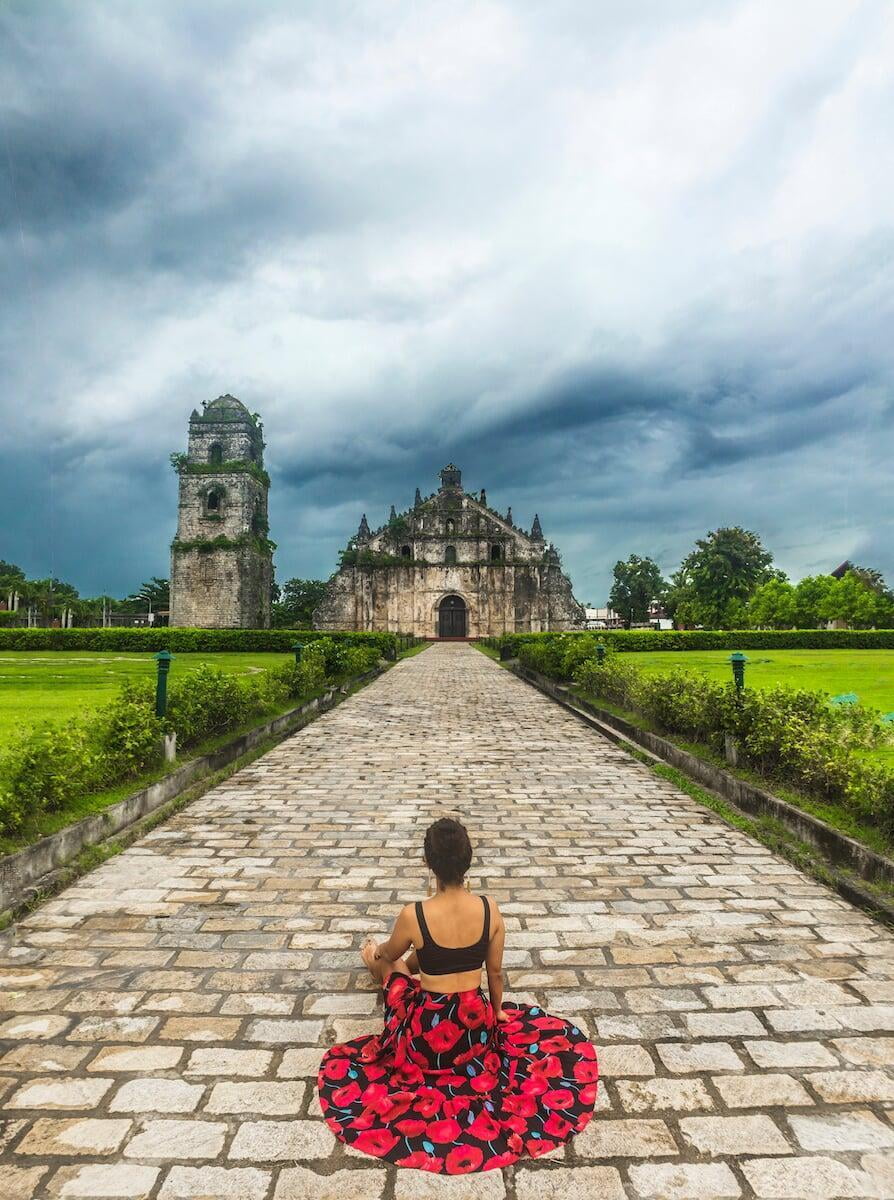
Many people think that a human being will be a blot on an otherwise perfect landscape shot, but this is flawed thinking.
A person standing alone on a sandy beach or in an open meadow can actually make the landscape seem much vaster and more awe-inspiring, as well as teaching the viewer a lesson in humility regarding our own cosmic insignificance.
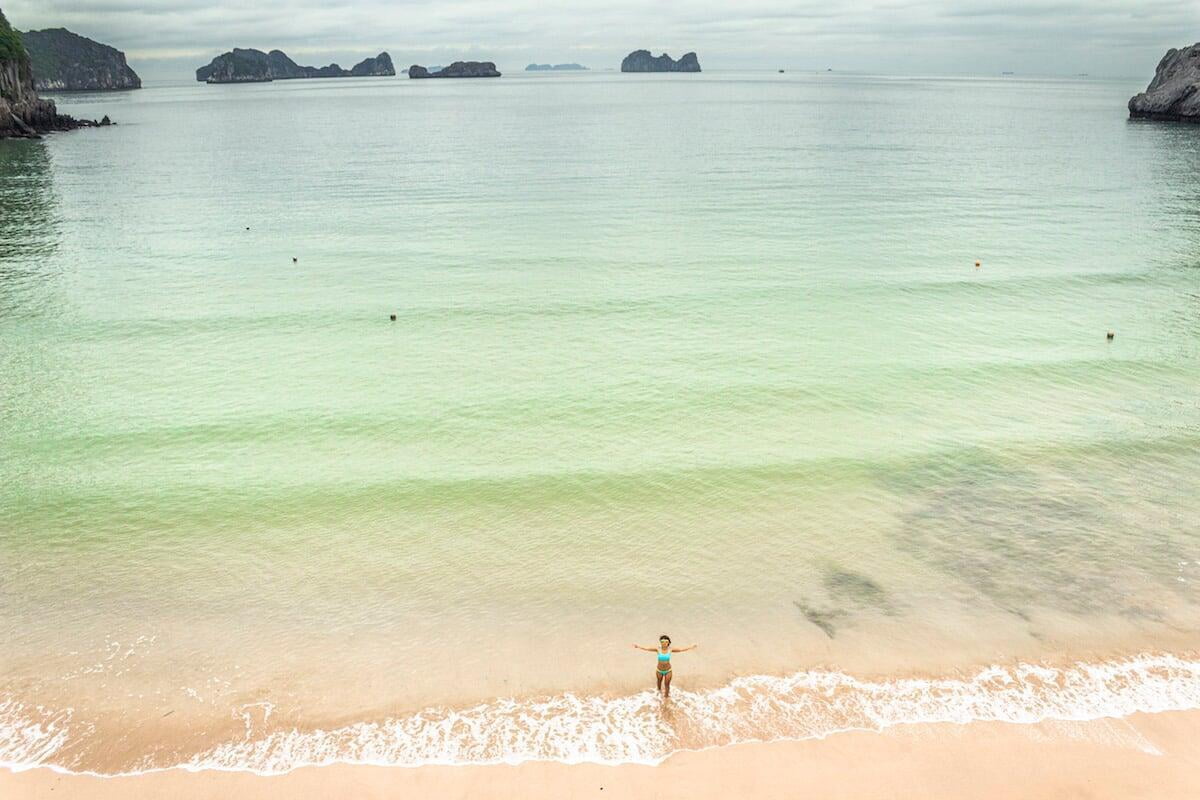
#41 - Always keep an eye out for reflections
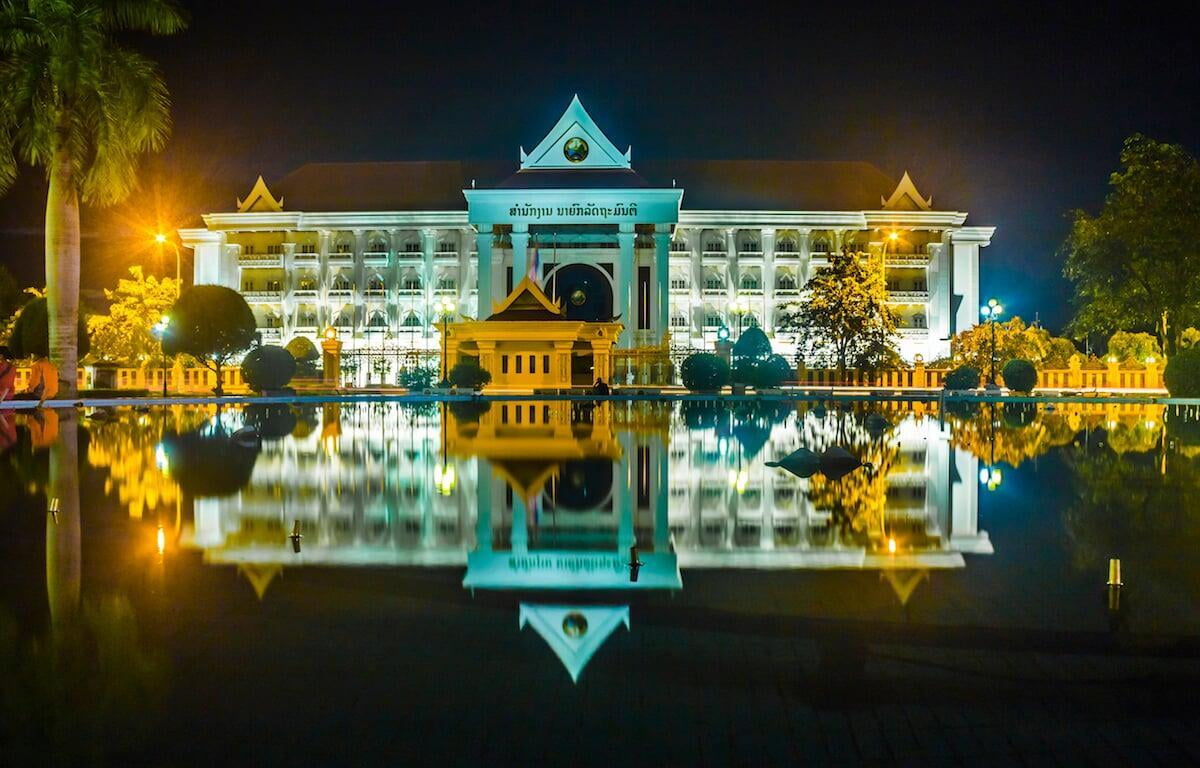
Although they aren’t particularly uncommon, reflections are often overlooked or ignored by photographers, which is a shame because they can often produce very symmetrical and captivating images.
Indeed, there’s something more intriguing and mysterious about the reflection of an object than the object itself, as it appears to the naked eye.
Reflections can be created in a wide variety of mediums, such as water, glass and polished metal surfaces.
When you’re travelling, you might observe the reflections of clouds, buildings, trees, people and other interesting subjects in puddles, still lakes, windows, glossy tiles, sunglasses, rain/dew droplets and in the wing mirrors of vehicles.
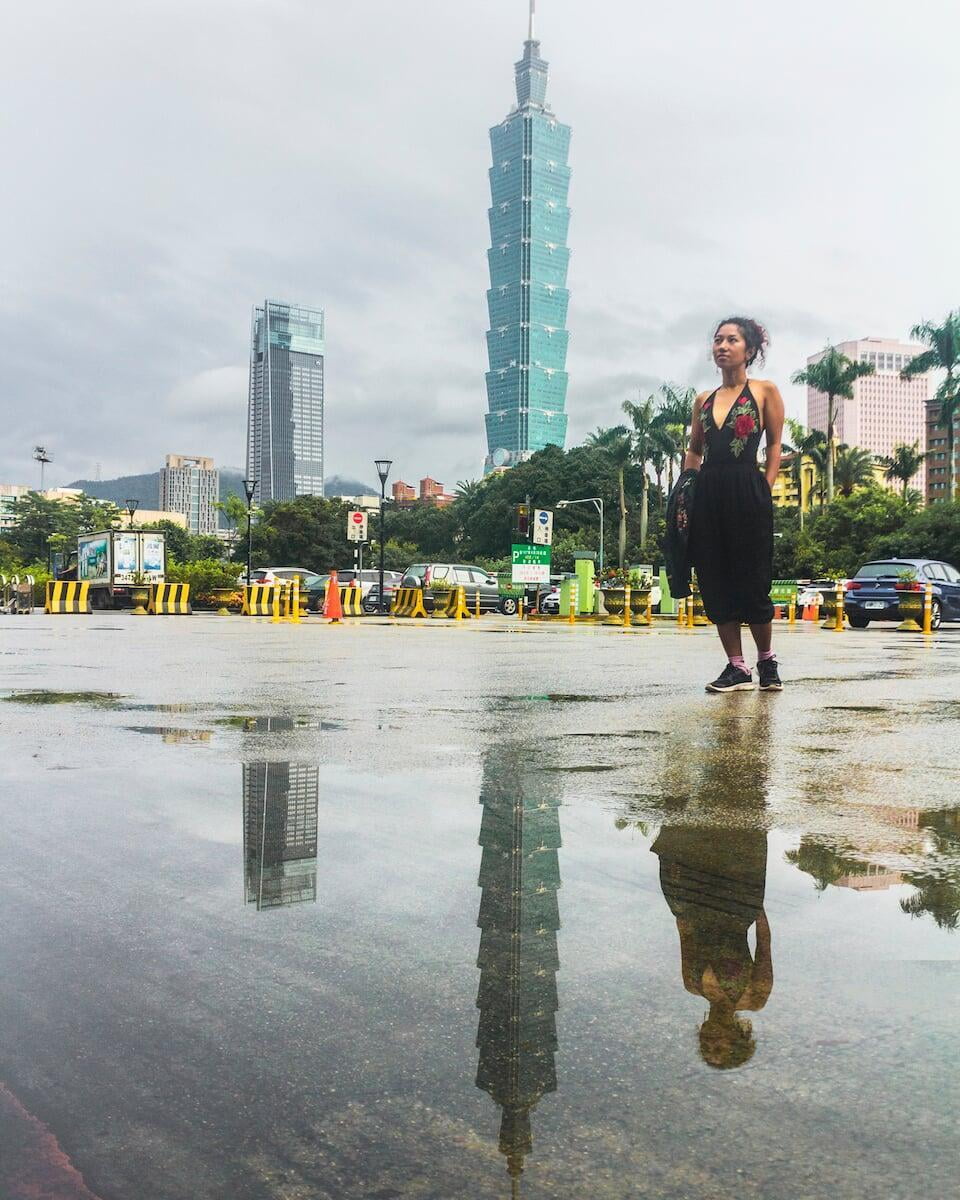
Reflections aren’t always so readily apparent; sometimes, for example, you’ll have to hunker down low to be able to see the reflection of a building in a puddle or to be able to see the entirety of the building's reflection.
There are other reflections that might be easily overlooked as well, like those in the dewdrops that cling to blades of grass early in the morning, or reflections in the iris of a person’s eye.
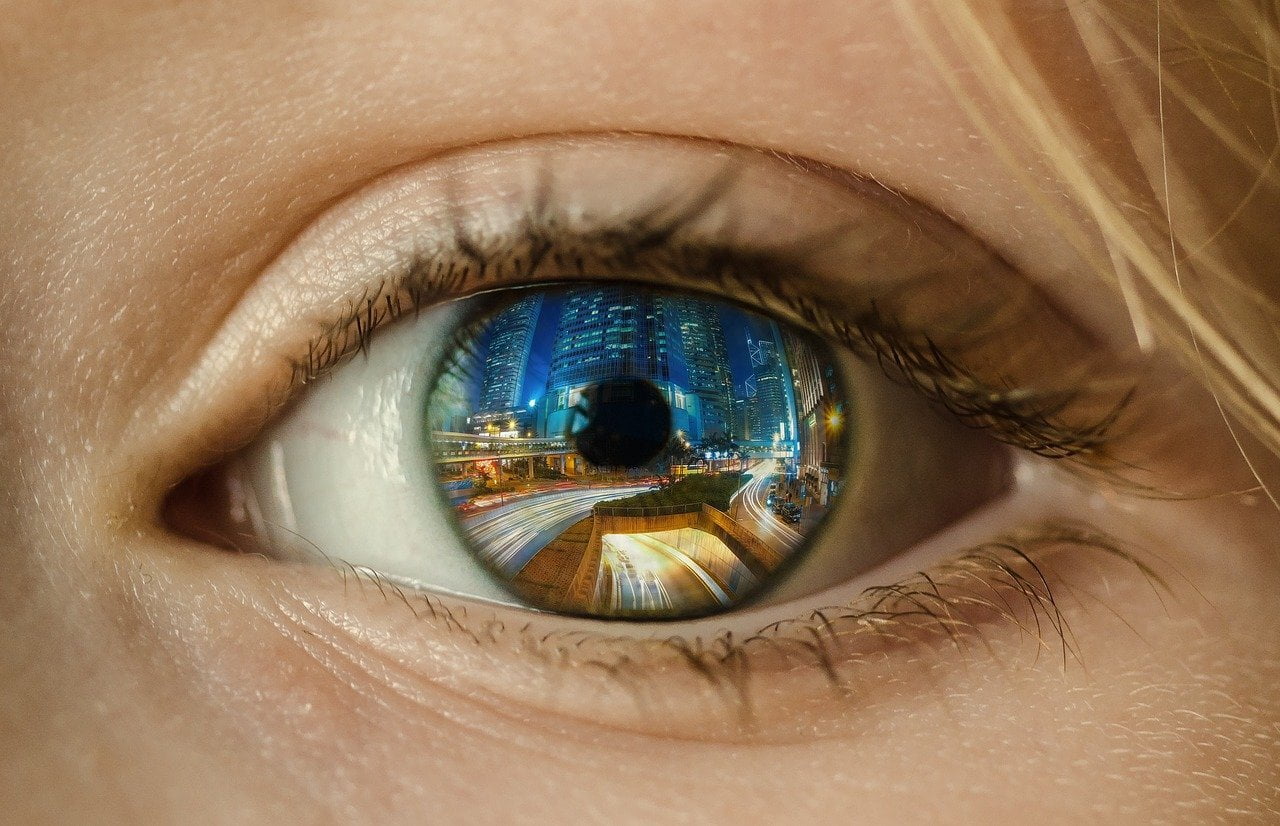
The reflections of subjects like the moon, stars or buildings with twinkling lights on water can create an especially magical effect at night.
An photograph with a reflection will usually have even greater appeal when the source object is also included in the shot. It can be interesting to compare the reflection with the real object to see how faithfully the reflection represents it.
These types of reflection photos often work best when they’re symmetrically balanced, which is to say that if the photo were divided into two halves, each half would be a mirror image of the other.
To achieve this perfect symmetrical balance the horizon line will need to run through the centre of the frame instead of being positioned according to the rule of thirds.
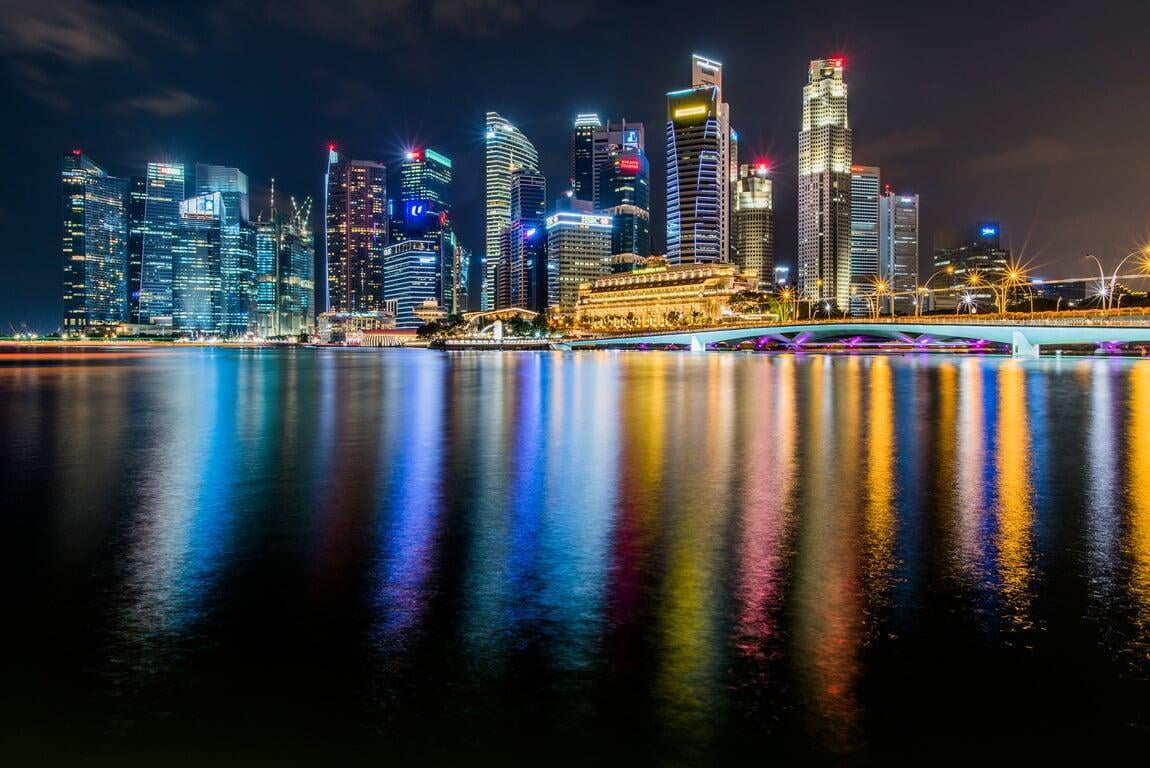
You can also create some interesting illusions with reflection photography, like when the sky is reflected in the surface of a very still body of water.
If there are boats or other objects floating on the water, they can almost appear to be suspended in mid-air, since the water now appears to be an extension of the sky.
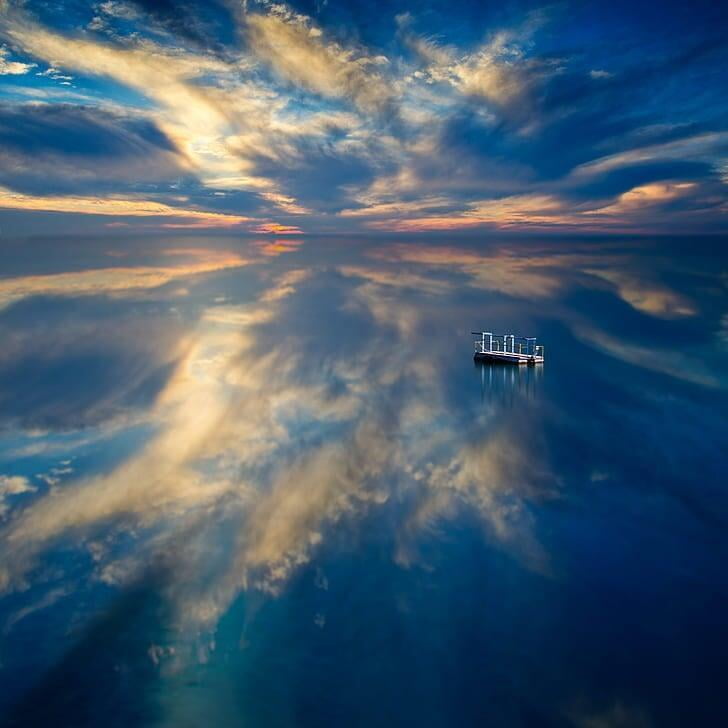
Reflection photos tend to work best on overcast days or when the sun is just below the horizon in the early morning or evening on regular days.
What you want to avoid when photographing reflections is harsh, direct light, as the reflection of the light itself will overpower and eclipse the reflection of the object that you’re trying to draw attention to.
Reflections in ponds, lakes and other large water bodies will work best on windless days when the water is completely still, as the surface will then act more like a mirror. When there are ripples or waves in the water the incident light is not reflected in an orderly manner and the reflected image will be distorted.
If you want to shoot reflections in puddles, then head out after it rains.
Make sure to check out this page as well for some more interesting examples of reflection photography that should help to to give you inspiration.
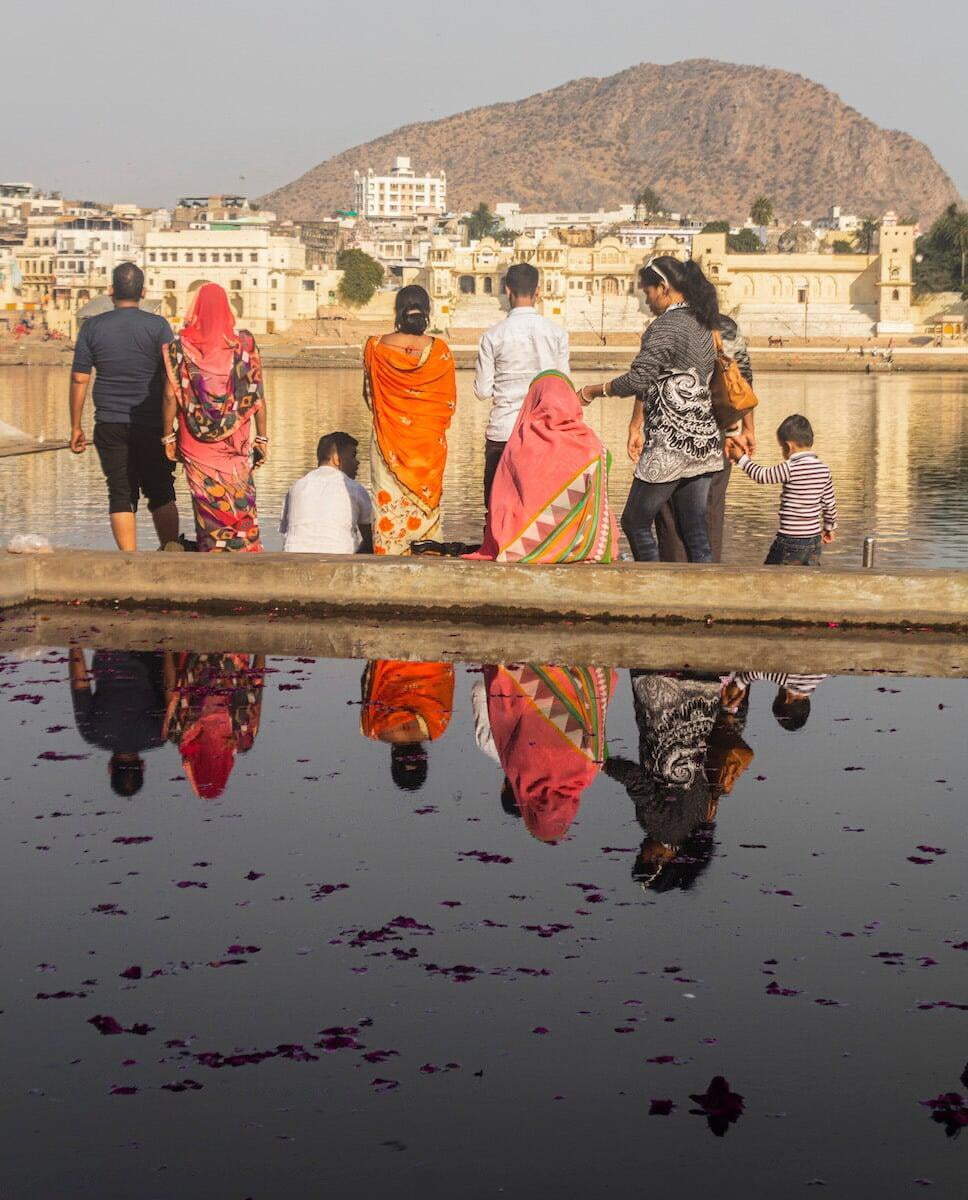
#42 - Convey a sense of depth in your photos

Because photographs are essentially a flat, two-dimensional representation of a three-dimensional world, it can be challenging to convey the impression to the viewer that they are looking at a three-dimensional scene that possesses depth.
A photo that manages to create the illusion of depth will be more engaging for the viewer than a flat-looking image, as it will have the effect of drawing the viewer’s eye into the photograph and taking them on a little journey through the scene.
So, how do you create photos that give the impression of depth?
The illusion of depth in a photo is most easily created by applying the concept of layering, which is most simply achieved by incorporating a foreground, middle-ground and background in your image.
Many people fail to create a sense of depth in their photographs by not including elements that represent all three of these essential layers.
When shooting a landscape, for example, many people will just capture the sky and a sweep of the land (background and middleground) but they’ll neglect to include any of the immediate foreground elements, like rocks or bushes. This results in a rather flat-looking image.
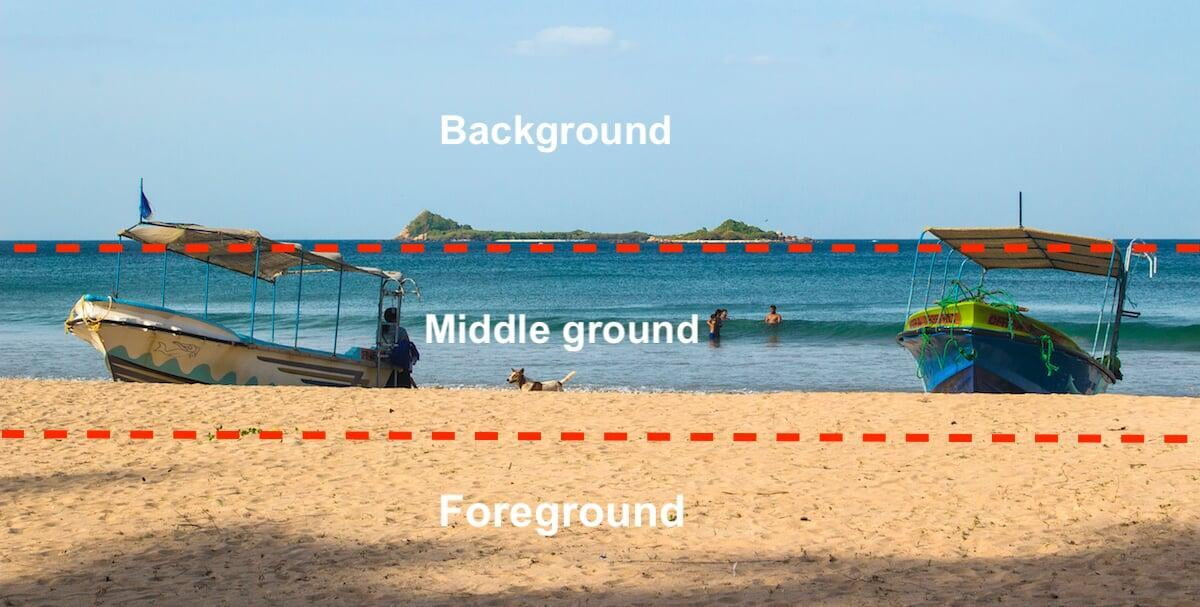
If you can’t find any interesting foreground elements to include in your image, you can use your own limbs as a substitute, and in some cases you might want to use them to draw attention towards your subject by pointing them at it.
For example, you could include your tanned (or burnt) legs in a photo of a swimming pool or the beach to show that you’re there sunbathing.
Or if you’re taking a photo while riding a motorcycle or pedalling a bicycle, you can try to include your arms and the handlebars in the picture. You could also take a photo of your arm holding up a pineapple or an ice cream or even a glass of beer.
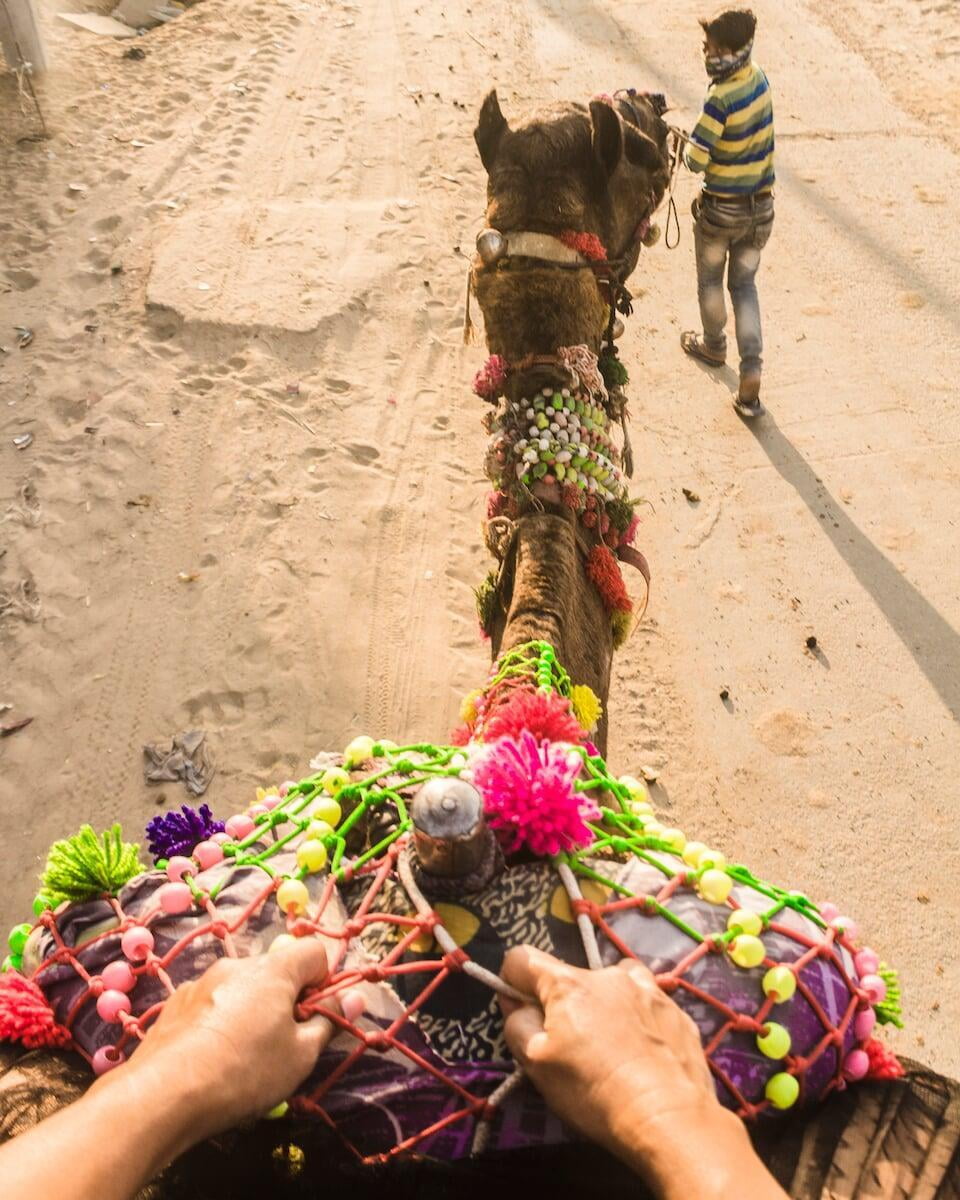
You could even try creating those “Follow Me To” photos , which were originally popularized by the Russian couple Murad and Natalie Osman and became a huge hit on Instagram. There are numerous possibilities.
Such images offer a first-person perspective (as is popular in many video games) and they can be highly engaging for the viewer, as they almost make the viewer feel as if they’re the one having the experience.
Bear in mind however that these first-person perspective shots are easiest and sometimes only possible to achieve with a wide-angle lens, or an action camera like a GoPro (see Section 2).
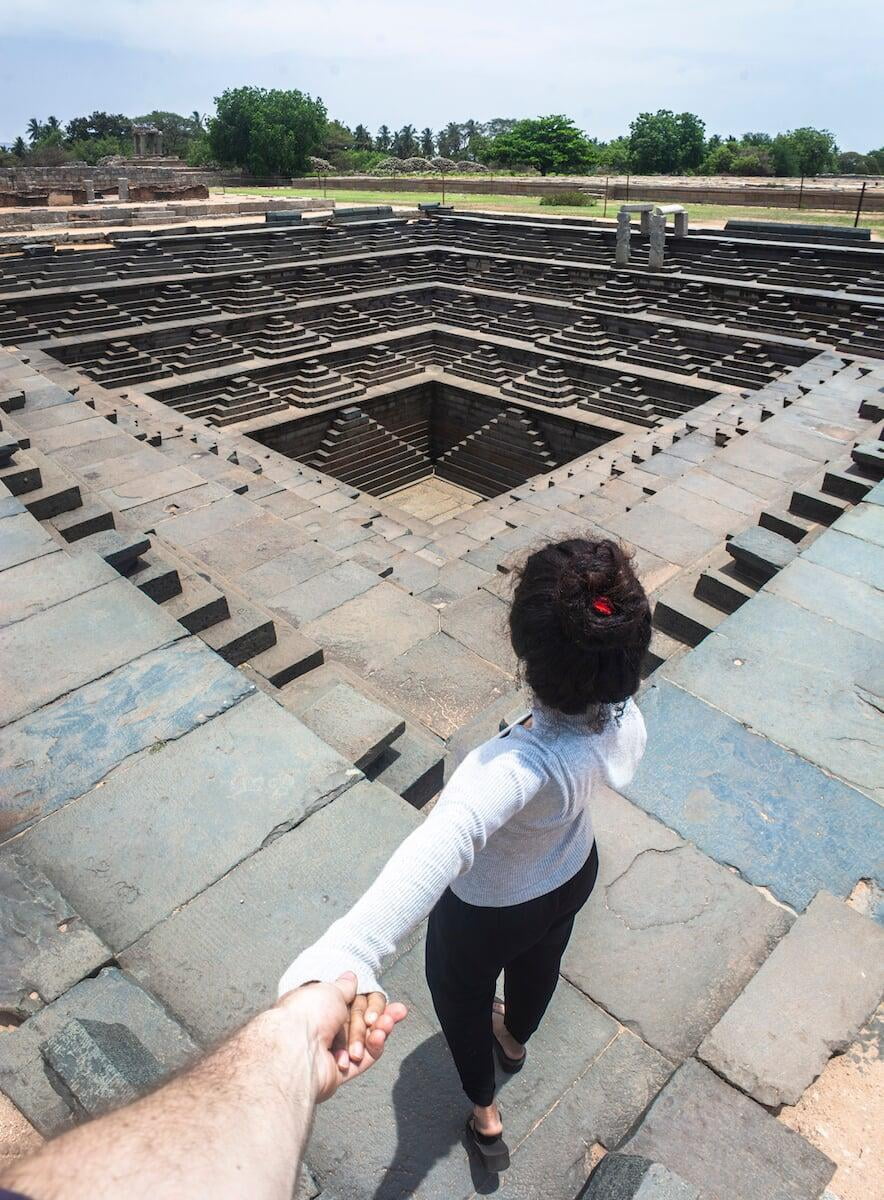
Shooting vertically in portrait orientation (as opposed to landscape orientation) naturally lends itself to creating photos that possess a sense of depth.
This is because when the camera is oriented vertically, you can more easily capture foreground elements without having to sacrifice the background, since the camera now has more scope in the up-down direction.
The downside with shooting vertically of course, is that you lose scope in the horizontal direction (this can be remedied with panoramas, which we address in the next tip below).
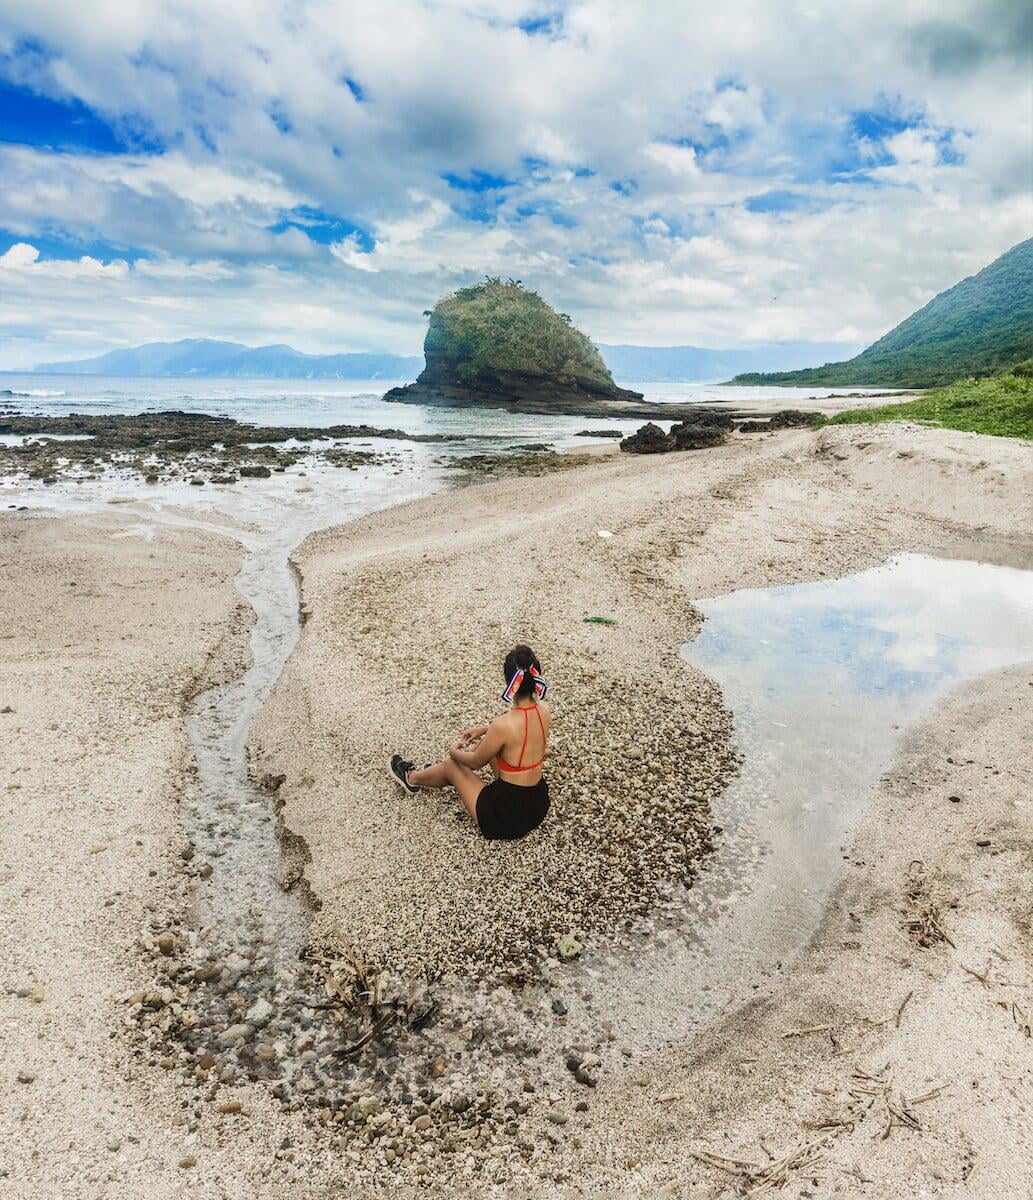
Shooting at a relatively short focal length like 18mm will also help to give your images more depth.
This is because zooming in or shooting at longer focal lengths tends to result in more compressed, flatter looking images where the objects in the image, despite being at different distances, can appear to be very close together or even in the same plane. The longer the focal length you shoot at, the more exaggerated this effect of compressing space is.
When shooting at short focal lengths however, the elements in the foreground appear larger and seem closer to the photographer, while those in the distance appear smaller and further away, giving the impression of depth.
I’m not saying that you should never take photos with a zoom lens (I use mine all the time), as you can get some really interesting images at longer focal lengths, but when your goal is to create images with a sense of depth, it’s better to shoot at shorter focal lengths.
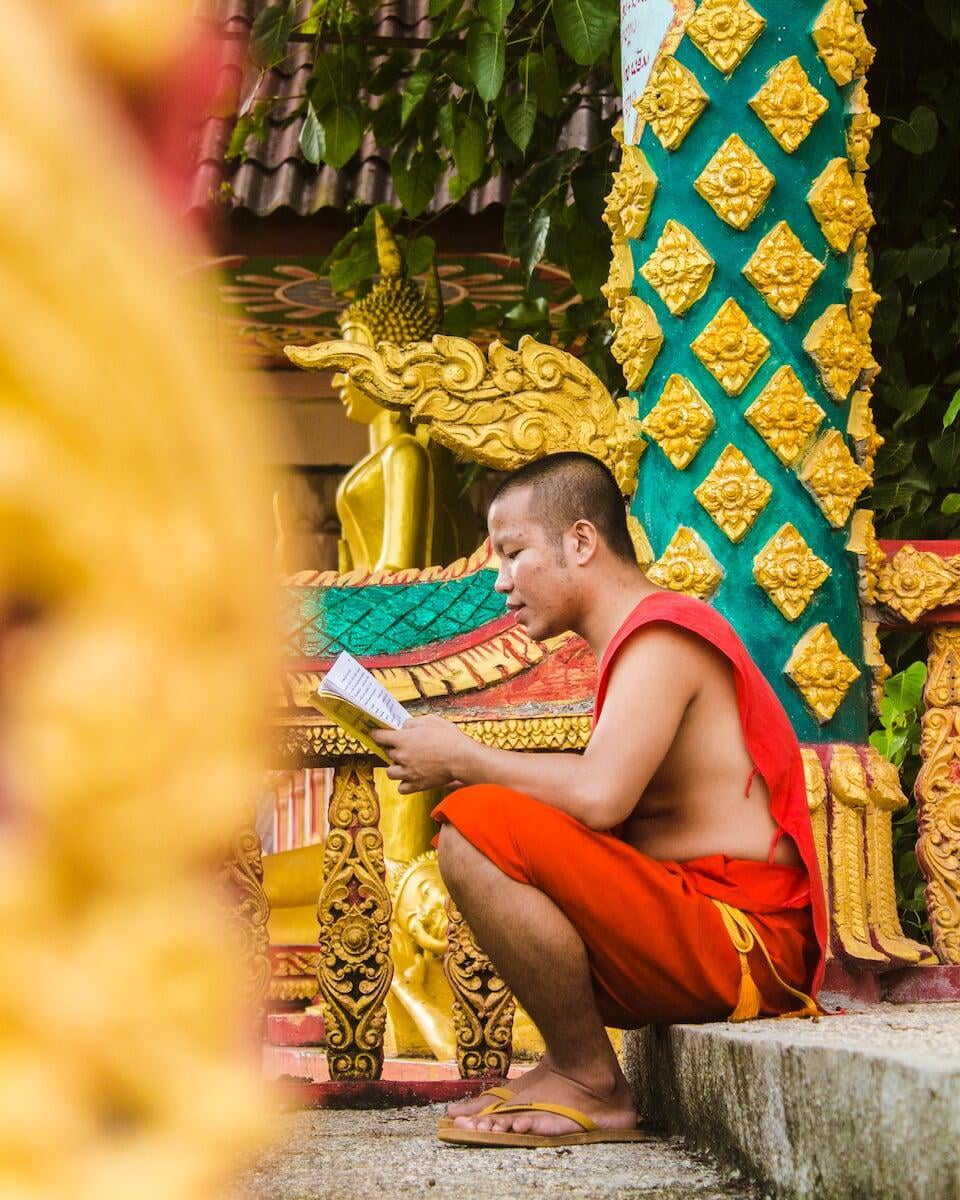
#43 - Panoramas are a secret weapon

Sometimes, there's a lot going on in a scene and you want to capture it all in a single, all-encompassing photograph instead of dividing it between multiple shots.
But when you go to compose your shot, you realize that the field of view of your lens isn’t wide enough to include all the elements of interest in the scene.
You observe that if you orient the camera vertically you're able to include the foreground and the sky in the frame, but you end up excluding or only partially including the elements that were near the margins of the frame when the camera was oriented horizontally.
If you then try orienting the camera horizontally, you observe that you get the desired horizontal field of view, but now you’re having to choose whether to include the sky or the foreground in the frame, because the camera’s field of view in the vertical direction is too small to include both.
Your camera is always forcing you to make a compromise.
One way to solve this problem would be to put on a wide-angle lens, which would be any lens with a focal length in the 10 – 20 mm range for a crop sensor camera and in the range of 15 - 35 mm for a full-frame camera.
But you may not want to carry an extra wide-angle lens when you’re travelling, and even if you’re okay with carrying one, you might want to avoid the hassle of swapping lenses whenever a wider field of view is required for a shot.
Another way of achieving a wide-angle shot, if you don’t own or don’t want to carry a wide-angle lens during your trip, is to shoot a sequence of 3-4 partially overlapping shots of a scene and then seamlessly blend them together on your computer into a single panoramic image with an editing program like Photoshop.
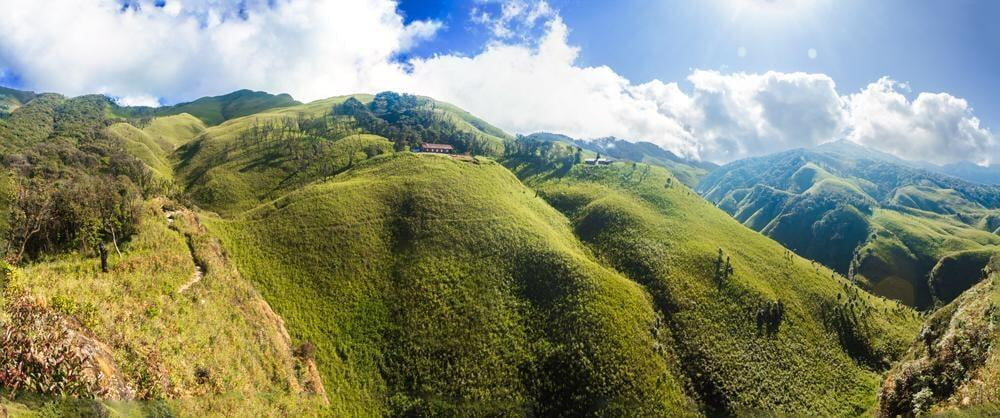
If you want to take a panorama of a landscape, cityscape or other scene where you need to pan the camera horizontally to capture a wide field of view, you will need to orient the camera vertically when shooting the individual images that will comprise your panorama.
You can then shoot the panorama sequence handheld or with a tripod; the latter will result in better alignment of the individual photos, but you can also achieve pretty good alignment while shooting handheld once you’ve had a bit of practice.
The key when shooting a panorama handheld is to plant your feet firmly in one spot and to rotate your torso from the hip as you pan across the scene, making a conscious effort to maintain the camera at the same height and angle of tilt for every shot.
If you are shooting handheld with a DSLR you will probably find it easier to shoot the sequence while looking through the viewfinder, since having the camera pressed against your face will help you to maintain stability.
As you pan across the scene while shooting the sequence, you should consciously endeavour to keep the angle of your head consistent (i.e. don’t tilt it up or down).
It’s recommended that every photo in your panorama sequence overlaps by approximately 40% with the one that came before it, because if there’s too little overlap between the images there’s a risk that the editing program won’t be able to blend them together properly.
If you’re shooting with a camera phone, you will probably have a special panorama shooting mode where you’ll see a horizontal line on the screen and an arrow that moves along the line while pointing in the direction that you need to pan the device to create the panorama.
If your phone starts to stray from the correct path while panning the arrow will indicate in some way or another that you’re veering off course so that you can make the necessary correction.
Unlike with a DSLR, you don’t have to take a sequence of individual photos when using your phone’s panorama mode; you just have to tap the shutter button once to initiate the panorama sequence and once more to end it. Your phone will then process all the captured data and output the finished panorama.
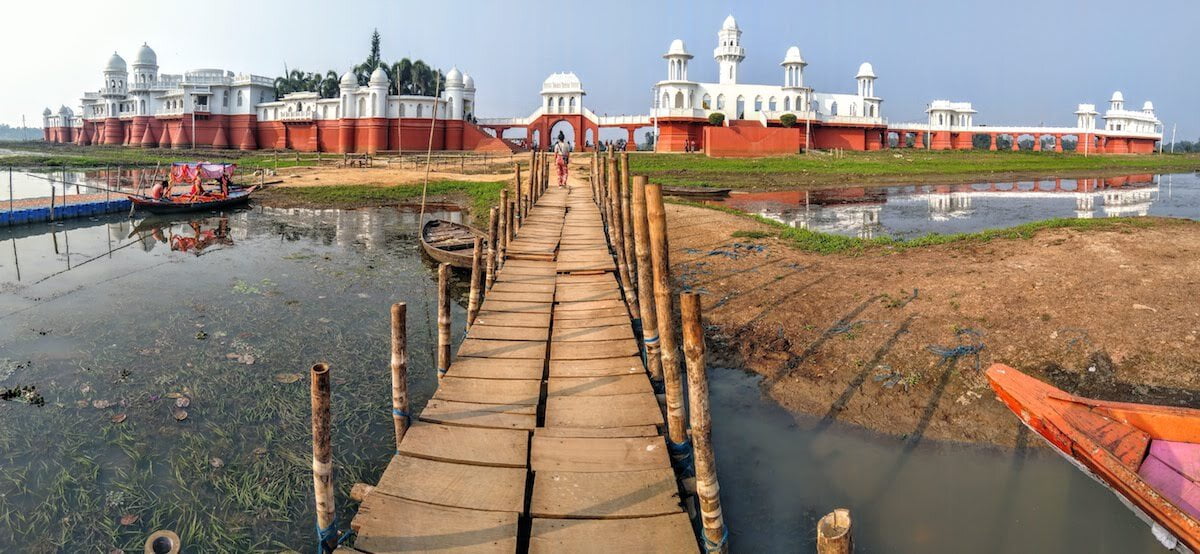
You can also shoot vertical panoramas in the same way that you can shoot horizontal panoramas, either with a camera phone or with a standalone camera.
Vertical panoramas are useful for capturing tall buildings and monuments when you’re too close to fit the whole thing in the frame with a normal vertical shot.
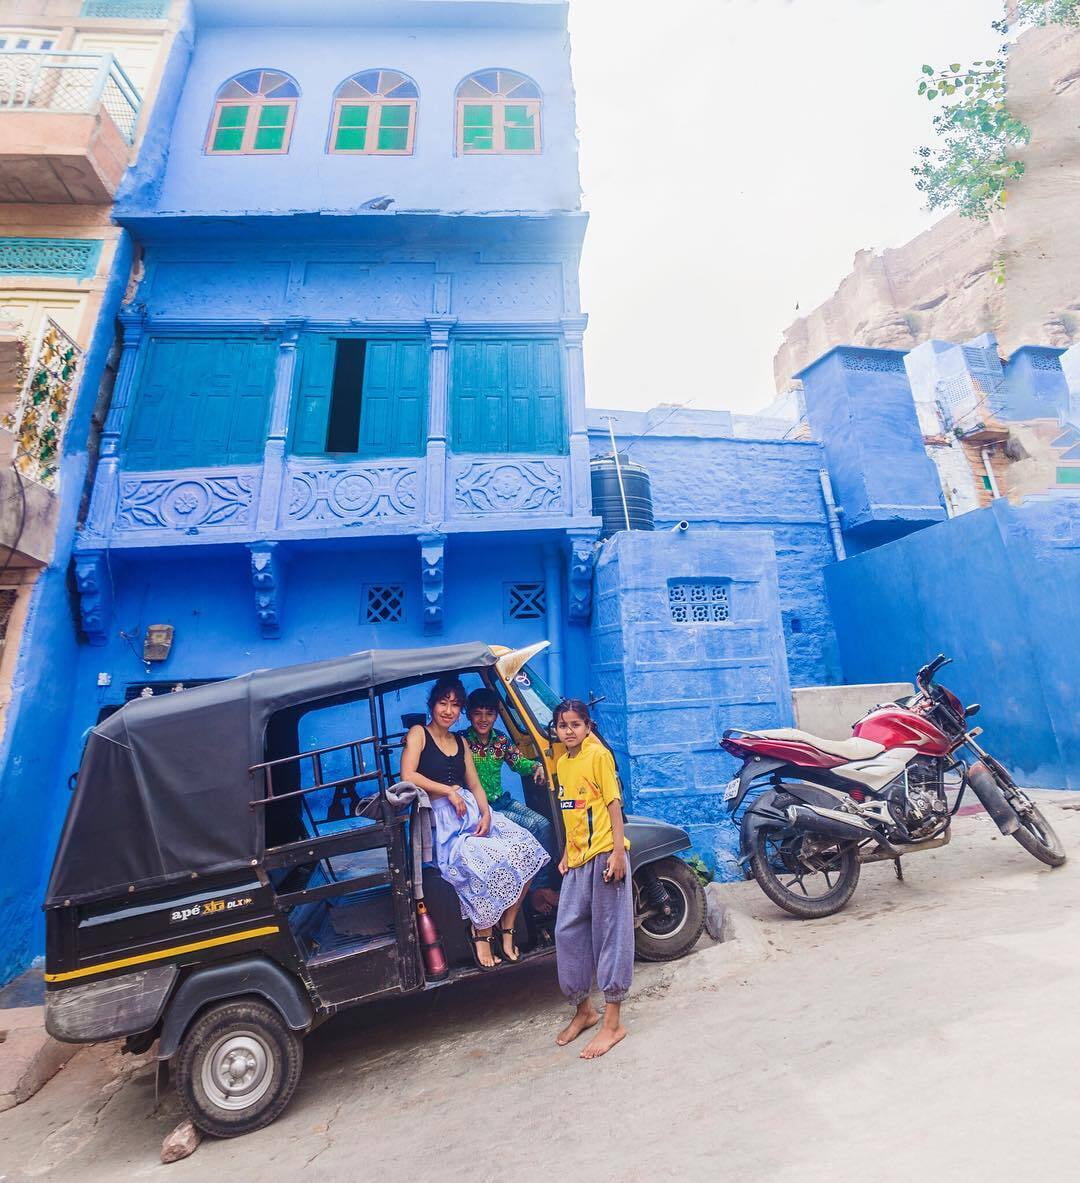
They’re also great for creating images with a sense of depth, as you can easily tilt the camera downwards to capture a foreground object close to your feet and then gradually tilt the camera upwards while capturing a sequence of images ending with the sky.
When shooting a vertical panorama with a DSLR, you will want to orient the camera horizontally (not vertically) and I again recommend shooting the sequence while looking through the viewfinder.
This time however, instead of rotating your torso as you move through the panorama sequence, you will want to tilt your head with your neck as you move from having the camera pointed at the ground to having it pointed up at the sky, or vice versa.
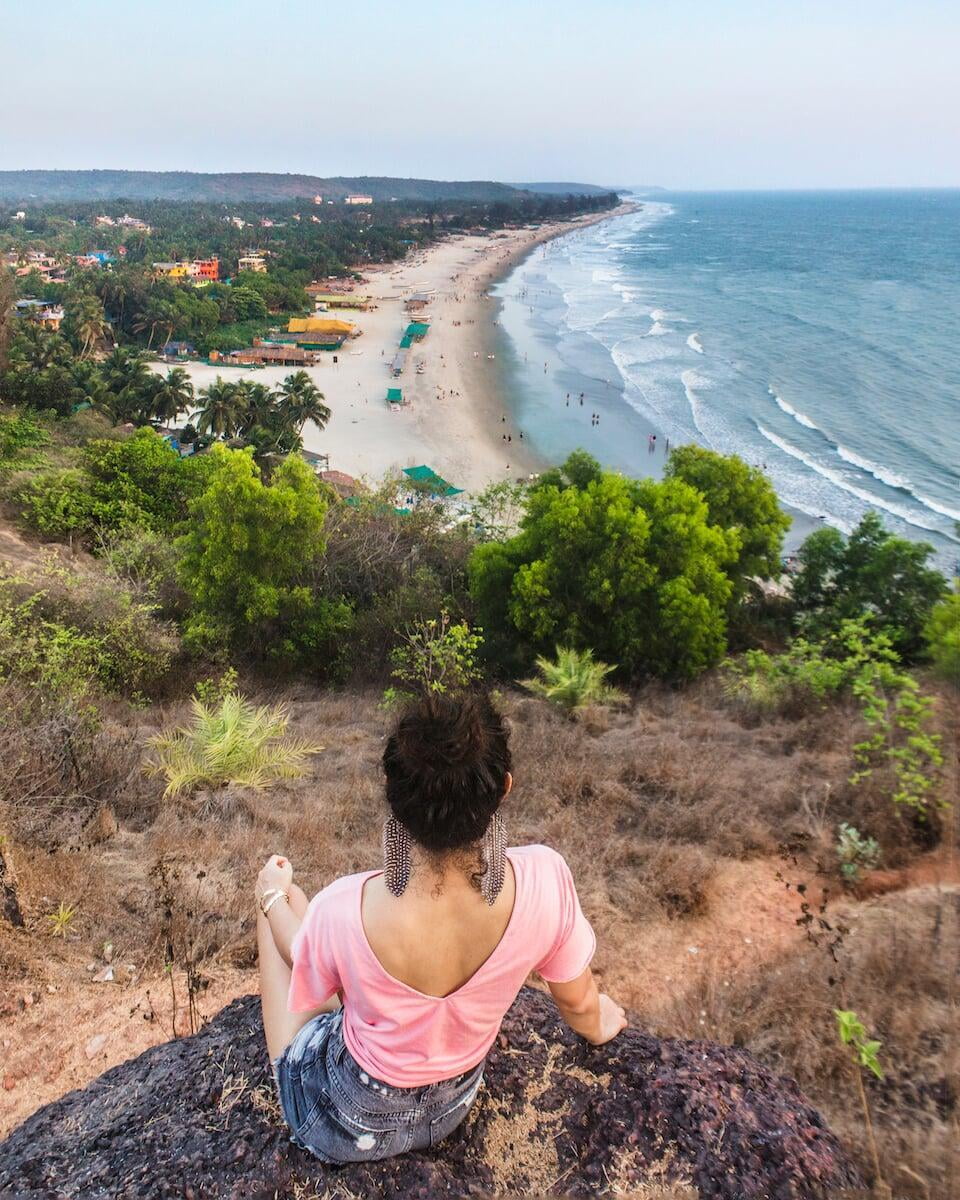
The number of shots that you need to take in your panorama sequence will depend on the focal length of your lens, the amount of overlap you have between the images, and as the field of view that you’re trying to cover.
If shooting with a regular 18mm lens on a crop frame camera with 40% overlap between images, you might need to take 5 shots to cover a field of view of 180°. I usually create 2, 3 or 4-shot panoramas with a field of view of less than 180°.
What you’ll find is that if you stitch too many images together the final panorama will have a very abnormal aspect ratio, where it’s either extremely tall and narrow or extremely wide and short.
2-shot or 3-shot panoramas help to preserve a more normal looking aspect ratio and the photos will also be more shareable on platforms like Instagram.
If you’ve shot a sequence of images with a DSLR or other standalone camera, I can give you a quick rundown on how to blend them together into a composite panorama image using Photoshop.
Basically, you want to open up all the images of your panorama sequence in Photoshop and then go to File -> Automate -> Photomerge.
A window will then appear and you’ll hit the “Add Open Files” button to import all your images into the window.
Make sure the “Blend Images Together” box is checked and you can then choose one of the blending layouts like “Auto”, “Perspective”, “Cylindrical”, “Spherical”, “Collage”, “Reposition” etc.
I usually try a few different layouts to see which one gives the most satisfactory result. Sometimes only one of the various layout options will stitch all the images together properly while all the others will mess it up, so just play around with the options until it works.
Once Photoshop has generated a panorama that you’re happy with, you’ll want to highlight all the layers, right click on them and hit “merge selected layers”. You can then tidy up the edges of your panorama image using the crop tool, before saving it to your computer.
As a testament to the power of this technique, I can tell you that a lot of my most popular photos (according to the amount of engagement they generated on Instagram) were panoramas created using this method, since I don’t actually travel with a wide-angle lens.
#44 - Give multi-frame action sequences a try
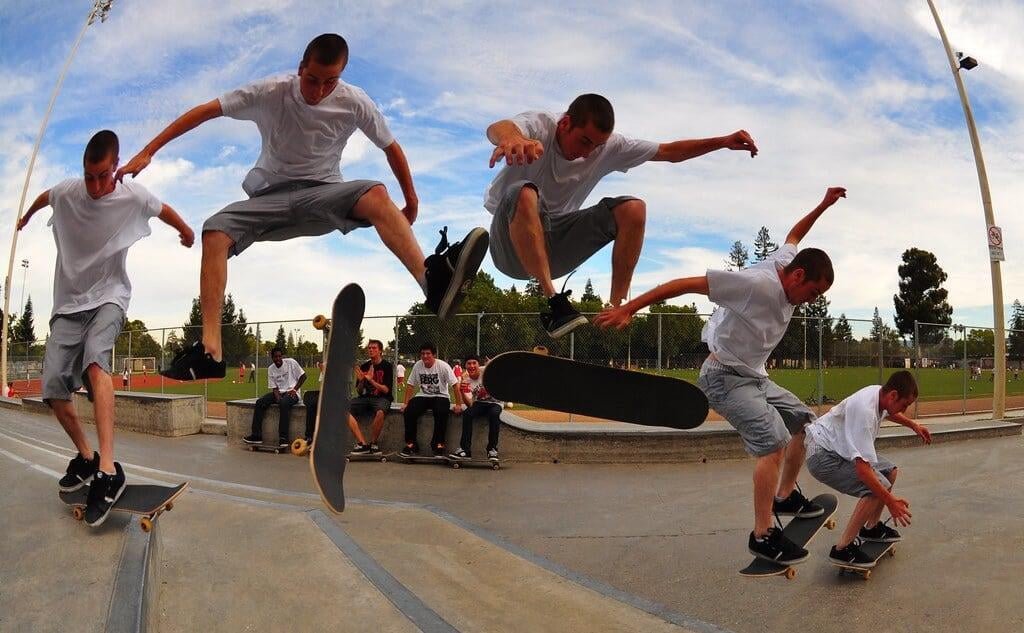
Have you ever seen those photos that present several different moments from an action sequence by combining multiple separate frames all into one composite image?
You know, those photos with "clones" of the subject at several different positions in the frame to show how the sequence unfolded, almost like you're watching a video?
These multi-frame sequences work especially well with adventure sports and high-adrenaline activities like cliff jumping, snowboarding, skateboarding, horse riding and so on.
The more pronounced the variations in the subject’s body configuration as the sequence unfolds, the more interesting these types of images tend to be.
In order to capture a multi-frame action sequence, you have to take a rapid succession of shots using your camera’s burst mode, and then you would take this group of images and blend them together into a composite image using an editing program like Photoshop.
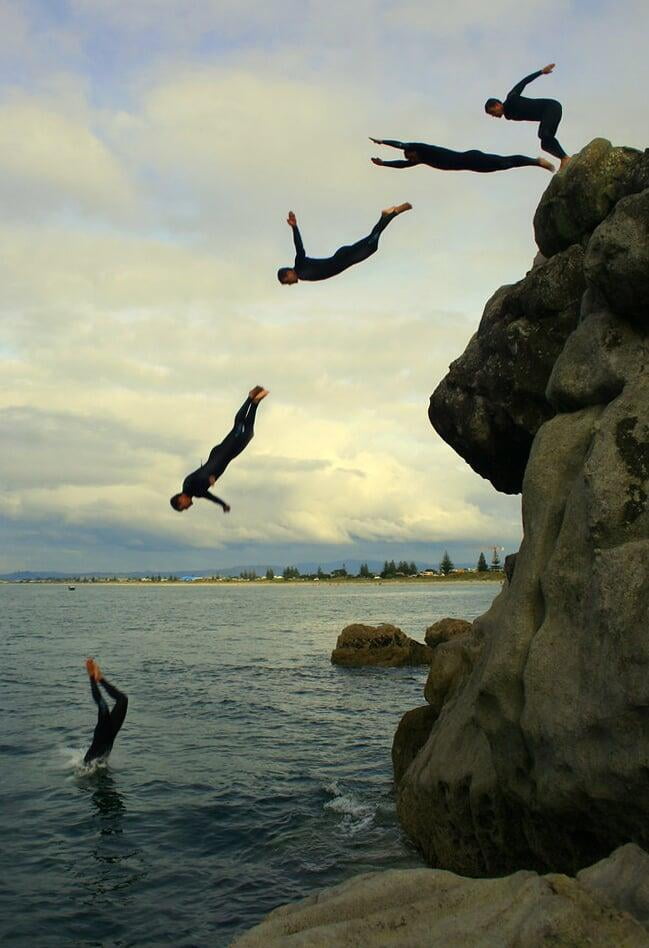
There are some technical aspects to the image blending process and you’ll need to understand how to work with layers and how to apply layer masks in order to achieve the desired outcome.
Here’s a helpful video tutorial from Jared Polin that walks you through the editing process from start to finish.
It’s very important when taking a multi-frame action sequence that your camera doesn’t move (or only moves very minimally) between the shots. This is why it’s highly recommended to use a tripod for this type of photo.
If your camera moves too much between frames, you will lose a lot of information from the final image when the editing program attempts to align the individual frames, as it will need to crop the image to ensure proper alignment.
Here are some other tips for capturing a professional-looking multi-frame action sequence:
- Use the widest lens that you’ve got so that you can capture the full sequence from start to finish in that single frame. Ensure that your subject’s start and end points fall within the frame.
Use a clean, uncluttered backdrop that your subject’s clones will stand out against. The sky often works best for these sequence shots.
Shoot from a side-on perspective (not from a head-on perspective) so that your clones will be more clearly separated from one another when the frames are blended together in the software editor.
You can create sequences with overlapping clones, but this makes the editing process more time consuming and complicated. For simplicity when you’re starting out, you might want to only use alternate frames from your sequence so that there is complete separation between each of the clones in the final composite image.
Choose a camera autofocus mode that locks onto a moving a subject (i.e. Canon’s AI Servo AF mode) and continually keeps it in focus even as it moves in the frame.
You may have to shoot in high-quality JPEG if your camera is struggling to shoot fast enough in RAW.
For example, when shooting in RAW, my Canon EOS 77D will shoot in burst mode for 3 seconds at 6 fps and then the shooting rate slows down dramatically. Thus, if I wanted to shoot a sequence that lasted longer than 3 seconds I would have to shoot in JPEG.
When shooting the sequence, set your camera to shutter priority mode (Tv) or manual mode and choose a high shutter speed of at least 1/500 but ideally 1/800 or higher, depending on how fast the subject is moving.
#45 - Try shooting against the light (backlighting) for a change
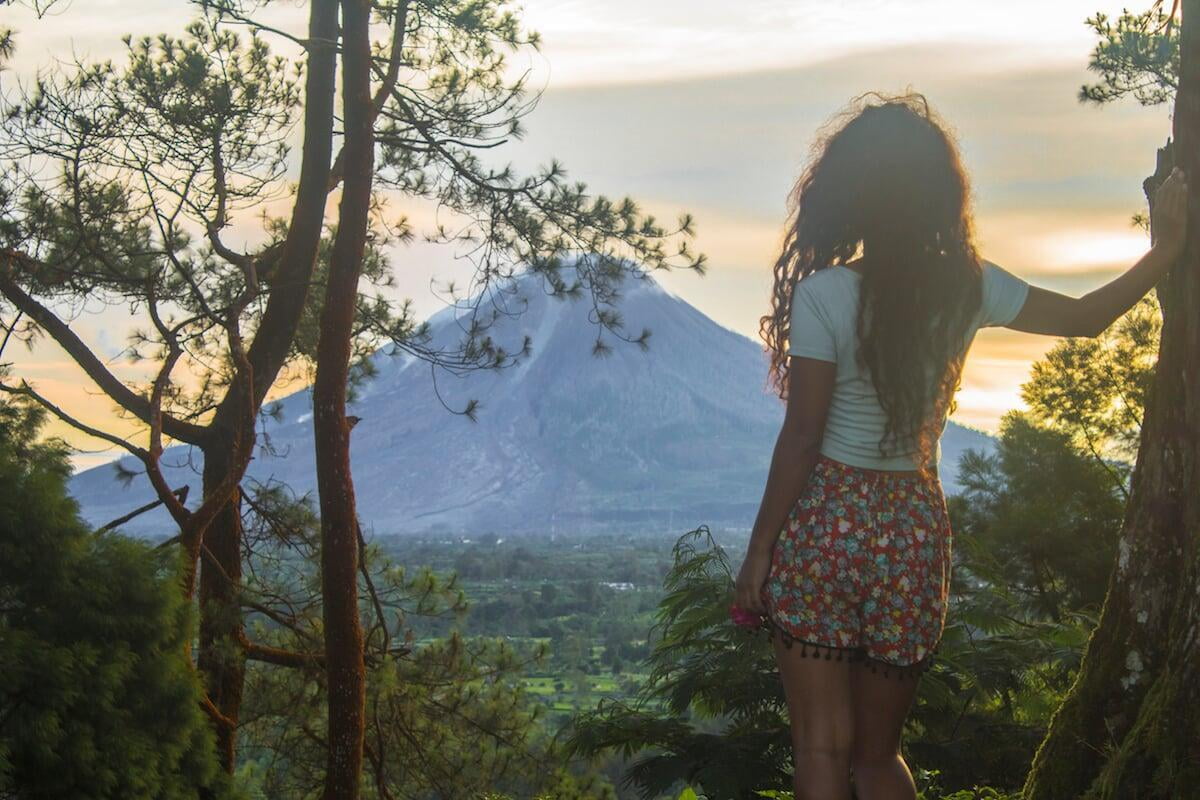
According to conventional photography wisdom, the subject(s) in a photo should be front-lit, meaning that the photographer is shooting with the light (in the same direction) while positioned on the same side of the subject as the light source.
Even non-photographers will instinctively stand with their back to the light source in order to photograph the fully illuminated side of a person or other subject.
This is the conventional approach for a good reason; it's easy to execute and there aren't many ways to screw it up, apart from perhaps the fact that it can make people squint since they're looking into the sun. The main problem with front-lighting is that it's repeated far too often because it's safe and familiar.
The unconventional approach is for the photographer to position himself on the opposite side of the subject to the light source and to shoot against or into the light.
In this case the light will be falling on the "back" of the subject, and the photographer will be capturing the dark or shadow side of the subject.
This unconventional method of lighting a subject from the rear is known as backlighting.
When shooting outdoors, backlighting works best when the sun is low in the sky, either in the early morning or late evening. This is because the sun needs to be coming from behind your subject, not from directly overhead.
Shooting at the beginning or end of the day has the added advantage of being able to work with that magical golden light that you only get in the hour after sunrise or before sunset.
Backlighting can produce a very ethereal looking glow when the light passes through objects or parts of a subject that have a degree of translucency.
For example, it can create a beautiful glow in a woman's dress, in a glass of golden beer, in a bottle of white wine, in ice crystals, dewdrops, blades of grass, foliage, moss, flower petals, flags and in many other objects of a similar nature. There is much scope for experimentation here.
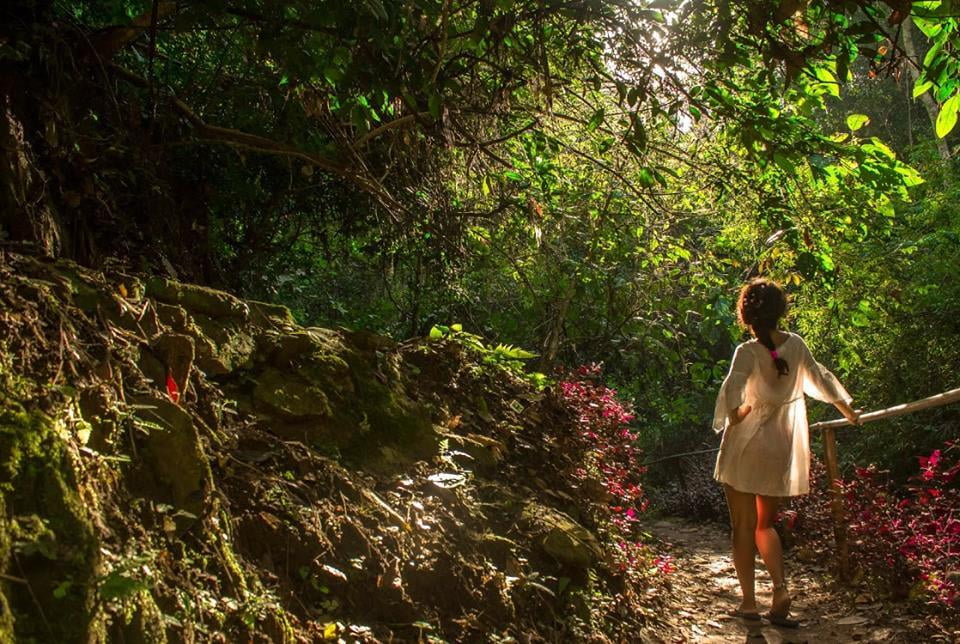
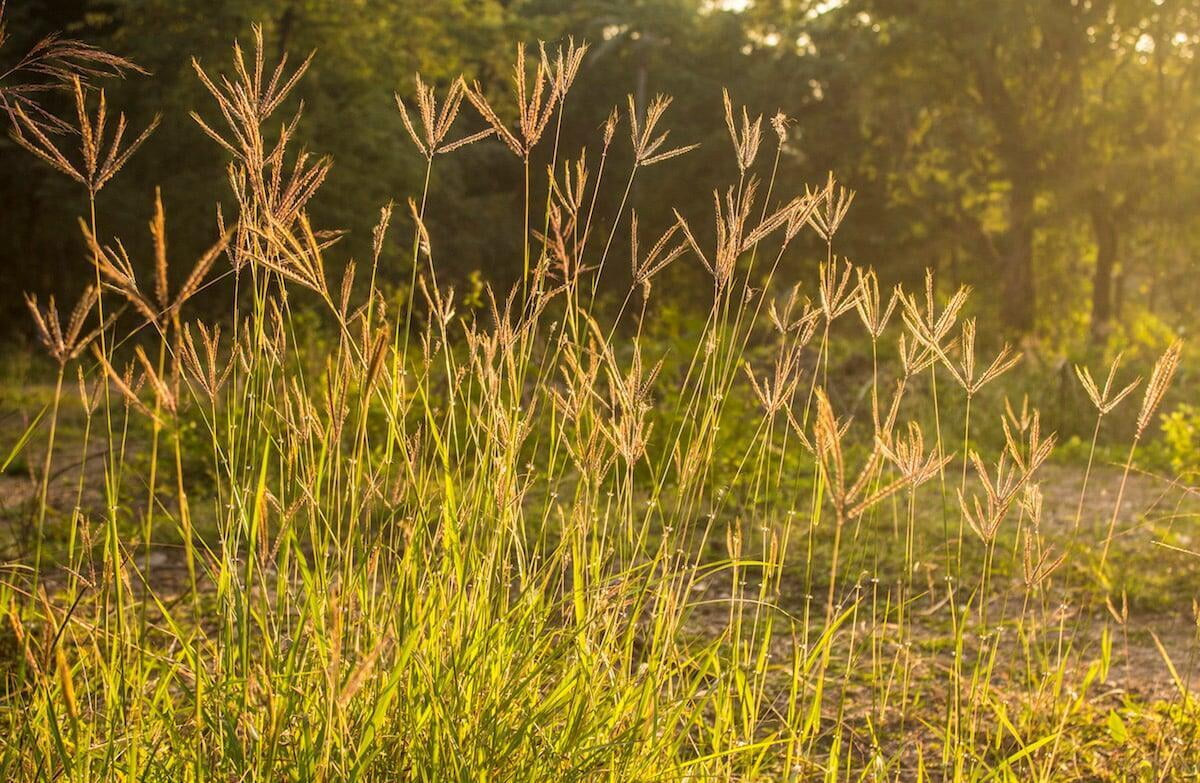
The technique is very popular in portrait photography for the magical rim-golden rim-lighting or halo effect that it produces around the rim of the subject's hair when the sun is low in the sky.
Backlighting is also commonly used when shooting a portrait inside a building next to a window through which daylight is streaming in from outside.
Backlit photos can be tricky to get right in practice, especially when you're shooting a portrait.
One thing that's really important is to set your subject against relatively dark backdrop (like trees, tall grass, buildings, etc.) because otherwise you'll completely blow out the sky and lose the rim-lighting or halo effect created by the backlighting.
You can achieve greater control over the backdrop by using a longer focal length to isolate your subject against a specific part of it.
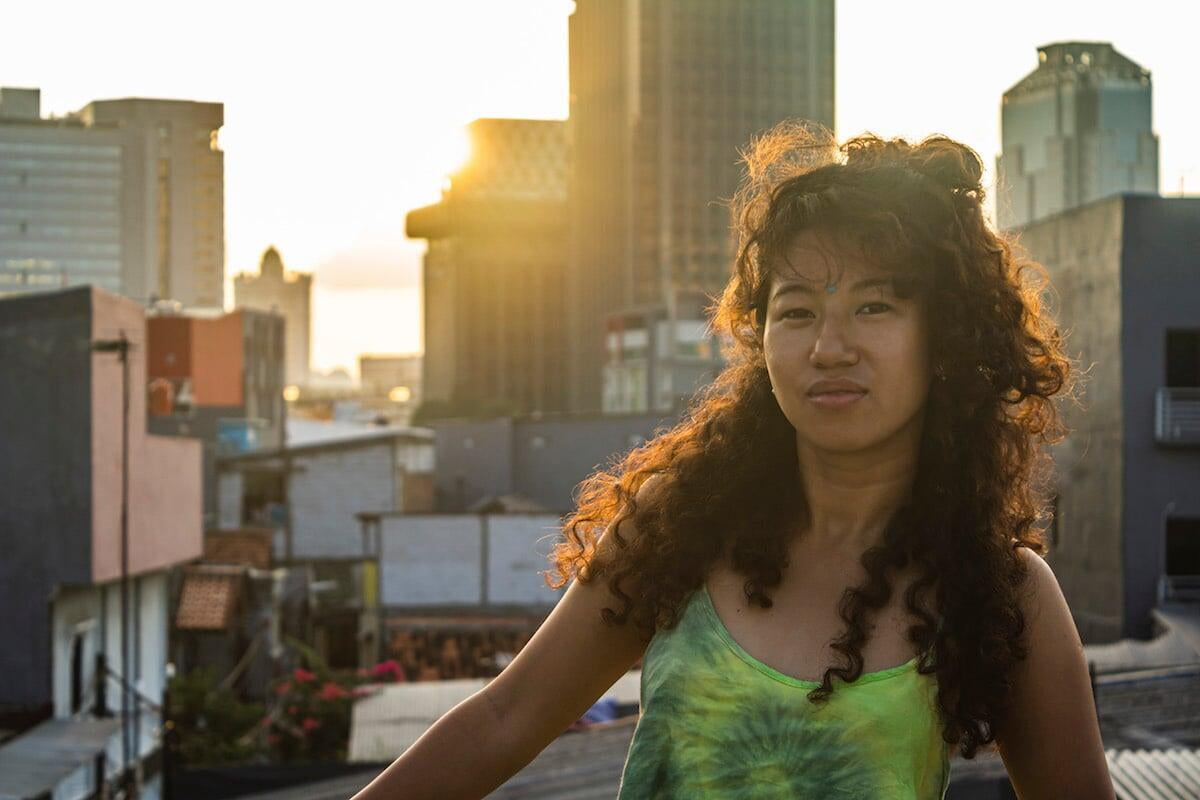
Using a longer focal length (as well as a large aperture or low f-number) will also help to blur the background and separate your subject from it, which helps keeps the viewer's attention on your subject.
It's also very important to use a lens hood when shooting backlit scenes to avoid a washed out appearance or lens flare effect in your image, unless you are deliberately trying to create such effects.
If you have no lens hood or if your lens hood is not working very well you can also play peek-a-boo with the light by using a tree, building or other object in the frame to wholly or partially obstruct it.
Getting your subject correctly exposed is also critical for a backlit portrait photo.
Normally when you take a photo you would use an exposure that's based on an average of the readings from numerous data points across the entire scene, with extra emphasis given to your focus points. This is known as evaluative metering (Canon) or matrix metering (Nikon).
But if you use this metering mode for a backlit photo your camera will make your subject so dark that it will almost become a silhouette, which is not what you're aiming for with a portrait at all (we cover silhouettes below in the next section).
That's why for backlit photos you want to specifically expose for your subject's shadow side, and you can achieve this by switching to your camera's spot metering mode. This mode exposes for whatever the central spot in the frame is placed on.
To use spot metering, you'll want to move in close to your subject, place the metering spot on their face to take a reading, dial in your camera settings manually and then use those same settings when you back up a few steps to take the shot.
If you're shooting in one of your camera's automatic modes you can also use exposure compensation to brighten up your subject, although this method is less accurate.
You would normally need to add at least one stop (+ 1 EV) of exposure compensation. With my camera I can easily do this by rotating the thumb dial next to the LCD monitor.
A third way to get your exposure when shooting in automatic is to use your camera's automatic exposure lock button, which is usually marked by an asterisk symbol on Canon cameras and by the letters "AE-L/AF-L" on Nikon cameras.
For this last method you would also use spot metering, move in close to take your reading of your subject and then press or hold the exposure lock button to keep the exposure settings locked in until you're ready to take your photo.
What matters most in a backlit portrait shot is that your subject's face is exposed correctly, even if this means that the backdrop becomes somewhat blown out. As I mentioned previously, it's easier to avoid blowing out the background by avoiding bright backdrops like the sky and reflective water surfaces.
If you are still having problems with an overexposed backdrop, one things that helps is to slightly underexpose the shadow side of your subject, which then allows you to reduce the brightness of the background a little. You can always lift the underexposed areas a bit in post.
Another thing that helps is to use your camera's in-built flash to throw some fill light on your subject using your on-camera flash. This will also allow you to reduce the brightness of the background, but it'll only work if you are close enough to your subject for the flash to have an illuminating effect.
Of course, you could use an off-camera flash if you're further away, but that's an extra piece of equipment that you might not want to carry when you're travelling.
Another way to get a better exposure of the backdrop in a backlighting situation is by using a reflector to bounce the light onto your subject, but again, that's a fairly bulky accessory that most travellers wouldn't want to carry, unless they were driving around a country in a vehicle.
What you can do instead is have your subject facing a natural reflector in the environment, such as a whitewashed wall. Water is another naturally reflective surface.
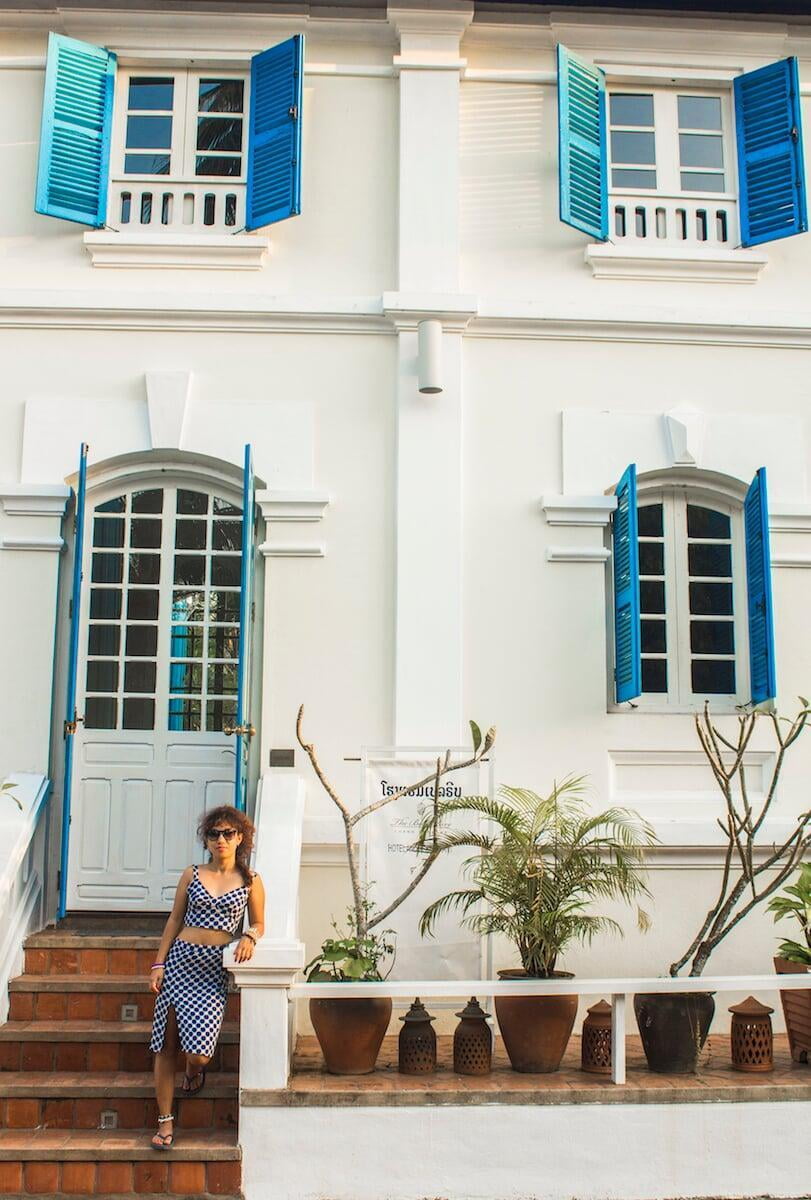
#46 - Learn how to create mysterious silhouettes
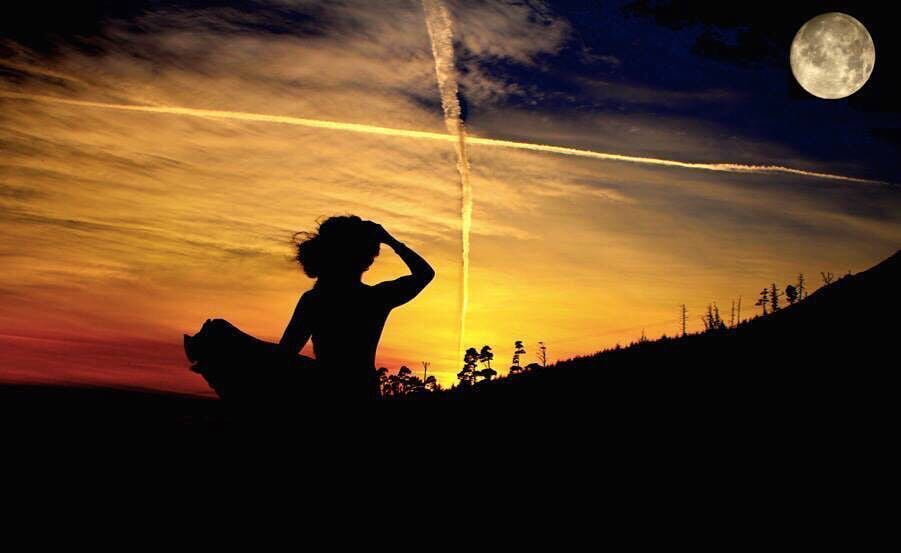
Although a camera’s limited dynamic range is often problematic and prevents us from capturing all the details in a scene, one of the positive consequences of this deficiency is that it gives us the ability to create silhouettes, even in many circumstances where our own eyes would not observe a silhouette.
A silhouette is a blacked out shape or outline of a subject set against a much brighter backdrop, such as the sky, a window or doorway with light pouring in, or the headlights of a vehicle.
Although you can usually tell what a silhouette is from its outline, the absence of any further detail or information creates a sense of intrigue and mystery, thus enhancing the atmosphere of the photograph.
Silhouettes are created in backlit conditions, but the trick is to set the subject against the bright part of the background and then expose for that bright background instead of the shadow side of the subject.
If the background is bright enough, the shadow side of the subject should turn completely or almost completely black when you expose for the sky, thereby creating your silhouette.
If the background is not bright enough it won’t work too well, as you will then have to underexpose the background in order to turn your subject into a silhouette, and you don’t want to have to do that.
The best silhouettes are those of objects with a clearly identifiable and complex outline, where the shadow side of the object is completely blacked out rather than just dark.
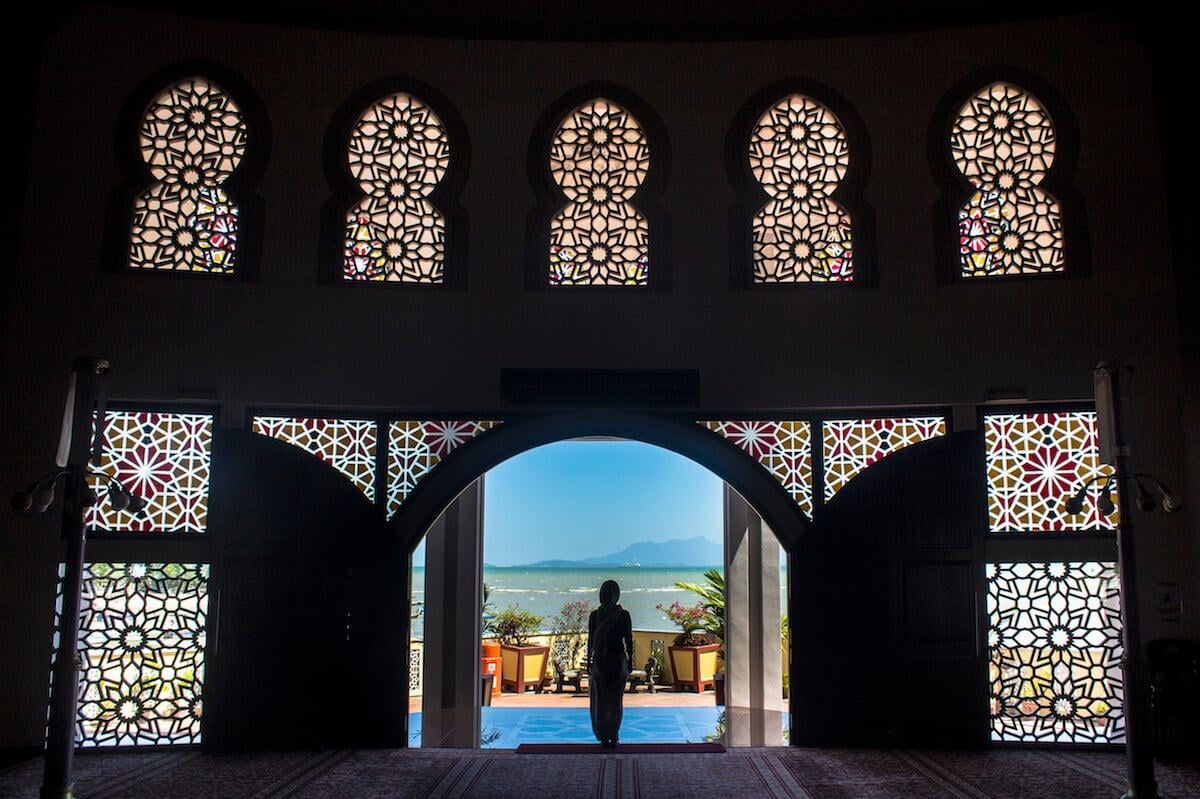
Here are a few examples of subject that make for great silhouettes:
- Tree skeletons (a bare, lone tree in a field works great)
People
Animals
Flowers
Bicycles
Wagon wheels
Bridges
Interesting buildings and monuments
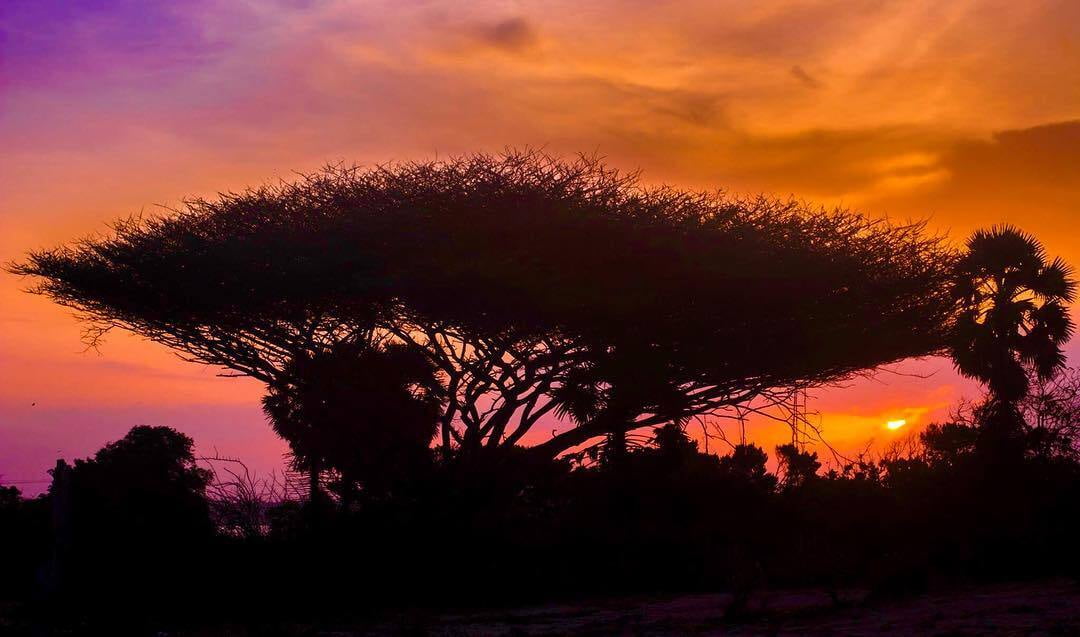
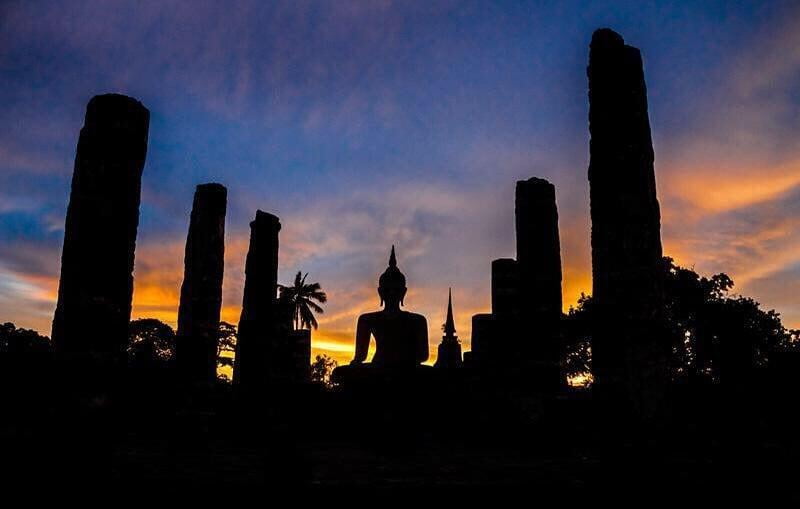
Silhouettes can be created at any time of day when there’s high-contrast lighting conditions, but the most beautiful and inspiring silhouettes are normally taken outdoors during the magic hour, as you can then set your silhouettes against a spectacular orange, red or purple sky backdrop.
Sometimes the best silhouettes can be gotten after the sun has gone down or before it has risen, as the sky often assumes the most mesmerizing colours during these so-called blue hours.
If you carry a telephoto lens you can also create those awesome-looking silhouettes set against the backdrop of an oversized rising full moon.
Technically speaking, silhouettes are not very difficult to execute.
When setting up the shot, you want to make sure that your subject is isolated against the sky or other bright background. In some cases you might need to shoot from a low angle or place your subject on a small hill or other elevated area to achieve this.
If you are shooting silhouettes of multiple objects, you’ll need to ensure that they’re all properly separated from each other, as any overlap between objects could result in the silhouettes losing their recognizability.
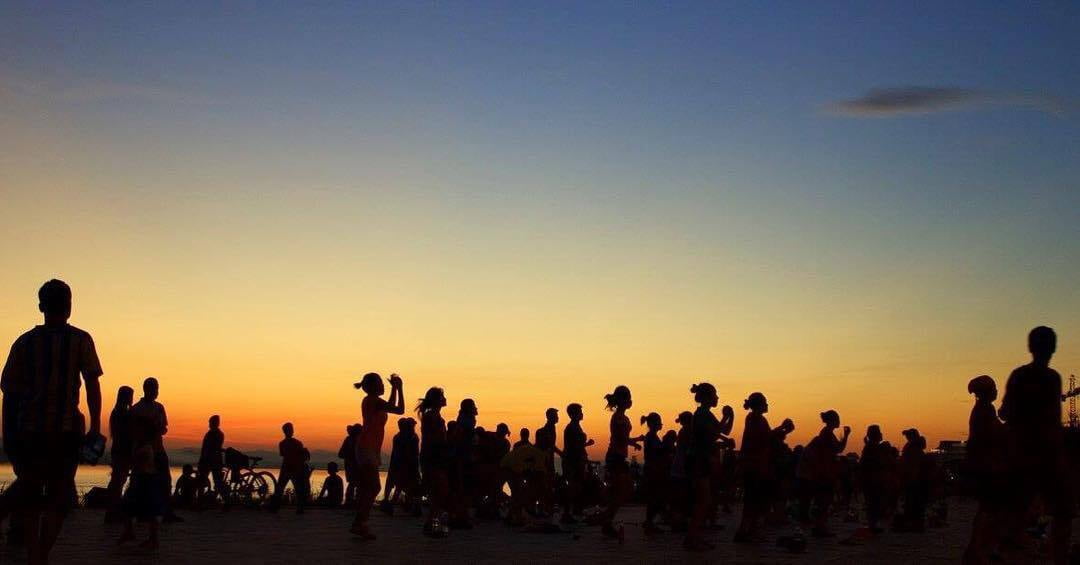
When shooting silhouettes of people’s faces it’s best to shoot their profile (side-on), as that way you can see the outline of their face properly.
Another tip for shooting silhouettes of people is to have their arms or legs (or both) outstretched or bent in a dancing or other pose, which creates a much more interesting and recognizable, human-like outline.
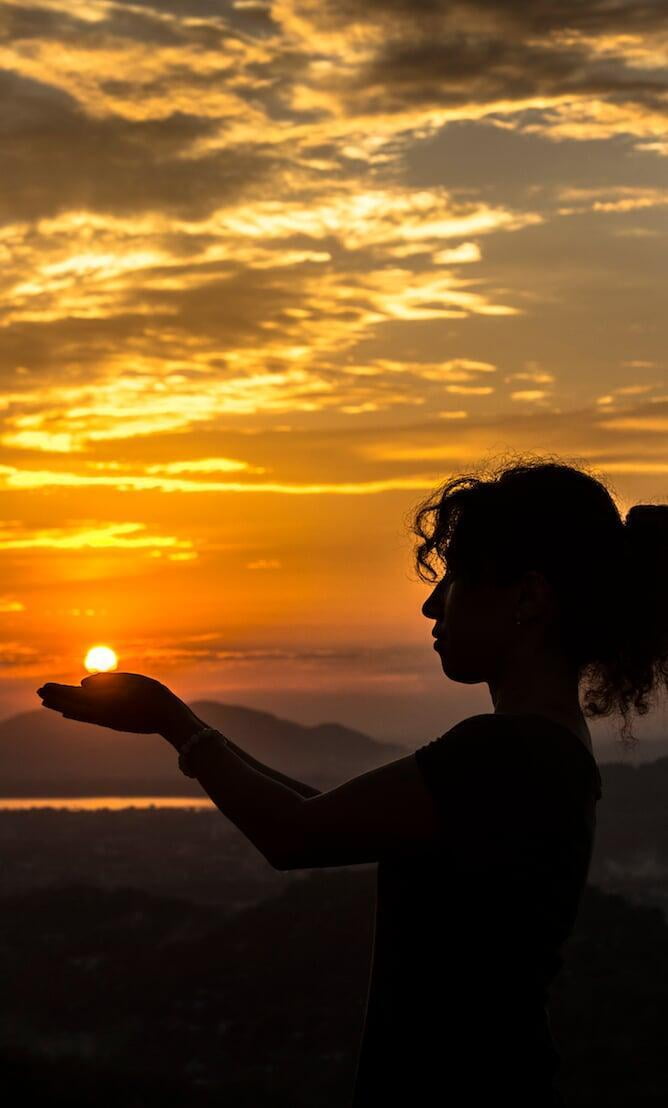
It’s best to shoot silhouettes in manual mode, especially if you’re shooting a human silhouette, as in automatic modes many cameras will try to expose for the people in the frame instead of prioritizing the background. Manual mode also ensures that your flash won’t go off during the shot and ruin your silhouette.
In many cases you will need to use a relatively high shutter speed to bring down the brightness of the sky and expose it correctly.
If you’ve reached your camera’s maximum shutter speed and the backdrop still isn’t dark enough make sure that your ISO is set to its lowest setting and increase your f-number to further reduce the amount of light entering your camera lens.
If it’s still not dark enough after this you can use an ND filter to further reduce the amount of light entering your lens.
If you have correctly exposed the background but you’re seeing that your subject isn’t quite fully blacked out, don’t worry about it too much, as you can always fix this later in your editing program. The most important thing is to get the background exposed correctly.
#47 - Beautify your backgrounds with good bokeh

Bokeh (pronounced bo-keh) comes from the Japanese words boke or boke-aji, which literally translate to “blur” or “blur quality”, referring to the visual quality of the out-of-focus or blurry areas of an image.
How the out-of-focus areas of an image appear depends on a number of factors including the type of camera lens used to the take photo, the focal length of the lens, the distance between subject and background, the focus point and certain camera settings chosen by the photographer.
Good bokeh is where the out-of-focus areas of an image have high aesthetic appeal, often affording the image a dreamy and almost otherworldly quality.
One of the best ways to create very attractive bokeh is by deliberately putting the point light sources (i.e. streetlights or sunlight glinting through foliage) in the background way out of focus to produce visually pleasing "orbs" of light.
These orbs of light can be either round (circular) or polygon-shaped; the exact shape really depends on the lens you’re using and the number of aperture blades it has.
The higher the number of aperture blades and the more rounded the individual blades the rounder the orbs of light will appear.
If the aperture has a smaller number of straight-cut blades the orbs of light will appear to be hexagonal, pentagonal and other polygonal shapes.
As you play around with your camera trying to create these orbs of light you’ll surely observe that the orbs of light get bigger or smaller as you rotate the manual focus wheel on your camera lens.
The orbs swell in size as the point light sources in the background become increasingly out of focus, until they achieve a certain maximum diameter.
How big the orbs of light appear in relation to the rest of the frame will also depend on how large the point sources of light are and how distant they are from your camera.
Practical advice for creating great bokeh
When the goal is to create really nice bokeh, it helps to have a “fast” lens with a really wide maximum aperture like f/2.8 or lower, such as is found in prime lenses or professional-grade zoom lenses.
However, it’s not essential to have high-end gear and you can still achieve decent bokeh with a regular kit lens that only stops down as far as f/3.5 or f/5.6. Whatever the widest aperture of your lens is, you’ll want to use that.
I took the photo below with my Canon EF-S 18-135 mm lens at full zoom (135 mm) at f/5.6. Of course, had I been able to use an even wider aperture the effect may have been even more desirable.
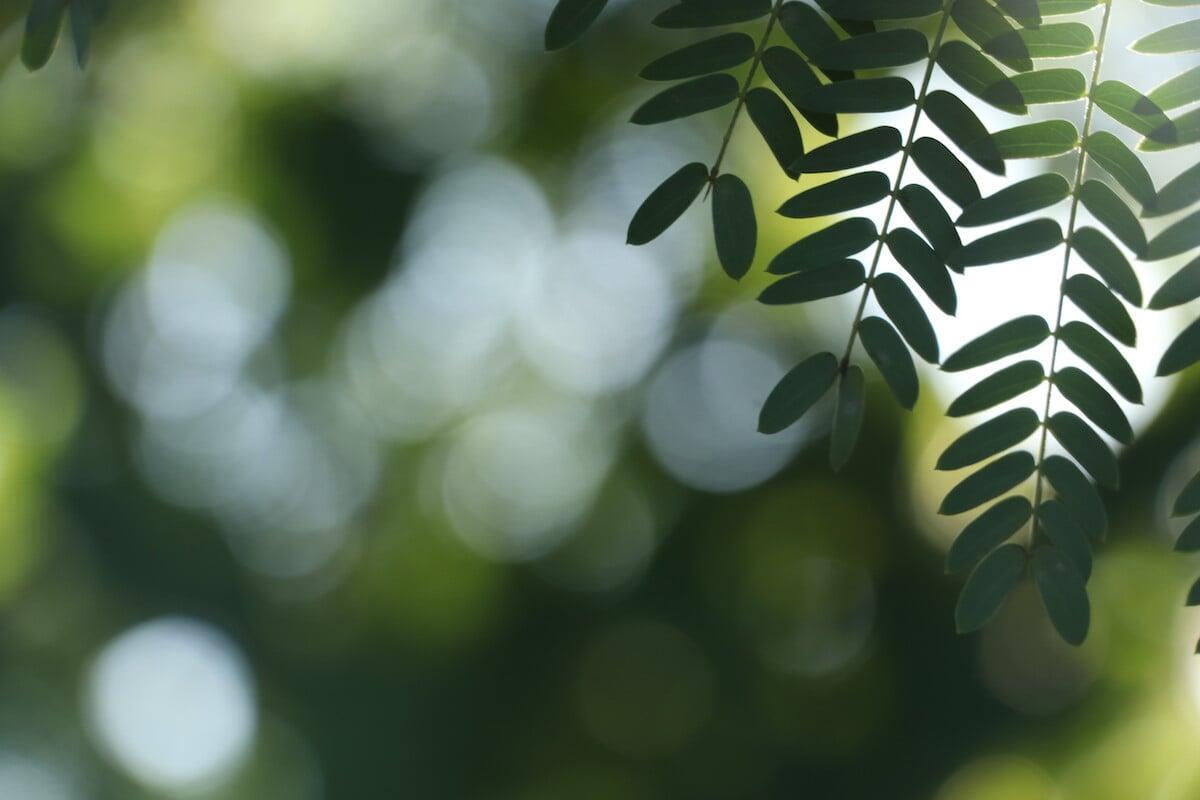
When trying to achieve good bokeh you can either shoot manually or in aperture priority (Av) mode, so that your aperture stays fully open while your camera chooses the shutter speed.
If shooting in Av mode, you might need to use exposure compensation if you’re not happy with your camera’s decision on the background exposure.
When trying to create good bokeh, it often helps to focus on a foreground subject while shooting into the light source. The image will also be more interesting if it's centre on an actual subject and doesn't merely consist of a blurred background.
I recommend using manual focus so that you can fine tune your focus point, as your camera’s autofocus may struggle with focusing on foreground objects that are very close to the lens and near the edges of the frame.
To get the maximum blurring of the background you will want to create a shallow depth of field (DOF) by choosing a long focal length and positioning your camera as close to your subject as you can before it becomes impossible to focus. Every lens has a closest focusing distance, which you can figure out by trial and error in the field.
There should also be ample distance between your subject and the background, although if this distance is too great the orbs of light will appear much smaller. This means that if you want large orbs, you shouldn't have your subject too far away from the lights.
An easy way to create attractive bokeh during the day is position the sun behind the foliage of a tree and use that foliage as your backdrop. You can then focus on a flower or leaf of a different plant or tree that’s much closer to your camera.
You might have to move around a bit and maybe even use a lens hood in order to avoid lens flare or too much light entering your lens, but if you do it right, you’ll get nice little circles or polygons of light wherever the sunlight is passing through gaps in the foliage.
Another way to get beautiful bokeh during the daytime is when shooting scenes with water; the light reflecting off the water’s surface can produce the same pleasing orbs of light when it’s sufficiently out of focus.
Some of the most beautiful bokeh can be obtained when shooting at night in urban locations, where you have a wide variety of point light sources like traffic lights, streetlights, neon signs, vehicle lights and lights from buildings.
The beauty is that all of these artificial city lights become orbs of varying colours (yellow, orange, green, red, blue etc.) when out of focus.
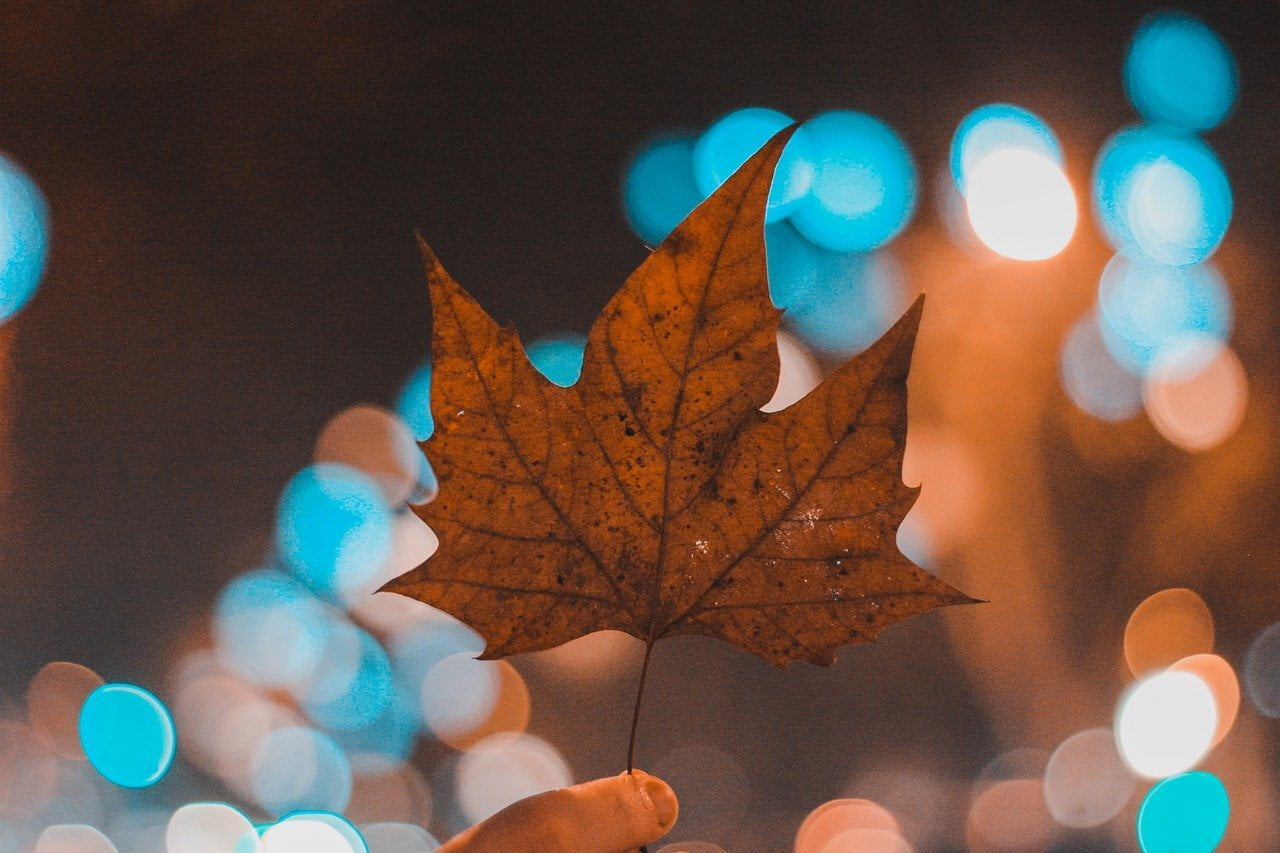
If you pack a set of string lights in your backpack, you can also use them creatively to produce nice bokeh on demand.
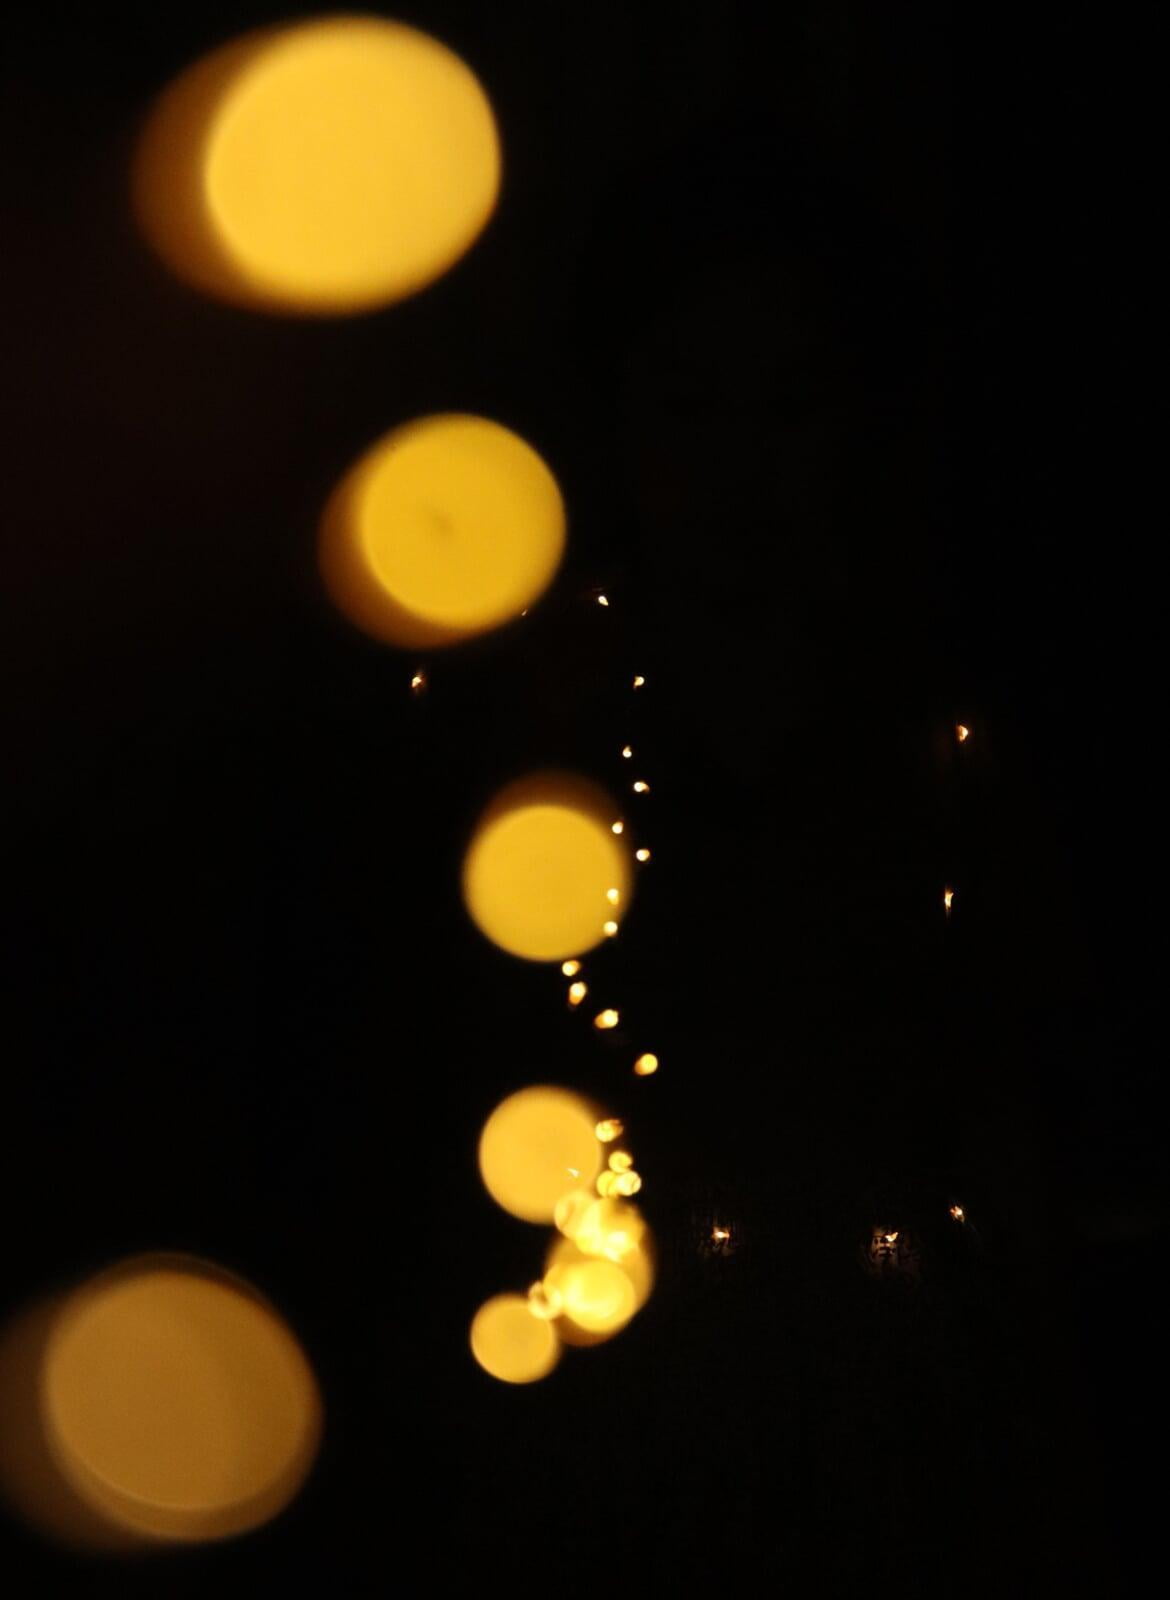
It’s also worth noting that bokeh doesn’t always have to refer to the visual quality of the background blur; you can also focus on a subject in the background and produce a blurred foreground if that gives a more attractive bokeh.
An example of where you might use foreground bokeh is if you’re shooting a person on the other side of a window and lights are reflecting off the glass in the foreground to form orbs of light.
Achieving beautiful bokeh isn’t quite as simple as having a blurred background with orbs of light; you also need to play around with the composition so that the orbs are the right size and form a pleasing pattern (clumps of light orbs don’t look so great).
If you are shooting artificially lit urban night scenes you will also need to choose the light sources carefully to create an attractive combination of coloured orbs in your background.
#48 - Overcome depth-of-field limitations with focus stacking
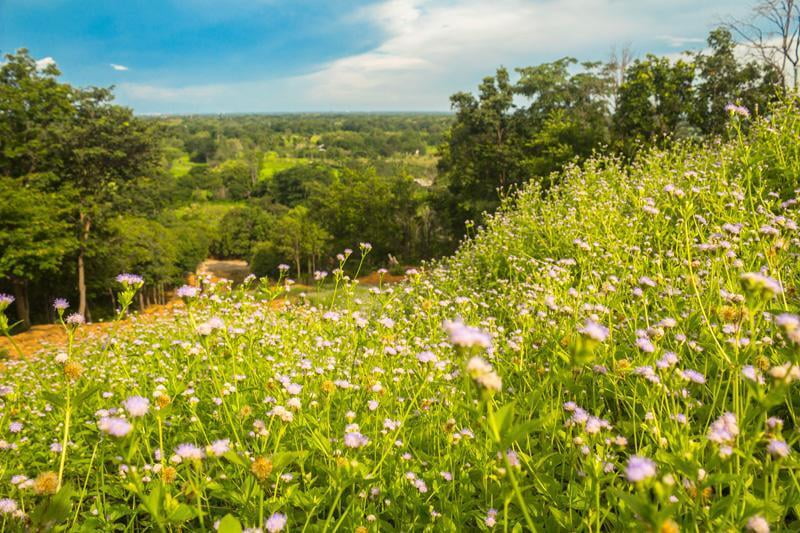
When shooting deep scenes with important elements in the foreground, middle ground and background, there are times when you might want every part of the scene to be in focus or acceptably sharp.
This deep depth of field can often be achieved without too much difficulty by shooting with a small aperture (high f-number) with a wide angle of view (short focal length).
However, using a small aperture will result in softer images due to the phenomenon of diffraction and it isn’t always feasible to use a small aperture if you’re shooting handheld and can’t use a slow shutter speed. Even if you’re shooting on a tripod a slow shutter speed could be problematic on a windy day.
There are also times when your camera may be incapable of achieving acceptable sharpness throughout the full depth of a scene even with the smallest possible aperture, especially if the foreground element(s) is exceedingly close to the camera and the background element(s) is very far away.
If you are into macro photography, you will also struggle to get every part of that flower or insect you’re photographing in focus unless you are shooting a subject that’s virtually two-dimensional.
In scenarios like these when you’re unable to achieve focus throughout the full depth of the scene or subject, there is a technique called focus stacking that enables you to overcome this difficulty.
The technique involves shooting a sequence of images that each place the focus on a different area of the scene or subject. These images are then blended together with the aid of an editing program like Photoshop to create a composite image where every part of the scene or subject is perfectly in focus.
What happens is that the desirable in-focus areas from each individual image are combined together to create a single image that’s in focus everywhere.
When focus stacking a landscape scene, you would normally take a sequence of 2-4 images, keeping the exposure settings the same for each shot and just changing the focus area each time.
For a macro shot of a small flower, you might need to take a lot more images than that to end up with every part of the flower in focus in the final composite image.
It’s important to use a tripod when taking your sequence of images, to ensure that all the images line up perfectly when you later merge them together in your editing program.
When it comes to the actual editing process, you need to import them into your editing program as a stack, auto-align them and then either blend them manually using layer masksor by using a simpler auto-blend technique like the one in Photoshop that’s described in this video (Edit -> Auto-blend layers).
Now, while focus stacking is certainly a great technique to know and will be very useful in certain situations, you shouldn’t fall into the trap of thinking that every part of a scene always needs to be perfectly in focus. This is a very common myth in photography.
An out-of-focus foreground or background can often work greatly in your favour, as it can help you to remove distractions that might be stealing your viewer’s attention away from what you want to direct it towards.
Not only that, but when an image has both soft, out-of-focus areas and sharp, in-focus areas, the sharp areas can almost appear even sharper by comparison.
If you were taking a landscape shot with some beautiful flowers in the foreground, you might want to really highlight the flowers and make them your main subject of your image by using a shallow depth of field and blurring out the background.
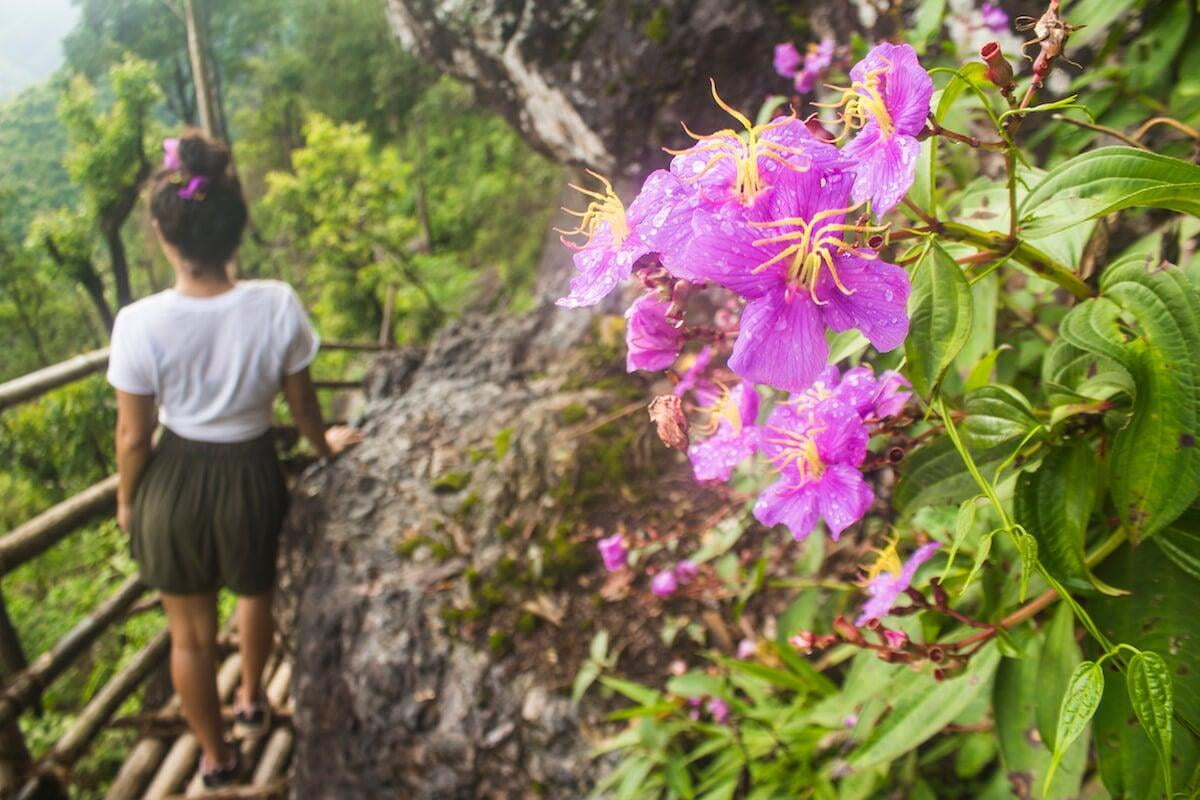
Conversely, you might wish to blur our distracting elements in the foreground if your main subject is situated further away in the background.
The main thing to remember when you’re blurring out part of a scene is that it should be fully out of focus; if it’s just ever-so-slightly blurred it will actually serve as more of a distraction, as the viewer will be trying to figure out whether it’s in focus or not.
#49 - Use leading lines to improve your compositions
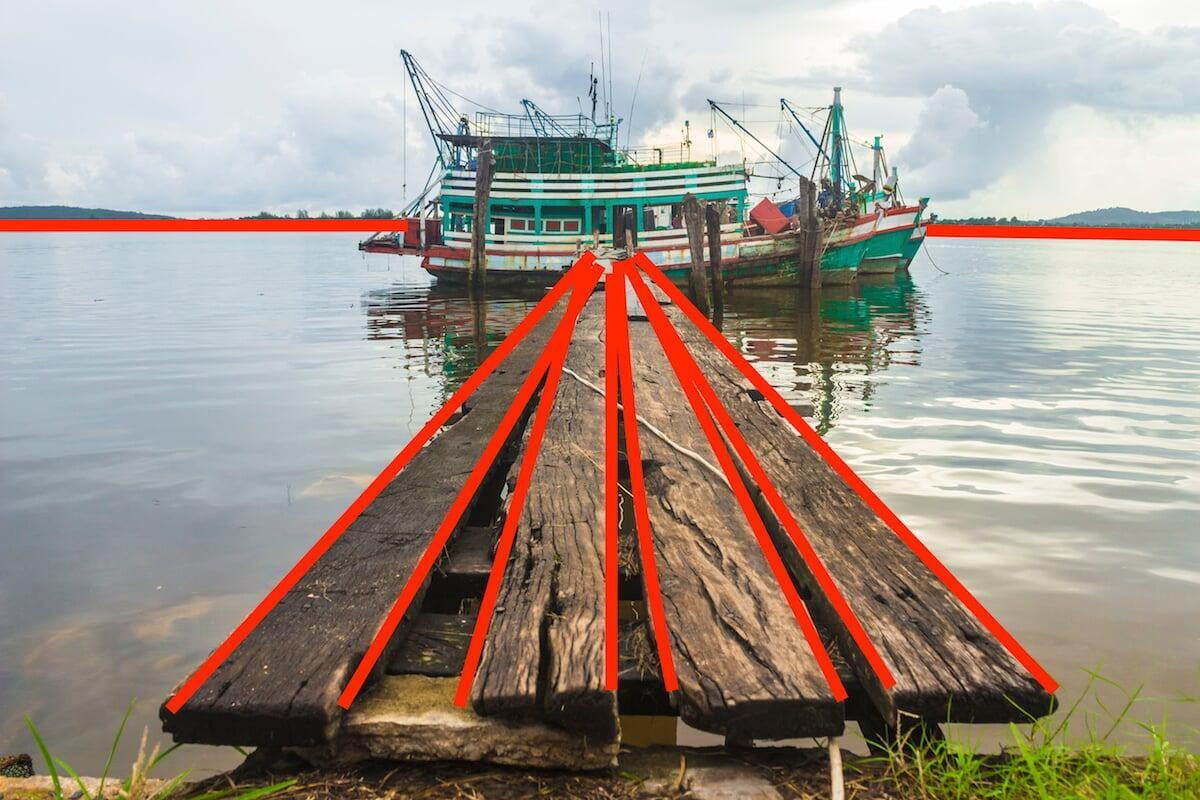
Lines, whether straight or curved, natural or man-made, horizontal, vertical or diagonal, can be found in virtually any scenario or environment that you might care to photograph.
Think about a straight stretch of two-lane road, for example. Instead of thinking of it as a road, you can also think of it abstractly as one really wide black line.
But there might also be real, painted lines on the road, such as broken or continuous white lines in the middle and yellow lines at the sides. You could also envision the boundary between the road and the grass/kerb on each side as another line.
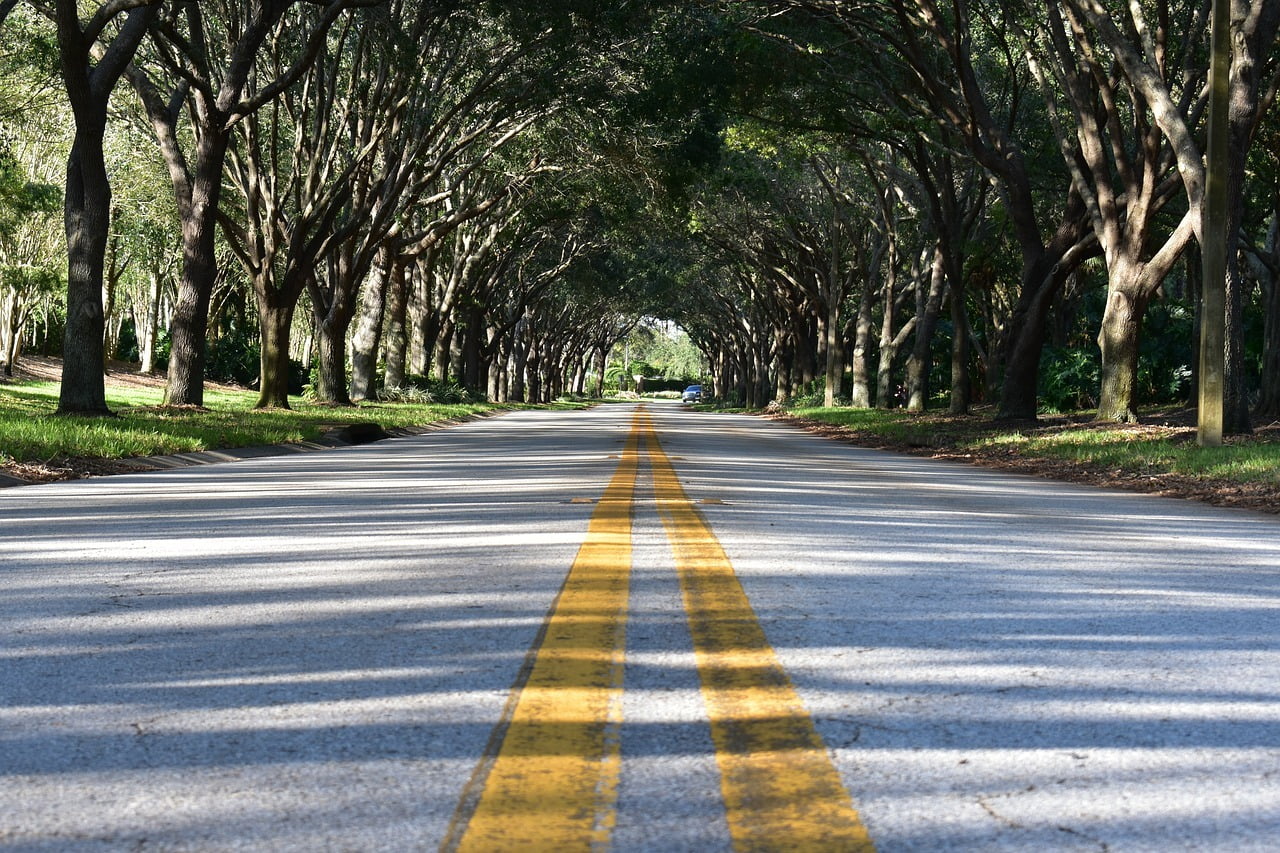
Here is an important principle; lines appear when there is an edge, a boundary or a transition between two different elements.
For example, at the edge of the sea where it transitions to the sandy beach a line is formed; we call it the shoreline. The edges of a building like the corners and the base where it meets the ground can be thought of lines.
A tree doesn’t really have any edges because it’s round, but you can abstractly think of the entire trunk of the tree as a line. A repeating row of trees in a timber plantation or lining a roadway also creates a line.
Once you start seeing the world in this way, you will begin seeing lines everywhere in the environment.
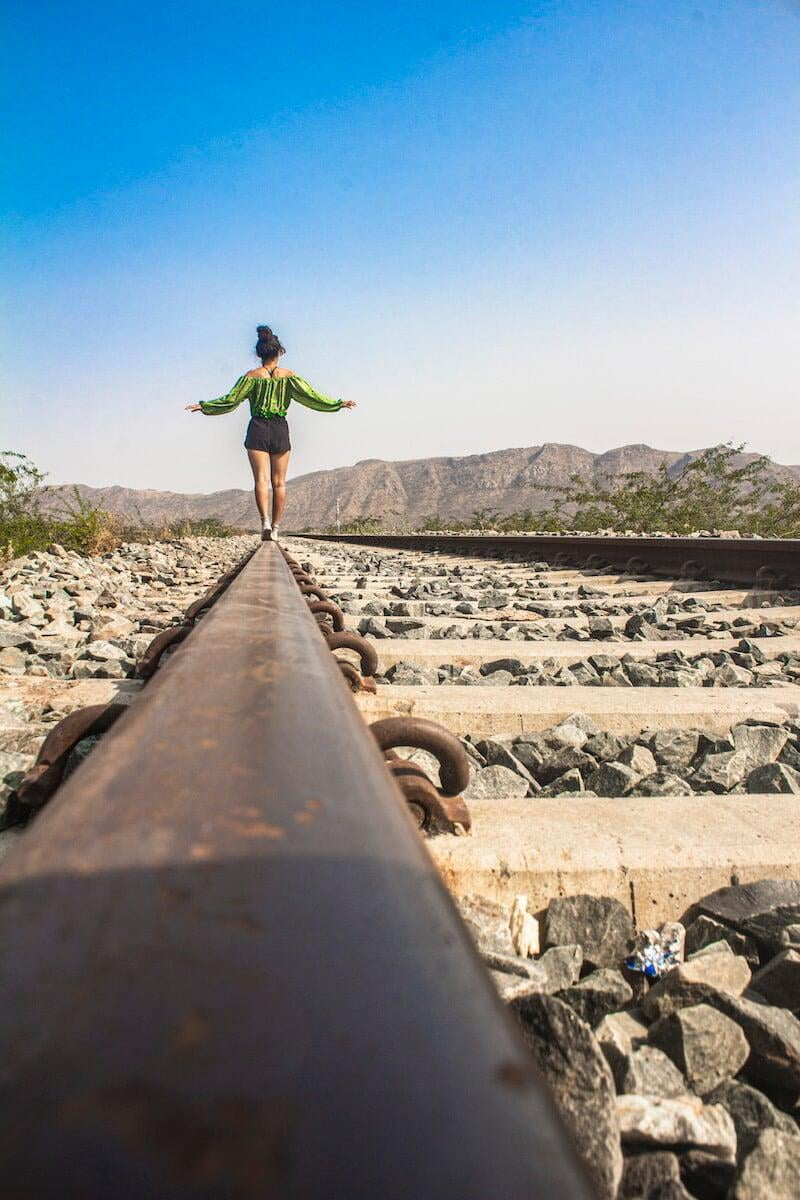
- Railway tracks
- Fences
Railings
Walls
Bridges
Boardwalks and jetties (especially with wooden floorboards)
Paths
Dirt trails
Anything in rows (i.e. fields of flowers planted in rows, grassy lawns or fields with alternating rows of light and dark green stripes, lampposts, old wooden jetty posts, pillars etc.)
Tractor tracks in crop fields
Bicycle tracks in soft mud
Human or animal footprints in the snow
Streaks created by receding ocean waves (long exposure)
Visible light rays
Alternating stripes of light and shadow when sunlight filters through the gaps between closely planted trees
Light trails at night (long exposure)
Ripples in sand (desert sand dunes, wet sand near the tideline etc.)
Ridges (sand dunes, mountain)
Crack lines in ice, concrete, mud and other mediums
Line patterns or strata in bedrock (gorges, canyons, cliffs etc.)
Rivers
Doors
Entrance gates
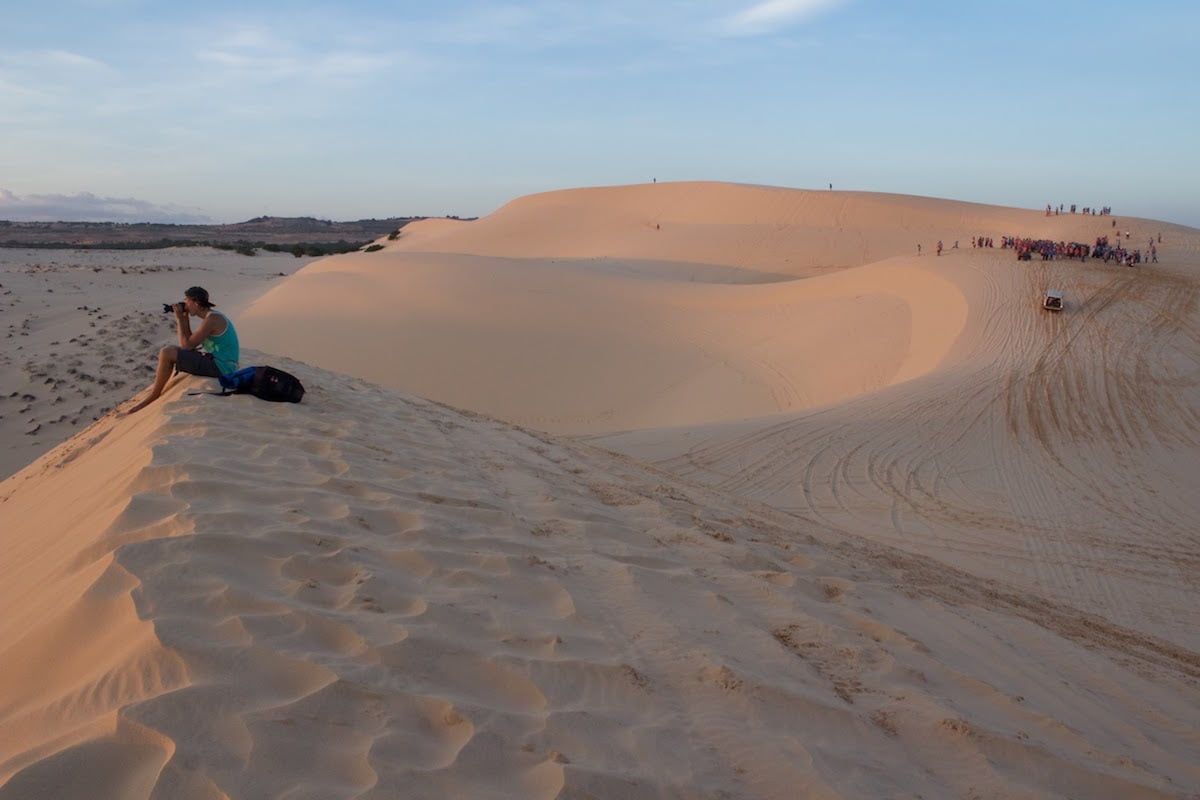
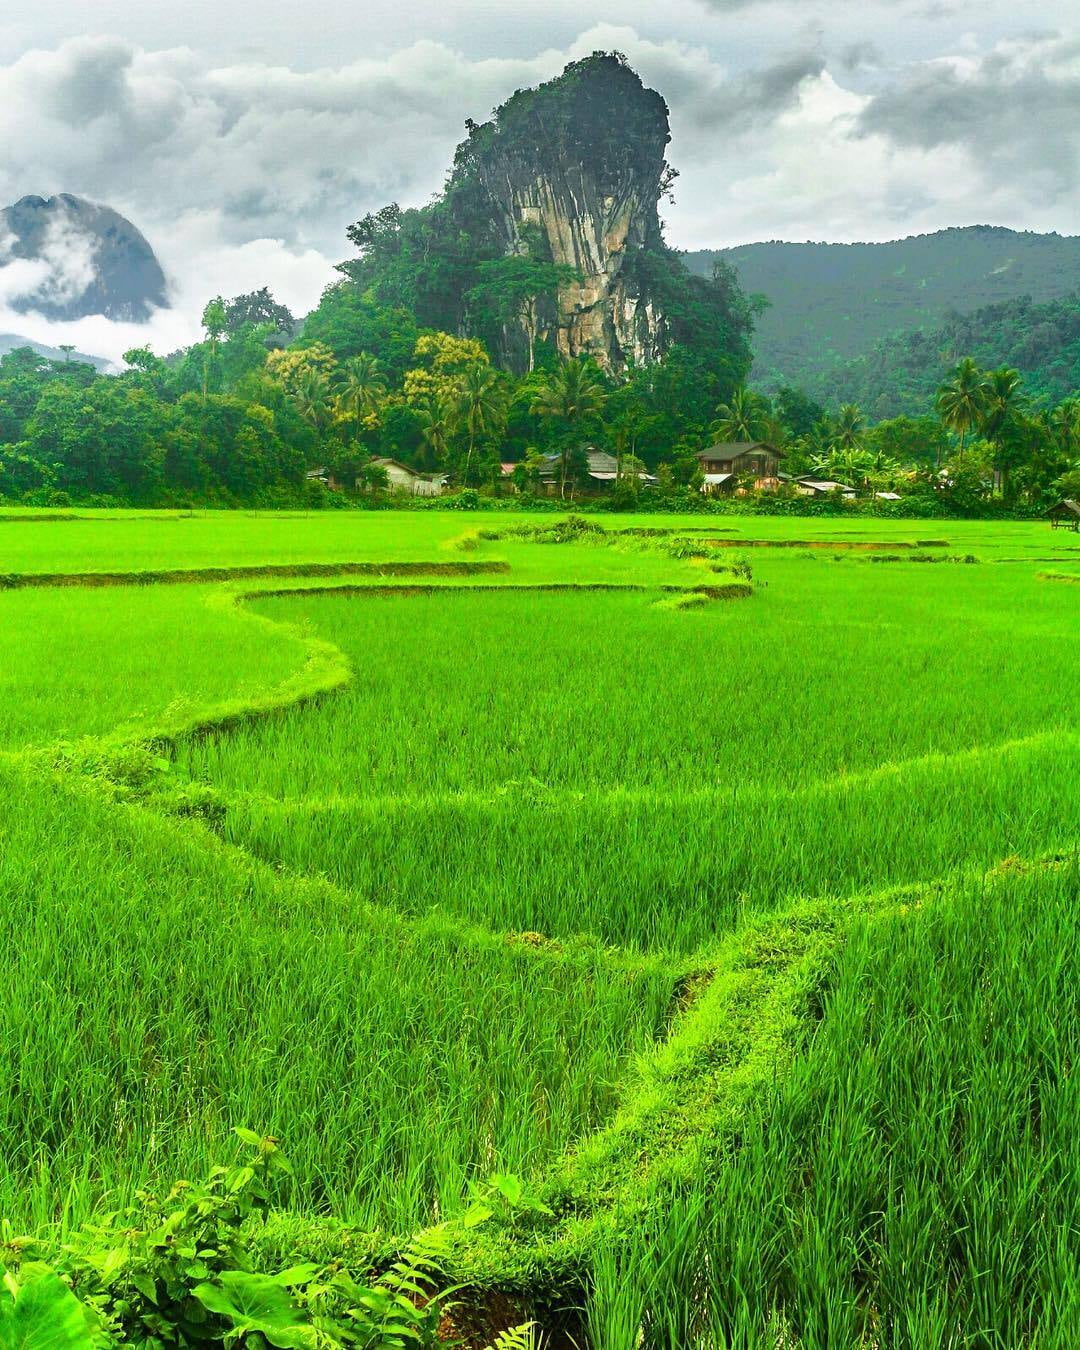

These are just a few of the hundreds of real-world scenarios where you will find lines.
But what is the significance of all these lines to you as a photographer?
Well, the beauty of lines is that you can use them strategically and deliberately to draw the viewer’s attention towards your subject. When you use the lines in a scene for this purpose they become known as leading lines.
You see, lines have the power to manipulate our gaze because our eyes have a natural tendency to follow them to see where they might lead.
What this means is that by framing your composition in such a way that the lines in a scene lead to your intended subject, you can ensure that the viewer’s eyes follow the precise path that you want.
Although they’re one of the simplest image composition techniques in photography, leading lines can be extremely powerful and will help you to create truly compelling photographs.
Remember, the purpose of using leading lines is to draw the viewer’s attention into your photograph and guide them on a journey through the image to a visual payoff (your interesting subject), which you would normally place at the end of the line(s).
As we mentioned above, lines come in many different forms (straight, curved, horizontal, diagonal, etc.) and can be created by manifold elements in the environment.
Curving and diagonal leading lines will generally work better in photos than straight horizontal or vertical lines that are parallel to the frame edges, as they interrupt the boring square format of a photo and encourage the viewer’s eye to travel the entire length and breadth of the frame.
Curved leading lines normally work best when the line (s) enters the frame in the foreground, forges a path through the middle ground and ultimately merges with your subject, which would normally be positioned close to the horizon.
The subject could be a person, an animal, a mountain, a sunset, a cool building or whatever.
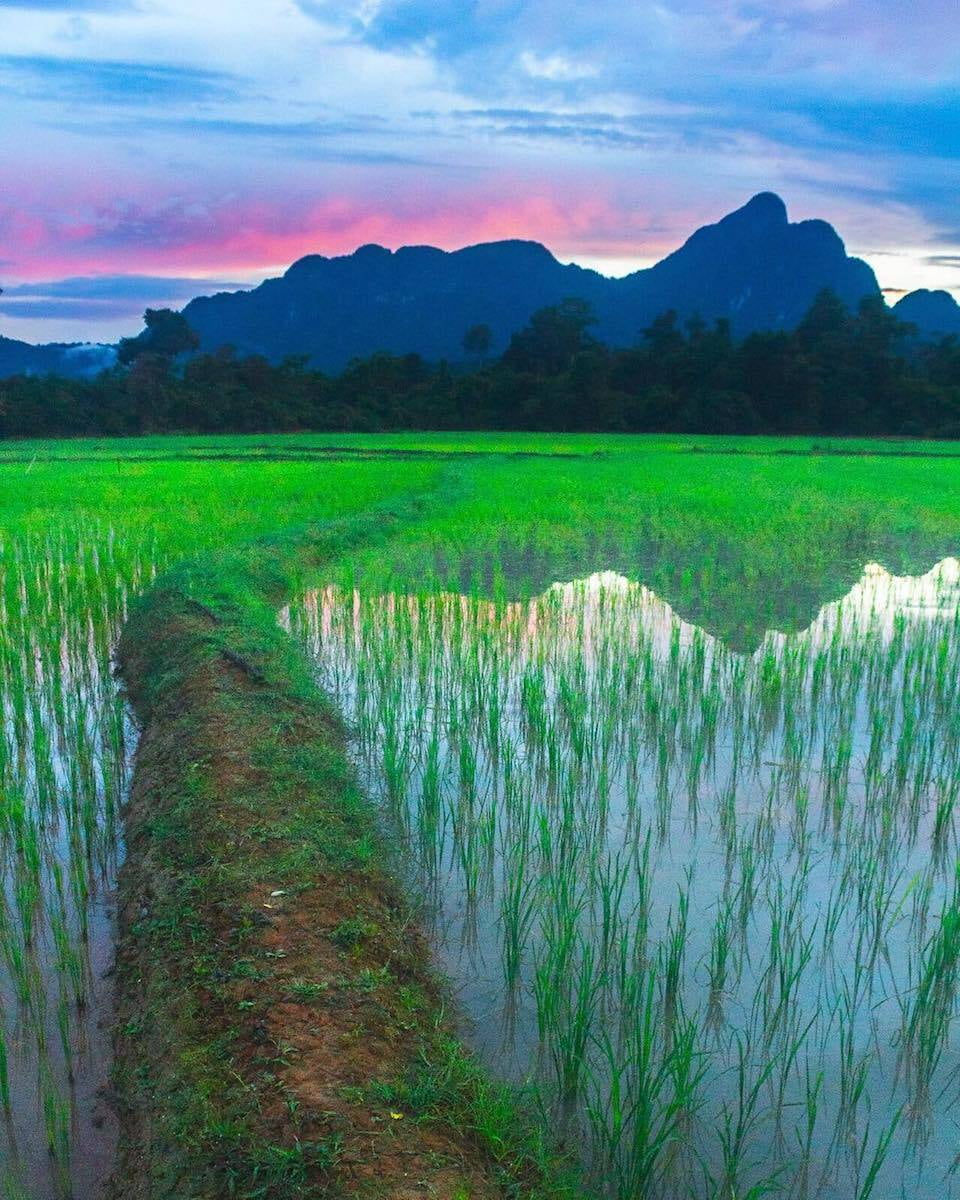
Diagonal leading lines work best when they enter the frame from the lower left or lower right hand corner and travel diagonally across the frame until they reach the subject. A powerful effect can be created when multiple diagonal lines converge at your subject.
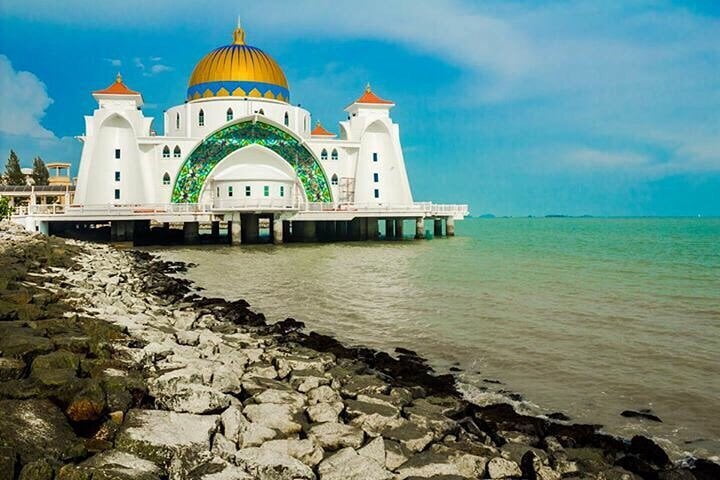
If you have to work with straight vertical leading lines, it’s best to centre them in the frame, as having vertical lines offset to the left or right of the centre line will mean that the viewer’s eye will be drawn over to that half the frame and won’t explore the other half.
Horizontal leading lines, whether straight or curved, can be tricky and can spoil your composition if you don’t use them correctly.
A common mistake that beginners make is to place the subject in the background while having a horizontal leading line entering the foreground from one side of the frame and traversing it from left to right or vice versa.
In this case, the horizontal line traversing the foreground leads the viewer’s eye from one side of the frame to the other, but it does not encourage them to look beyond the line towards the subject in the background.
The horizontal line in this case therefore acts as a kind of barrier that prevents the viewer’s eye from wandering where it should.
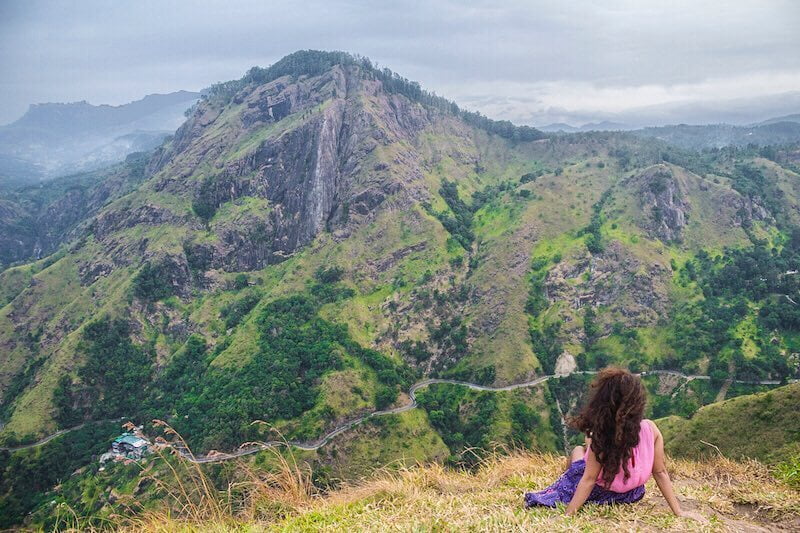
Another common error with leading lines is to have the line veer off course and exit out the side of the frame before reaching the subject. This causes the viewer’s eye to be led out of the frame instead of to your subject.
In my opinion, leading lines also don’t work very well when the subject is placed in the foreground and the leading line begins from the horizon, traversing the frame in the reverse direction from the background towards the subject in the foreground.
This type of composition doesn’t work because it’s essentially asking our eyes to do the opposite of what they are naturally inclined to do.
Our eyes naturally tend to begin their journey in the foreground to see what’s in the immediate environment before then gradually wandering towards the background.
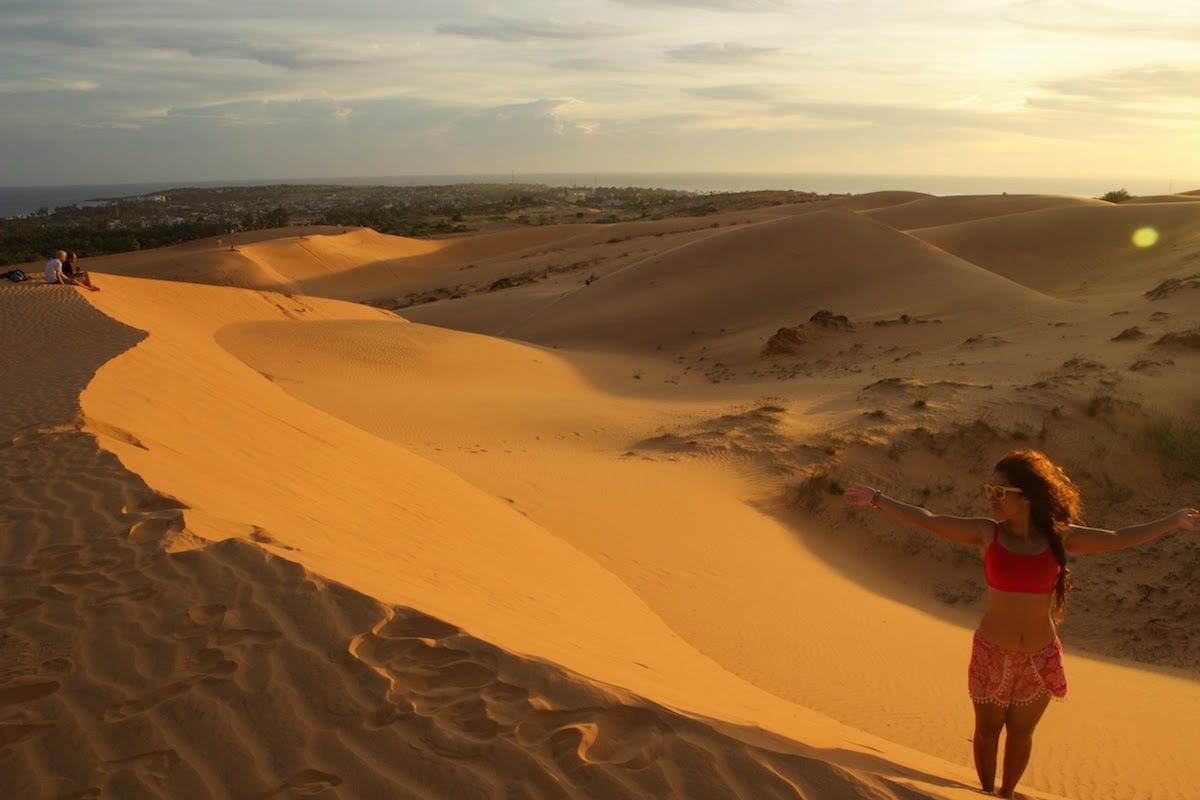
In practice, you won’t always be able to choose the types of leading lines that you have to work with, as they will be dictated to you by the environment you’re in.
What is within your control however, is how you make use of the lines that are available to you in a given scenario and how you incorporate them into your composition.
Often, you will have to move around a bit and try shooting from a few different positions and angles in order to get the leading lines in your scene to traverse the correct path through your frame and point towards your subject.
For instance, if you are photographing a scene with a meandering river leading towards a beautiful mountain range in the distance, you might just have to move a few paces to the right in order to get that river flowing into your frame and pointing at the mountains.
Less common types of leading lines
Another way of using leading lines is to create a cyclical composition, where the line moves in a spiral pattern, gradually drawing the viewer’s eye towards the centre of the frame. A classic example is a photo taken from the top of a spiral staircase.
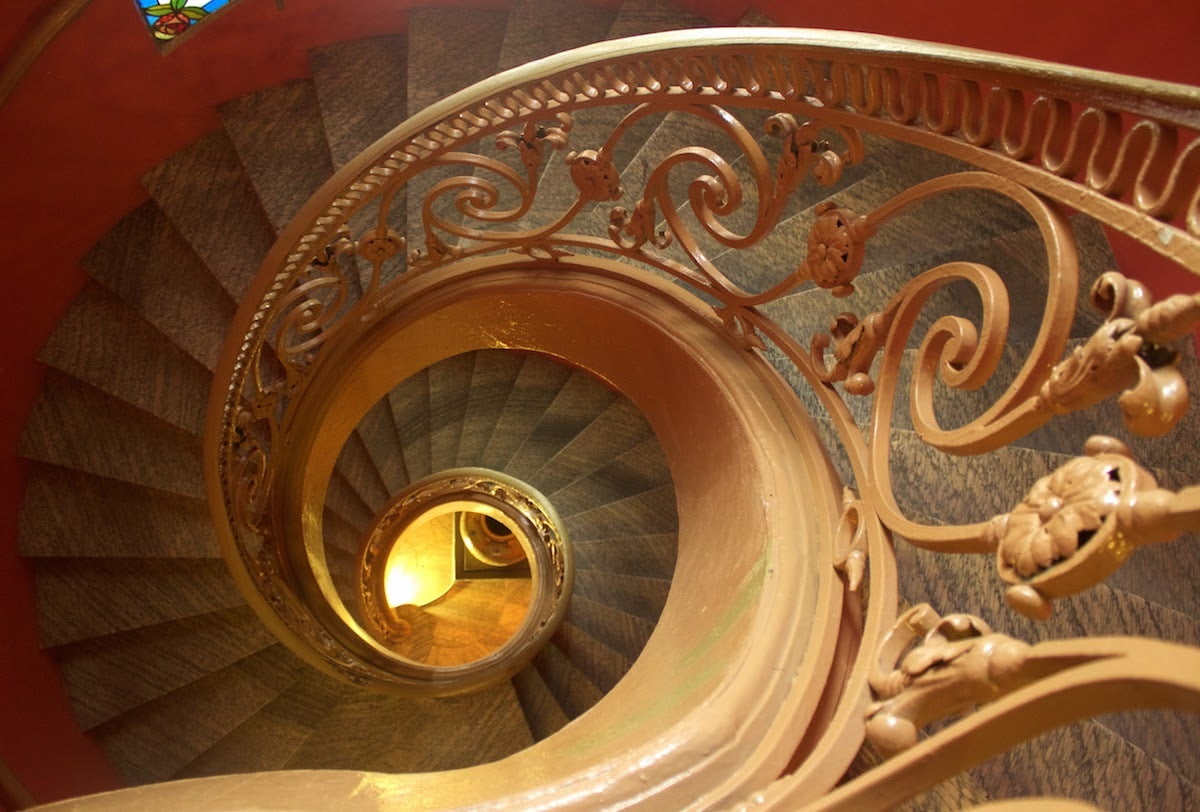
In the same way that the spokes of a bicycle wheel point towards the hub, radial leading lines in the environment can also be used to draw the viewer’s attention towards a central subject.
A good example would be radial footpaths converging at a water fountain in the centre of a park or monuments like the Arc De Triomphe in Place Charles De Gaulle in Paris, where 12 radial avenues converge at the iconic arch.
In order to be able to show these kinds of radial patterns you will need to get an aerial perspective using a drone or by climbing up to an elevated vantage point, such as the top of a building.
There are also implied leading lines, which is where an imaginary line is created by a person or animal in a photo looking in a certain direction. The viewer has a tendency to follow the line of a person’s gaze to see where they are looking.
Implied leading lines can also be created by anything that has a trajectory, such as ball leaving a tennis racket or an airplane taking off. The eye will naturally follow the implied line of travel to see where the object is going and to check whether it's on a collision course with anything ahead.
Leading lines vs paths
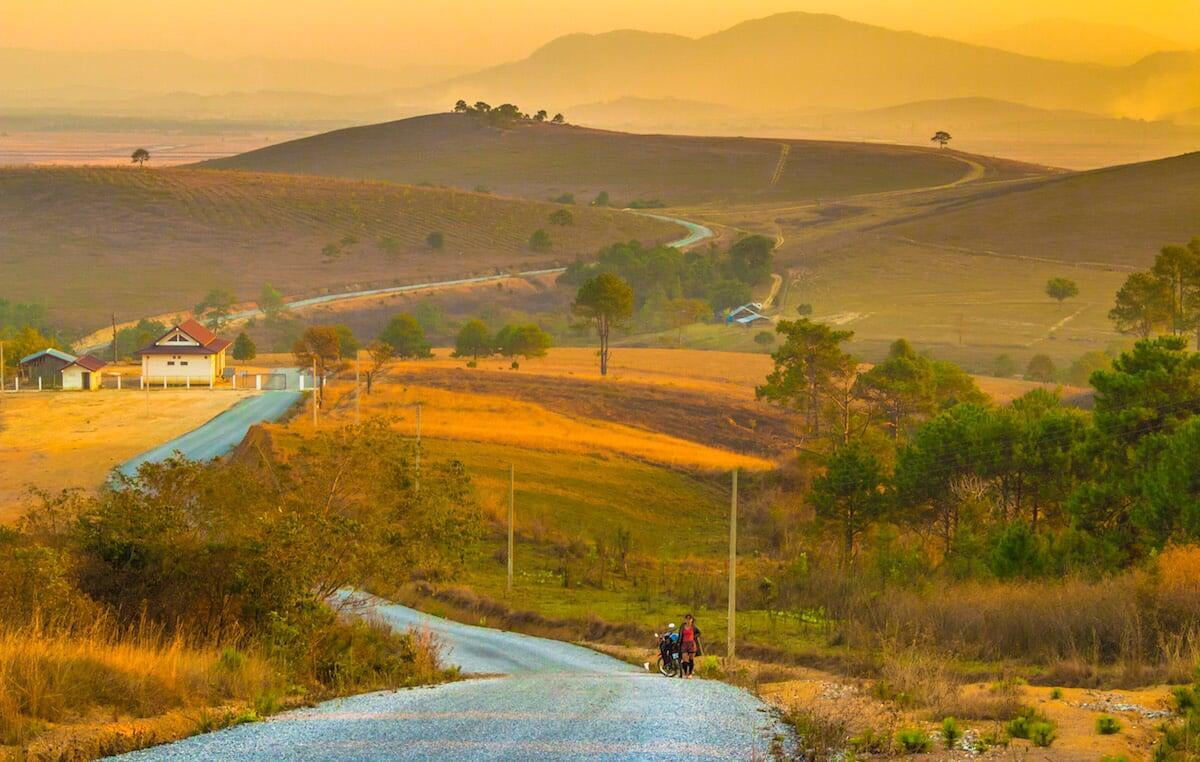
A similar composition technique in photography that beginners often confuse with leading lines is paths.
A path is similar to a leading line except that it doesn’t lead to any subject, but rather just exits the frame or leads to a vanishing point in the distance.
#50 - Use exposure blending to create beautiful HDR images
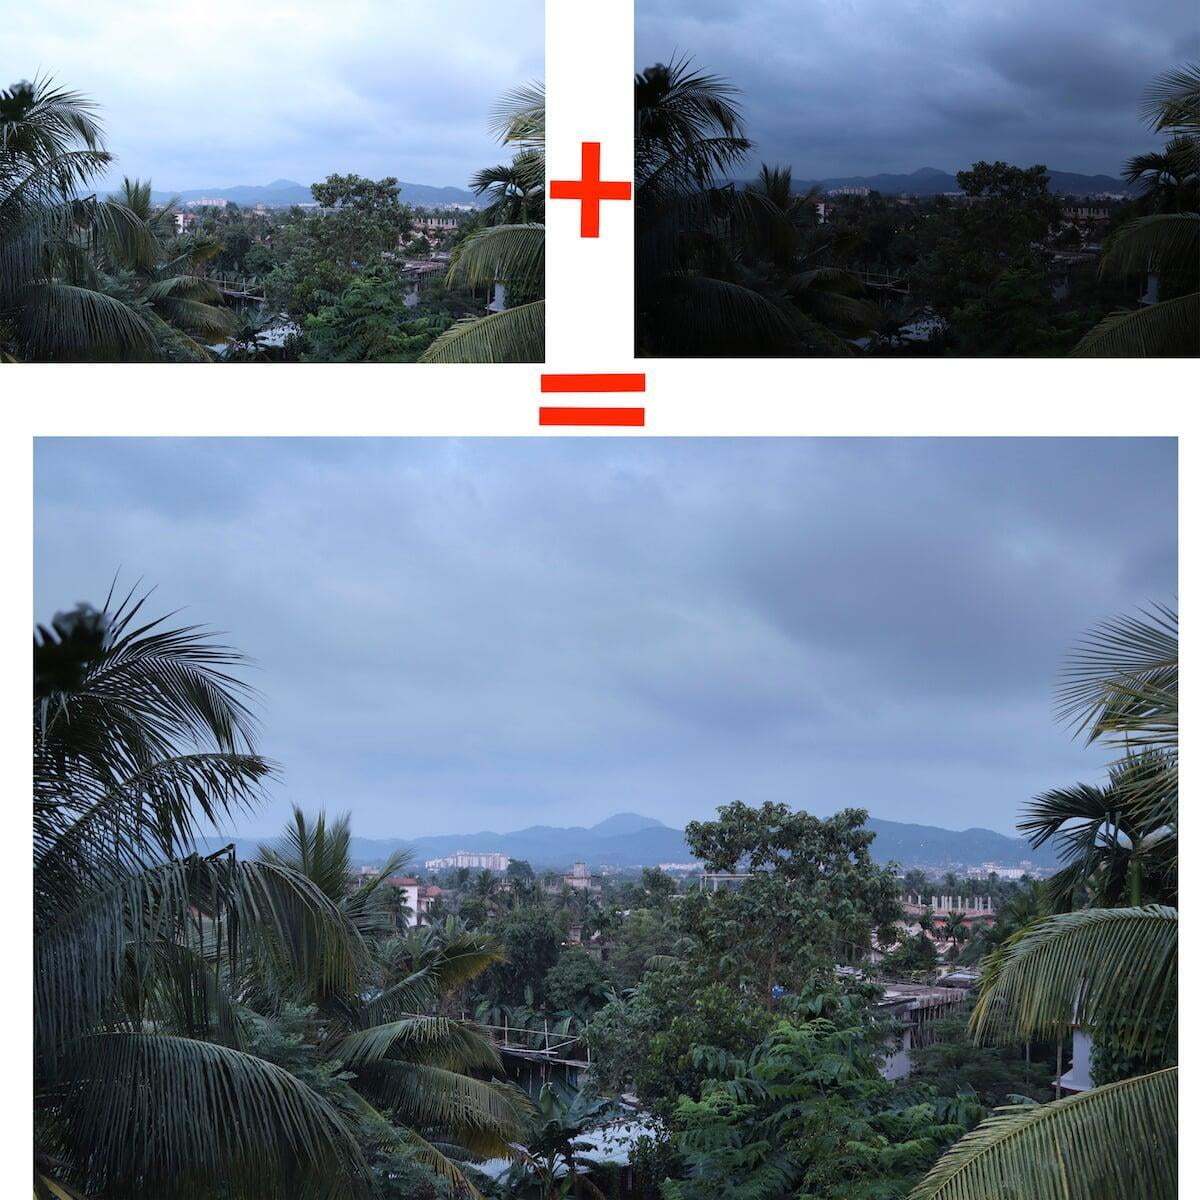
Some of the most challenging scenes to capture in a desirable way are the ones that possess high-contrast lighting, where very bright areas and very dark areas both occur together.
The difference in brightness between the brightest and darkest areas of a scene is known as the dynamic range and in real-world scenarios there can be a difference of 20-stops or more between the two extremes.
The problem is that even the best modern cameras can only handle scenes with a dynamic range of 15 or 16 stops. My current travel camera, the Canon EOS 77D, fares slightly worse than the best digital cameras with a dynamic range of 13.3 stops.
What this means in practice is that if you’re shooting a scene whose dynamic range exceeds that which your camera is capable of handling, your images will have to sacrifice detail in either the highlight or shadow areas, depending in which you expose for.
If you have ever photographed a landscape scene at sunset, for example, you will surely have noticed that whenever you exposed for the sky and got that looking nice, your foreground became almost completely. black or silhouetted.
When you then tried exposing for the foreground, your sky became glaringly white and all the colours, clouds and other details in it were lost.
Another common scenario where your camera’s limited dynamic range can really let you down is when you want to photograph somebody next to a window on a bright day but correctly exposing for your subject means that you’re unable to see what’s going on outside the window (it’s completely blown out).
The opposite situation can also be a problem in broad daylight; if you’re trying to capture the interior of a building from outside (say by shooting through a doorway) you might find that when you expose the room correctly you end up with a completely blown-out doorframe.
This last technique that I want to share with you is, in my opinion, the best way to creates images that capture the entire dynamic range of a scene and get it into a single photograph, thereby elevating your travel photos well above the usual snapshots.
The technique is known as exposure blending and involves taking a sequence of exposures of a scene where you expose for a different part of the scene in each individual photo, and then blend all the images together using an editing program like Photoshop.
It’s the exact same principle as the focus stacking technique that we already discussed in some detail.
Usually you would blend together 3 different exposures of a scene (one underexposed, one correctly exposed, one overexposed), but you can also take 5, 7 or even more exposures if you like.
The easiest way to do this is to turn on your camera’s AEB (automatic exposure bracketing) mode, which can be found in your camera’s menu and some models also have a button on the outside that you can press to enable it (see your user manual).
When AEB is enabled your camera will automatically take three consecutive shots with three different exposures; one underexposed, one correctly exposed and one overexposed. Some cameras will also offer five consecutive shots, with two overexposed, two underexposed and one correctly exposed.
This feature can come in very handy when you’re not sure of the “right” exposure for a particular scene (some scenes actually look much better when over or underexposed) and you don’t want to take any chances by only taking a single exposure.
By taking three different exposures of the same scene using automatic exposure bracketing, you can make sure you always have the one that looks best.
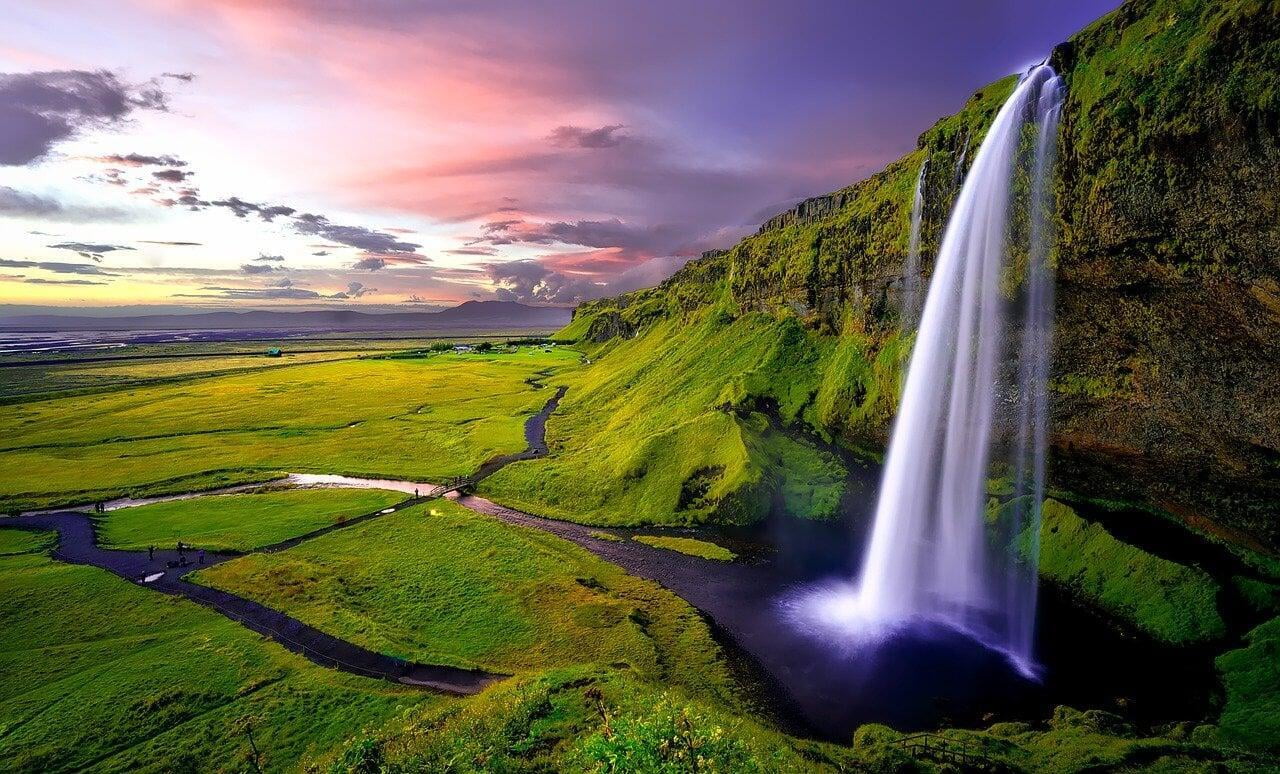
When you enable automatic exposure bracketing you’ll need to set the size of the gap between each of the three (or five) exposures; in my camera this is done by rotating the main dial to the left and right.
I normally like to set the gap no bigger than 1 EV, as I find that the results are best when the exposures aren’t too far apart. You’ll normally be able to adjust the gap in 1/3 stop increments and you’ll most likely have a maximum range from +2 to -2 EV or from +3 to -3 EV .
In single shooting mode you might have to press the shutter button for each of the three or five photos; if you want them to be taken in quick succession you may have to enable your camera’s burst mode.
If your camera, like mine only supports three bracketed exposures in AEB but you want to take more than that, you can still do it and I’ll tell you how. The trick I’m about to show you allows you to take nine exposures even if you have a camera like mine that only lets you take three bracketed exposures.
What you have to do first is enable AEB mode and set the gap between exposures to 1 EV. Then, instead of taking your three exposures centred on the zero point as usual you’ll want to use exposure compensation to centre your first set of three exposures on -3EV instead.
(In my Canon camera the exposure compensation can be set by rotating the thumb dial next to the LCD monitor.)
You’ll then take your first three bracketed exposures (-3EV, -4EV and -2EV) and then you’ll set your exposure compensation to centre your second set of three exposures on the zero point, before taking three more bracketed exposures (0, -1 EV and +1EV).
Finally, you’ll centre the third set of three exposures on +3EV and take the last three bracketed exposures (+3EV, +2EV and +4EV), for a total of nine exposures with a 1 EV gap between them all.
Once you have your sequence of multiple exposures, the next step is to import all the images into Photoshop and then blend them together into a final image that captures all the important details of the scene.
Now, there are numerous editing techniques for achieving this and many of them involve knowing how to work with layers, layer masks and the brush tool. Some of the more advanced techniques use what are known as luminosity masks.
I recommend starting out with this relatively simple tutorial and then you can gradually move onto more complex techniques like luminosity masks once you get more comfortable with using Photoshop. There are different techniques for different situations.
Exposure blending is not the only way for dealing with scenes with high dynamic range; many cameras have a HDR mode that will merge two or three shots together in camera to create an image with greater dynamic range.
There are also software programs like Lightroom that can automatically merge a sequence of differently exposed images into a HDR image, even with RAW files.
However, if you want the best possible results, I advise that you stick with the multiple exposure blending technique that I’ve highlight here. The most beautiful and high-quality HDR images are usually created using this method.
The in-camera or other shortcut methods are inferior because they are automatic, which means that they give you less control over the final result. They can also produce very undesirable ghosting effects when you are shooting scenes with moving subjects, whereas this is a non-issue if you use the exposure blending technique.
Conclusion
So there you have it - 50 powerful travel photography tips that’ll surely propel you forwards on your journey towards being able to create moving, inspiring, compelling images that capture the essence of your travel experiences.
These tips give a fairly broad overview of the very big subject of photography and although many of the topics we’ve covered here could be expanded into entire articles in themselves, I think we’ve covered them in sufficient detail here for most people.
You can begin implementing the majority of these tips immediately or the next time you’re out shooting.
We highly recommend you invest in at least some of the accoutrements recommended in Section 2 if you don’t have them already, as they’ll open up many new doors, as well as enabling you to perform techniques that are difficult or impossible to execute without these accessories.
As we mentioned in the article, reading and assimilating all the information here is just the first step.
The next time you’re on a trip or even just shooting around your home, I want you to practice applying these tips and techniques until they become second nature in your photography. By the time you reach that point, you should have noticed a dramatic improvement in your images.
Happy shooting!
JOIN OUR LIST
SUPPORT US
FOLLOW US
ABOUT US
Our names are Eoghan and Jili and we hail from Ireland and India respectively.
We are two ardent shoestring budget adventure travellers and have been travelling throughout Asia continuously for the past few years.
Having accrued such a wealth of stories and knowledge from our extraordinary and transformative journey, our mission is now to share everything we've experienced and all of the lessons we've learned with our readers.
Do make sure to subscribe above in order to receive our free e-mail updates and exclusive travel tips & hints. If you would like to learn more about our story, philosophy and mission, please visit our about page.
Never stop travelling!
FOLLOW US ON FACEBOOK
FOLLOW US ON PINTEREST
